一、回顾SpringMVC访问接口流程
1.容器加载分析
-
容器分析
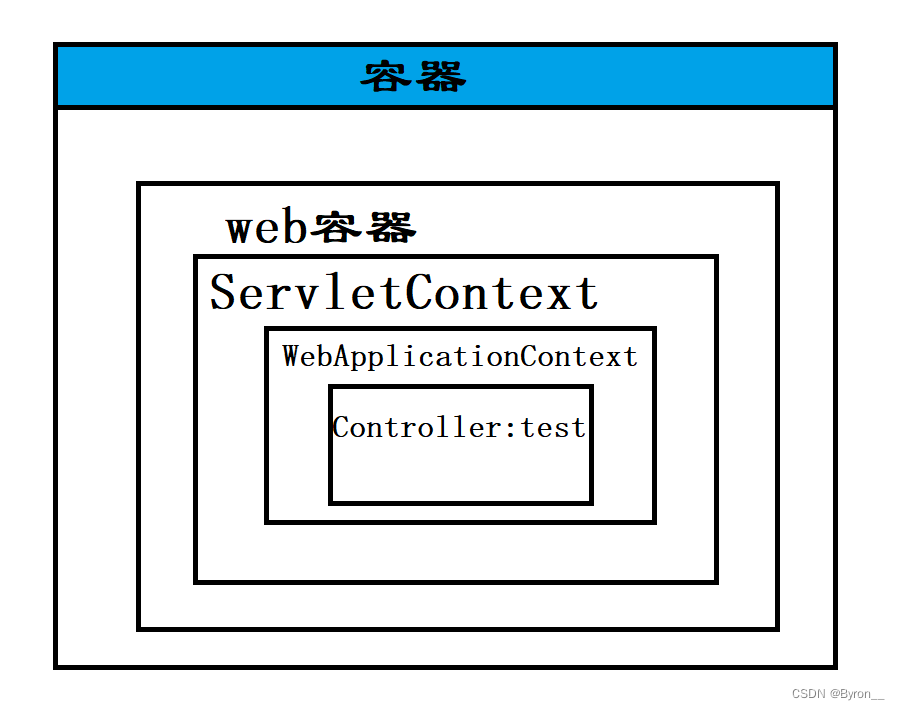
-
手动注册WebApplicationContext
public class ServletConfig extends AbstractDispatcherServletInitializer {@Overrideprotected WebApplicationContext createServletApplicationContext() {//获取SpringMVC容器AnnotationConfigWebApplicationContext context = new AnnotationConfigWebApplicationContext();context.register(SpringMvcConfig.class);return context;}@Overrideprotected String[] getServletMappings() {return new String[]{"/"};}@Overrideprotected WebApplicationContext createRootApplicationContext() {return null;}
}
2.容器加载过程分析
-
tomcat 服务器启动的时候,加载ServletConfig类之后,做初始化web容器操作,相当于 web.xml
-
执行注册容器的方法,获取 SpringMVC容器 WebApplicationContext
@Nullableprotected WebApplicationContext createRootApplicationContext() {Class<?>[] configClasses = this.getRootConfigClasses();if (!ObjectUtils.isEmpty(configClasses)) {AnnotationConfigWebApplicationContext context = new AnnotationConfigWebApplicationContext();context.register(configClasses);return context;} else {return null;}}protected WebApplicationContext createServletApplicationContext() {AnnotationConfigWebApplicationContext context = new AnnotationConfigWebApplicationContext();Class<?>[] configClasses = this.getServletConfigClasses();if (!ObjectUtils.isEmpty(configClasses)) {context.register(configClasses);}return context;} -
通过@ComponentScan(“cn.sycoder.controller”) 加载 Controller 下面的bean 进 WebApplicationContext
@RestController public class TestController {@GetMapping("/test/{id}")public String test(@PathVariable Long id) {return "ok:" + id;} } -
把使用了 RequestMapping 注解的方法的 value — 对应一个方法,建立起了一对一映射关系(可以想象hashmap)
- /test/{id} ---- test 方法
3.请求接口过程
- 访问 http://localhost:8082/test/1
- 匹配 springmvc 的 / servletMapping 规则,交给 springmvc 处理
- 解析 /test/1路径找到对应的 test 方法
- 执行方法
- 因为使用 RestController ,所以返回方法的返回值作为响应体返回给浏览器
4.SSM整合会出现bean界定不清楚问题
- SpringMVC 需要加载哪些bean?
- controller 层(表现层即可)
- Spring 加载哪些bean?
- service
- dao
4.1如何处理
-
将spring配置注入到 web 容器中
@Configuration
@ComponentScan(value={"cn.sycoder.service","cn.sycoder.dao"})
public class SpringConfig {
}
public class ServletConfig extends AbstractAnnotationConfigDispatcherServletInitializer {@Overrideprotected Class<?>[] getRootConfigClasses() {return new Class[]{SpringConfig.class};}@Overrideprotected Class<?>[] getServletConfigClasses() {return new Class[]{SpringMvcConfig.class};}@Overrideprotected String[] getServletMappings() {return new String[]{"/"};} }
4.2验证两个容器的bean相互不干扰
-
验证代码
@Test
public void test(){AnnotationConfigApplicationContext applicationContext =new AnnotationConfigApplicationContext(SpringConfig.class);ITestService bean = applicationContext.getBean(ITestService.class);bean.get(1L);TestController bean1 = applicationContext.getBean(TestController.class);System.out.println(bean1.test(1L));
}
二、SSM整合
1.SSM整合流程分析
- 概述SSM:Spring SpringMVC Mybatis
1.1创建工程
-
导入依赖
- ssm 所需要的依赖包
-
配置 web 项目入口配置替换 web.xml(AbstractAnnotationConfigDispatcherServletInitializer)
-
配置 Spring 配置类交给 web 容器管理
@Overrideprotected Class<?>[] getRootConfigClasses() {return new Class[]{SpringConfig.class};} -
配置 SpringMVC 配置类交给 web 容器管理
@Overrideprotected Class<?>[] getServletConfigClasses() {return new Class[]{SpringMvcConfig.class};} -
配置请求拦截规则,交给 springmvc 处理
@Overrideprotected String[] getServletMappings() {return new String[]{"/"};}
-
1.2配置 Spring
- SpringConfig
- @Configuration 标记Spring配置类,替换Spring-config-xml
- @ComponetScan 扫描需要被Spring 管理的bean
- @EnableTransactionManagment 启动管理事务支持
- @PropertySource 引入db.properties 配置文件
- 配置 JdbcConfig 配置类
- 使用德鲁伊 DataSource 数据源
- 构建平台事务管理器 DataSourceTransactionManager
- 配置 MyBatis 配置类
- 构建 SqlSessionFactoryBean
- 指定 MapperScanner 设置 mapper 包扫描寻找 mapper.xml 文件
1.3配置 SpringMVC
- 配置SpringMvcConfig
- @Configuration
- @ComponentScan 只扫描 Controller
- 开启SpringMVC 注解支持 @EnableWebMvc
1.4开发业务
- 使用注解
- 注入bean 注解
- @Autowired
- @RestController
- @GetMapping
- @RequestParam
- @PostMapping
- @RequestBody
- @DeleteMapping
- @PathVariable
- @PutMapping
- @GetMapping
- @Service
- @Transactional
- junit
- @RunWith
- @ContextConfiguration
- @Test
- 注入bean 注解
2.SSM整合
2.1导入依赖
-
依赖
<dependencies><dependency><groupId>org.springframework</groupId><artifactId>spring-webmvc</artifactId><version>5.2.17.RELEASE</version></dependency><dependency><groupId>org.springframework</groupId><artifactId>spring-jdbc</artifactId><version>5.2.17.RELEASE</version></dependency><dependency><groupId>org.springframework</groupId><artifactId>spring-test</artifactId><version>5.2.17.RELEASE</version></dependency><dependency><groupId>org.mybatis</groupId><artifactId>mybatis</artifactId><version>3.5.6</version></dependency><dependency><groupId>org.mybatis</groupId><artifactId>mybatis-spring</artifactId><version>1.3.0</version></dependency><dependency><groupId>mysql</groupId><artifactId>mysql-connector-java</artifactId><version>8.0.29</version></dependency><dependency><groupId>com.alibaba</groupId><artifactId>druid</artifactId><version>1.1.16</version></dependency><dependency><groupId>junit</groupId><artifactId>junit</artifactId><version>4.12</version><scope>test</scope></dependency><dependency><groupId>javax.servlet</groupId><artifactId>javax.servlet-api</artifactId><version>3.1.0</version><scope>provided</scope></dependency><dependency><groupId>com.fasterxml.jackson.core</groupId><artifactId>jackson-databind</artifactId><version>2.9.0</version></dependency></dependencies>
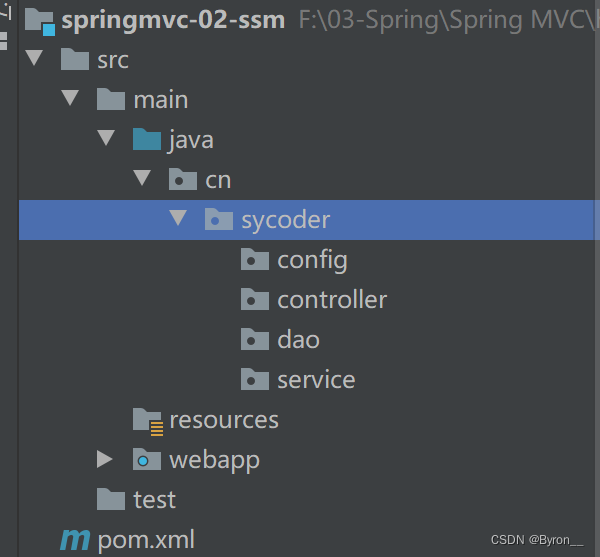
2.2创建各目录结构
-
目录如下
2.3创建SpringConfig
-
SpringConfig(在整合项目的时候不能扫描mvc的类,否则会出现创建容器失败)
@Configuration
@ComponentScan(value = {"cn.sycoder.service","cn.sycoder.dao"})
@EnableTransactionManagement
@PropertySource("classpath:db.properties")
@Import({DbConfig.class,MybatisConfig.class})
public class SpringConfig {
}
2.4创建DbConfig配置类
-
创建数据库配置文件
jdbc.url=jdbc:mysql://localhost:3306/ssm jdbc.driver=com.mysql.cj.jdbc.Driver jdbc.username=root jdbc.password=123456 -
创建DbConfig
public class DbConfig {@Value("${jdbc.url}")private String url;@Value("${jdbc.driver}")private String driver;@Value("${jdbc.username}")private String username;@Value("${jdbc.password}")private String password;/*** 配置德鲁伊连接池* @return*/@Beanpublic DataSource dataSource(){DruidDataSource source = new DruidDataSource();source.setUrl(url);source.setDriverClassName(driver);source.setPassword(password);source.setUsername(username);return source;}@Beanpublic PlatformTransactionManager transactionManager(DataSource dataSource){DataSourceTransactionManager manager = new DataSourceTransactionManager();manager.setDataSource(dataSource);return manager;}}
2.5创建MybatisConfig配置类
-
MyBatisConfig
public class MybatisConfig {@Beanpublic SqlSessionFactoryBean sessionFactoryBean(DataSource dataSource){SqlSessionFactoryBean bean = new SqlSessionFactoryBean();bean.setDataSource(dataSource);bean.setTypeAliasesPackage("cn.sycoder.domain");return bean;}@Beanpublic MapperScannerConfigurer mapperScannerConfigurer(){MapperScannerConfigurer configurer = new MapperScannerConfigurer();configurer.setBasePackage("cn.sycoder.dao");return configurer;}
}
2.6创建SpringMVC配置类
-
SpringMvcConfig
@Configuration
@ComponentScan("cn.sycoder.controller")
@EnableWebMvc
public class SpringMvcConfig {
}
2.7创建Web项目入口配置类
-
ServletConfig
public class ServletConfig extends AbstractAnnotationConfigDispatcherServletInitializer {@Overrideprotected Class<?>[] getRootConfigClasses() {return new Class[]{SpringConfig.class};//配置Spring交给Web 管理}@Overrideprotected Class<?>[] getServletConfigClasses() {return new Class[]{SpringMvcConfig.class};}@Overrideprotected String[] getServletMappings() {return new String[]{"/"};}
}
3.功能开发
3.1创建数据库及表
-
创建 ssm 数据库
-
创建 item 表
create table item
(id bigint auto_increment,type varchar(64) null,name varchar(64) null,remark text null,constraint item_pkprimary key (id)
);
3.2编写模型类
-
添加 lombok 依赖
<dependency><groupId>org.projectlombok</groupId><artifactId>lombok</artifactId><version>1.18.22</version> </dependency> -
模型类
@Data
public class Item {private Long id;private String name;private String type;private String remark;
}
3.3编写Mapper接口
-
Mapper 接口
@Repository
public interface ItemMapper {@Insert("insert into item(name,type,remark) value(#{name},#{type},#{remark})")public int save(Item item);@Delete("delete from item where id = #{id}")public int delete(Long id);@Update("update item set name = #{name},type = #{type},remark=#{remark} where id=#{id}")public int update(Item item);@Select("select * from item where id = #{id}")public Item getById(Long id);@Select("select * from item")public List<Item> list();}
3.4编写Service接口和实现类
-
Service 接口
public interface IItemService {/*** 添加闲置物品方法* @param item* @return*/public boolean save(Item item);/*** 删除闲置物品* @param id* @return*/public boolean delete(Long id);/*** 更新闲置物品* @param item* @return*/public boolean update(Item item);/*** 查询闲置物品通过id* @param id* @return*/public Item getById(Long id);/*** 查询所有闲置商品* @return*/public List<Item> lists(); } -
定义接口实现类
@Service
public class ItemServiceImpl implements IItemService {@AutowiredItemMapper mapper;@Override@Transactionalpublic boolean save(Item item) {return mapper.save(item) > 0;}@Override@Transactionalpublic boolean delete(Long id) {return mapper.delete(id) >0;}@Override@Transactionalpublic boolean update(Item item) {return mapper.update(item) >0;}@Overridepublic Item getById(Long id) {return mapper.getById(id);}@Overridepublic List<Item> lists() {return mapper.list();}
}
3.5编写Contorller类
-
Controller
@RestController
@RequestMapping("/item")
public class ItemController {@AutowiredIItemService service;@PostMappingpublic boolean save(@RequestBody Item item){return service.save(item);}@PutMappingpublic boolean update(@RequestBody Item item){return service.update(item);}@DeleteMapping("/{id}")public boolean delete(@PathVariable Long id){return service.delete(id);}@GetMapping("/{id}")public Item getById(@PathVariable Long id){return service.getById(id);}@GetMappingpublic List<Item> list(){return service.lists();}
}
4.验证 ssm 整合结果
-
启动项目并且解决问题

-
修改Spring配置类
@Configuration
@ComponentScan(value = {"cn.sycoder.service","cn.sycoder.dao"})
@EnableTransactionManagement
@PropertySource("classpath:db.properties")
@Import({DbConfig.class,MybatisConfig.class})
public class SpringConfig {
}
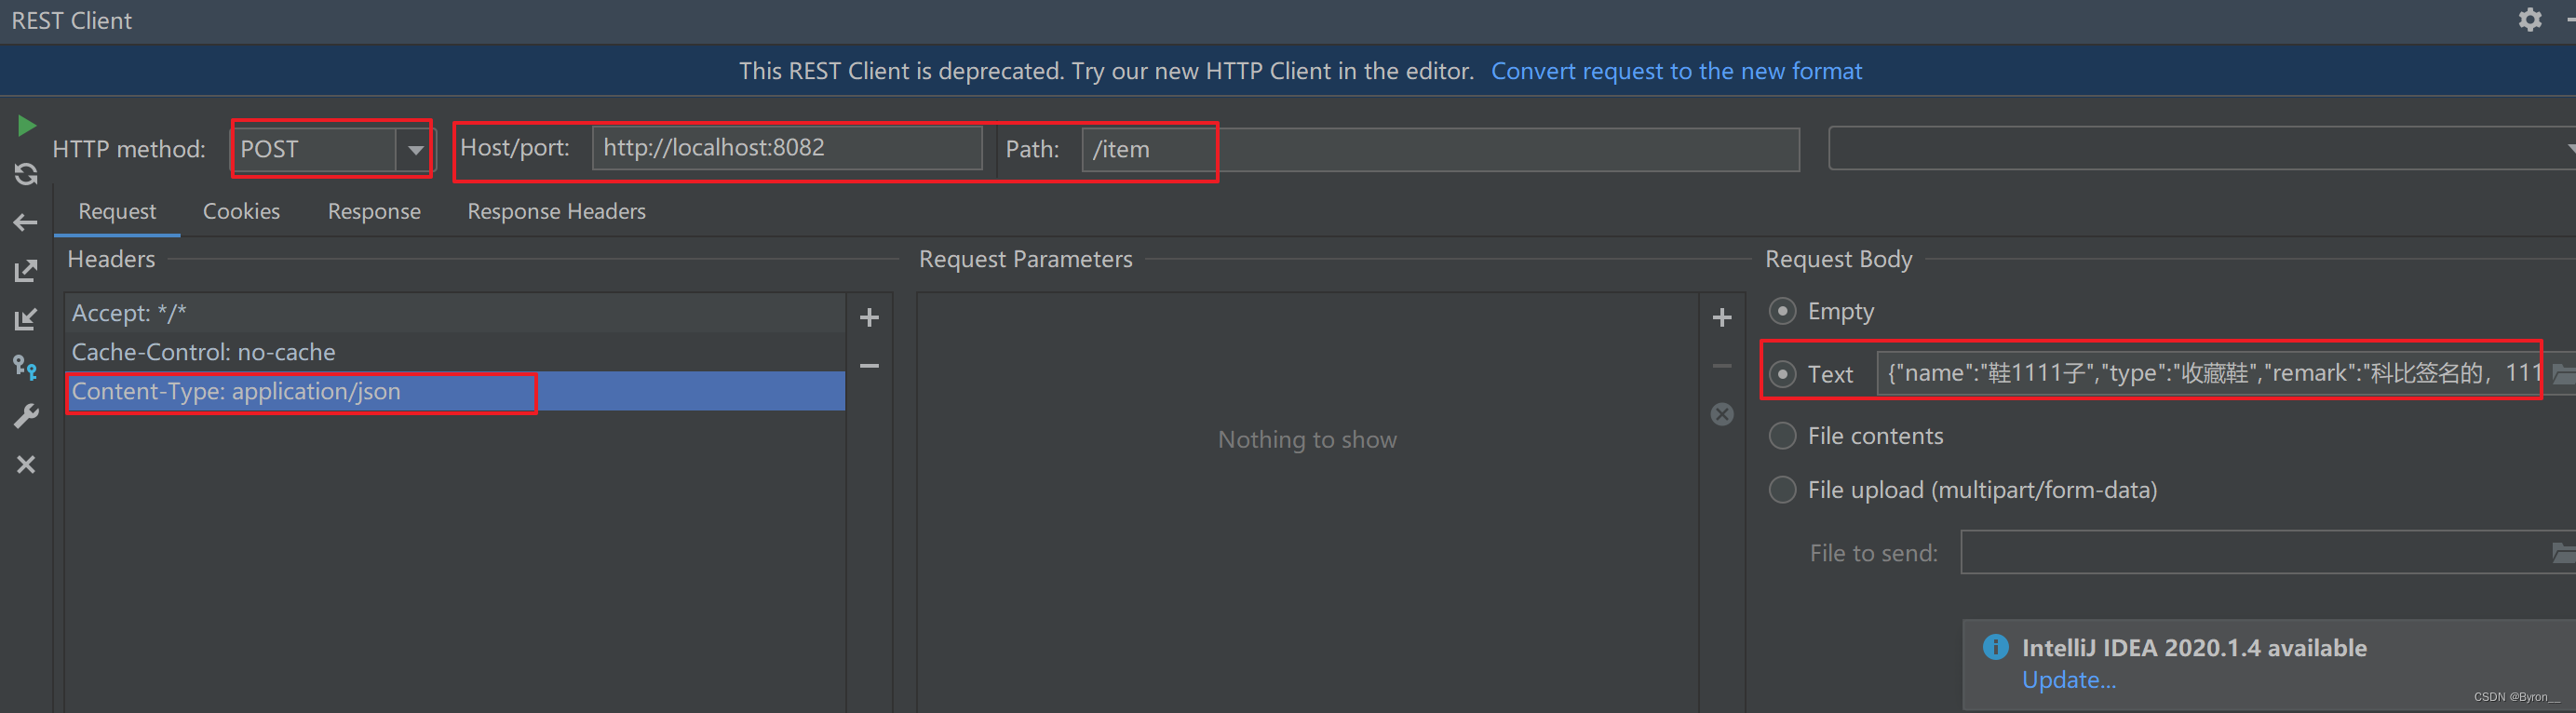
4.1添加item 数据
-
准备 item 数据
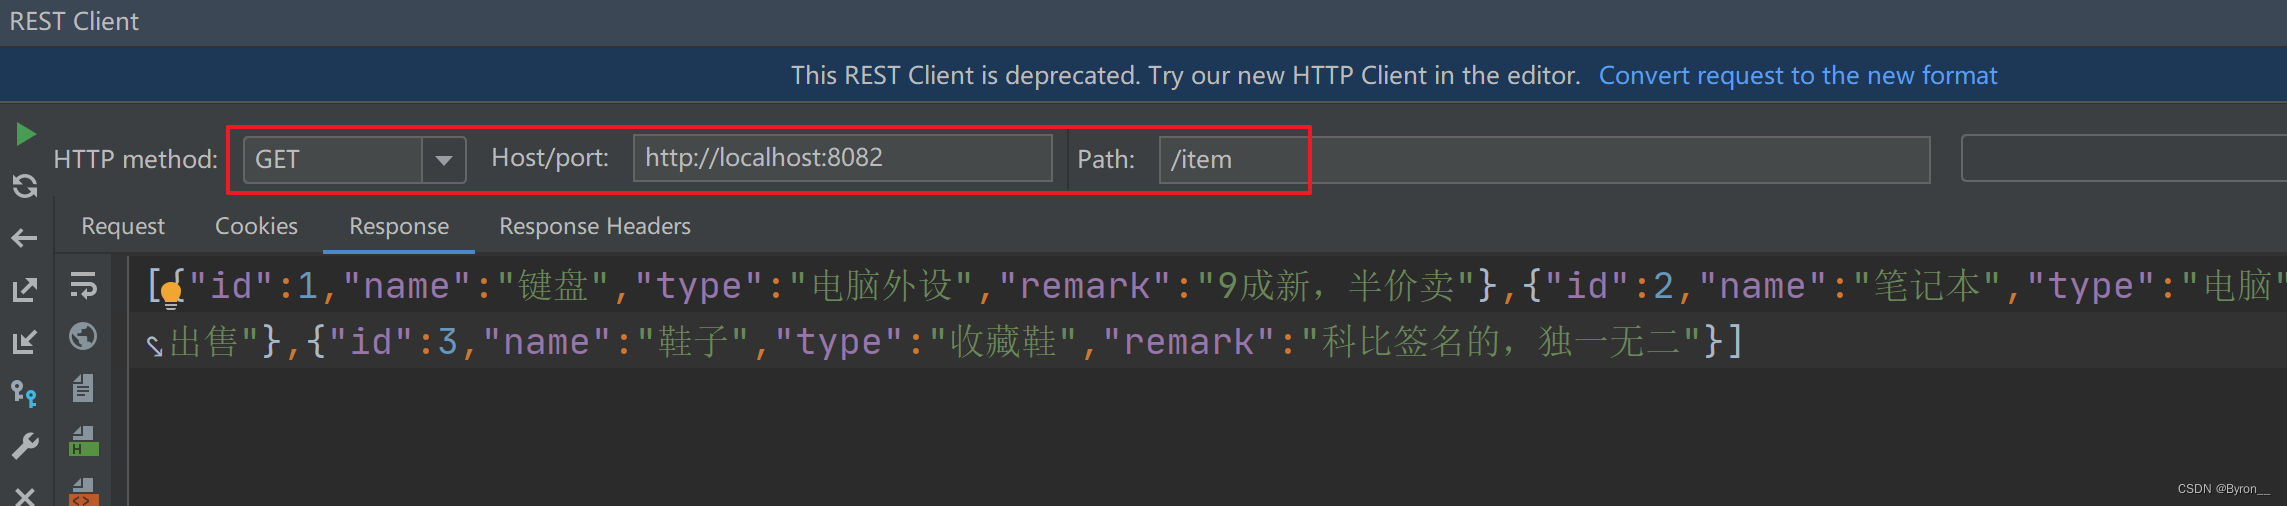
{"name":"键盘","type":"电脑外设","remark":"9成新,半价卖"}{"name":"笔记本","type":"电脑","remark":"9成新,8折出售"}{"name":"鞋子","type":"收藏鞋","remark":"科比签名的,独一无二"} -
添加数据
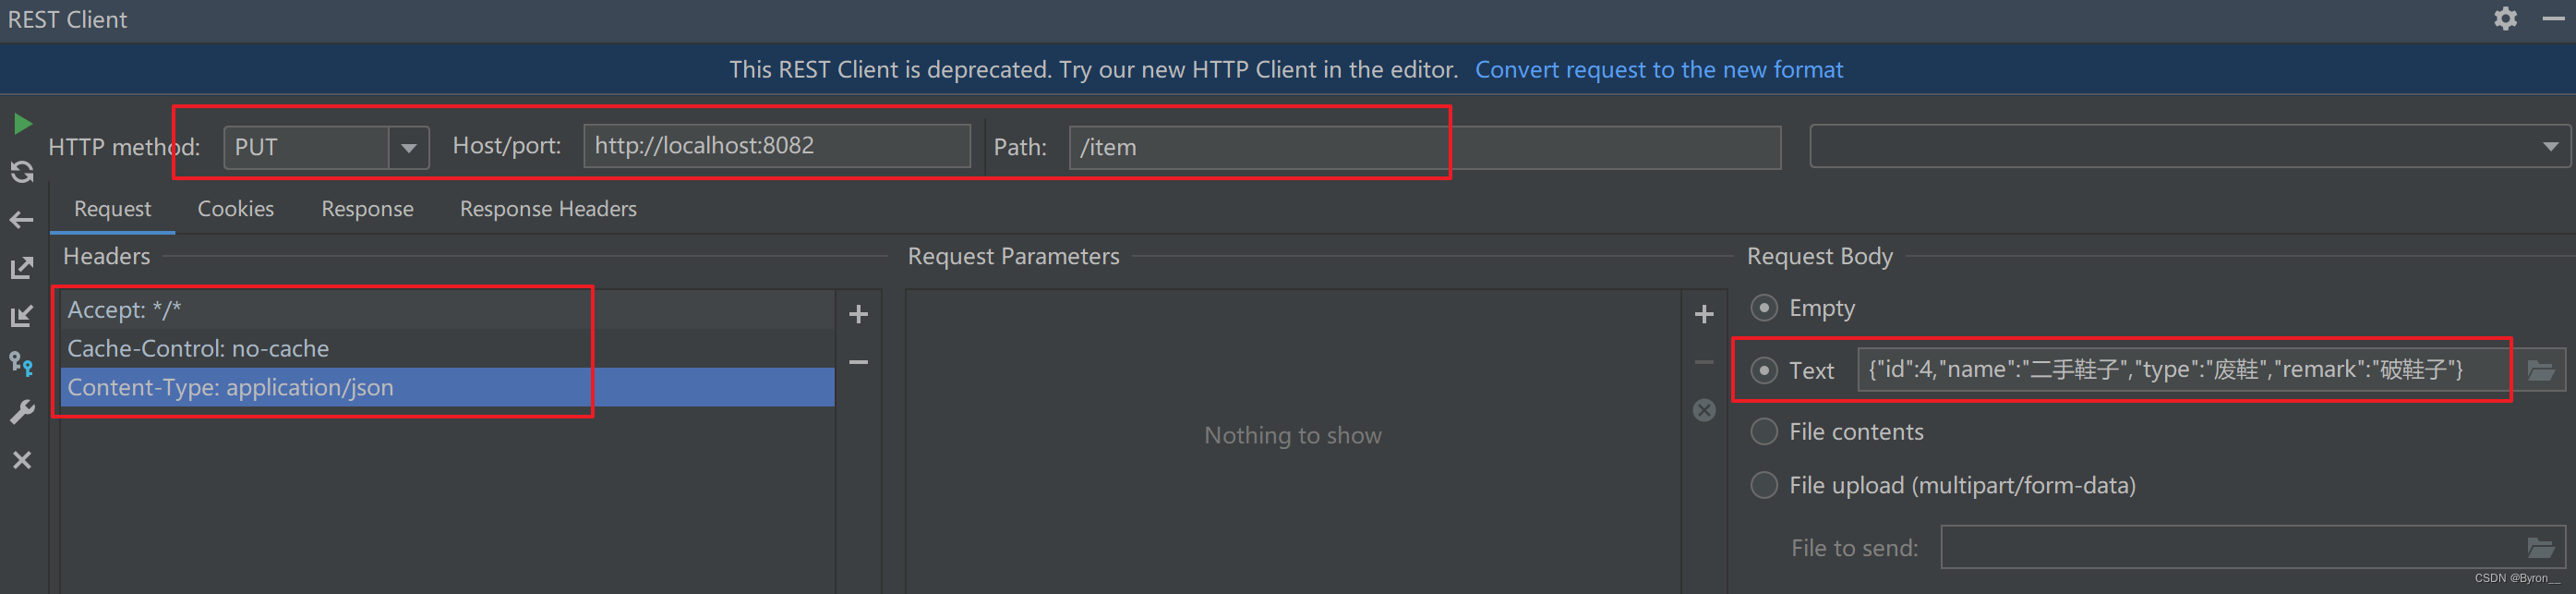
4.2修改数据
-
准备数据
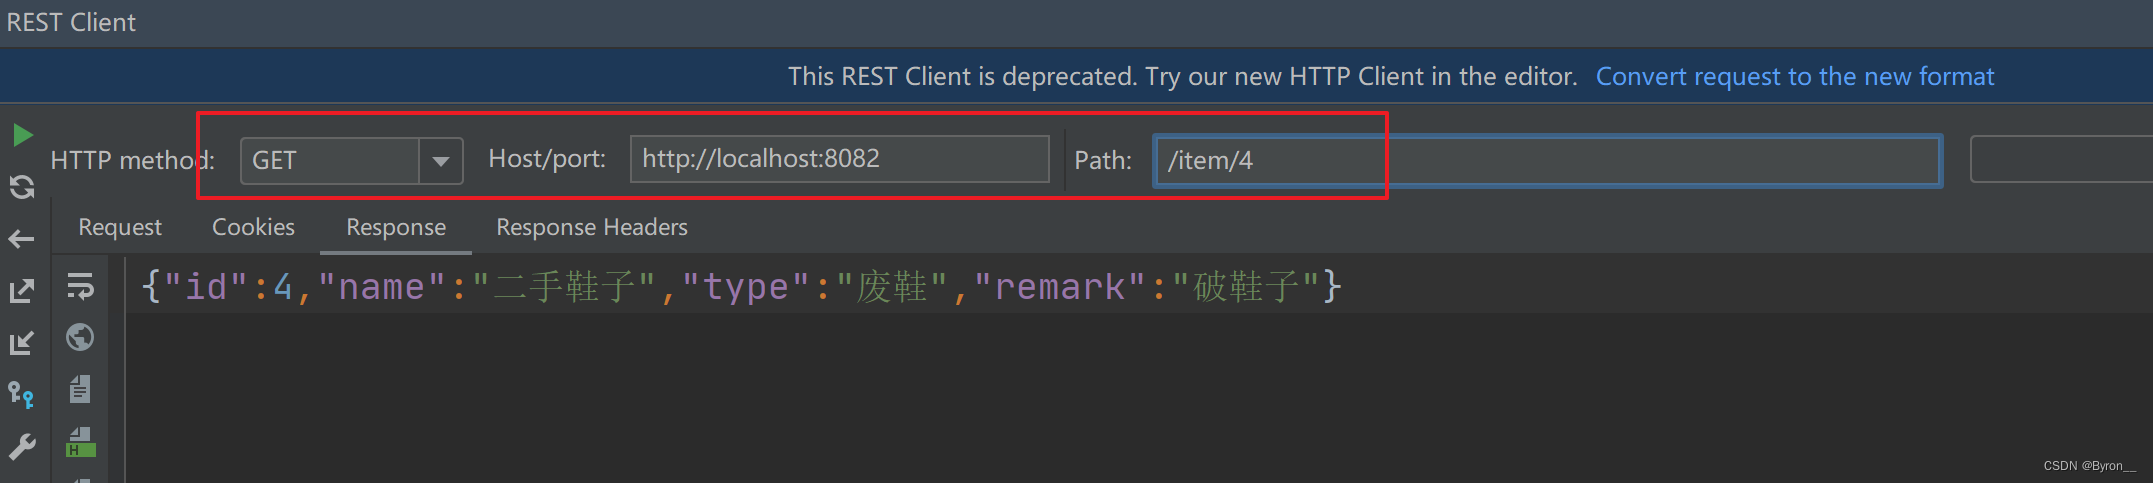
{"id":4,"name":"二手鞋子","type":"废鞋","remark":"破鞋子"} -
修改操作
4.3查询单个数据
-
查询id=4的物品
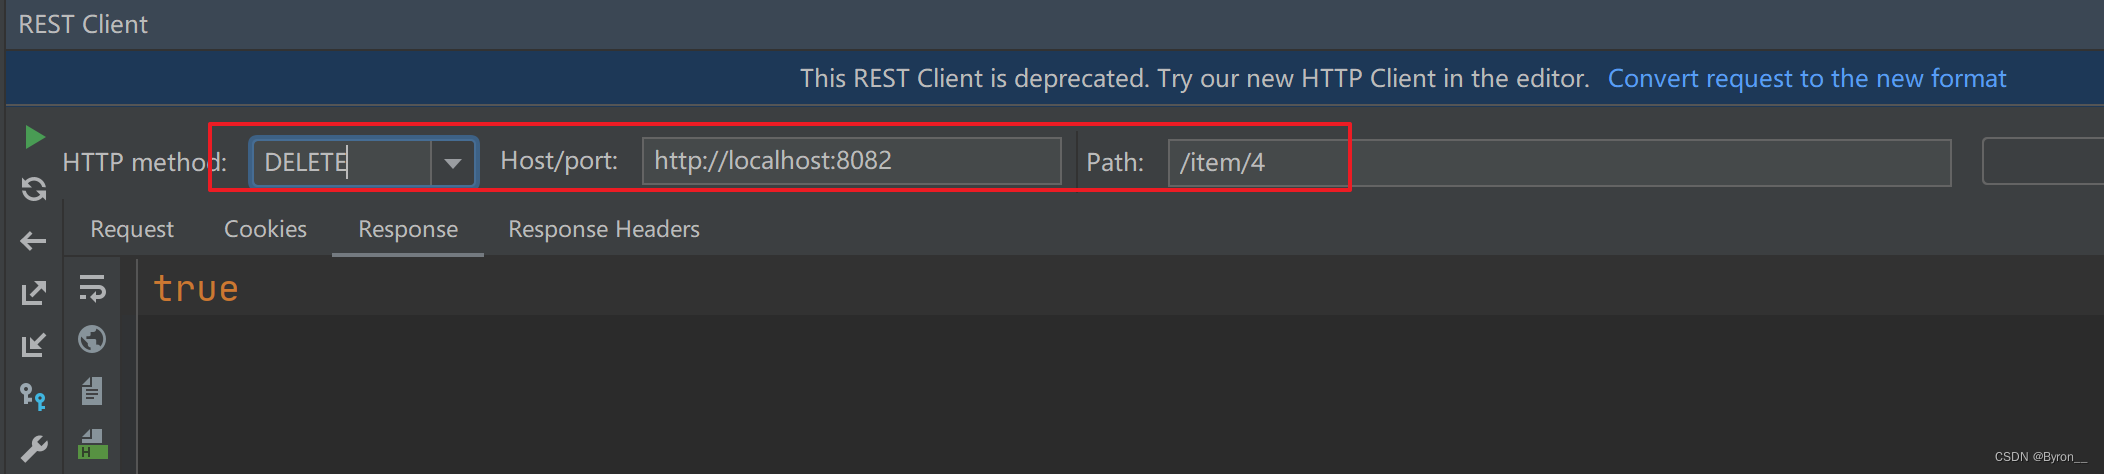
4.4删除单个数据
-
删除id=4的物品
4.5查询全部数据操作
-
查询全部
5.整合单元测试
-
目录结构
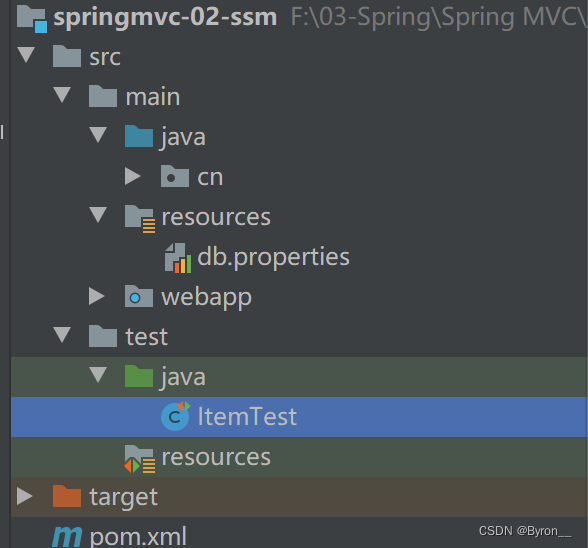
-
新建测试类
@RunWith(SpringJUnit4ClassRunner.class)
@ContextConfiguration(classes = SpringConfig.class)
public class ItemTest {@AutowiredIItemService service;@Testpublic void save(){Item item = new Item();item.setName("单元测试");item.setRemark("单元测试");item.setType("单元测试");boolean save = service.save(item);System.out.println(save);}@Testpublic void update(){Item item = new Item();item.setId(5L);item.setName("单元测试");item.setRemark("单元测试");item.setType("单元测试");boolean save = service.update(item);System.out.println(save);}@Testpublic void getById(){Item byId = service.getById(5L);System.out.println(byId);}@Testpublic void list(){List<Item> lists = service.lists();System.out.println(lists);}
}
三、项目实战中细节问题
1.导入前端资源
1.1静态资源拦截处理
-
设置访问 index 访问主页
@Controller public class IndexController {@RequestMapping("/index")public String index(){System.out.println("----------------");return "/pages/items.html";}} -
出现静态资源被拦截问题
@Configuration public class StaticSupport extends WebMvcConfigurationSupport {@Overrideprotected void addResourceHandlers(ResourceHandlerRegistry registry) {registry.addResourceHandler("/pages/**").addResourceLocations("/pages/");registry.addResourceHandler("/js/**").addResourceLocations("/js/");registry.addResourceHandler("/css/**").addResourceLocations("/css/");registry.addResourceHandler("/plugins/**").addResourceLocations("/plugins/");} } -
将 staticSupport 交给 SpringMvc 管理
@Configuration
@ComponentScan(value = {"cn.sycoder.controller","cn.sycoder.config"})
@EnableWebMvc
public class SpringMvcConfig {
}
1.2项目实现
-
保存方法
handleAdd () {console.log("========")axios.post("/item",this.formData).then((res)=>{//todo}) }, -
列表查询
getAll() {axios.get("/item",).then((res)=>{this.dataList = res.data;}) }, -
删除操作
handleDelete(row) {axios.delete("/item/"+row.id).then((res)=>{//todo})
}


![BUUCTF-WEB-[ACTF2020 新生赛]Includel](https://img-blog.csdnimg.cn/5268adda713b4d178f0150e34c4a28c7.png)