本系列教程配套出有视频教程,观看地址:https://www.bilibili.com/video/BV1gV4y1e7Sg
7. LVGL对接EC11旋转编码器驱动
本次实验我们向LVGL库中对接EC11旋转编码器驱动,让我们能通过EC11旋转编码器操作UI。
7.1 复制工程
上次实验得出的工程我们可以通过复制在原有的基础上得到一个新的工程。
如果你不清楚复制工程的步骤,请参考阅读第三章实验的步骤教程。
本次实验我们的项目命名为:05_dshanmcu_ra6m5_lvgl_display_touchpad_encoder
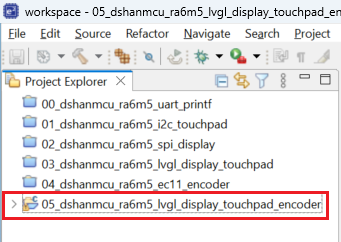
7.2 对接驱动
打开 05_dshanmcu_ra6m5_lvgl_display_touchpad_encoder\dshanmcu_ra6m5\drivers\drv_gpio_ec11.c 文件,做如下修改:
将第 9 行的代码改为如下:
#define DRV_GPIO_EC11_USE_LVGL (1)
打开 05_dshanmcu_ra6m5_lvgl_display_touchpad_encoder\dshanmcu_ra6m5\drivers\lv_port_indev.c 文件,下面对其进行修改适配我们的工程:
- 在第 14 行空白处添加头文件包含:
#include "drv_gpio_ec11.h"
- 修改
lv_port_indev_init函数为如下代码:
void lv_port_indev_init(void)
{/*** Here you will find example implementation of input devices supported by LittelvGL:*  - Touchpad*  - Mouse (with cursor support)*  - Keypad (supports GUI usage only with key)*  - Encoder (supports GUI usage only with: left, right, push)*  - Button (external buttons to press points on the screen)**  The `..._read()` function are only examples.*  You should shape them according to your hardware*//*------------------* Touchpad* -----------------*//*Initialize your touchpad if you have*/touchpad_init();/*Register a touchpad input device*/static lv_indev_drv_t indev_pointer_drv;lv_indev_drv_init(&indev_pointer_drv);indev_pointer_drv.type = LV_INDEV_TYPE_POINTER;indev_pointer_drv.read_cb = touchpad_read;indev_touchpad = lv_indev_drv_register(&indev_pointer_drv);/*------------------* Mouse* -----------------*//*Initialize your mouse if you have*///mouse_init();/*Register a mouse input device*///lv_indev_drv_init(&indev_drv);//indev_drv.type = LV_INDEV_TYPE_POINTER;//indev_drv.read_cb = mouse_read;//indev_mouse = lv_indev_drv_register(&indev_drv);/*Set cursor. For simplicity set a HOME symbol now.*///lv_obj_t * mouse_cursor = lv_img_create(lv_scr_act());//lv_img_set_src(mouse_cursor, LV_SYMBOL_HOME);//lv_indev_set_cursor(indev_mouse, mouse_cursor);/*------------------* Keypad* -----------------*//*Initialize your keypad or keyboard if you have*///keypad_init();/*Register a keypad input device*///lv_indev_drv_init(&indev_drv);//indev_drv.type = LV_INDEV_TYPE_KEYPAD;//indev_drv.read_cb = keypad_read;//indev_keypad = lv_indev_drv_register(&indev_drv);/*Later you should create group(s) with `lv_group_t * group = lv_group_create()`,*add objects to the group with `lv_group_add_obj(group, obj)`*and assign this input device to group to navigate in it:*`lv_indev_set_group(indev_keypad, group);`*//*------------------* Encoder* -----------------*//*Initialize your encoder if you have*/encoder_init();/*Register a encoder input device*/static lv_indev_drv_t indev_encoder_drv;lv_indev_drv_init(&indev_encoder_drv);indev_encoder_drv.type = LV_INDEV_TYPE_ENCODER;indev_encoder_drv.read_cb = encoder_read;indev_encoder = lv_indev_drv_register(&indev_encoder_drv);/*Later you should create group(s) with `lv_group_t * group = lv_group_create()`,*add objects to the group with `lv_group_add_obj(group, obj)`*and assign this input device to group to navigate in it:*`lv_indev_set_group(indev_encoder, group);`*//*------------------* Button* -----------------*//*Initialize your button if you have*///button_init();/*Register a button input device*///lv_indev_drv_init(&indev_drv);//indev_drv.type = LV_INDEV_TYPE_BUTTON;//indev_drv.read_cb = button_read;//indev_button = lv_indev_drv_register(&indev_drv);/*Assign buttons to points on the screen*///static const lv_point_t btn_points[2] = {//    {10, 10},   /*Button 0 -> x:10; y:10*///    {40, 100},  /*Button 1 -> x:40; y:100*///};//lv_indev_set_button_points(indev_button, btn_points);lv_group_t *g = lv_group_create();lv_group_set_default(g);lv_indev_set_group(indev_touchpad, g);lv_indev_set_group(indev_encoder, g);
}
- 修改
encoder_init函数为如下代码:
static void encoder_init(void)
{/*Your code comes here*/fsp_err_t err;err = drv_gpio_ec11_init();if(FSP_SUCCESS != err){printf ("%s %d\r\n", __FUNCTION__, __LINE__);__BKPT();}
}- 修改
encoder_read函数为如下代码:
/*Will be called by the library to read the encoder*/
static void encoder_read(lv_indev_drv_t * indev_drv, lv_indev_data_t * data)
{uint32_t handler_start = lv_tick_get();if(drv_gpio_ec11_get_pin_state(EC11_PIN_KEY)){if(handler_start >= drv_gpio_ec11_get_pin_press_tick(EC11_PIN_KEY)){encoder_diff = 0;encoder_state = LV_INDEV_STATE_PR;drv_gpio_ec11_set_pin_state(EC11_PIN_KEY, 0);}}else if(drv_gpio_ec11_get_pin_state(EC11_PIN_S1)){if(handler_start >= drv_gpio_ec11_get_pin_press_tick(EC11_PIN_S1)){encoder_diff -= 1;drv_gpio_ec11_set_pin_state(EC11_PIN_S1, 0);}}else if(drv_gpio_ec11_get_pin_state(EC11_PIN_S2)){if(handler_start >= drv_gpio_ec11_get_pin_press_tick(EC11_PIN_S2)){encoder_diff += 1;drv_gpio_ec11_set_pin_state(EC11_PIN_S2, 0);}}else{bsp_io_level_t level;g_ioport.p_api->pinRead(&g_ioport_ctrl, EC11_PIN_KEY, &level);if(level){encoder_state = LV_INDEV_STATE_REL;encoder_diff = 0;}}data->enc_diff = encoder_diff;data->state = encoder_state;
}
7.3 调用app
打开 05_dshanmcu_ra6m5_lvgl_display_touchpad_encoder\dshanmcu_ra6m5\src\hal_entry.c 将 hal_entry 函数修改为如下所示的代码:
void hal_entry(void)
{/* TODO: add your own code here *///app_uart_test();//app_i2c_touchpad_test();//app_spi_display_test();app_lvgl_test();//app_ec11_test();#if BSP_TZ_SECURE_BUILD/* Enter non-secure code */R_BSP_NonSecureEnter();
#endif
}
7.4 验证效果
点击编译按钮,再点击 debug 按钮,将程序烧写到开发板中。操作EC11编码器(左转、右转、按下)会看到UI也会跟着变化。
