1、添加node1、node2环境
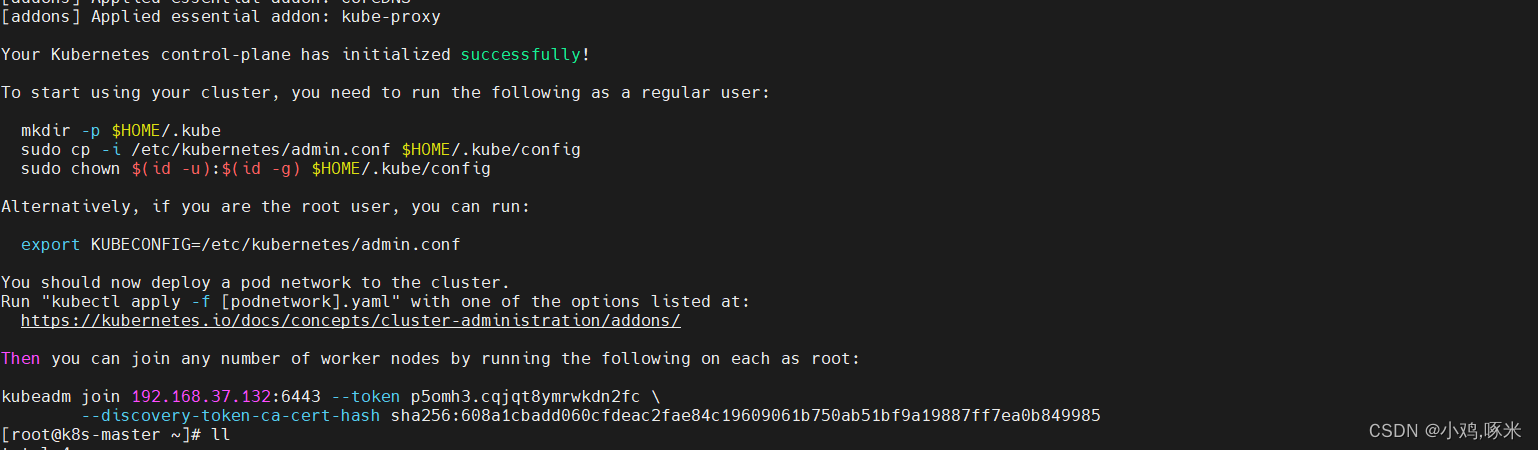
前面配置master环境的截图最后一段 复制下来 分别在node主机执行
kubeadm join 192.168.37.132:6443 --token p5omh3.cqjqt8ymrwkdn2fc \
--discovery-token-ca-cert-hash sha256:608a1cbadd060cfdeac2fae84c19609061b750ab51bf9a19887ff7ea0b849985
k8s-node1
[root@k8s-node1 ~]# netstat -pltun
Active Internet connections (only servers)
Proto Recv-Q Send-Q Local Address           Foreign Address         State       PID/Program name
tcp        0      0 127.0.0.1:25            0.0.0.0:*               LISTEN      1303/master
tcp        0      0 0.0.0.0:22              0.0.0.0:*               LISTEN      950/sshd
tcp6       0      0 ::1:25                  :::*                    LISTEN      1303/master
tcp6       0      0 :::22                   :::*                    LISTEN      950/sshd
[root@k8s-node1 ~]# kubeadm join 192.168.37.132:6443 --token p5omh3.cqjqt8ymrwkdn2fc \
>         --discovery-token-ca-cert-hash sha256:608a1cbadd060cfdeac2fae84c19609061b750ab51bf9a19887ff7ea0b849985
[preflight] Running pre-flight checks[WARNING SystemVerification]: this Docker version is not on the list of validated versions: 24.0.6. Latest validated version: 20.10
[preflight] Reading configuration from the cluster...
[preflight] FYI: You can look at this config file with 'kubectl -n kube-system get cm kubeadm-config -o yaml'
[kubelet-start] Writing kubelet configuration to file "/var/lib/kubelet/config.yaml"
[kubelet-start] Writing kubelet environment file with flags to file "/var/lib/kubelet/kubeadm-flags.env"
[kubelet-start] Starting the kubelet
[kubelet-start] Waiting for the kubelet to perform the TLS Bootstrap...This node has joined the cluster:
* Certificate signing request was sent to apiserver and a response was received.
* The Kubelet was informed of the new secure connection details.Run 'kubectl get nodes' on the control-plane to see this node join the cluster.[root@k8s-node1 ~]# netstat -pltun
Active Internet connections (only servers)
Proto Recv-Q Send-Q Local Address           Foreign Address         State       PID/Program name
tcp        0      0 127.0.0.1:25            0.0.0.0:*               LISTEN      1303/master
tcp        0      0 127.0.0.1:41244         0.0.0.0:*               LISTEN      10223/kubelet
tcp        0      0 127.0.0.1:10248         0.0.0.0:*               LISTEN      10223/kubelet
tcp        0      0 127.0.0.1:10249         0.0.0.0:*               LISTEN      10663/kube-proxy
tcp        0      0 0.0.0.0:22              0.0.0.0:*               LISTEN      950/sshd
tcp6       0      0 ::1:25                  :::*                    LISTEN      1303/master
tcp6       0      0 :::10250                :::*                    LISTEN      10223/kubelet
tcp6       0      0 :::10256                :::*                    LISTEN      10663/kube-proxy
tcp6       0      0 :::22                   :::*                    LISTEN      950/sshd
k8s-node2
[root@k8s-node2 ~]# kubeadm join 192.168.37.132:6443 --token p5omh3.cqjqt8ymrwkdn2fc \
>         --discovery-token-ca-cert-hash sha256:608a1cbadd060cfdeac2fae84c19609061b750ab51bf9a19887ff7ea0b849985
[preflight] Running pre-flight checks[WARNING SystemVerification]: this Docker version is not on the list of validated versions: 24.0.6. Latest validated version: 20.10
[preflight] Reading configuration from the cluster...
[preflight] FYI: You can look at this config file with 'kubectl -n kube-system get cm kubeadm-config -o yaml'
[kubelet-start] Writing kubelet configuration to file "/var/lib/kubelet/config.yaml"
[kubelet-start] Writing kubelet environment file with flags to file "/var/lib/kubelet/kubeadm-flags.env"
[kubelet-start] Starting the kubelet
[kubelet-start] Waiting for the kubelet to perform the TLS Bootstrap...This node has joined the cluster:
* Certificate signing request was sent to apiserver and a response was received.
* The Kubelet was informed of the new secure connection details.Run 'kubectl get nodes' on the control-plane to see this node join the cluster.
master环境验证
[root@k8s-master ~]# kubectl get nodes
NAME         STATUS     ROLES                  AGE     VERSION
k8s-master   NotReady   control-plane,master   18m     v1.23.6
k8s-node1    NotReady   <none>                 5m28s   v1.23.6
[root@k8s-master ~]# kubectl get nodes
NAME         STATUS     ROLES                  AGE     VERSION
k8s-master   NotReady   control-plane,master   21m     v1.23.6
k8s-node1    NotReady   <none>                 8m6s    v1.23.6
k8s-node2    NotReady   <none>                 2m31s   v1.23.6
处理 节点的notready问题
[root@k8s-master ~]# kubectl get pod -n kube-system
NAME READY STATUS RESTARTS AGE
coredns-6d8c4cb4d-hjbtl 0/1 Pending 0 28m
coredns-6d8c4cb4d-pwhjz 0/1 Pending 0 28m
master环境执行
需要下载网络插件
mkdir /opt/k8s/ && cd /opt/k8s/
curl https://raw.githubusercontent.com/projectcalico/calico/v3.26.1/manifests/calico.yaml -O
修改这俩行

取消注释
改成
- name: CALICO_IPV4POOL_CIDR
value: "10.244.0.0/16" #要和pod的网段ip一样
# 删除镜像 docker.io缀,避免下载过慢导致失败
[root@k8s-master k8s]# sed -i 's#docker.io/##g' calico.yaml [root@k8s-master k8s]# grep image calico.yamlimage: calico/cni:v3.25.0imagePullPolicy: IfNotPresentimage: calico/cni:v3.25.0imagePullPolicy: IfNotPresentimage: calico/node:v3.25.0imagePullPolicy: IfNotPresentimage: calico/node:v3.25.0imagePullPolicy: IfNotPresentimage: calico/kube-controllers:v3.25.0imagePullPolicy: IfNotPresent
[root@k8s-master k8s]# kubectl apply -f calico.yaml
poddisruptionbudget.policy/calico-kube-controllers created
serviceaccount/calico-kube-controllers created
serviceaccount/calico-node created
configmap/calico-config created
customresourcedefinition.apiextensions.k8s.io/bgpconfigurations.crd.projectcalico.org created
customresourcedefinition.apiextensions.k8s.io/bgppeers.crd.projectcalico.org created
customresourcedefinition.apiextensions.k8s.io/blockaffinities.crd.projectcalico.org created
customresourcedefinition.apiextensions.k8s.io/caliconodestatuses.crd.projectcalico.org created
customresourcedefinition.apiextensions.k8s.io/clusterinformations.crd.projectcalico.org created
customresourcedefinition.apiextensions.k8s.io/felixconfigurations.crd.projectcalico.org created
customresourcedefinition.apiextensions.k8s.io/globalnetworkpolicies.crd.projectcalico.org created
customresourcedefinition.apiextensions.k8s.io/globalnetworksets.crd.projectcalico.org created
customresourcedefinition.apiextensions.k8s.io/hostendpoints.crd.projectcalico.org created
customresourcedefinition.apiextensions.k8s.io/ipamblocks.crd.projectcalico.org created
customresourcedefinition.apiextensions.k8s.io/ipamconfigs.crd.projectcalico.org created
customresourcedefinition.apiextensions.k8s.io/ipamhandles.crd.projectcalico.org created
customresourcedefinition.apiextensions.k8s.io/ippools.crd.projectcalico.org created
customresourcedefinition.apiextensions.k8s.io/ipreservations.crd.projectcalico.org created
customresourcedefinition.apiextensions.k8s.io/kubecontrollersconfigurations.crd.projectcalico.org created
customresourcedefinition.apiextensions.k8s.io/networkpolicies.crd.projectcalico.org created
customresourcedefinition.apiextensions.k8s.io/networksets.crd.projectcalico.org created
clusterrole.rbac.authorization.k8s.io/calico-kube-controllers created
clusterrole.rbac.authorization.k8s.io/calico-node created
clusterrolebinding.rbac.authorization.k8s.io/calico-kube-controllers created
clusterrolebinding.rbac.authorization.k8s.io/calico-node created
daemonset.apps/calico-node created
deployment.apps/calico-kube-controllers created
查看pod是否启动
#节点已经Ready状态
[root@k8s-master k8s]# kubectl get nodes
NAME STATUS ROLES AGE VERSION
k8s-master Ready control-plane,master 52m v1.23.6
k8s-node1 Ready <none> 39m v1.23.6
k8s-node2 Ready <none> 33m v1.23.6
解决node节点不可以使用kubectl命令
[root@k8s-node1 ~]# kubectl get pod
The connection to the server localhost:8080 was refused - did you specify the right host or port?
[root@k8s-master ~]# cd /etc/kubernetes/[root@k8s-master kubernetes]# scp admin.conf k8s-node1:/etc/kubernetes/
The authenticity of host 'k8s-node1 (192.168.37.133)' can't be established.
ECDSA key fingerprint is SHA256:v+UeuPf/k3LWyRvPn3fm67FDoU4yIZ7IprAUBLqxnFQ.
ECDSA key fingerprint is MD5:7c:dd:0f:66:0b:a8:a9:53:ec:25:80:50:80:06:b6:48.
Are you sure you want to continue connecting (yes/no)? yes[root@k8s-master kubernetes]# scp admin.conf k8s-node2:/etc/kubernetes/
The authenticity of host 'k8s-node2 (192.168.37.134)' can't be established.
ECDSA key fingerprint is SHA256:wQKSzrjeA0e37M7zYFsiHZH2n+kO43VYr/NR+pXvwlk.
ECDSA key fingerprint is MD5:ff:80:7d:af:61:3a:75:88:ef:e3:0e:48:2e:51:53:0b.
Are you sure you want to continue connecting (yes/no)? yes
分别在node1、node2节点执行
echo "export KUBECONFIG=/etc/kubernetes/admin.conf" >> ~/.bash_profilesource ~/.bash_验证
[root@k8s-node2 ~]# kubectl get nodes
NAME STATUS ROLES AGE VERSION
k8s-master Ready control-plane,master 83m v1.23.6
k8s-node1 Ready <none> 70m v1.23.6
k8s-node2 Ready <none> 64m v1.23.6
因为命令行工具是向apiserver发送请求,是因为node1、node2环境没有apiserver配置地址
就需要把master的admin.conf文件scp到node节点,这样node节点就可以找到目标端在发送请求
这样k8s的集群环境就部署结束了