目前,主要使用的MySQL有5.7和8.0两个版本,在安装上,5.7和8.0版本基本一致,区别只在于配置root密码和远程登陆上不同。本次将以5.7版本作为对象,进行后续安装。
1.wget下载MySQL安装文件

下载完成,得到mysql的tar包:

解压tar包:

2.通过rpm安装MySQL
对各个rpm程序进行安装:
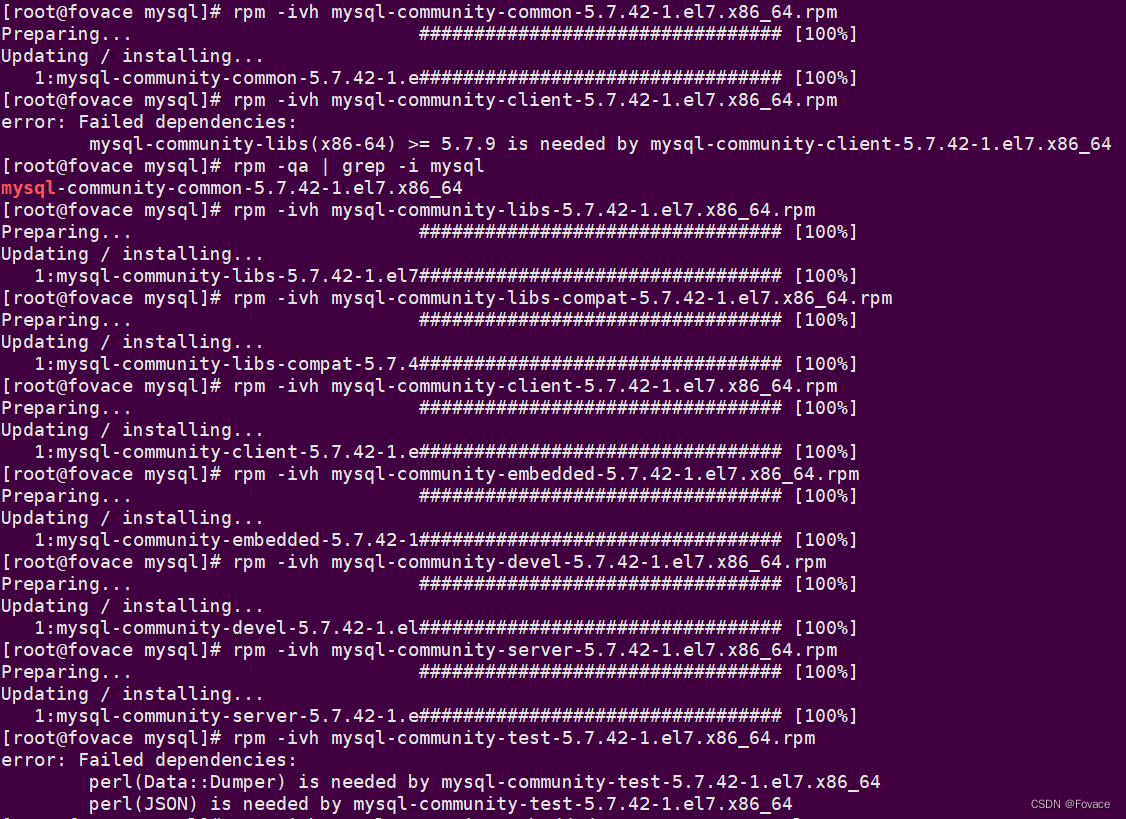
如上图所示,在安装”mysql-community-test“时报错,对于错误的处理如下:
处理第一个错误perl(data::Dumper):
yum -y install autoconf

处理第二个报错perl(JSON):
yum install perl-JSON.noarch -y
yum install perl.x86_64 perl-devel.x86_64 -y
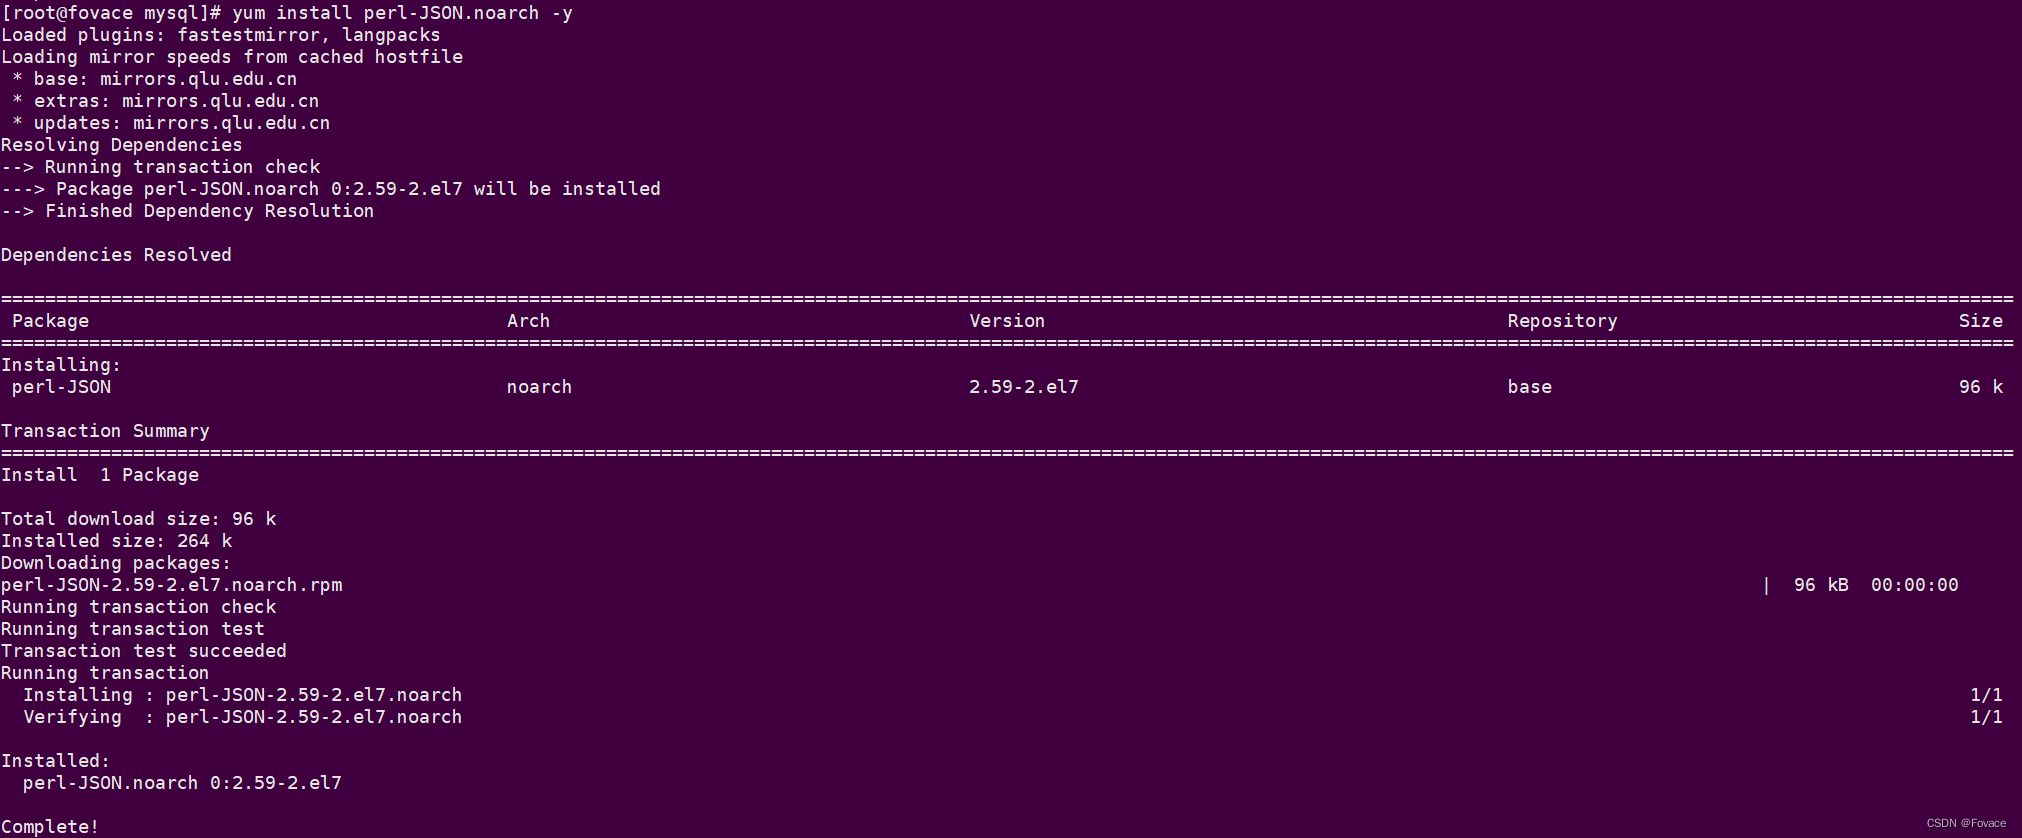

处理完上述两个报错后,继续安装”mysql-community-test“:

3.初始化MySQL
mysqld --initialize --console
![]()
4.对MySQL目录进行授权
chown -R mysql:mysql /var/lib/mysql/
5.MySQL初始设置
5.1 启动MySQL,并查看其状态

5.2 查看MySQL临时密码
cat /var/log/mysqld.log | grep password

5.3 使用临时密码登录MySQL

5.4 设置MySQL密码
alter user 'root'@'localhost' identified with mysql_native_password by '你的密码';
flush privileges;

