一、组件基础
1、单文件组件
第一步:引入组件 import ComponentTest from './components/ComponentTest.vue'
第二步:挂载组件 components: {ComponentTest }
第三步:显示组件 <ComponentTest></ComponentTest>
<!-- 父组件 -->
<template><ComponentTest></ComponentTest>
</template><script>
import ComponentTest from './components/ComponentTest.vue'export default {name: 'App',components: {ComponentTest}
}
</script><style></style>
<!-- 子组件 -->
<template><h3>单文件组件</h3>
</template><script>
export default {name: "ComponentTest"
}
</script><!-- stye添加scoped修饰,表示属性尽在当前组件中生效 -->
<style scoped>
h3 {color: red;
}
</style>

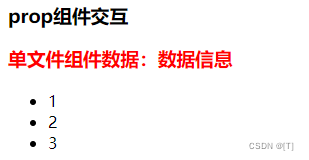
二、Props组件交互(向下传递)
1、Props组件交互
<!-- 父组件 -->
<template><h3>prop组件交互</h3><ComponentTest :message="msg" :values="values"></ComponentTest>
</template><script>
import ComponentTest from './components/ComponentTest.vue'export default {name: 'App',components: {ComponentTest},data() {return {msg: "数据信息",values: [1, 2, 3]}}
}
</script><style></style>
<!-- 子组件 -->
<template><h3>单文件组件数据:{{ message }}</h3><ul><li v-for="(item, index) in values" :key="index">{{ item }}</li></ul>
</template><script>
export default {name: "ComponentTest",props: {message: {type: String,default: ""},values: {type: Array,// 数组和对象的默认值必须使用函数返回default: function () {return [];}}}
}
</script><!-- stye添加scoped修饰,表示属性尽在当前组件中生效 -->
<style scoped>
h3 {color: red;
}
</style>
三、自定义事件组件交互(向上传递)
1、自定义事件组件交互
<!-- 父组件 -->
<template><h3>自定义事件组件交互</h3><ComponentTest @onMsg="GetMsg"> </ComponentTest>
</template><script>
import ComponentTest from './components/ComponentTest.vue'export default {name: 'App',components: {ComponentTest},methods: {GetMsg(data) {console.log(data);}}
}
</script><style></style>
<!-- 子组件 -->
<template><button @click="sendClickHandle">发送数据给父组件</button>
</template><script>
export default {name: "ComponentTest",data() {return {msg: "子组件数据"}},methods: {sendClickHandle() {// 父组件监听的事件名称,字符串 // 向父组件传递的参数this.$emit("onMsg", this.msg);}}
}
</script><!-- stye添加scoped修饰,表示属性尽在当前组件中生效 -->
<style scoped>
h3 {color: red;
}
</style>

四、组件生命周期
1、组件生命周期
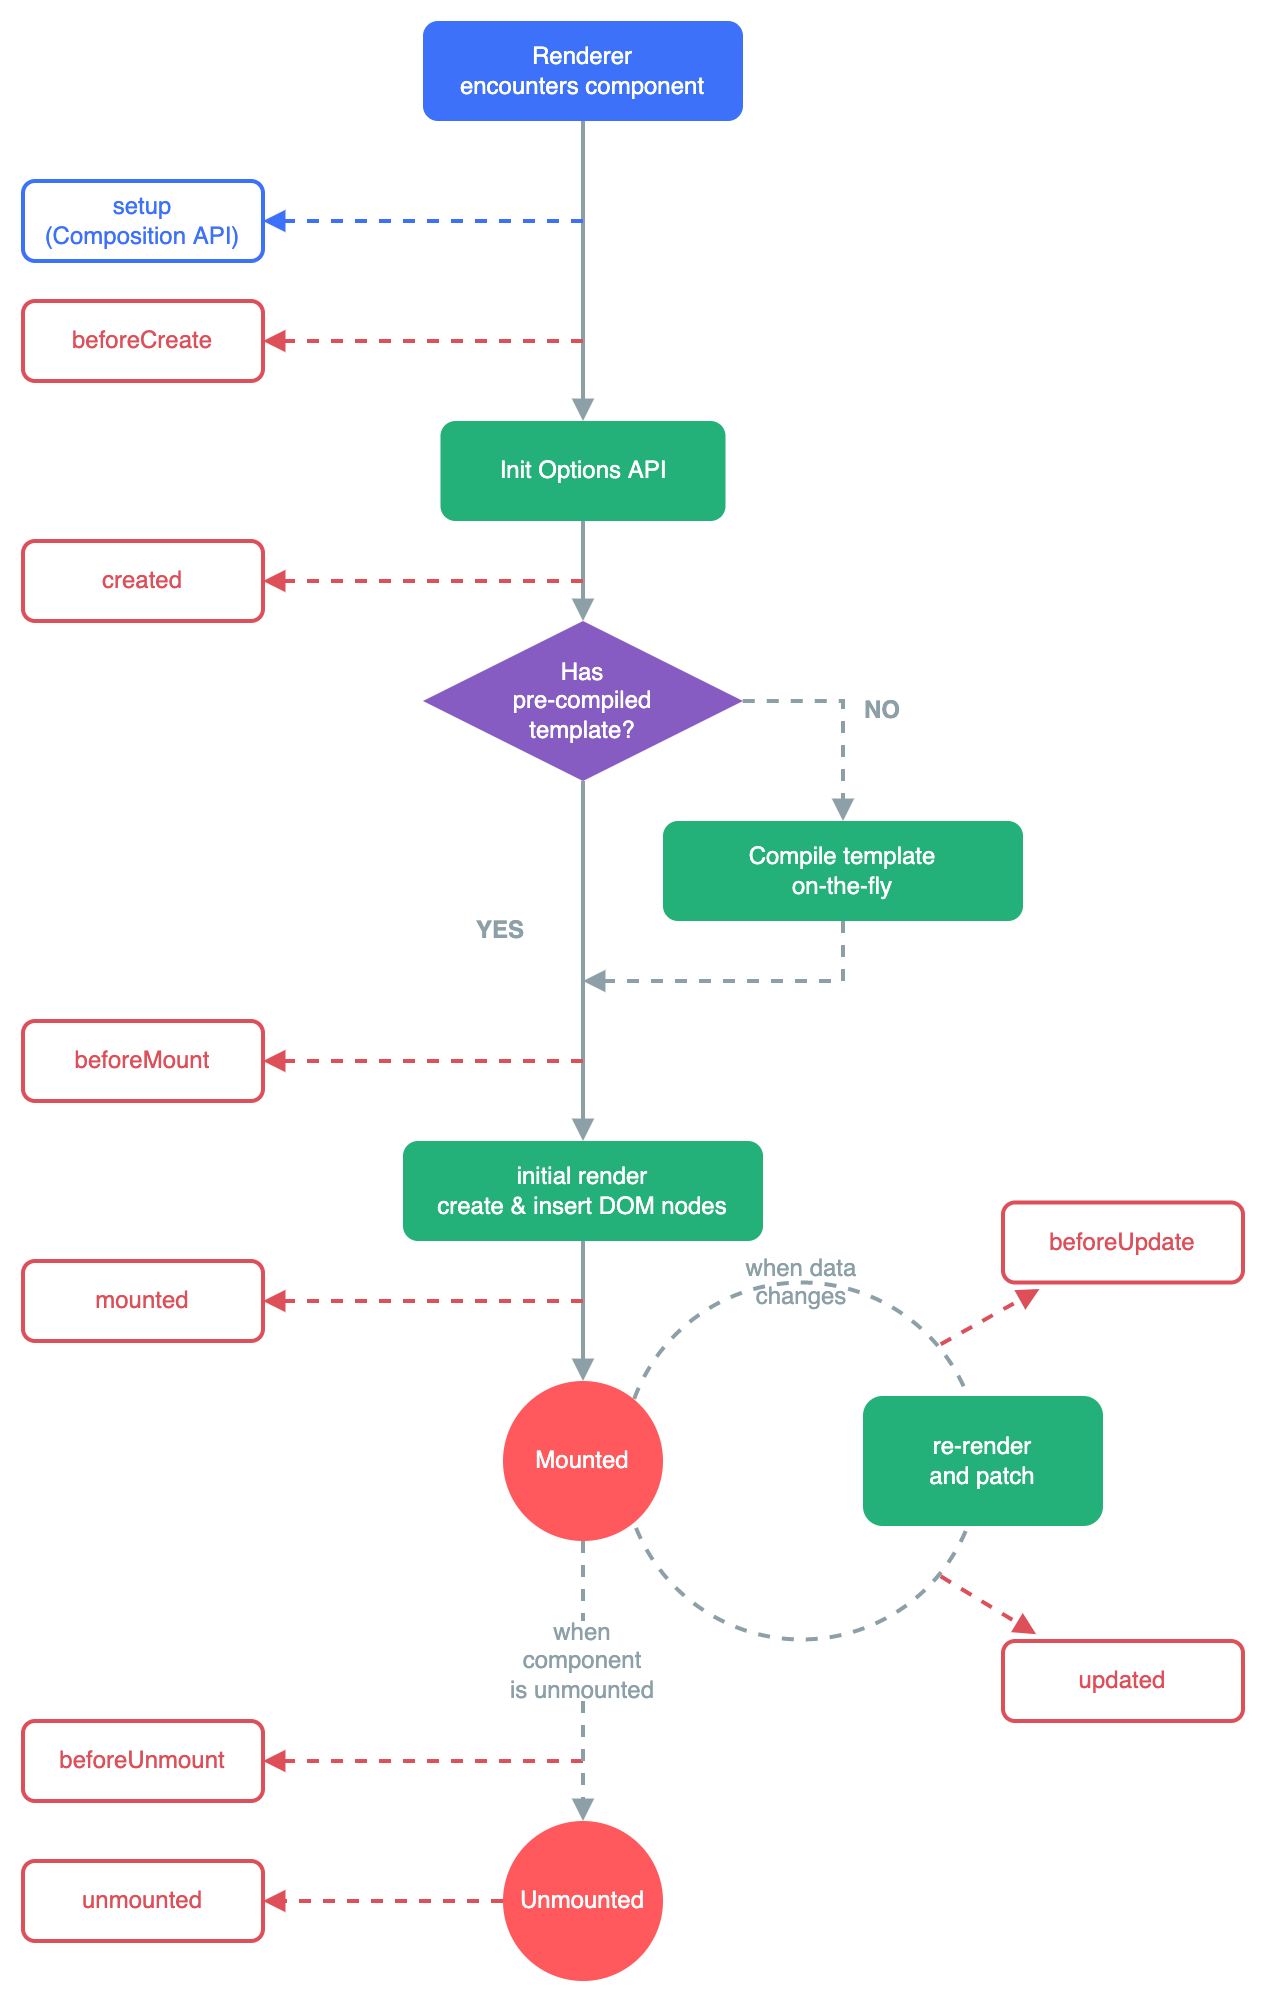
创建:brforeCreate、created
渲染:brforeMount、mounted
更新:brforeUpdate、updated
卸载:brforeUnmount、unmounted
<!-- 父组件 -->
<template><h3>组件生命周期</h3><ComponentTest></ComponentTest>
</template><script>
import ComponentTest from './components/ComponentTest.vue'export default {name: 'App',components: {ComponentTest}
}
</script><style></style>
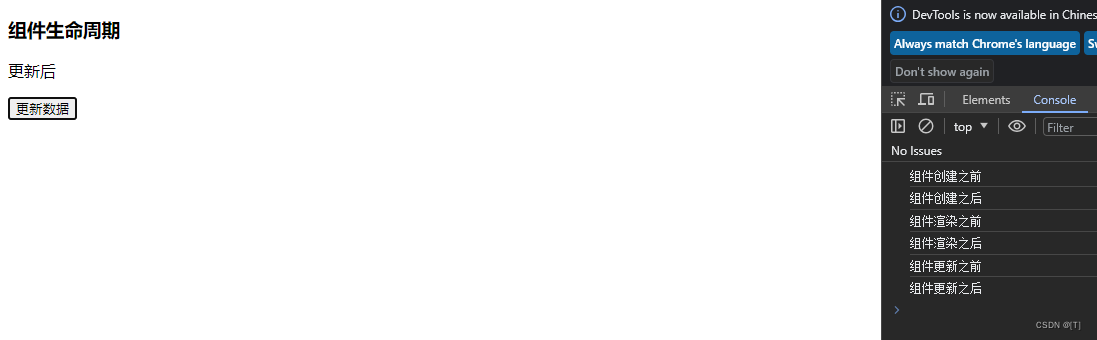
<!-- 子组件 -->
<template><p>{{ msg }}</p><button @click="msg = '更新后'">更新数据</button>
</template><script>
export default {name: "ComponentTest",data() {return {msg: "子组件数据"}},beforeCreate() {console.log("组件创建之前");},created() {console.log("组件创建之后");},beforeMount() {console.log("组件渲染之前");},mounted() {console.log("组件渲染之后");},beforeUpdate() {console.log("组件更新之前");},updated() {console.log("组件更新之后");},beforeUnmount() {console.log("组件卸载之前");},unmounted() {console.log("组件卸载之后");}
}
</script><!-- stye添加scoped修饰,表示属性尽在当前组件中生效 -->
<style scoped>
h3 {color: red;
}
</style>
五、vuex(全局数据管理)
1、创建vuex项目
Vue CLI v5.0.8
? Please pick a preset: Manually select features
? Check the features needed for your project: (Press <space> to select, <a> to toggle all, <i> to invert selection, and <enter> to
proceed)(*) Babel( ) TypeScript(*) Progressive Web App (PWA) Support( ) Router
>(*) Vuex	//vuex选项( ) CSS Pre-processors( ) Linter / Formatter( ) Unit Testing( ) E2E Testing
2、使用方法
(1)State(存储数据)
// vue-vuex\src\store\index.js
import { createStore } from 'vuex'export default createStore({// 所有数据都存放在这里state: {counter: 100}
})
方式一:
<template><p>{{ $store.state.counter }}</p><HelloWorld></HelloWorld>
</template><script>
import HelloWorld from './components/HelloWorld.vue'export default {name: 'App',components: {HelloWorld}
}
</script>
方式二
<template><div class="hello"><p>{{ counter }}</p></div>
</template><script>
import { mapState } from 'vuex';export default {name: 'HelloWorld',computed: {...mapState(["counter"])}
}
</script><style scoped></style>
(2)Getter(获取数据)
对vuex中的数据进行过滤
// vue-vuex\src\store\index.js
import { createStore } from 'vuex'export default createStore({// 所有数据都存放在这里state: {counter: 100},getters: {getCounter(state) {return state.counter > 0 ? state.counter : "counter的值小于0"}},mutations: {},actions: {}
})
方式一
<template><p>{{ $store.getters.getCounter }}</p><HelloWorld></HelloWorld>
</template><script>
import HelloWorld from './components/HelloWorld.vue'export default {name: 'App',components: {HelloWorld}
}
</script><style>
#app {font-family: Avenir, Helvetica, Arial, sans-serif;-webkit-font-smoothing: antialiased;-moz-osx-font-smoothing: grayscale;text-align: center;color: #2c3e50;margin-top: 60px;
}
</style>
方式二
<template><div class="hello"><p>{{ getCounter }}</p></div>
</template><script>
import { mapGetters } from 'vuex';export default {name: 'HelloWorld',computed: {...mapGetters(["getCounter"])}
}
</script><style scoped></style>
(3)Mutation(提交修改数据)
// vue-vuex\src\store\index.js
import { createStore } from 'vuex'export default createStore({// 所有数据都存放在这里state: {counter: 100},getters: {getCounter(state) {return state.counter > 0 ? state.counter : "counter数据异常"}},mutations: {addCounter(state, num) {state.counter += num;}},actions: {}
})
方法一
<template><p>{{ $store.getters.getCounter }}</p><HelloWorld></HelloWorld><button @click="addCounterHandle">增加数据</button>
</template><script>
import HelloWorld from './components/HelloWorld.vue'export default {name: 'App',components: {HelloWorld},methods: {addCounterHandle() {// 固定调用方式this.$store.commit("addCounter", 10);}}
}
</script>
<style></style>
方法二
<template><div class="hello"><p>{{ getCounter }}</p><button @click="addCounterHandle">增加20</button></div>
</template><script>
import { mapGetters, mapMutations } from 'vuex';export default {name: 'HelloWorld',computed: {...mapGetters(["getCounter"])},methods: {...mapMutations(["addCounter"]),addCounterHandle() {// 固定调用方式this.addCounter(20);}}
}
</script><style scoped></style>
(4)Action
action提交给mutation,包含异步操作
// vue-vuex\src\store\index.js
import { createStore } from 'vuex'export default createStore({// 所有数据都存放在这里state: {counter: 100},getters: {getCounter(state) {return state.counter > 0 ? state.counter : "counter数据异常"}},mutations: {addCounter(state, num) {state.counter += num;}},actions: { //为异步操作准备asyncAddCounter({ commit }) {commit("addCounter", 30);}}
})
方法一
<template><div class="hello"><p>{{ getCounter }}</p><button @click="asyncAddCounterHandle">增加20</button></div>
</template><script>
import { mapGetters, mapMutations } from 'vuex';export default {name: 'HelloWorld',computed: {...mapGetters(["getCounter"])},methods: {...mapMutations(["addCounter"]),asyncAddCounterHandle() {this.$store.dispatch("asyncAddCounter");}}
}
</script><style scoped></style>
方式二
<template><div class="hello"><p>{{ getCounter }}</p><button @click="asyncAddCounterHandle">增加20</button></div>
</template><script>
import { mapGetters, mapMutations, mapActions } from 'vuex';export default {name: 'HelloWorld',computed: {...mapGetters(["getCounter"])},methods: {...mapMutations(["addCounter"]),...mapActions(["asyncAddCounter"]),asyncAddCounterHandle() {this.asyncAddCounter();}}
}
</script><style scoped></style>