目录
一、准备
1、引入依赖
2、创建配置类
二、相关注解
一、准备
1、引入依赖
首先我们需要在项目中引入依赖,有两种方式。第一种我们可以在创建Spring Boot项目时搜索WebSocket然后勾选依赖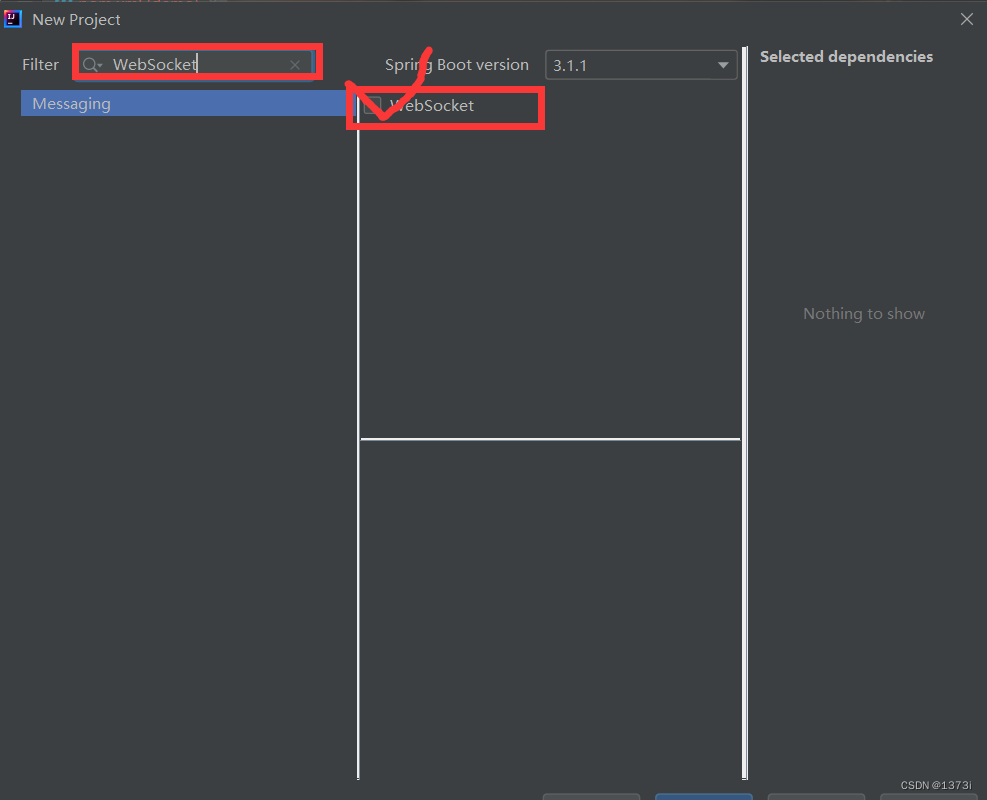
第二种是我们可以直接在项目的pom.xml文件中插入以下依赖
<dependency><groupId>org.springframework.boot</groupId><artifactId>spring-boot-starter-websocket</artifactId></dependency>
2、创建配置类
我们需要进行如下配置
@Configuration
public class WebSocketConfig {/***  ServerEndpointExporter 是一个Spring框架提供的类,它可以自动注册和管理WebSocket的端点。它会扫描带有 @ServerEndpoint 注解的类,并将其注册为WebSocket的端点,以便客户端可以连接和通信。** 通过将 ServerEndpointExporter 实例化为一个Spring Bean,该配置类允许自动配置和管理WebSocket端点,使得在应用程序中使用WebSocket变得更加简单和方便。* @return*/@Beanpublic ServerEndpointExporter serverEndpointExporter() {return new ServerEndpointExporter();}
}
ServerEndpointExporter 是一个Spring框架提供的类,它可以自动注册和管理WebSocket的端点。它会扫描带有 @ServerEndpoint 注解的类,并将其注册为WebSocket的端点,以便客户端可以连接和通信。 通过将 ServerEndpointExporter 实例化为一个Spring Bean,该配置类允许自动配置和管理WebSocket端点,使得在应用程序中使用WebSocket变得更加简单和方便。
二、相关注解
这个时候我们就可以使用,一下注解进行使用,可以参考之前的文章
【计网】WebSocket协议_1373i的博客-CSDN博客![]() https://blog.csdn.net/qq_61903414/article/details/130389150?spm=1001.2014.3001.5501
https://blog.csdn.net/qq_61903414/article/details/130389150?spm=1001.2014.3001.5501
package com.example.demo.component;import org.springframework.stereotype.Component;import javax.websocket.*;
import javax.websocket.server.ServerEndpoint;@ServerEndpoint(value = "/chat")  //路径
@Component
public class WebSocketServer {@OnOpenpublic void onOpen(Session session,String username) {// 连接刚建立时的处理逻辑}@OnMessagepublic void onMessage(String message, Session session) {// 接收到消息时的处理逻辑}@OnClosepublic void onClose(Session session) {// 连接关闭时的处理逻辑}@OnErrorpublic void onError(Throwable error) {// 发生错误时的处理逻辑}
}