three.js学习总结超详细附带素材及源码
安装three.js
npm install --save three
引入three.js
import * as THREE from 'three'
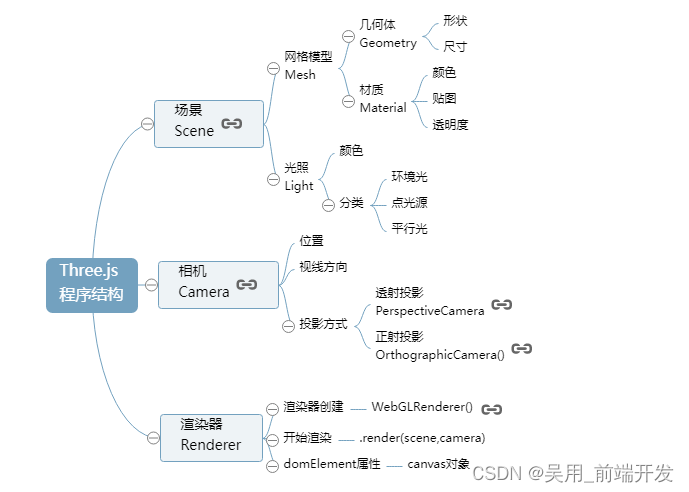
three.js结构
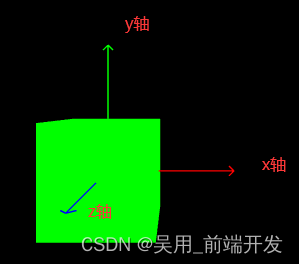
three.js坐标
创建一个场景
scene场景,camera相机,renderer渲染器
- 创建一个场景
this.scene = new THREE.Scene()
- 创建一个透视摄像机
this.camera = new THREE.PerspectiveCamera(75,800/800,0.1,700)
PerspectiveCamera:
参数一:视野角度,无论在什么时候,你所能再显示器上看到的场景的范围,单位是角度。
参数二:长宽比,一个物体的宽除以她的高
参数三:近截面和远截面,当某些部分比摄像机的远截面或者近截面近的时候,该部分将不会被渲染到场景中。
- 创建渲染器
renderer = new THREE.WebGLRenderer();
- 创建渲染器的宽高
renderer.setSize( 800, 800 );
- 创建一个立方体物体
const geometry = new THREE.BoxGeometry( 1, 1, 1 );
BoxGeometry(x轴上的宽度,y轴上的高度,z轴上的深度) 默认为1
- 确定立方体的材质和颜色 MeshBasicMaterial材质,颜色绿色
const material = new THREE.MeshBasicMaterial( { color: 0x00ff00 } );
- 创建一个网格
表示基于以三角形为polygon mesh(多边形网格)的物体的类。
同时也作为其他类的基类 Mesh( geometry :
BufferGeometry, material : Material ) geometry ——
(可选)BufferGeometry的实例,默认值是一个新的BufferGeometry。 material ——
(可选)一个Material,或是一个包含有Material的数组,默认是一个新的MeshBasicMaterial。
mesh = new THREE.Mesh( geometry, material );
- 插入元素,执行渲染操作
//元素中插入canvas对象container.appendChild(this.renderer.domElement);
- WebGL兼容性检查(WebGL compatibility check)
某些设备以及浏览器直到现在仍然不支持WebGL。
以下的方法可以帮助你检测当前用户所使用的环境是否支持WebGL,如果不支持,将会向用户提示一条信息。
// webGL兼容
import WebGL from 'three/examples/jsm/capabilities/WebGL.js';
if ( WebGL.isWebGLAvailable() ) {this.animate();
} else {const warning = WebGL.getWebGLErrorMessage();document.getElementById( 'container' ).appendChild( warning );
}
- 执行旋转函数,执行渲染
animate() {requestAnimationFrame( this.animate );this.mesh.rotation.x += 0.01;this.mesh.rotation.y += 0.01;this.renderer.render( this.scene, this.camera );}
- 加入坐标辅助器
// 看的方向
this.camera.lookAt(0,0,0)
//添加世界坐标辅助器
const axesHelper = new THREE.AxesHelper(3)
this.scene.add( axesHelper );
- 引入并加入轨道控制器,并设置阻尼效果
// 轨道控制器
import { OrbitControls } from "three/examples/jsm/controls/OrbitControls.js"
//添加轨道控制器
this.controls = new OrbitControls(this.camera,this.renderer.domElement)
//设置带阻尼的惯性
this.controls.enableDamping = true
//设置阻尼系数,惯性的大小
this.controls.dampingFactor = 0.05
//设置自动旋转
this.controls.autoRotate = true
//更新
this.controls.update()
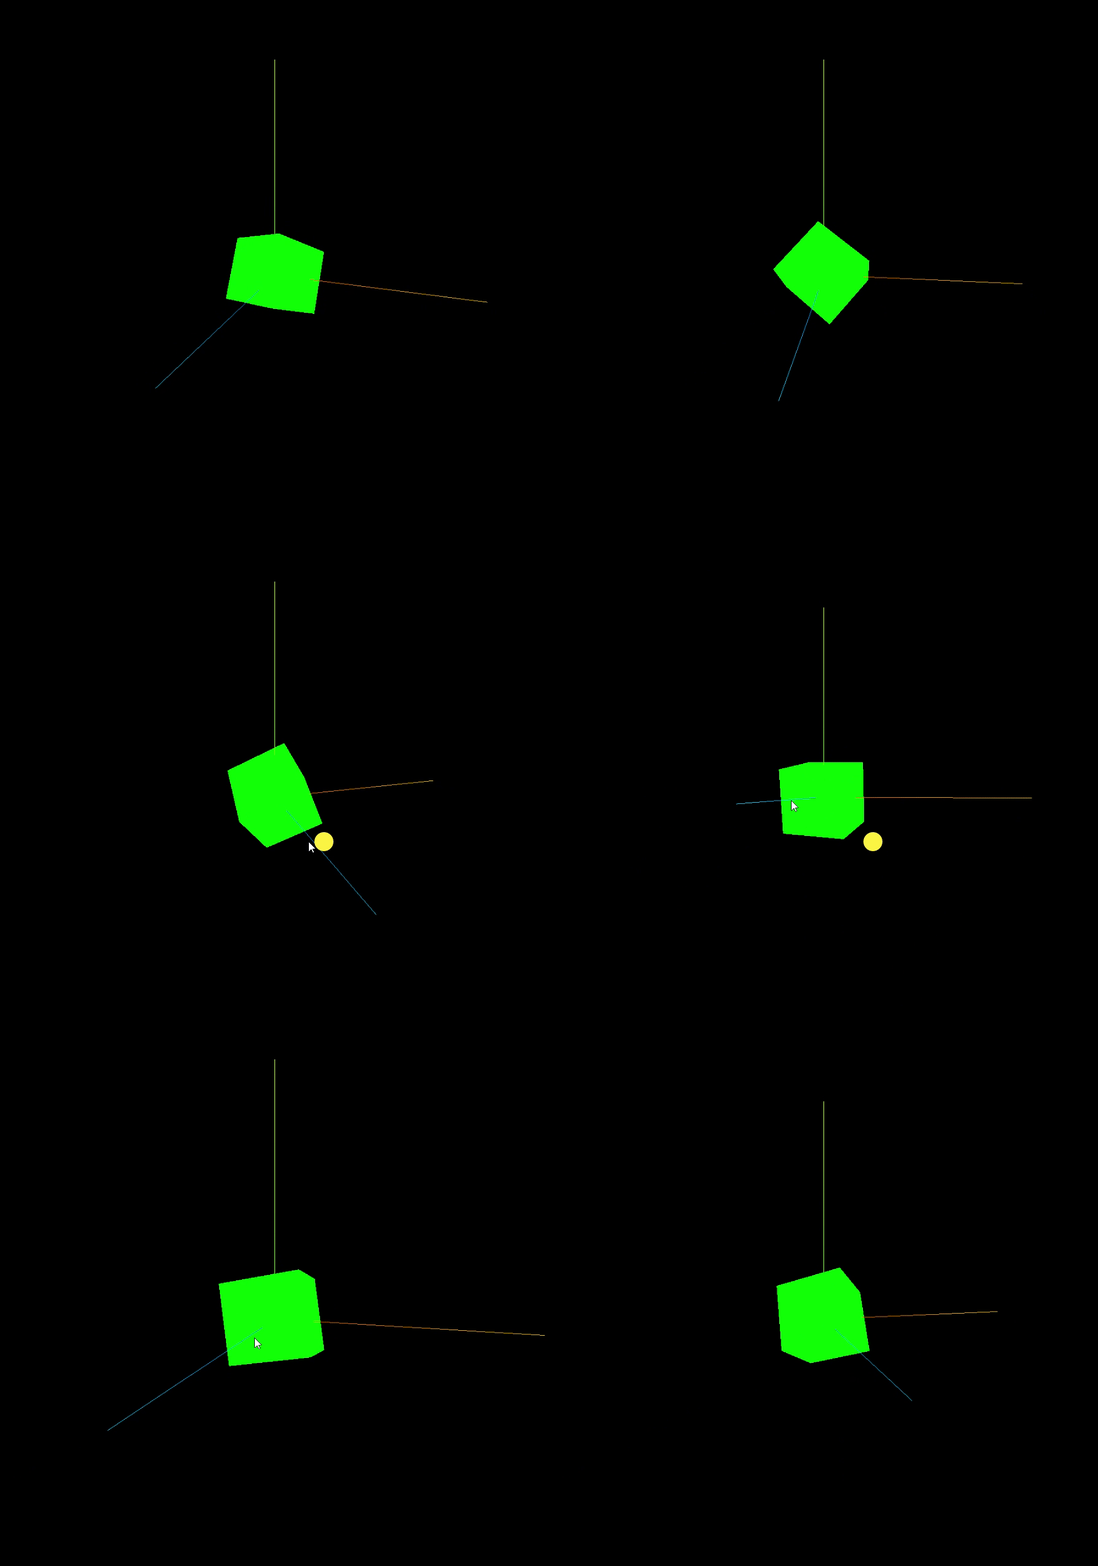
运行效果:
完整代码:
<template><div id="container"></div>
</template><script>
import * as THREE from 'three'
// webGL兼容
import WebGL from 'three/examples/jsm/capabilities/WebGL.js';
// 轨道控制器
import { OrbitControls } from "three/examples/jsm/controls/OrbitControls.js"
export default {name: 'HomeView',components: {},mounted(){this.init()},data(){return {camera: null,  //相机对象scene: null,  //场景对象renderer: null,  //渲染器对象mesh: null,  //网格模型对象Meshcontrols:null, //轨道控制器}},methods:{init(){let container = document.getElementById('container');//创建一个场景this.scene = new THREE.Scene()//透视摄像机this.camera = new THREE.PerspectiveCamera(75,1000/1000,0.1,700)//创建渲染器this.renderer = new THREE.WebGLRenderer();//渲染器尺寸this.renderer.setSize( 1000, 1000 );     //创建一个立方体const geometry = new THREE.BoxGeometry( 1, 1, 1 );//我们需要给它一个MeshBasicMaterial材质,来让它有绿色颜色const material = new THREE.MeshBasicMaterial( { color: 0x00ff00 } );//需要一个 Mesh(网格)this.mesh = new THREE.Mesh( geometry, material );// 添加物体到网格this.scene.add( this.mesh );// 设置相机位置this.camera.position.z = 5;   this.camera.position.y =2;  this.camera.position.x = 2; // 看的方向 this.camera.lookAt(0,0,0)//添加世界坐标辅助器const axesHelper = new THREE.AxesHelper(3) this.scene.add( axesHelper );//添加轨道控制器this.controls = new OrbitControls(this.camera,this.renderer.domElement)//添加阻尼带有惯性this.controls.enableDamping = true//设置阻尼系数this.controls.dampingFactor = 0.05//设置自动旋转this.controls.autoRotate = true//元素中插入canvas对象container.appendChild(this.renderer.domElement); if ( WebGL.isWebGLAvailable() ) {this.animate();} else {const warning = WebGL.getWebGLErrorMessage();document.getElementById( 'container' ).appendChild( warning );}},//旋转起来animate() {this.controls.update()requestAnimationFrame( this.animate );this.mesh.rotation.x += 0.01;this.mesh.rotation.y += 0.01;this.renderer.render( this.scene, this.camera );}}
}
</script>
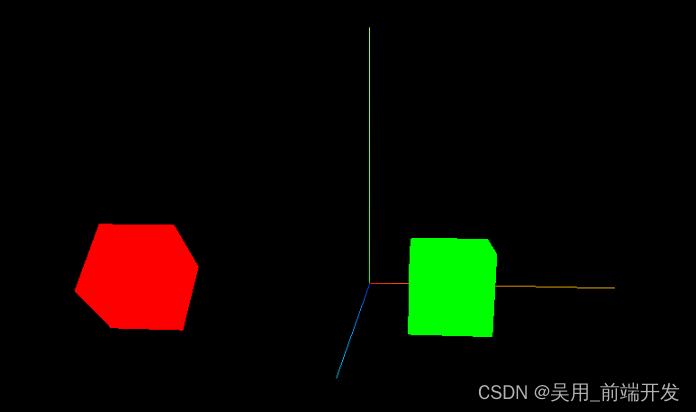
three.js物体位移与父子元素
//子元素材质绿色
const material = new THREE.MeshBasicMaterial( { color: 0x00ff00 } );
//父元素材质红色
const material2 = new THREE.MeshBasicMaterial( { color: "red" } );
this.mesh2 = new THREE.Mesh( geometry, material2 );
this.mesh = new THREE.Mesh( geometry, material );//父元素添加子元素
this.mesh2.add(this.mesh)
//设置父元素位置
this.mesh2.position.set(-3,0,0)
//设置子元素位置
this.mesh.position.set(3,0,0)
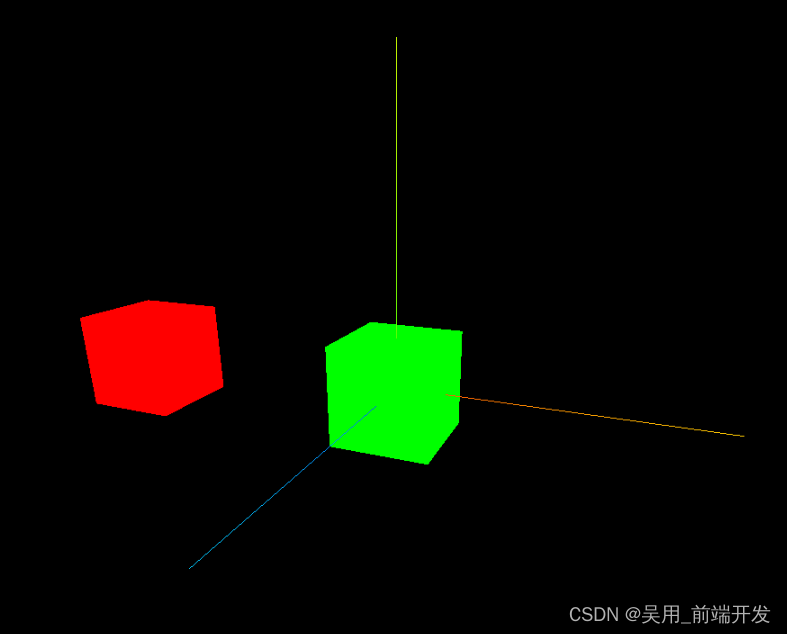
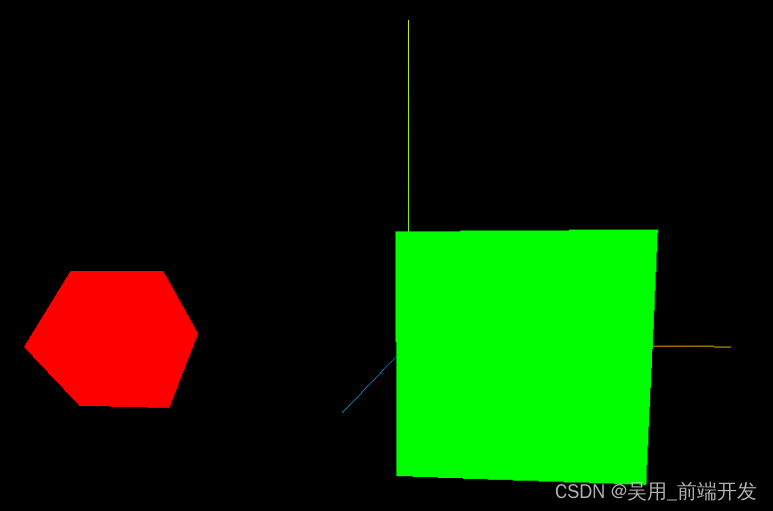
效果:
three.js物体的缩放与旋转
物体的局部缩放。默认值是Vector3( 1, 1, 1 )。父元素被放大了,子元素也根着进行放大。
物体的局部旋转,以弧度来表示,欧拉角秒是一个旋转变换,通过指定轴顺序和各个轴上的指定旋转角度来旋转一个物体,对Euler实例进行遍历将按相应的顺序生成她的分量(x,y,z,order)。
也属于局部旋转,跟父元素有关联。会叠加父元素的旋转
Euler(0,1,1,“YXZ”)
x:用弧度表示x轴旋转的量,默认是0
y:用弧度表示y轴旋转的量,默认是0
z:用弧度表示z轴旋转的量,默认是0
order:表示旋转顺序的字符串,默认为’XYZ’(必须是大写)
//子物体放大两倍this.mesh.scale.set(2,2,2)//物体绕着X轴旋转45°this.mesh.rotation.x = Math.PI / 4
three.js画布自适应窗口变化
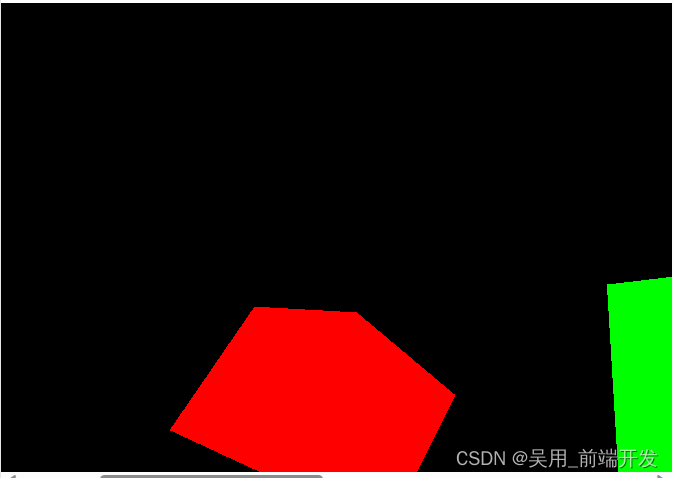
当窗口缩小的时候会出现如下效果:
自适应代码,监听窗口变化
window.addEventListener("resize",()=>{console.log("我改变了")//重置渲染器宽高比this.renderer.setSize(window.innerWidth,window.innerHeight)//重置相机宽高比this.camera.aspect = window.innerWidth/window.innerHeight//更新相机投影矩阵this.camera.updateProjectionMatrix()})
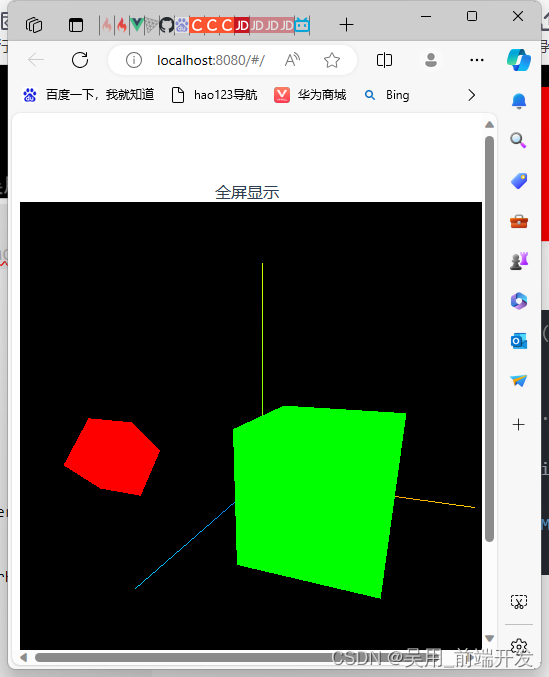
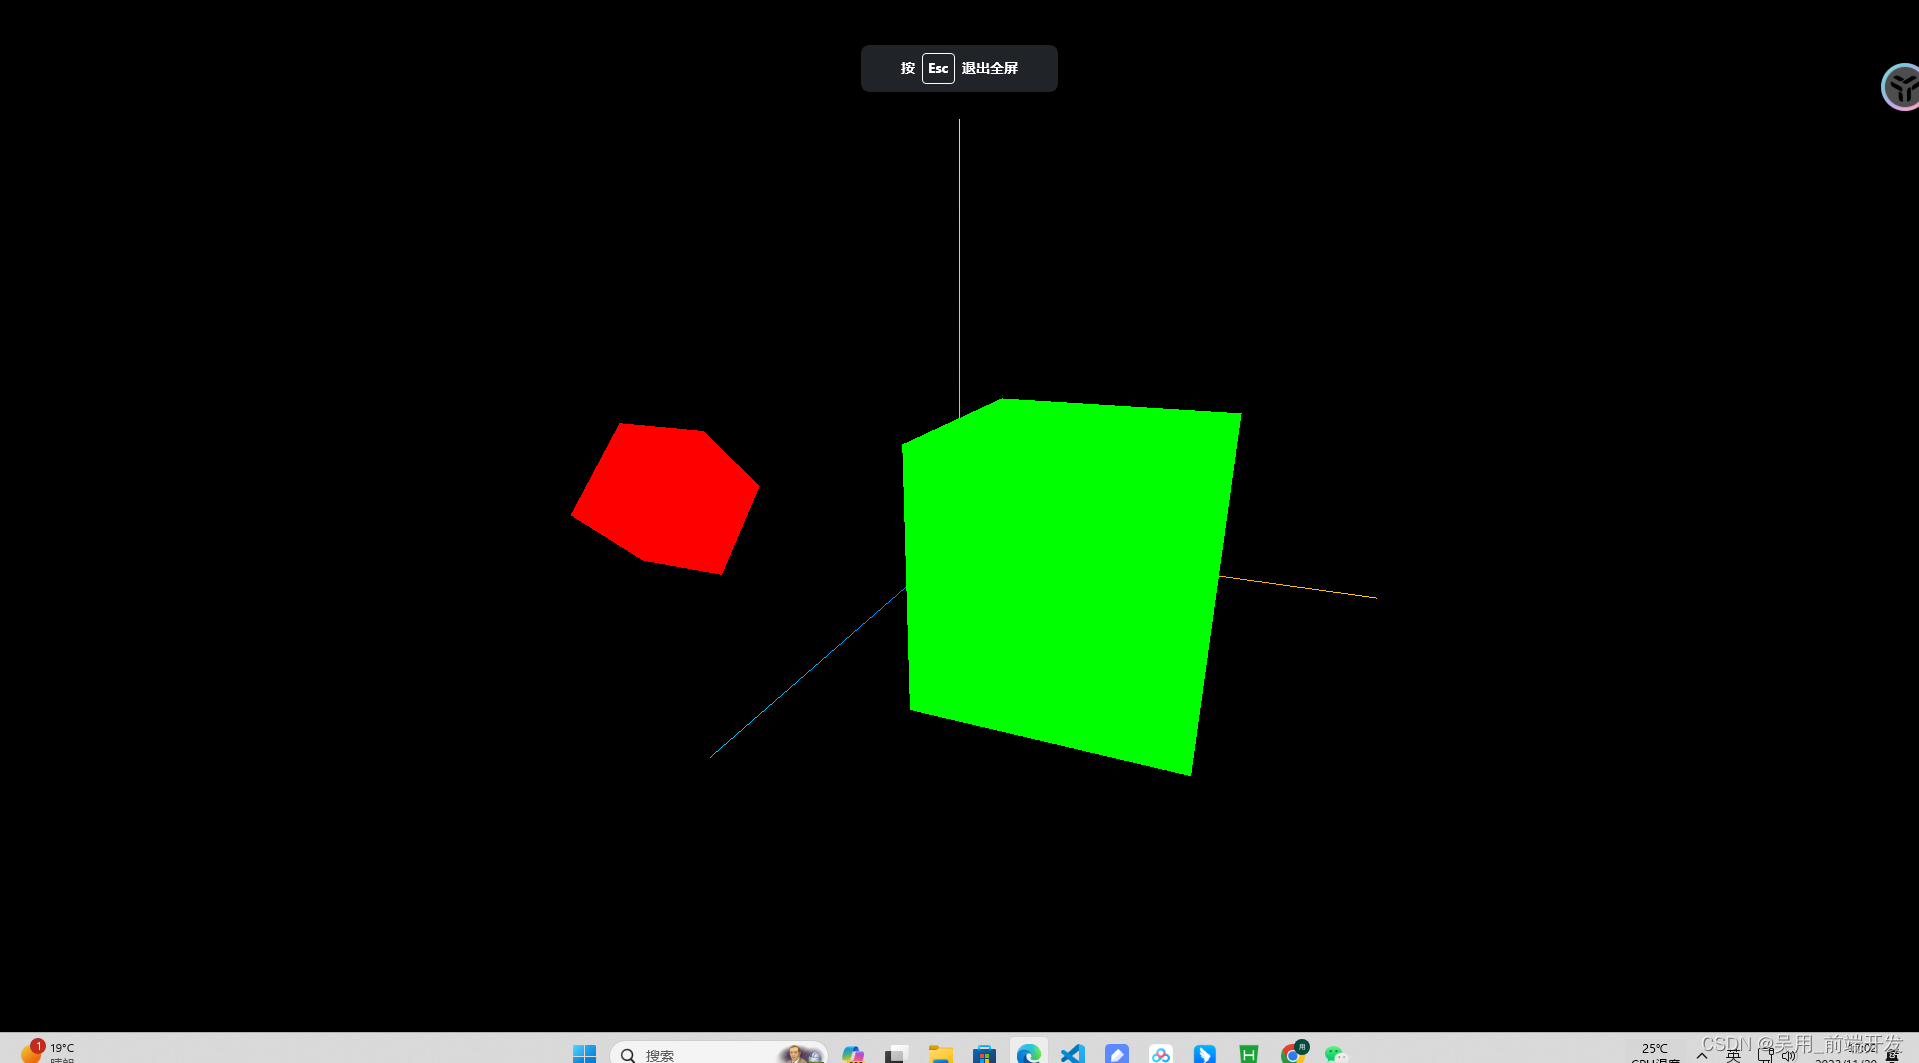
全屏显示,添加一个按钮带有全屏显示
 //全屏
allView(){this.renderer.domElement.requestFullscreen()},//退出全屏backAllView(){this.renderer.domElement.exitFullscreen()},
应用lil-GUI调试开发3D效果
为了能够快速的搭建three.js的交互,three.js社区就出现了lil-gui,语法简介,上手快,主要作用获取一个对象和该对象上的属性名,并根据属性的类型自动生成一个界面组件来操作该属性,使用lil-gui,可以通过界面组件来控制场景中的物体,提高调试效率。
方便编写代码时对相机,灯光等对象的参数进行实时调节,使用lil-GUI库,可以快速创建控制三维场景的UI交互界面,threejs三维空间很多参数都需要通过GUI的方式调试出来。
导入GUI
//导入GUI
import { GUI } from 'three/examples/jsm/libs/lil-gui.module.min.js';
//实例化一个gui对象
const gui = new GUI()
add()
xxx.add()方法用于向GUI中添加要控制的对象及其属性
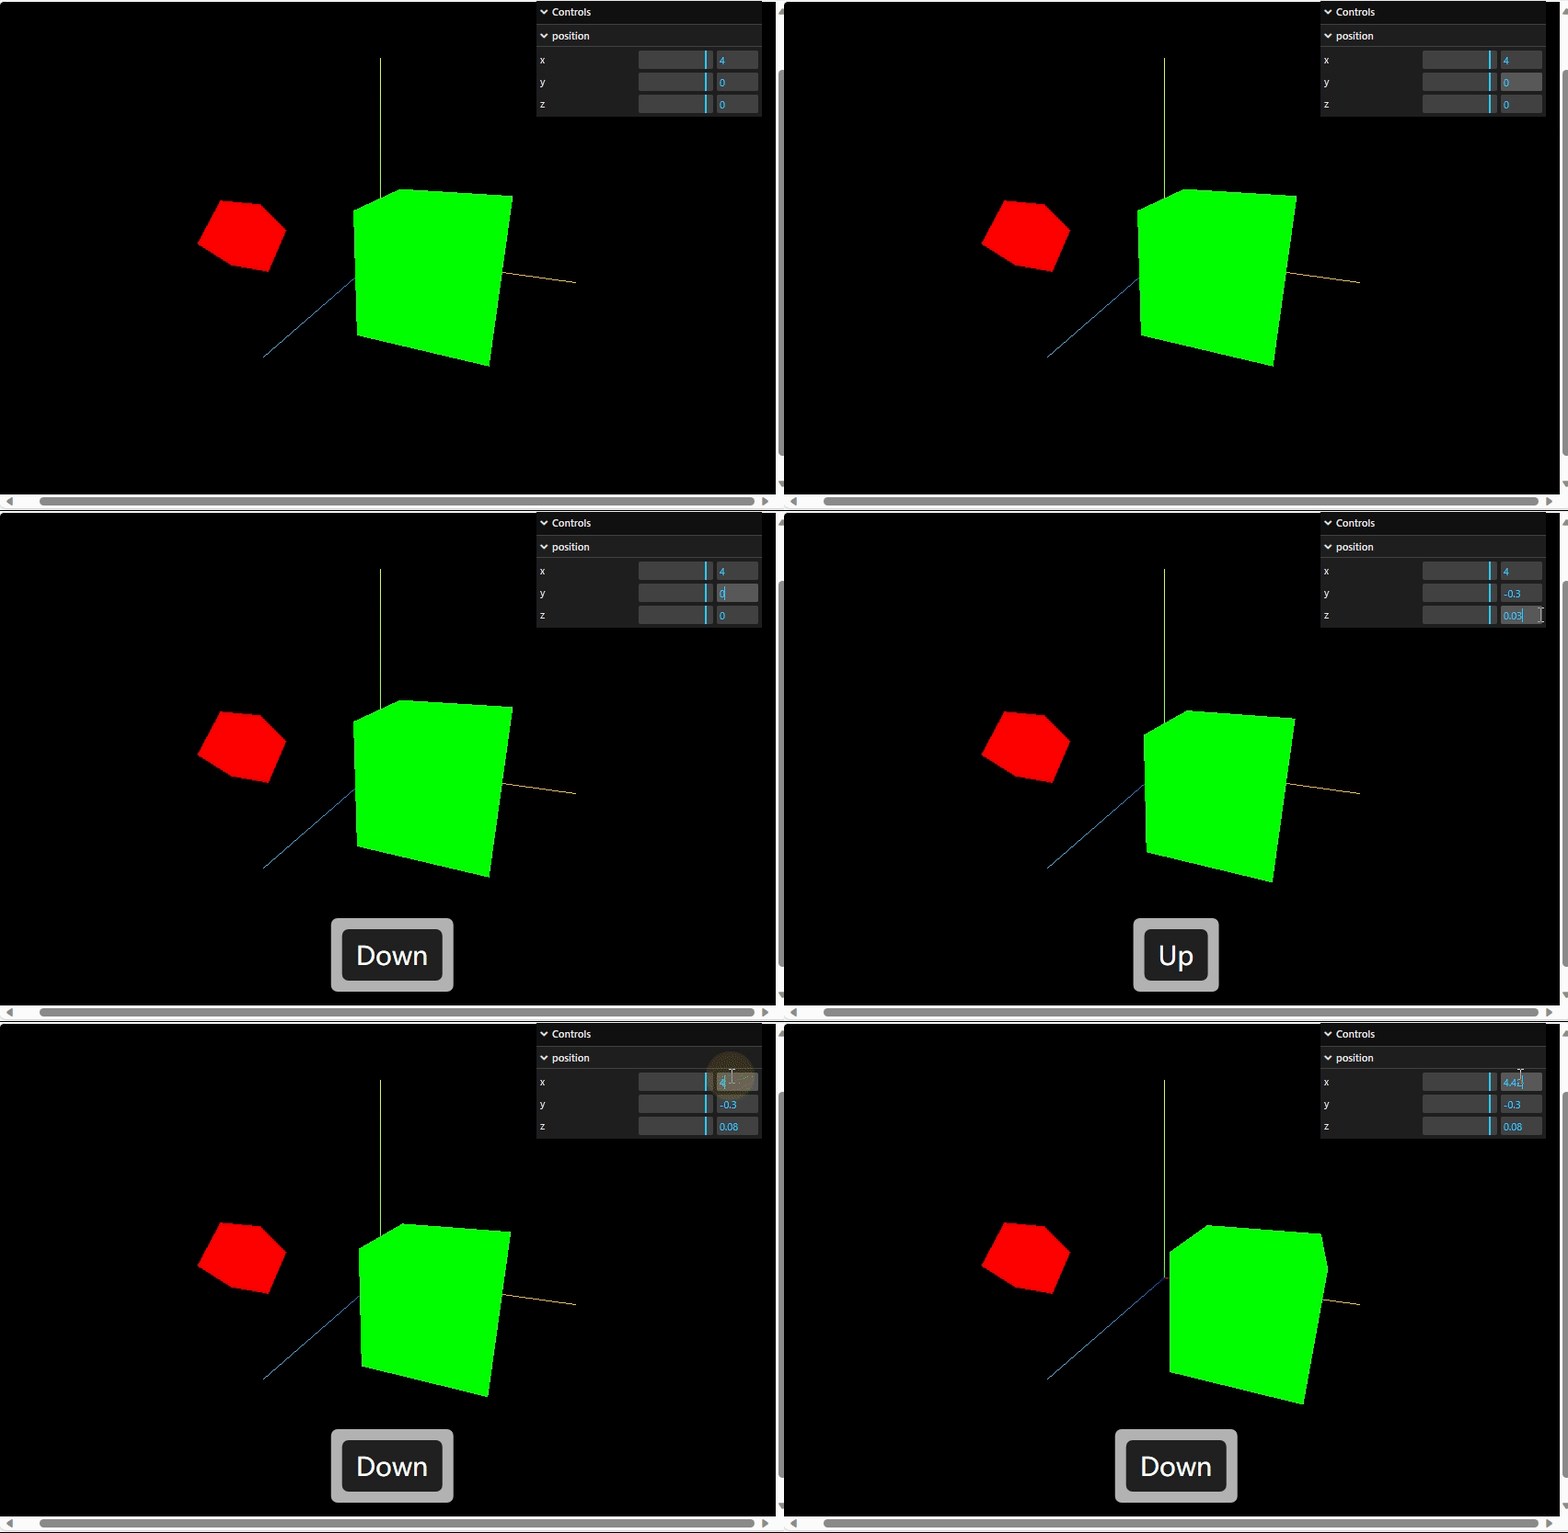
// Object.add(控制对象,对象具体属性,属性参数最小值,属性参数最大值)folder.add(vector3, 'x', -1000, 100, 0.01)folder.add(vector3, 'y', -1000, 100, 0.1)folder.add(vector3, 'z', -1000, 100, 0.01)folder.open()
示例:
onChange()
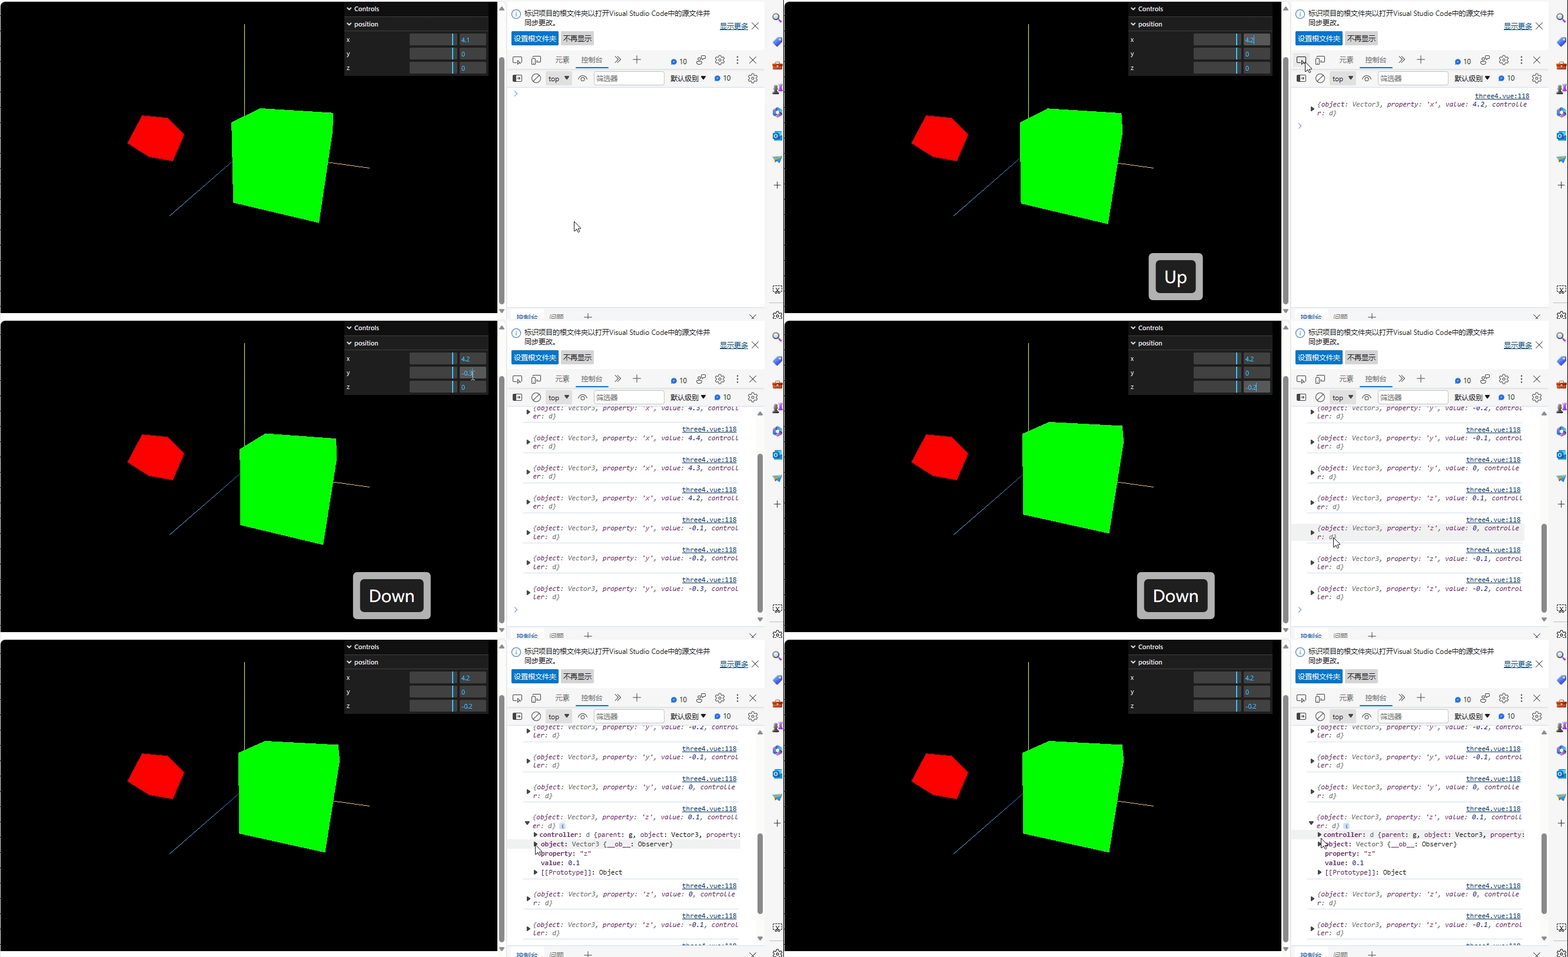
Object.onChange方法方法用于监听控件的改变,它接收一个回调函数作为参数,在回调函数中可以接收改变的值,并处理相关的业务逻辑。
gui.onChange(function(val){console.log(val);})
当加入add后,该表物体位置会触发gui.onChange的回调。
step()
Object.step()方法可以设置每次改变属性值间隔是多少。
folder.add(vector3, 'z', -1000, 100).step(0.1)
addColor()
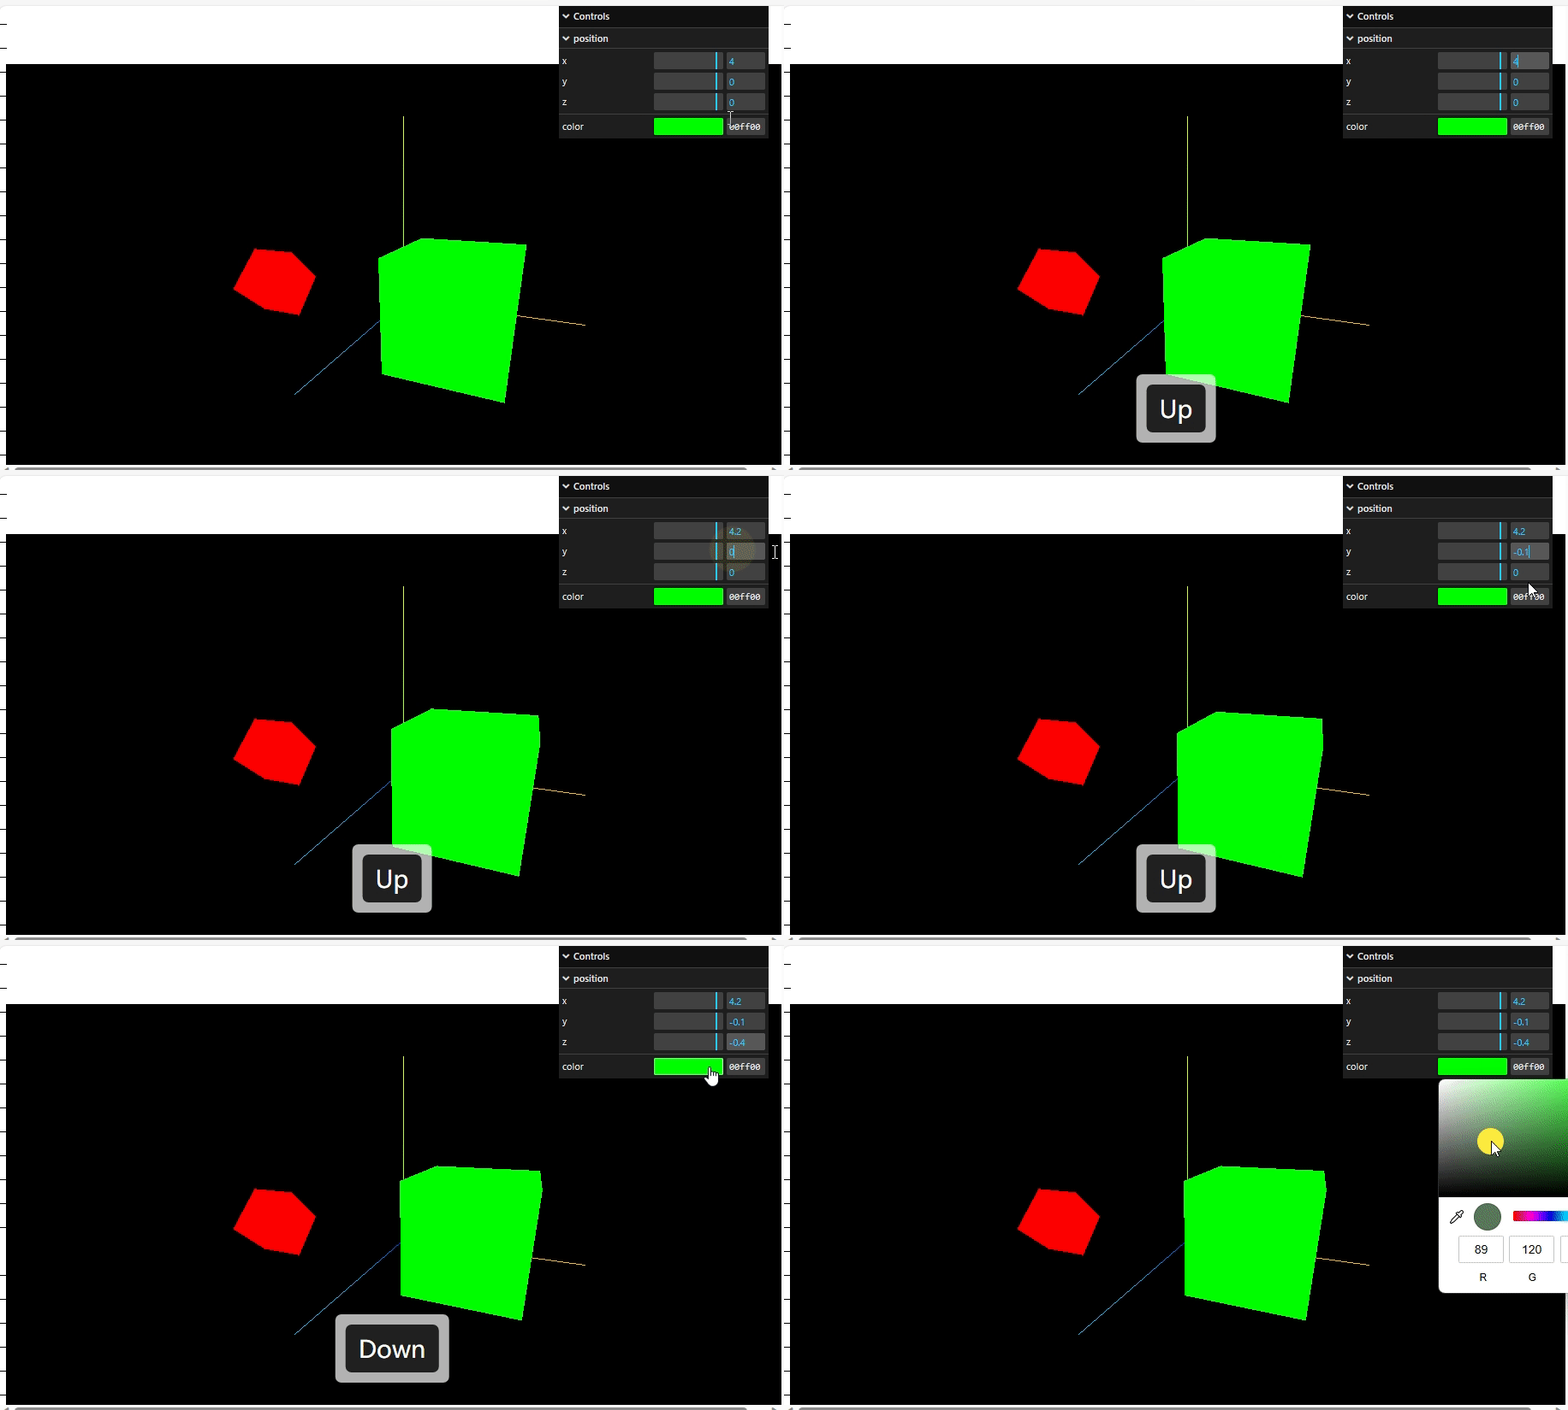
Object.addColor()方法生成颜色值改变的交互界面,它接收两个参数,一个是控制对象,一个是颜色属性。
const material = new THREE.MeshBasicMaterial( { color: 0x00ff00 } );gui.addColor(params, 'color').onChange( function() { material.color.set( params.color ); } );
name()
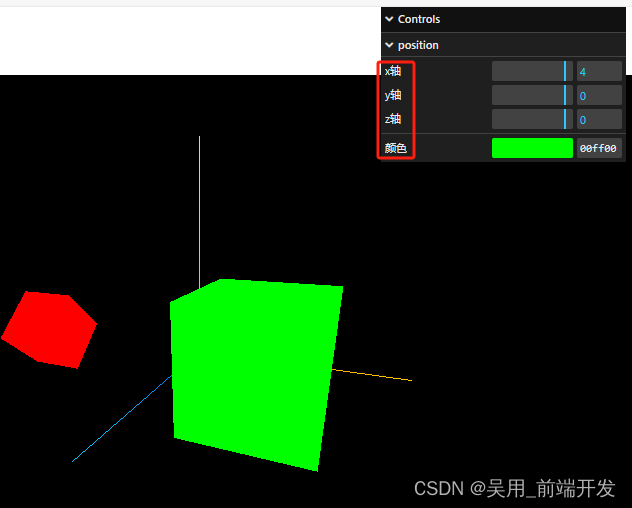
Object.name()方法让gui界面显示的中文名称。
gui.addColor(params, 'color').name("颜色").onChange( function() { material.color.set( params.color ); } );
folder.add(vector3, 'x', -1000, 100, 0.1).step(0.1).name("x轴")
folder.add(vector3, 'y', -1000, 100, 0.1).step(0.1).name("y轴")
folder.add(vector3, 'z', -1000, 100, 0.1).step(0.1).name("z轴")
addFolder()
Object.addFolder()创建一个分组,我们可以将同一对象的属性通过.addFolder()方法创建在同一个分组中。
//创建颜色和位置分组const groupPositoinGui = gui.addFolder("位置") const groupColorGui = gui.addFolder("颜色")groupPositoinGui.add(vector3, 'x', -1000, 100, 0.1).step(0.1).name("x轴")groupPositoinGui.add(vector3, 'y', -1000, 100, 0.1).step(0.1).name("y轴")groupPositoinGui.add(vector3, 'z', -1000, 100, 0.1).step(0.1).name("z轴")groupColorGui.addColor(params, 'color').name("颜色").onChange( function() { material.color.set( params.color ); } );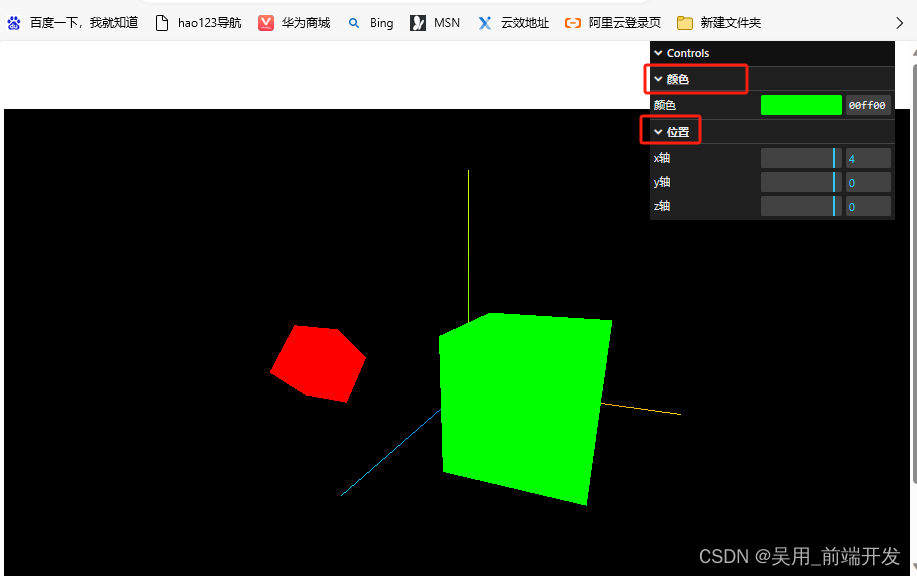
Object.close()和Object.open()交互界面
默认情况下,GUI创建的所有菜单都是打开的,我们可以通过.close()方法控制其关闭,通过.open()方法控制其打开。
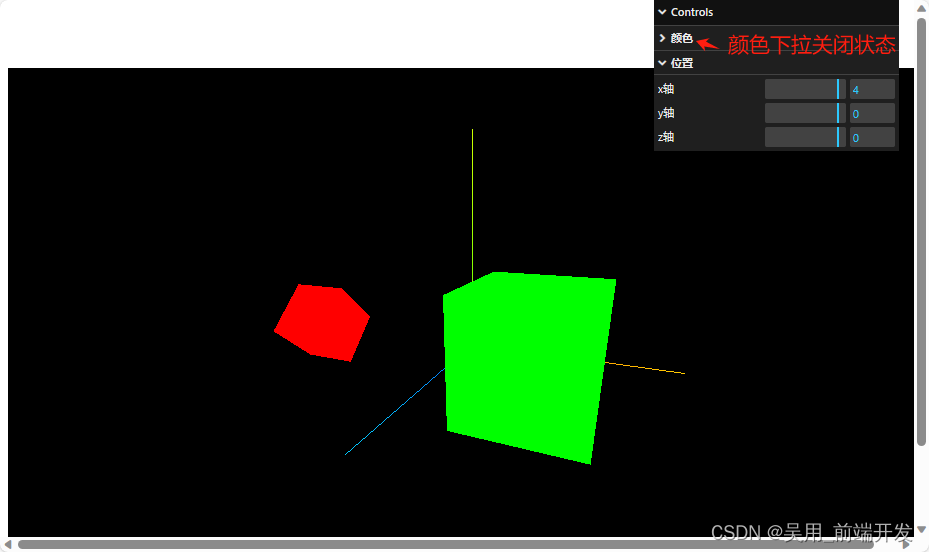
几何体顶点
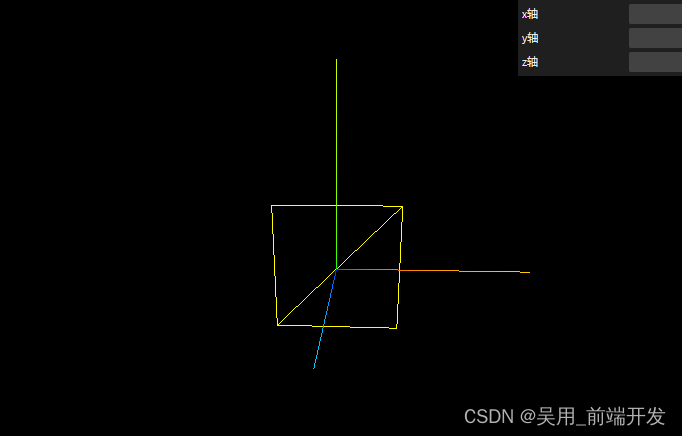
- 创建一个Buffer类型几何体对象
var geometry = new THREE.BufferGeometry();
- 创建顶点数据
// 创建顶点数据
const vertices = new Float32Array([-1.0,-1.0,0.0,1.0,-1.0,0.0,1.0,1.0,0.0,1.0,1.0,0,-1.0,1.0,0,-1.0,-1.0,0
])
- 创建顶点属性
3个为一组,表示一个顶点的xyz坐标
geometry.setAttribute( 'position', new THREE.BufferAttribute( vertices, 3 ) );
- 创建材质
可设置材质的颜色,是否正反面都可看,线框
//创建材质
const material = new THREE.MeshBasicMaterial({color: 0xffff00,  //材质颜色// side:THREE.DoubleSide,  //是否正反面都可看wireframe:true,//线框})
this.mesh = new THREE.Mesh( geometry, material );
// 添加物体到网格
this.scene.add( this.mesh );
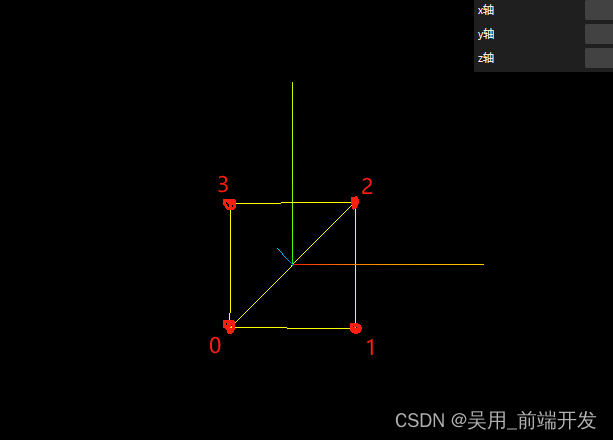
5. 共用顶点使用并绘制索引,两个点面重合公用一个线
//使用索引绘制
const vertices = new Float32Array([-1.0,-1.0,0.0,1.0,-1.0,0.0,1.0,1.0,0.0,-1.0,1.0,0
])
//创建顶点属性
geometry.setAttribute( 'position', new THREE.BufferAttribute( vertices, 3 ) );
//创建索引
const indice = new Uint16Array([0,1,2,2,3,0])
//设置索引
geometry.setIndex(new THREE.BufferAttribute(indice,1))
//创建材质
const material = new THREE.MeshBasicMaterial({color: 0xffff00,  //材质颜色side:THREE.DoubleSide,  //是否正反面都可看wireframe:true,//线框})
几何体划分顶点设置不同材质
//创建索引
const indice = new Uint16Array([0,1,2,2,3,0])
//设置索引
geometry.setIndex(new THREE.BufferAttribute(indice,1))
//设置两个顶点组,形成两个素材
geometry.addGroup(0,3,0)
geometry.addGroup(3,3,1)
//创建材质
const material = new THREE.MeshBasicMaterial({color: 0xffff00,  //材质颜色side:THREE.DoubleSide,  //是否正反面都可看})const material2 = new THREE.MeshBasicMaterial({color: 0xff00,  //材质颜色side:THREE.DoubleSide,  //是否正反面都可看})
this.mesh = new THREE.Mesh( geometry, [material,material2] );
// 添加物体到网格
this.scene.add( this.mesh );
其中/设置两个顶点组,形成两个素材 geometry.addGroup(0,3,0)
,geometry.addGroup(3,3,1)。 this.mesh = new THREE.Mesh( geometry,
[material,material2] );中应使用参数标识第一和第二个素材。
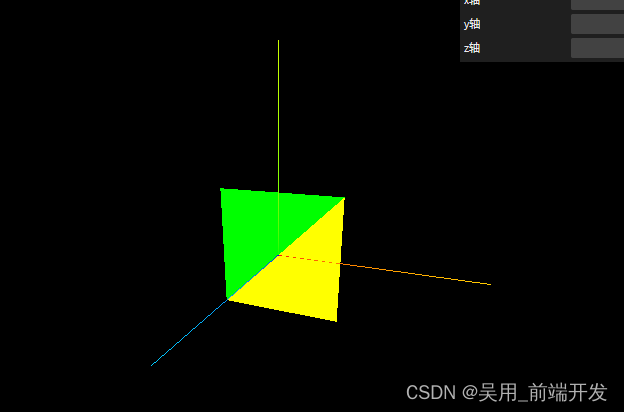
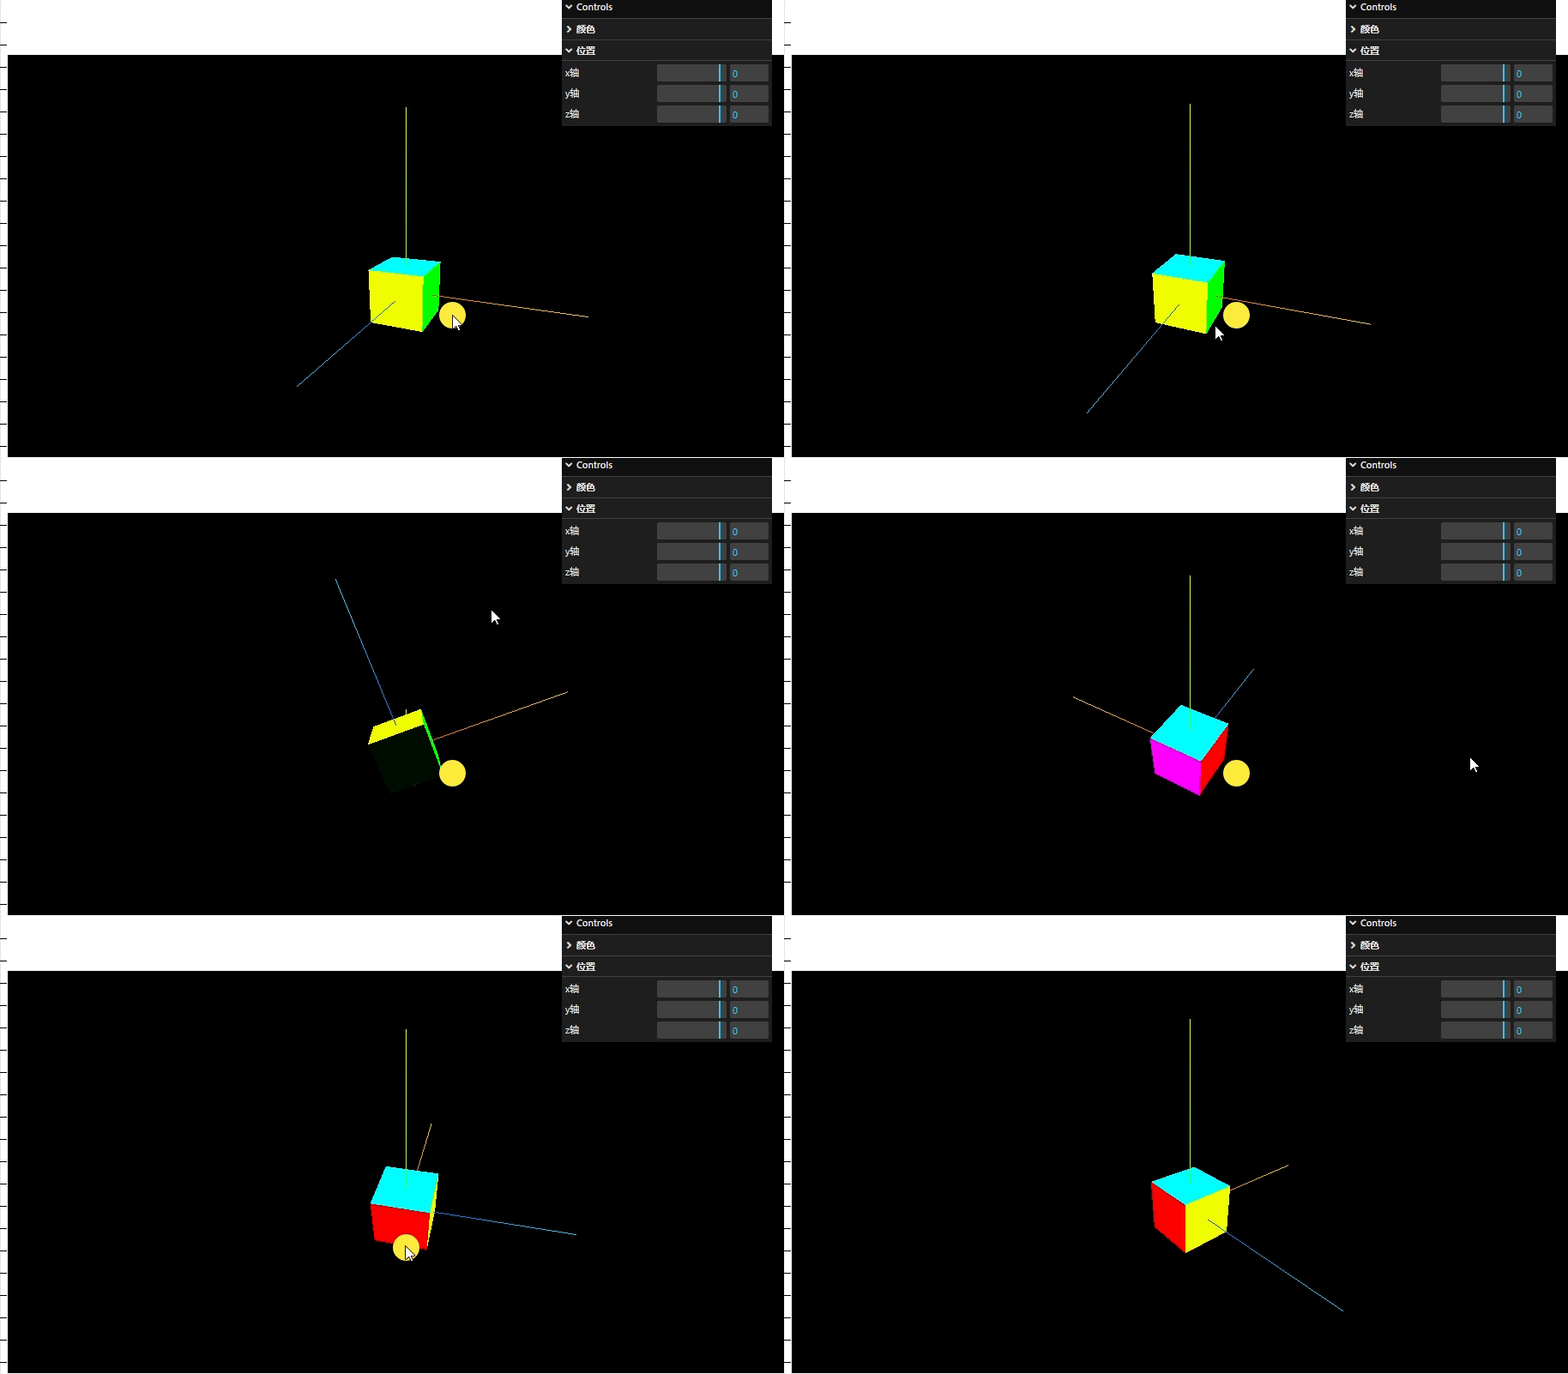
几何顶点组成一个立方体,划分定点组设置不同材质
const cubeGemoetry = new THREE.BoxGeometry( 1, 1, 1 );//创建材质const material0 = new THREE.MeshBasicMaterial({color: 0x00ff00, //材质颜色side:THREE.DoubleSide, //是否正反面都可看})const material1 = new THREE.MeshBasicMaterial({color: 0xff0000, //材质颜色side:THREE.DoubleSide, //是否正反面都可看})const material2 = new THREE.MeshBasicMaterial({color: 0x00ffff, //材质颜色side:THREE.DoubleSide, //是否正反面都可看})const material3 = new THREE.MeshBasicMaterial({color: 0x000f00, //材质颜色side:THREE.DoubleSide, //是否正反面都可看})const material4 = new THREE.MeshBasicMaterial({color: 0xf0ff00, //材质颜色side:THREE.DoubleSide, //是否正反面都可看})const material5 = new THREE.MeshBasicMaterial({color: 0xff00ff, //材质颜色side:THREE.DoubleSide, //是否正反面都可看})this.mesh = new THREE.Mesh( cubeGemoetry, [material0,material1,material2,material3,material4,material5] );// 添加物体到网格this.scene.add( this.mesh );
three贴图的加载与环境遮蔽贴图强度设置
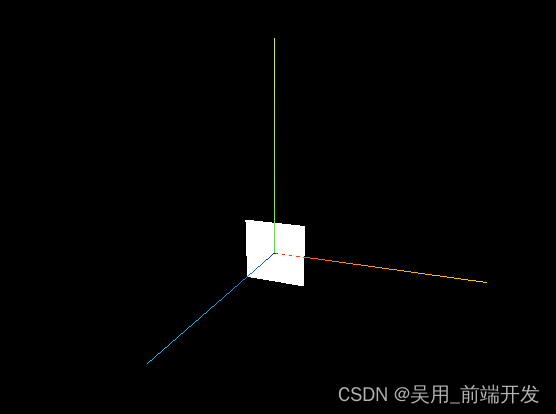
- 创建一个平面
let planeGeometry = new THREE.PlaneGeometry(1,1)
2. 加载纹理加载器
let textureLoader = new THREE.TextureLoader()
- 加载纹理加载ao贴图
//加载纹理let texture = textureLoader.load(require("../../public/map.png"))// 加载ao贴图let aoMap = textureLoader.load(require("../../public/aomap.jpg"))
素材:
map.png纹理

roughness.png:粗糙度贴图

置换贴图 作位移使用displacementMap.png

aomap.png该纹理的红色通道用作环境遮挡贴图。默认值为null。aoMap需要第二组UV

normal.png 法线贴图

metalness金属贴图

alpha.ng,alpha贴图是一张灰度纹理,用于控制整个表面的不透明度

- 设置平面材质,允许透明度,设置ao贴图
 //设置平面材质
let planeMaterial = new THREE.MeshBasicMaterial( { color: 0xffffff,map:texture,  //贴图transparent:true, //允许透明度aoMap:aoMap,//设置ao贴图
});
gui.add(planeMaterial,"aoMapIntensity").min(0).max(10).name("ao强度")
this.planeMesh = new THREE.Mesh( planeGeometry, planeMaterial );
this.scene.add( this.planeMesh );
效果:
纹理常用属性
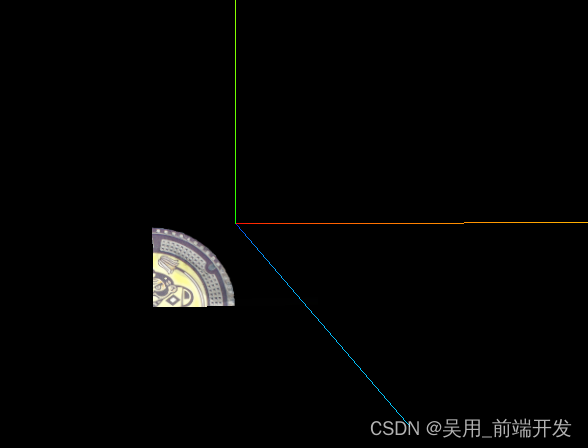
- 偏移属性:让纹理贴图在物体上做偏移
texture.offset.set(0.5, 0.5, 0)
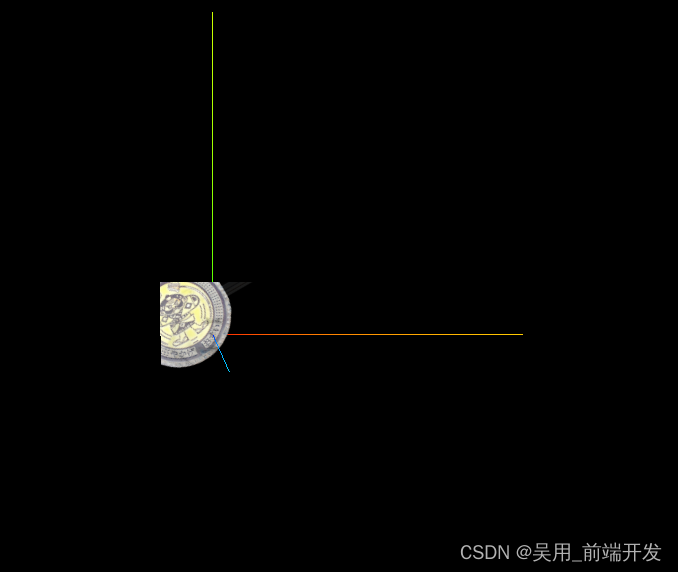
2. 旋转属性:纹理将围绕中心点旋转多少度,单位为弧度(rad),正值为逆时针旋转,默认值问为 0
texture.rotation = Math.PI / 6
由于没有设置中心点导致旋转后的问题
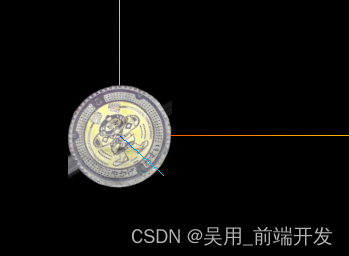
3. 设置旋转中心点:对应纹理的中心,默认为 (0, 0)
texture.center.set(0.5, 0.5)
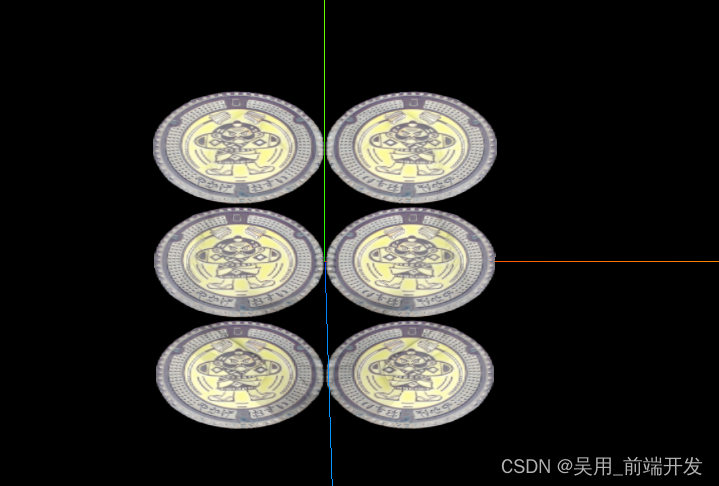
4. 纹理的重复:repeat 让纹理在物体上重复
// 设置纹理的重复(x 轴方向重复2次,y 轴方向重复3次)
texture.repeat.set(2, 3)
// 设置纹理重复的模式(重复到无穷大)
texture.wrapS = THREE.MirroredRepeatWrapping
texture.wrapT = THREE.RepeatWrapping
环境遮挡贴图与强度
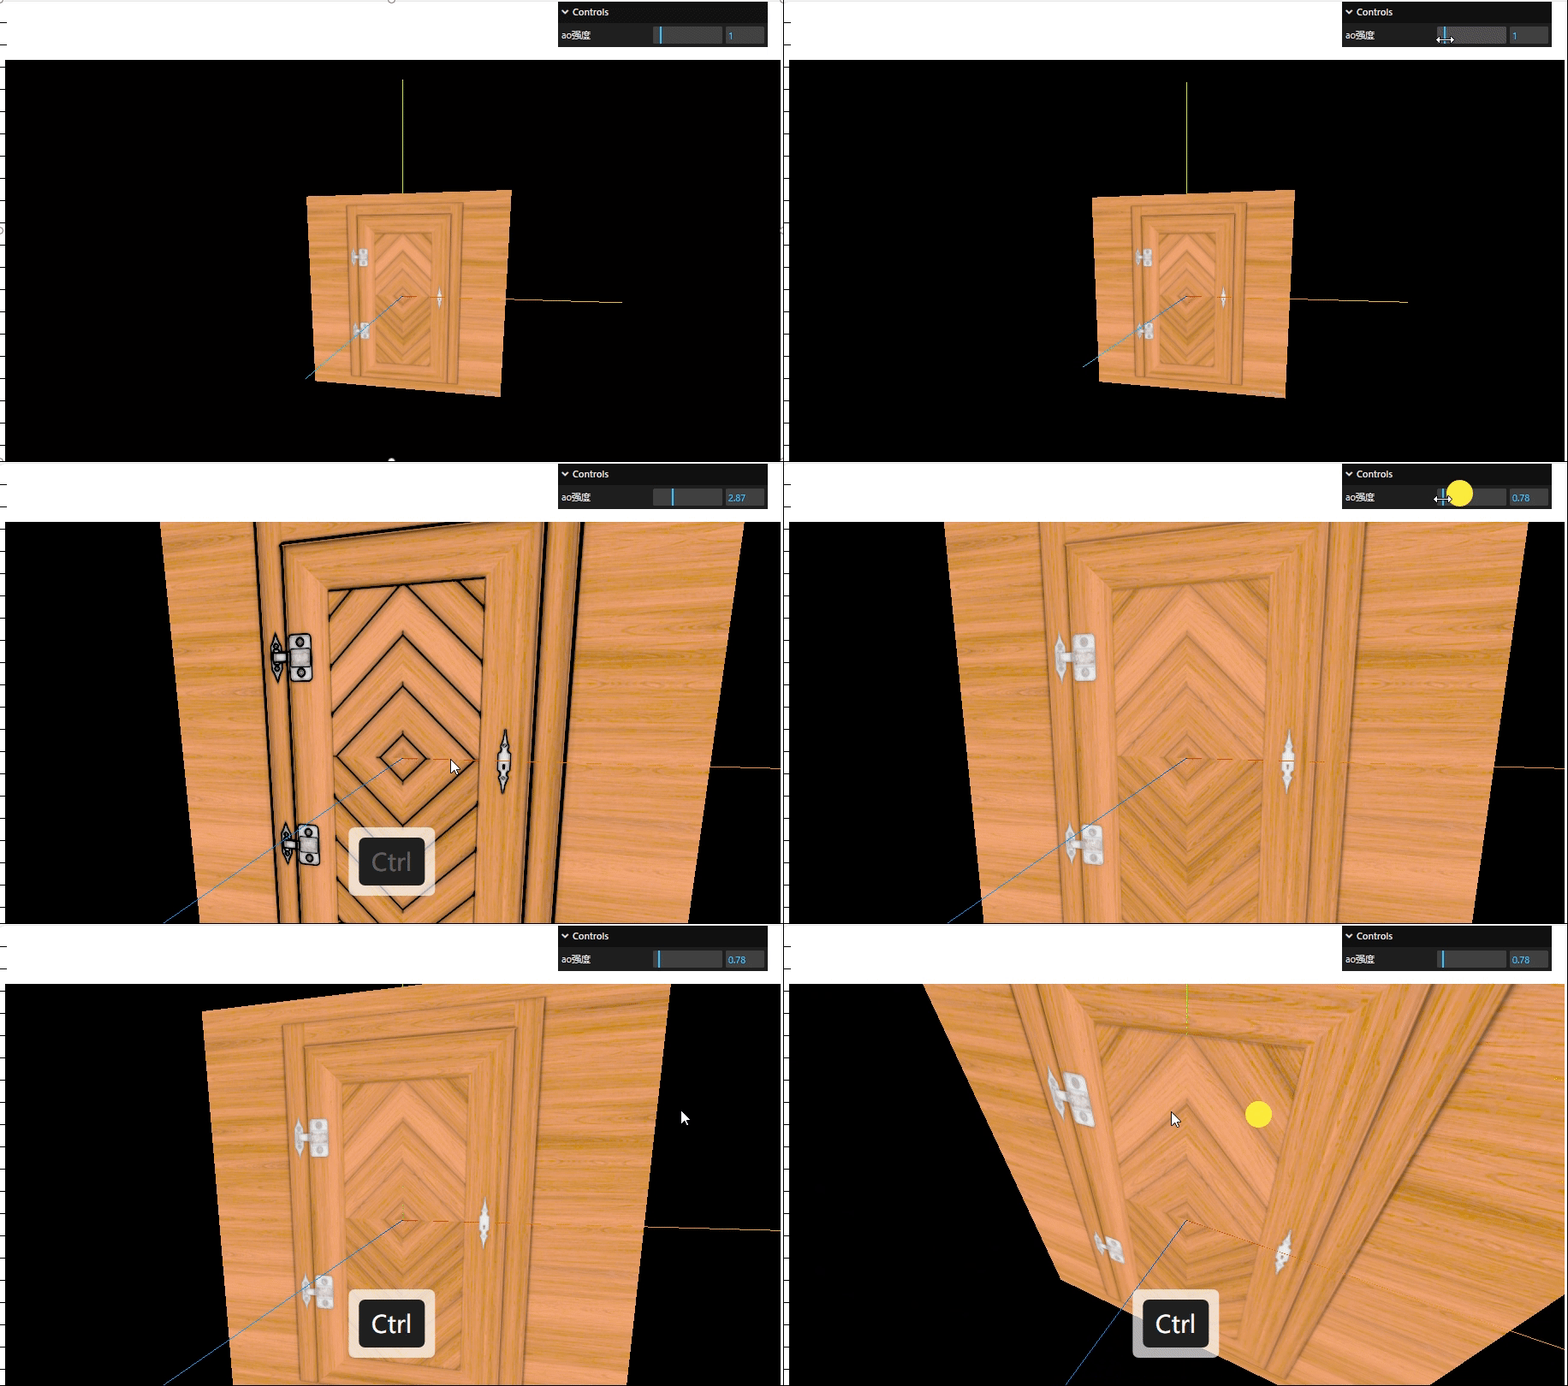
.aoMap 该纹理的红色通道用作环境遮挡贴图。默认值为 null。aoMap 需要第二组 UV,UV:纹理坐标通常具有U和V两个坐标轴,因此称之为UV坐标。U代表横向坐标上的分布、V代表纵向坐标上的分布。
其实oa贴图就是让物体更具有立体感,加深三维感官,我就随便找了张图替代oa贴图
- 加载oa贴图
// 加载ao贴图let aoMap = textureLoader.load(require("../../public/ao.jpg"))
- 设置平面材质和oa强度控制器
 //设置平面材质
let planeMaterial = new THREE.MeshBasicMaterial( { color: 0xffffff,map:texture,  //贴图transparent:true, //允许透明度aoMap:aoMap,//设置ao贴图});gui.add(planeMaterial,"aoMapIntensity").min(0).max(10).name("ao强度")
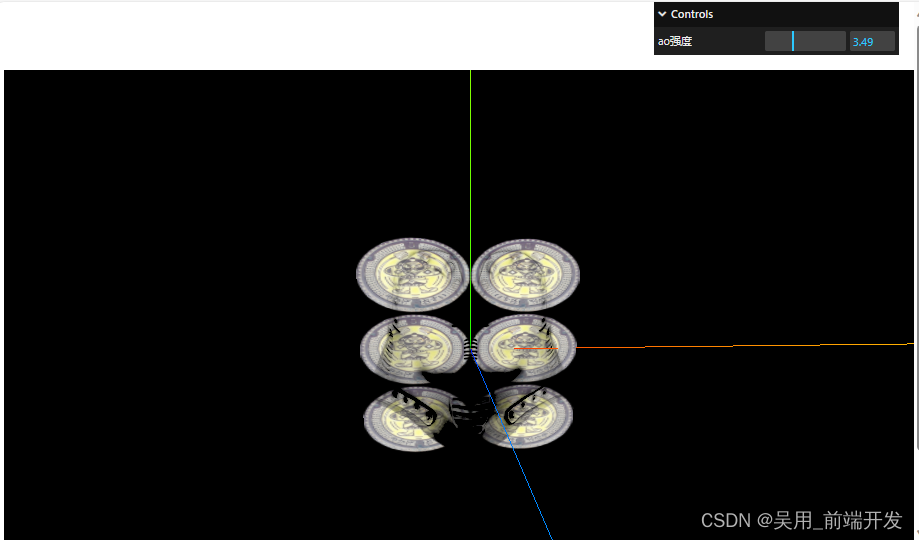
如果有井盖更深的oa图 立体感就会实现,井盖的凹凸之类的效果。
透明度贴图、环境贴图加载与高光贴图配合使用
- 透明度贴图
//透明度贴图
let alphaMap = textureLoader.load(require("../../public/displacementMap.png"))
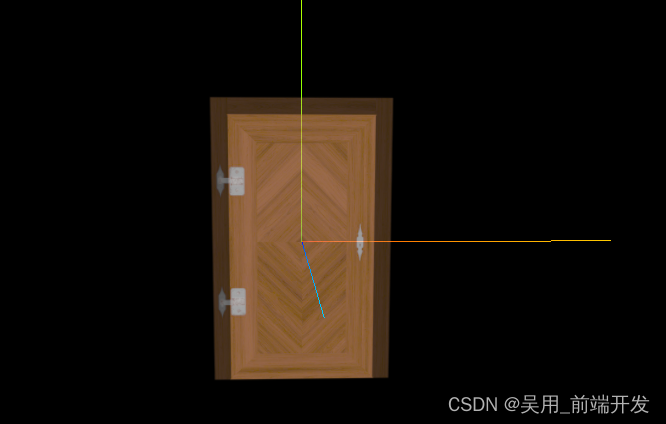
let planeMaterial = new THREE.MeshBasicMaterial( { color: 0xffffff,map:texture,  //贴图transparent:true, //允许透明度aoMap:aoMap,//设置ao贴图alphaMap:alphaMap//透明度贴图
});
处于一个半透明状态
2. 添加光照贴图
贴图网址:https://ambientcg.com/
//环境贴图我是直接three的仓库中获取的
https://github.com/mrdoob/three.js/blob/master/examples/textures/equirectangular/venice_sunset_1k.hdr
- 导入RGBRload加载器
import { RGBELoader } from "three/examples/jsm/loaders/RGBELoader.js"
- 加载.hdr环境图设置为球形映射北京,资源较大,使用异步加载
let rgbeLoader = new RGBELoader()
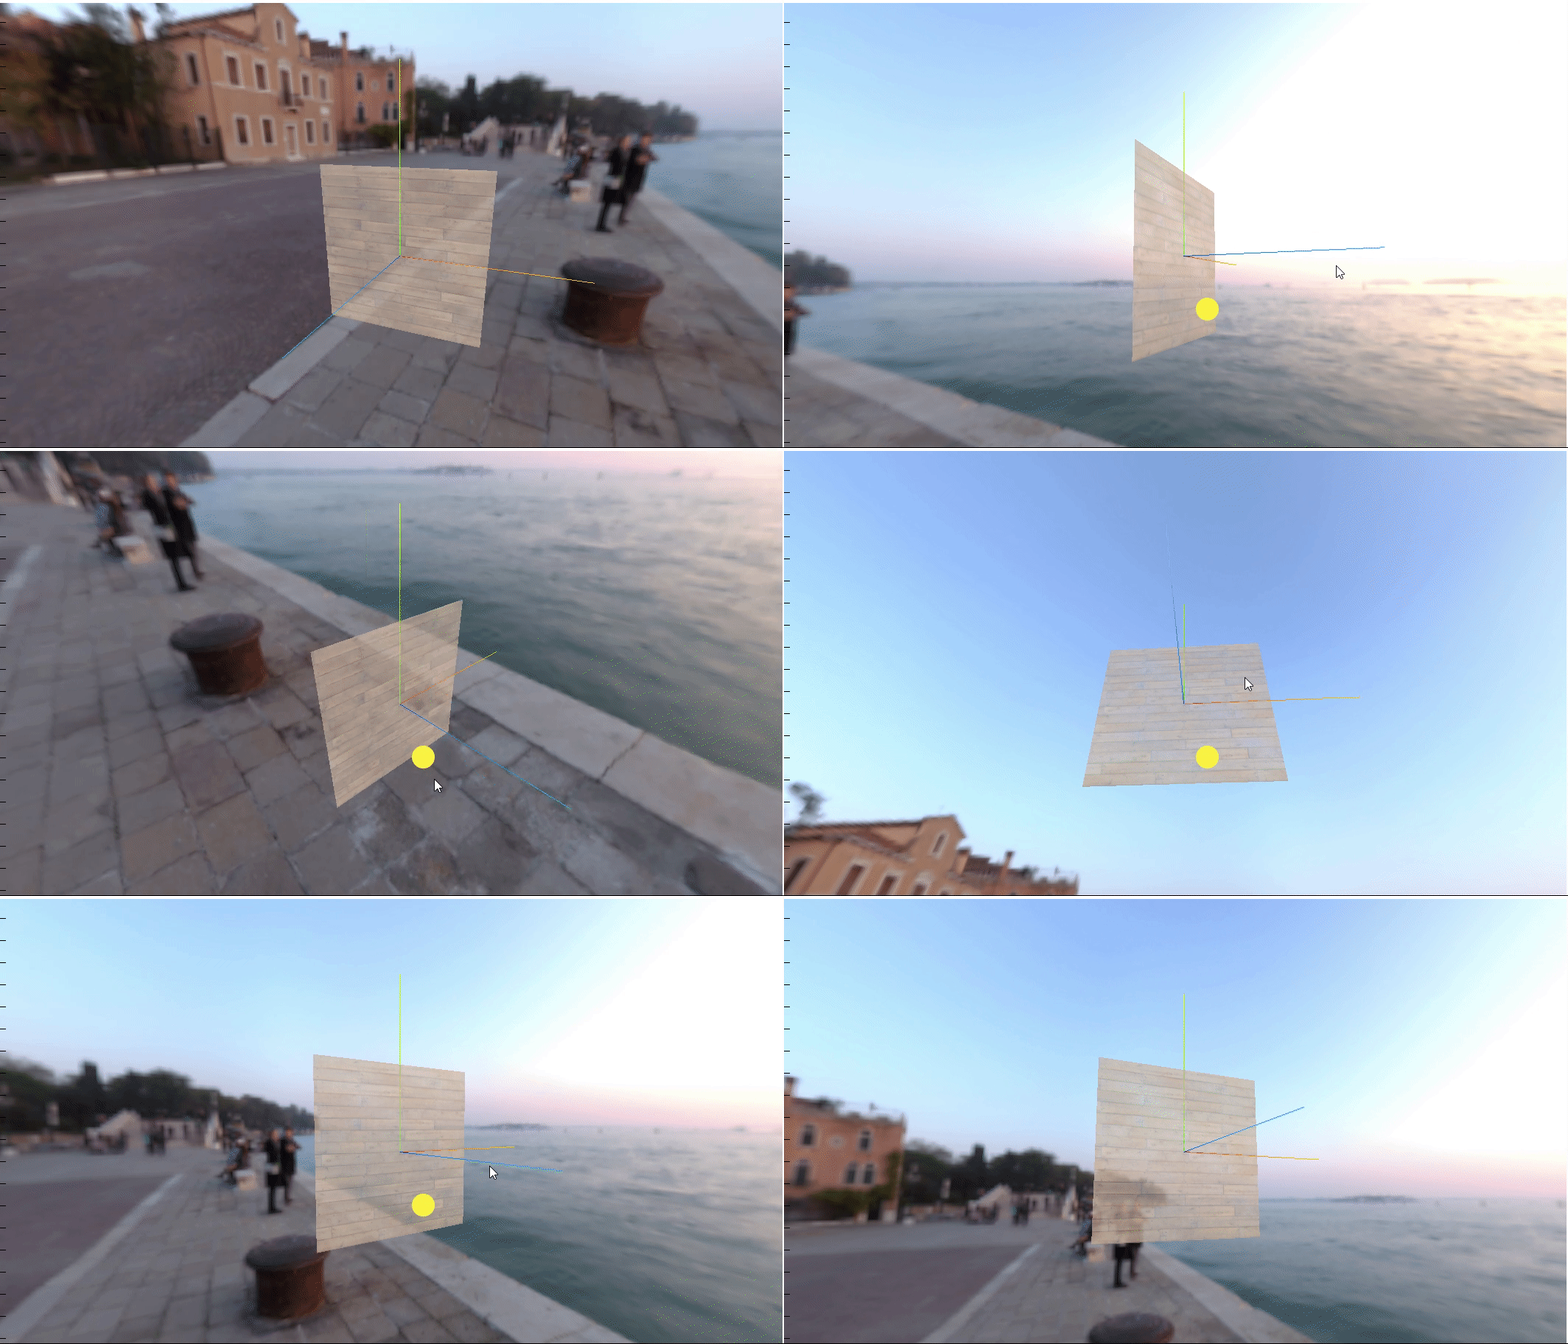
rgbeLoader.loadAsync("../venice_sunset_1k.hdr").then((texture) => {//设置球形贴图texture.mapping = THREE.EquirectangularReflectionMapping;//将加载的材质texture设置给背景和环境this.scene.background = texture;this.scene.environment = texture;
});
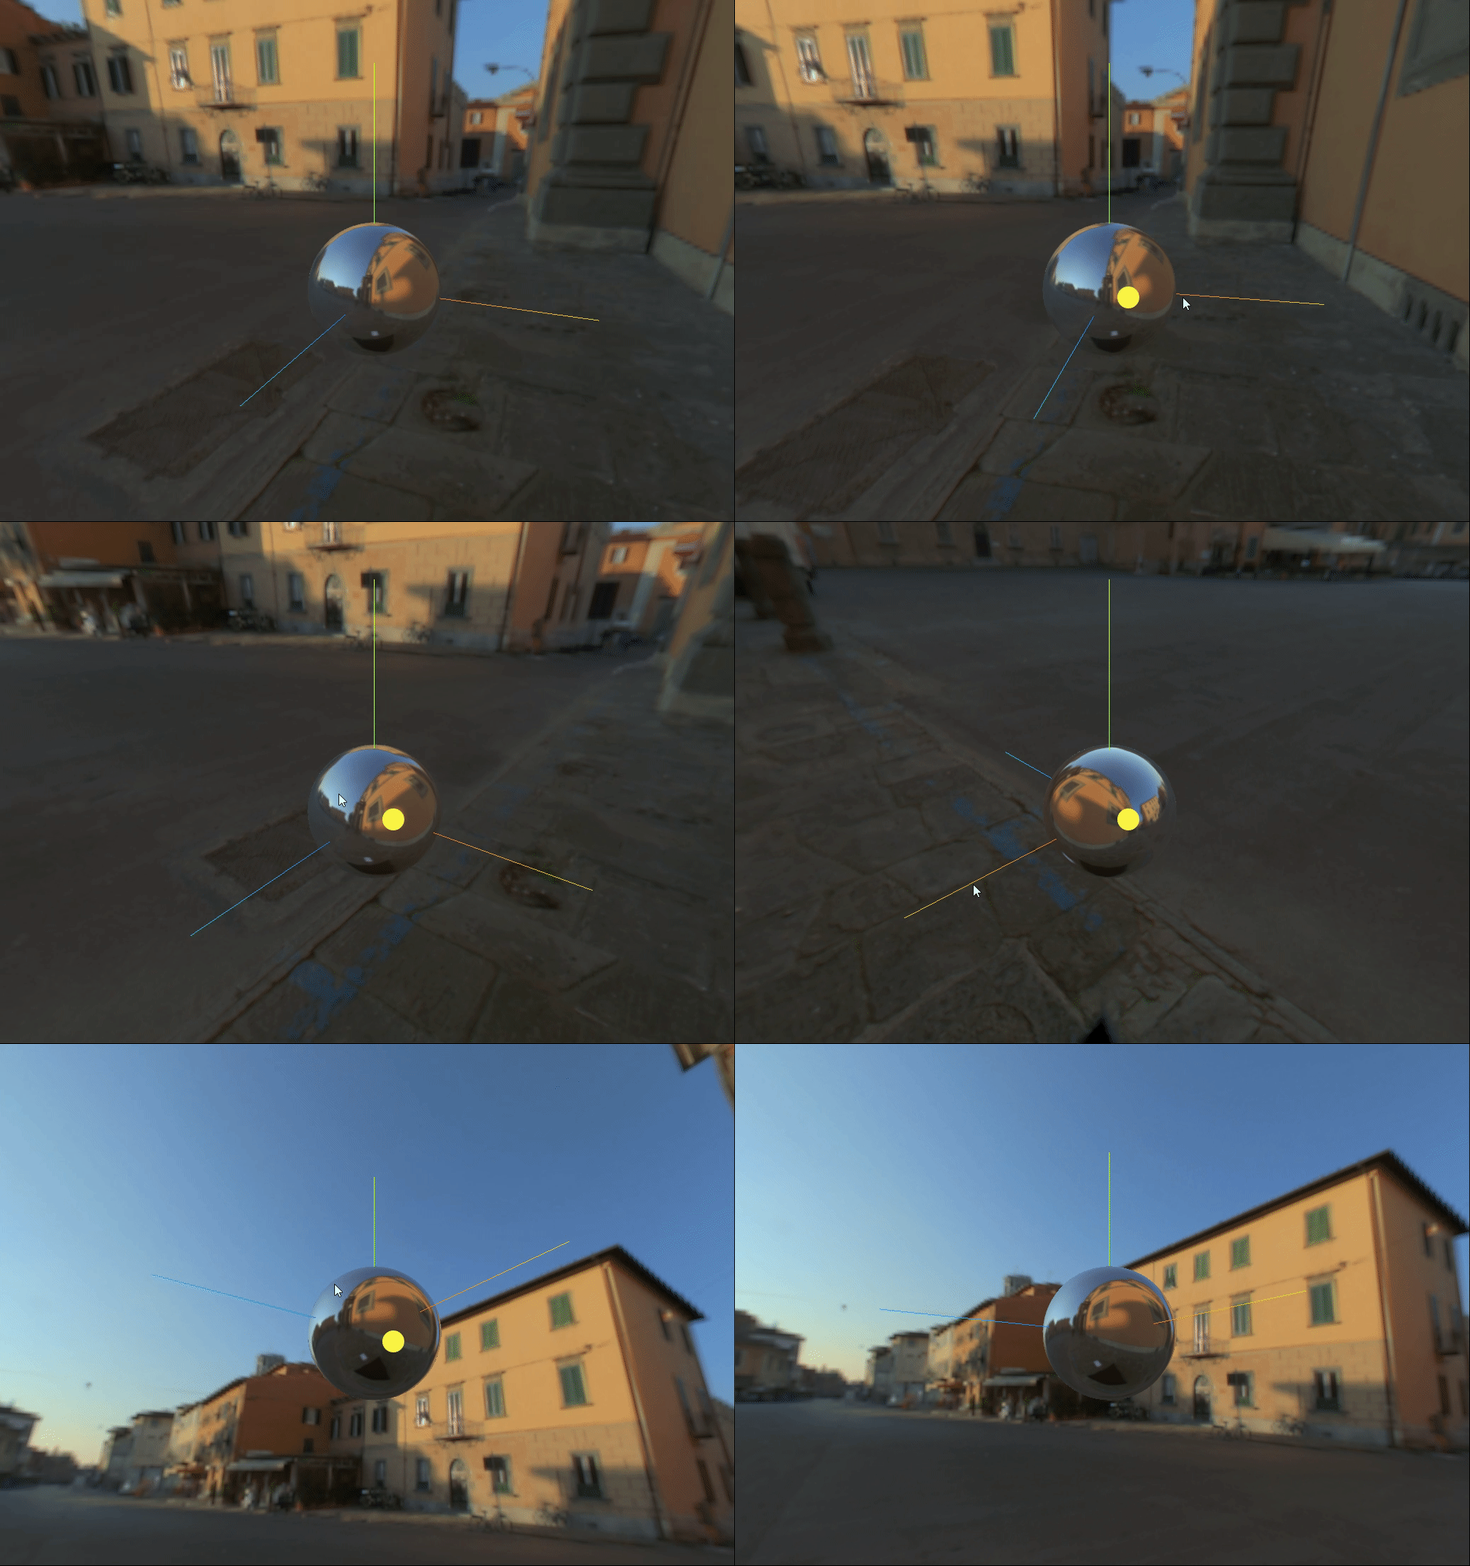
效果:
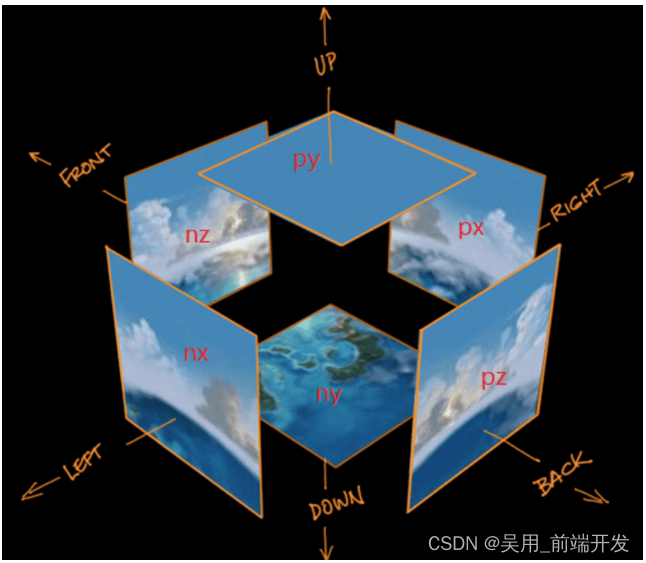
three.js通过CubeTexture加载环境贴图
Three.js中可以通过使用CubeTexture进行环境贴图,CubeTexture需要将6张图片(正面、反面、上下左右)包装成一个立方体纹理。
//素材:
https://github.com/mrdoob/three.js/tree/master/examples/textures/cube/pisa
- 设置纹理加载器
 // 设置cube纹理加载器
const cubeTextureLoader = new THREE.CubeTextureLoader(); // 立方体纹理加载器
const envMapTexture = cubeTextureLoader.load([ // 设置环境贴图"../px.png","../nx.png","../py.png","../ny.png","../pz.png","../nz.png",
]);
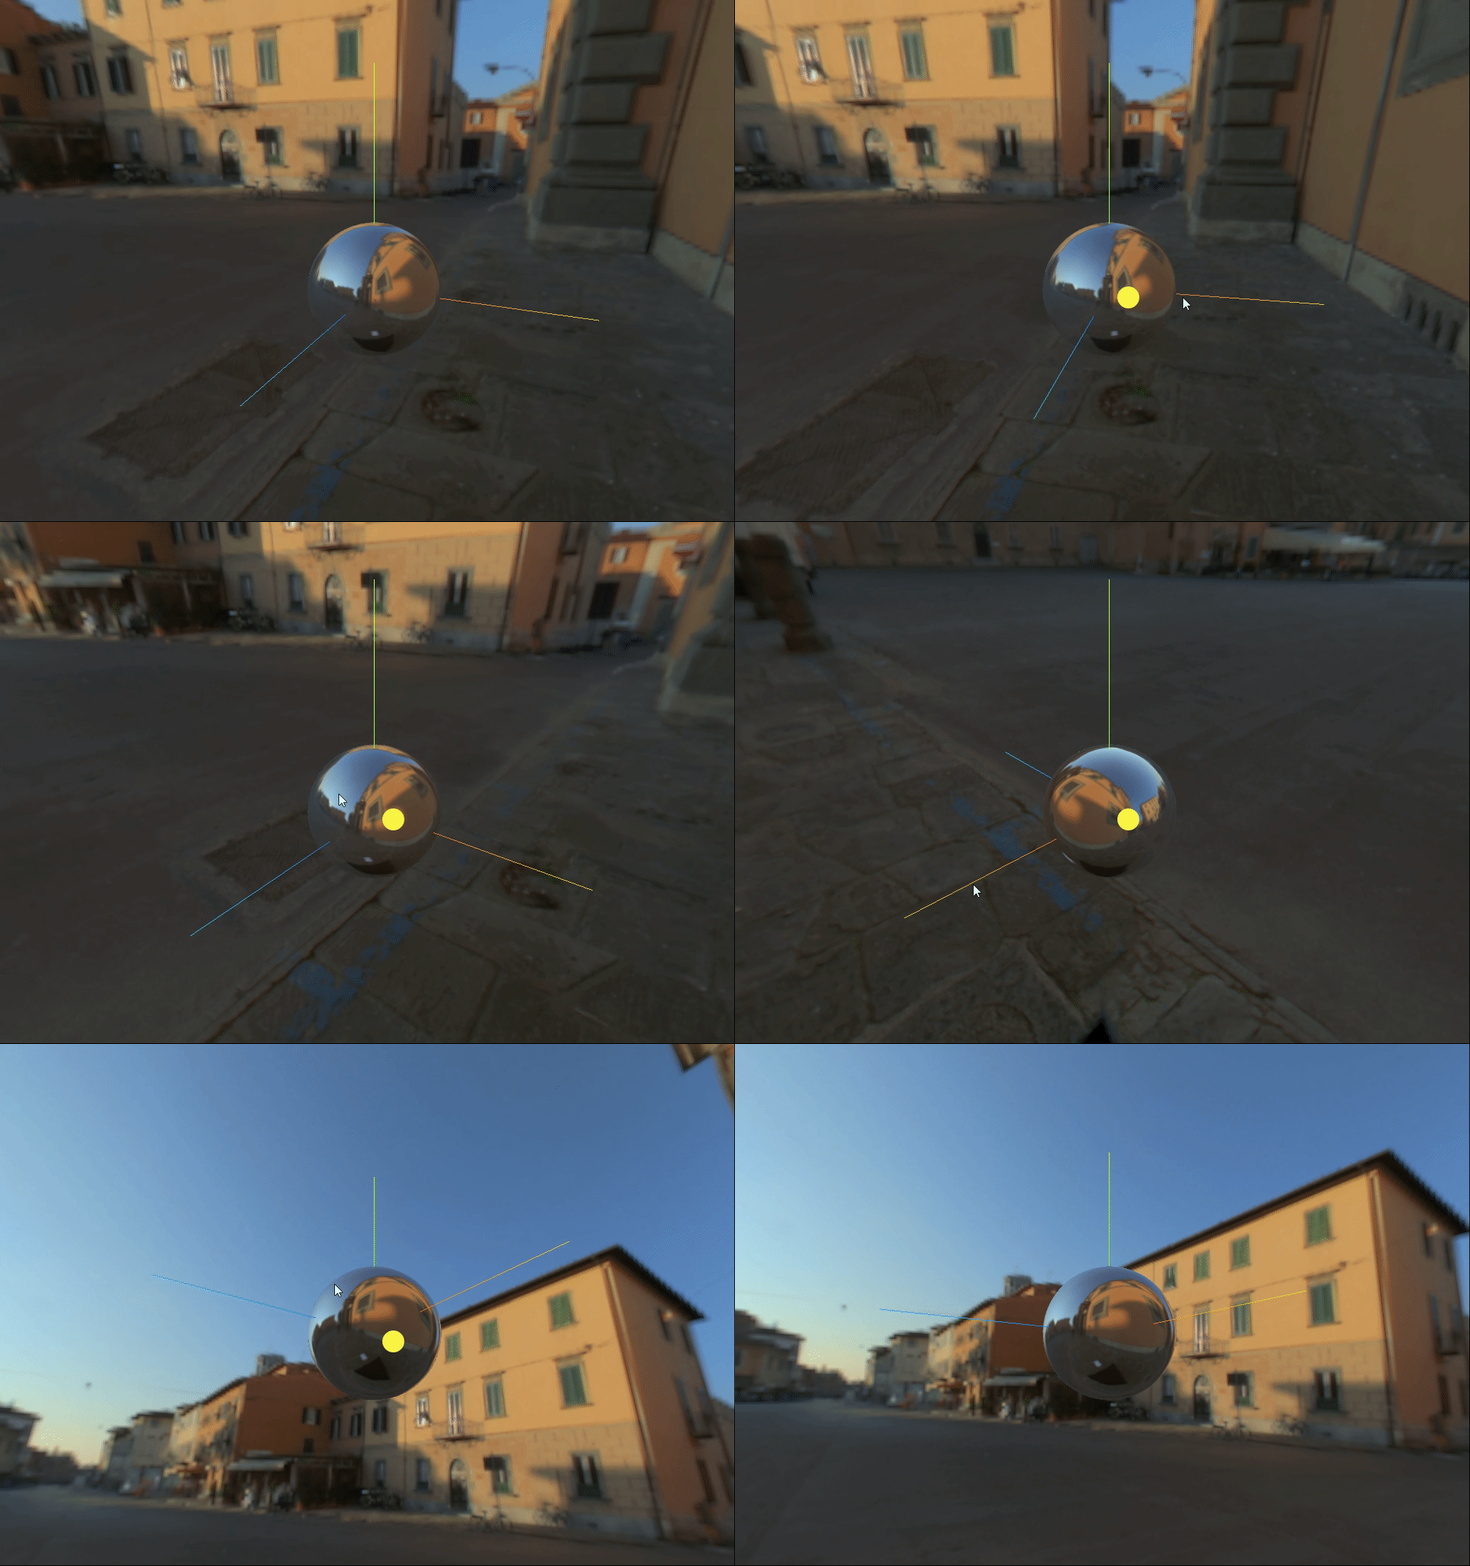
- 创建一个球体,和设置球体材质
let planeGeometry = new THREE.SphereGeometry(1, 32, 32);
let planeMaterial = new THREE.MeshStandardMaterial( { metalness: 0.7, // 金属度roughness: 0.1, // 粗糙度envMap: envMapTexture, // 环境贴图
});//给场景添加背景
this.scene.background = envMapTexture;
效果:
three.js通过RGBELoader加载环境贴图,光照贴图,高光贴图
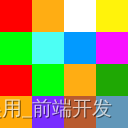
colors.png
heightmap.png

//导入RGBRload加载器
import { RGBELoader } from  "three/examples/jsm/loaders/RGBELoader.js"
//加载纹理加载器
let  textureLoader = new THREE.TextureLoader()//加载纹理
let texture = textureLoader.load(require("../../public/Planks033A_1K-JPG_Color.jpg"))
// 加载ao贴图
let aoMap = textureLoader.load(require("../../public/Planks033A_1K-JPG_AmbientOcclusion.jpg"))
//透明度贴图
let alphaMap = textureLoader.load(require("../../public/Planks033A_1K-JPG_Displacement.jpg"))
// 光照贴图
let lightMap = textureLoader.load(require("../../public/colors.png"))
// 高光贴图
let specularMap = textureLoader.load(require("../../public/heightmap.png"))
//rebeLoader贴图,加载hdr贴图
let rgbeLoader = new RGBELoader()     rgbeLoader.loadAsync("../venice_sunset_1k.hdr").then((texture) => {//设置球形贴图texture.mapping = THREE.EquirectangularReflectionMapping;//将加载的材质texture设置给背景和环境this.scene.background = texture;this.scene.environment = texture;});      // 创建球体
let planeGeometry = new THREE.SphereGeometry(1, 32, 32);//设置球体材质let planeMaterial = new THREE.MeshStandardMaterial( { metalness: 0.7, // 金属度roughness: 0.1, // 粗糙度map:texture,  //贴图transparent:true, //允许透明度aoMap:aoMap,//设置ao贴图lightMap:lightMap, //光照贴图specularMap:specularMap // 设置高光贴图// alphaMap:alphaMap//透明度贴图});
this.planeMesh = new THREE.Mesh( planeGeometry, planeMaterial );
this.scene.add( this.planeMesh );

前两张完整代码:【如何设置加载RGPRload贴图,如何设置透明度贴图,如何设置光照贴图,高光贴图,如何设置纹理贴图,如何加载oa贴图,如何加载加载hdr贴图,如何创建一个球体,材质,】
<template><div id="container"></div>
</template><script>
import * as THREE from 'three'
// webGL兼容
import WebGL from 'three/examples/jsm/capabilities/WebGL.js';
import { GUI } from 'three/examples/jsm/libs/lil-gui.module.min.js';
// 轨道控制器
import { OrbitControls } from "three/examples/jsm/controls/OrbitControls.js"
//导入RGBRload加载器
import { RGBELoader } from  "three/examples/jsm/loaders/RGBELoader.js"
export default {name: 'HomeView',components: {},mounted(){this.init()},data(){return {camera: null,  //相机对象scene: null,  //场景对象renderer: null,  //渲染器对象mesh: null,  //网格模型对象Meshmesh2:null,controls:null, //轨道控制器material2:null, //父元素planeMesh:null, //平面rgbeLoacer:null,}},methods:{init(){const gui = new GUI()let container = document.body;//创建一个场景this.scene = new THREE.Scene()//透视摄像机this.camera = new THREE.PerspectiveCamera(75,window.innerWidth/window.innerHeight,0.1,700)//创建平面//加载纹理加载器let  textureLoader = new THREE.TextureLoader()// 设置cube纹理加载器// const cubeTextureLoader = new THREE.CubeTextureLoader(); // 立方体纹理加载器// const envMapTexture = cubeTextureLoader.load([ // 设置环境贴图//   "../px.png",//   "../nx.png",//   "../py.png",//   "../ny.png",//   "../pz.png",//   "../nz.png",// ]);//加载纹理let texture = textureLoader.load(require("../../public/Planks033A_1K-JPG_Color.jpg"))// 加载ao贴图let aoMap = textureLoader.load(require("../../public/Planks033A_1K-JPG_AmbientOcclusion.jpg"))//透明度贴图let alphaMap = textureLoader.load(require("../../public/Planks033A_1K-JPG_Displacement.jpg"))// 光照贴图let lightMap = textureLoader.load(require("../../public/colors.png"))// 高光贴图let specularMap = textureLoader.load(require("../../public/heightmap.png"))//rebeLoader贴图,加载hdr贴图let rgbeLoader = new RGBELoader()     rgbeLoader.loadAsync("../venice_sunset_1k.hdr").then((texture) => {//设置球形贴图texture.mapping = THREE.EquirectangularReflectionMapping;//将加载的材质texture设置给背景和环境this.scene.background = texture;this.scene.environment = texture;});      // 创建球体      let planeGeometry = new THREE.SphereGeometry(1, 32, 32);//设置球体材质let planeMaterial = new THREE.MeshStandardMaterial( { metalness: 0.7, // 金属度roughness: 0.1, // 粗糙度map:texture,  //贴图transparent:true, //允许透明度aoMap:aoMap,//设置ao贴图lightMap:lightMap,specularMap:specularMap // 设置高光贴图// alphaMap:alphaMap//透明度贴图});// this.scene.background = envMapTexture;// gui.add(planeMaterial,"aoMapIntensity").min(0).max(10).name("ao强度")this.planeMesh = new THREE.Mesh( planeGeometry, planeMaterial );this.scene.add( this.planeMesh );//创建渲染器this.renderer = new THREE.WebGLRenderer();//渲染器尺寸this.renderer.setSize( window.innerWidth,  window.innerHeight );     //创建一个立方体const geometry = new THREE.BoxGeometry( 1, 1, 1 );//我们需要给它一个MeshBasicMaterial材质,来让它有绿色颜色const material = new THREE.MeshBasicMaterial( { color: 0x00ff00 } );this.mesh = new THREE.Mesh( geometry, material );//设置子元素位置      this.mesh.position.set(0,0,0)// 添加物体到网格// this.scene.add( this.mesh );// 设置相机位置this.camera.position.z = 5;   this.camera.position.y =2;  this.camera.position.x = 2; // 看的方向 this.camera.lookAt(0,0,0)//添加世界坐标辅助器const axesHelper = new THREE.AxesHelper(3) this.scene.add( axesHelper );//添加轨道控制器this.controls = new OrbitControls(this.camera,this.renderer.domElement)//添加阻尼带有惯性this.controls.enableDamping = true//设置阻尼系数this.controls.dampingFactor = 0.05//设置自动旋转//元素中插入canvas对象container.appendChild(this.renderer.domElement); if ( WebGL.isWebGLAvailable() ) {this.animate();} else {const warning = WebGL.getWebGLErrorMessage();document.getElementById( document.body ).appendChild( warning );}},//旋转起来animate() {this.controls.update()requestAnimationFrame( this.animate );// this.mesh.rotation.x += 0.01;// this.mesh.rotation.y += 0.01;this.renderer.render( this.scene, this.camera );}}
}
</script>
three.js场景的线型和指数雾
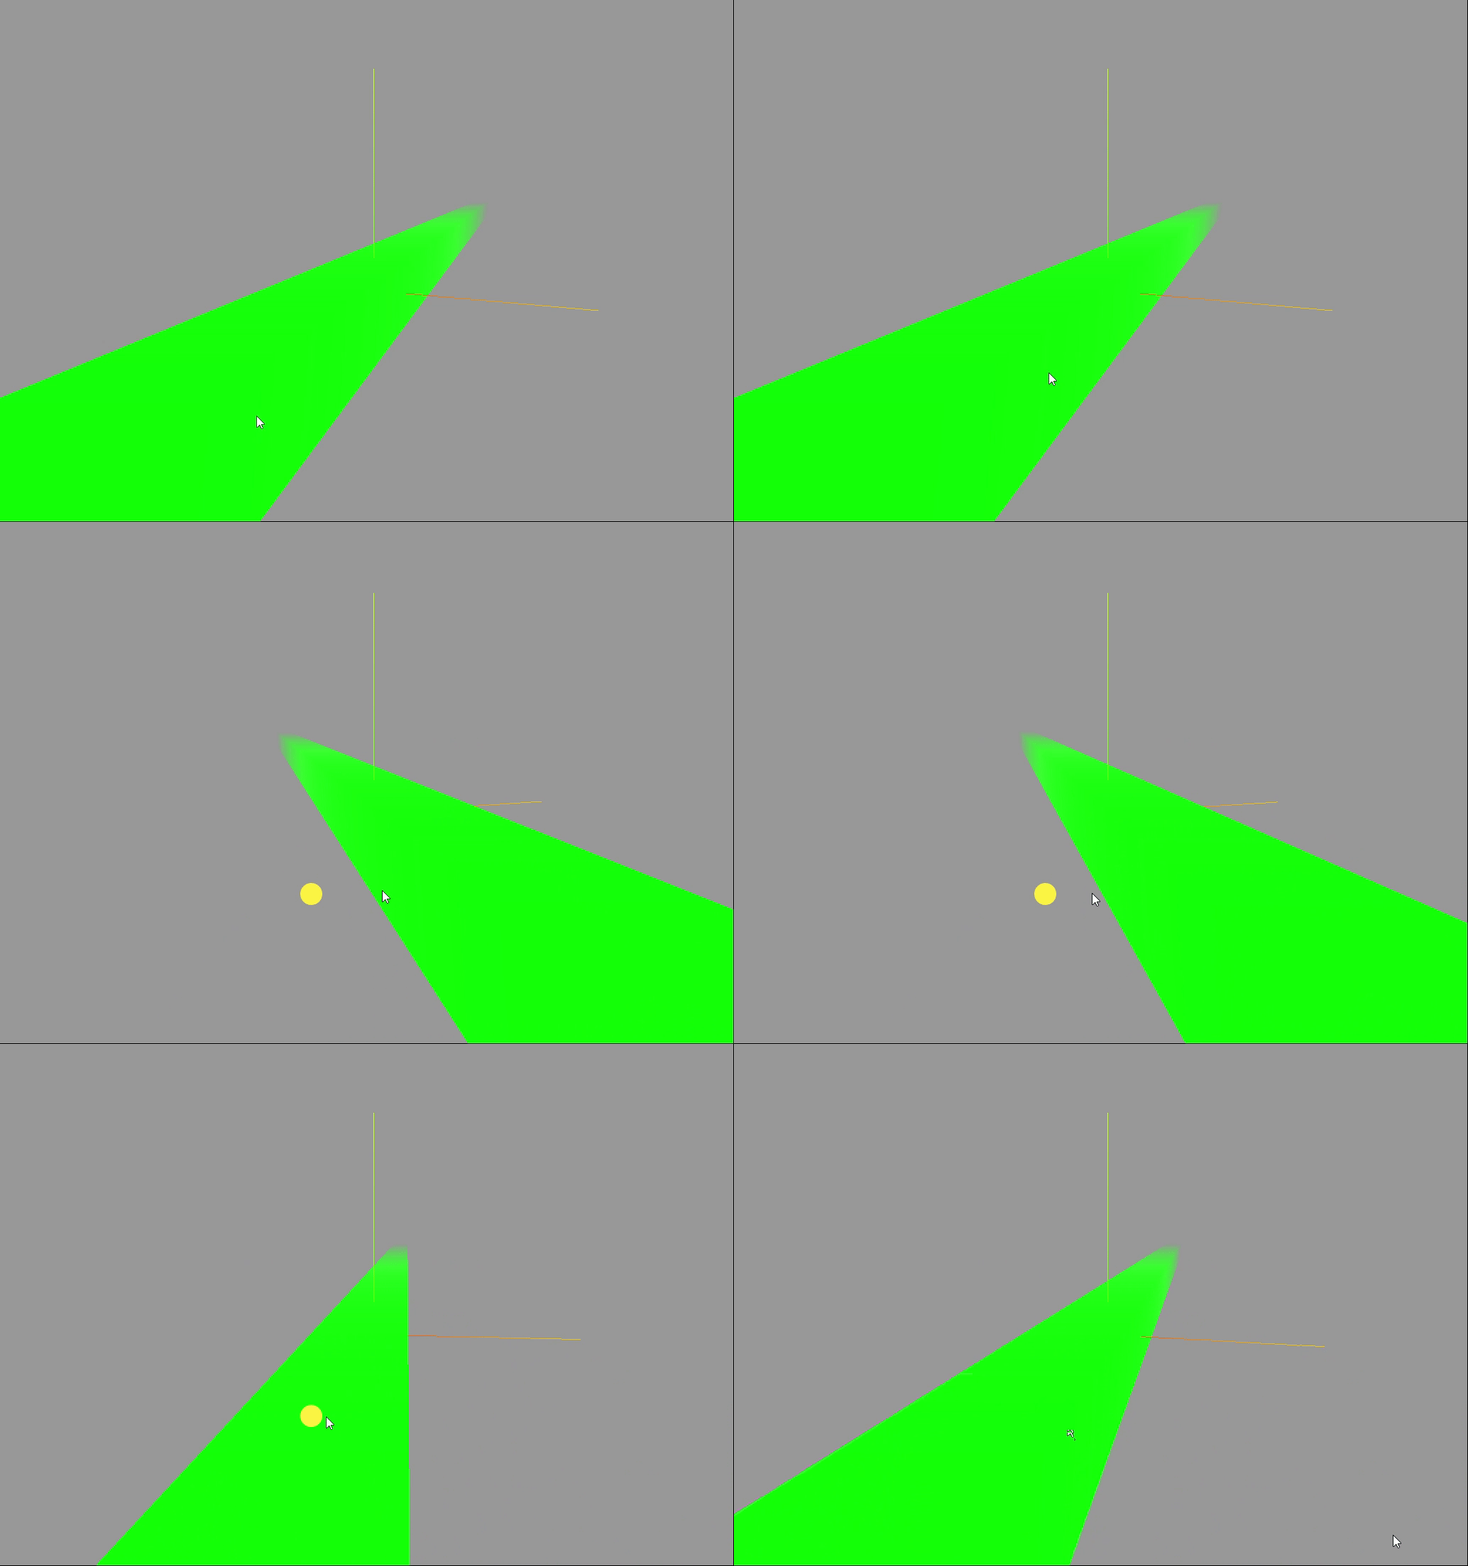
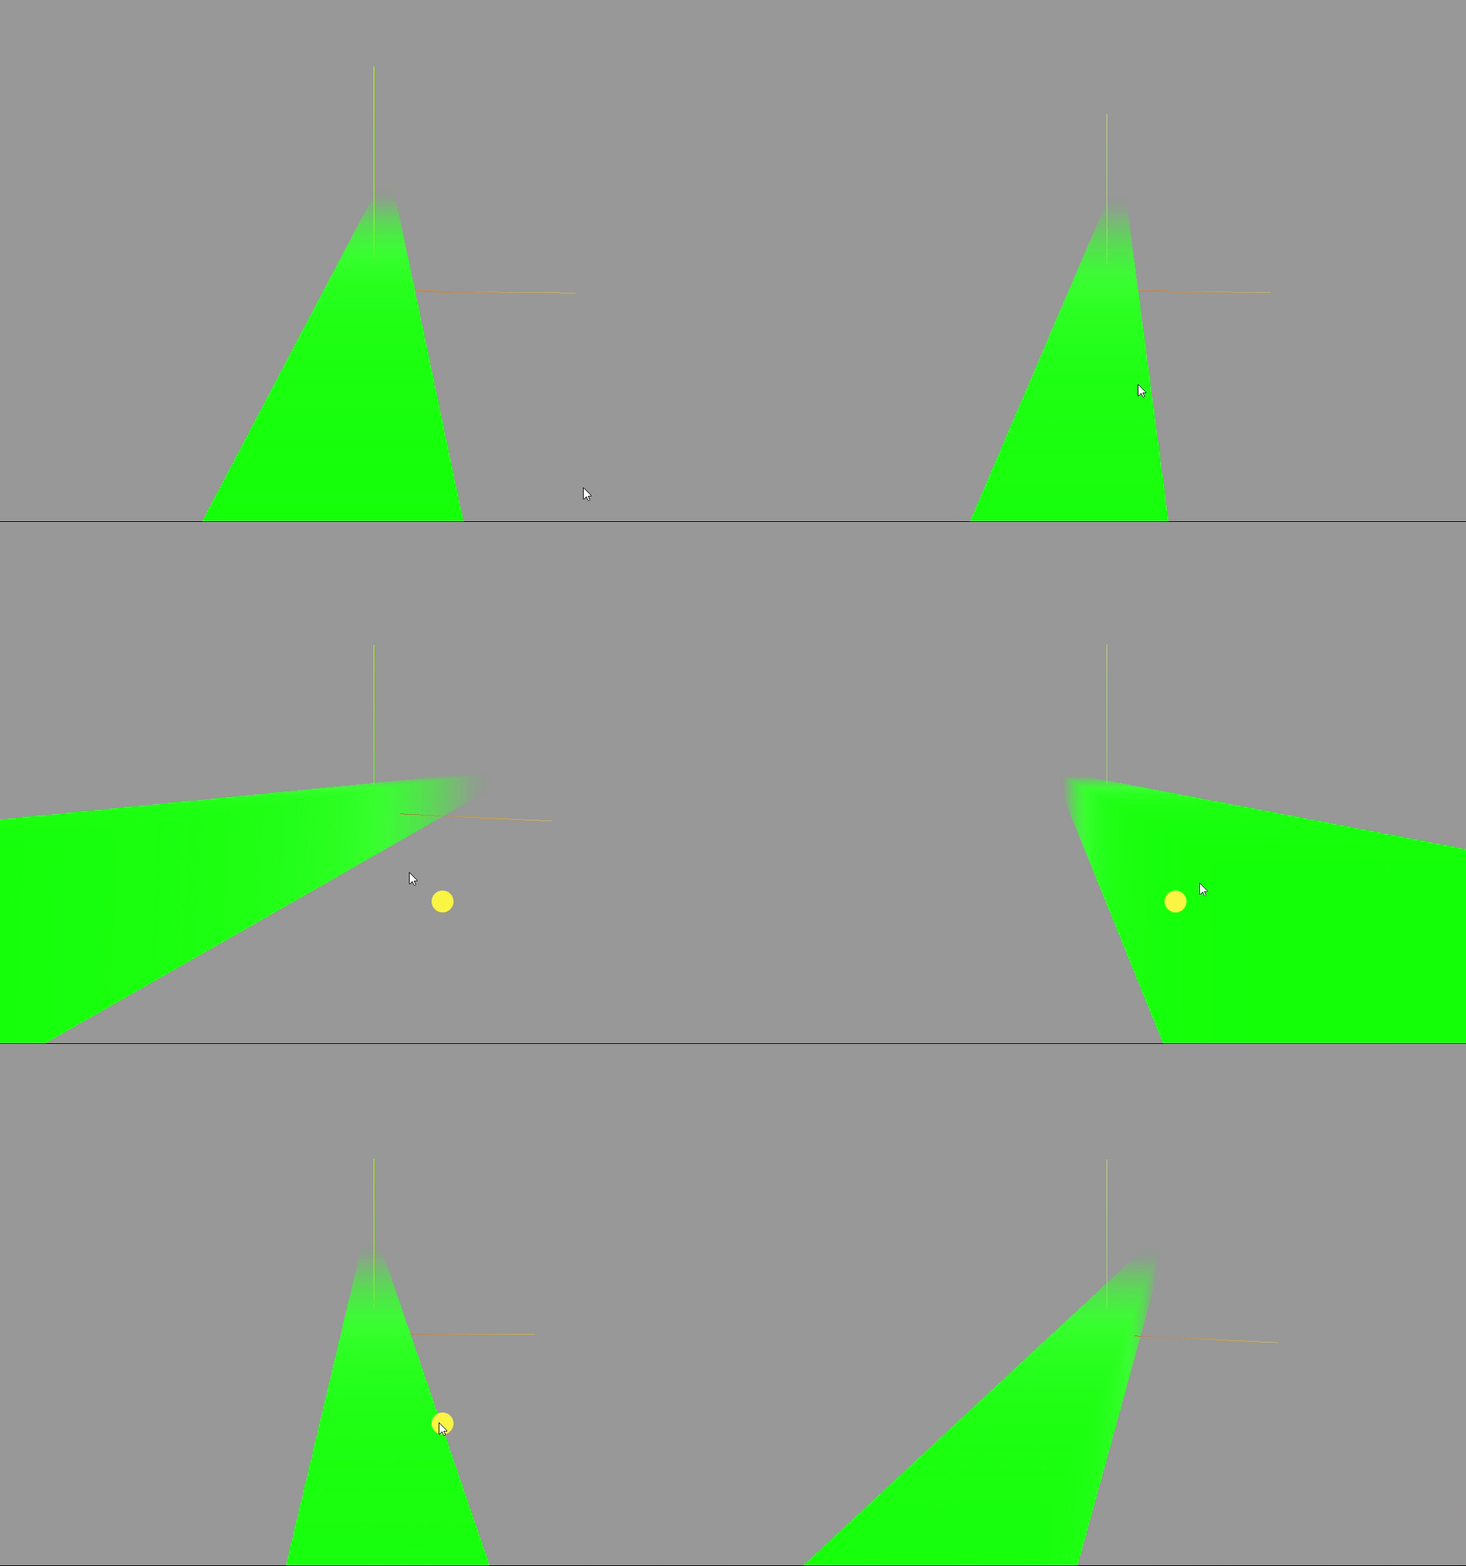
在Three.js中,fog类是用于创建线性雾的效果,雾效果常用于模拟真实世界中视觉深度递减的效果,也可以用于创建某些艺术效果,当物体距离观察者越远,雾就越密,物体的颜色就越接近雾的颜色。
雾通常是基于离摄像机的距离褪色至某种特定颜色的方式。 在three.js中有两种设置雾的对象:
.Fog() 定义了线性雾。简单来说就是雾的密度是随着距离线性增大的。.color 雾的颜色。.near 应用雾的最小距离。任何物体比 near 近不会受到影响。.far 应用雾的最大距离。任何物体比 far 远则完全是雾的颜色。
.FogExp2(color,density) 定义了指数雾。在相机附近提供清晰的视野,且距离相机越远,雾的浓度随着指数增长越快。color代表雾的颜色density代表雾的增涨速度
<template><div id="container"></div>
</template><script>
import * as THREE from 'three'
// webGL兼容
import WebGL from 'three/examples/jsm/capabilities/WebGL.js';
import { GUI } from 'three/examples/jsm/libs/lil-gui.module.min.js';
// 轨道控制器
import { OrbitControls } from "three/examples/jsm/controls/OrbitControls.js"
//导入RGBRload加载器
import { RGBELoader } from  "three/examples/jsm/loaders/RGBELoader.js"
export default {name: 'HomeView',components: {},mounted(){this.init()},data(){return {camera: null,  //相机对象scene: null,  //场景对象renderer: null,  //渲染器对象mesh: null,  //网格模型对象Meshmesh2:null,controls:null, //轨道控制器material2:null, //父元素planeMesh:null, //平面rgbeLoacer:null,}},methods:{init(){let container = document.body;//创建一个场景this.scene = new THREE.Scene()//透视摄像机this.camera = new THREE.PerspectiveCamera(75,window.innerWidth/window.innerHeight,0.1,700)//创建渲染器this.renderer = new THREE.WebGLRenderer();//渲染器尺寸this.renderer.setSize( window.innerWidth,  window.innerHeight );     //创建一个立方体const boxGeometry = new THREE.BoxGeometry( 1,1,100 );//我们需要给它一个MeshBasicMaterial材质,来让它有绿色颜色const material = new THREE.MeshBasicMaterial( { color: 0x00ff00 });//添加到场景中this.mesh = new THREE.Mesh( boxGeometry, material );this.scene.add( this.mesh );//创建场景雾this.scene.fog = new THREE.Fog(0x999999,0.1,30)//创建场景指数雾// this.scene.fog = new THREE.FogExp2(0x999999,0.1)this.scene.background = new THREE.Color(0x999999)// 设置相机位置this.camera.position.z = 5;   this.camera.position.y =2;  this.camera.position.x = 2; // 看的方向 this.camera.lookAt(0,0,0)//添加世界坐标辅助器const axesHelper = new THREE.AxesHelper(3) this.scene.add( axesHelper );//添加轨道控制器this.controls = new OrbitControls(this.camera,this.renderer.domElement)//添加阻尼带有惯性this.controls.enableDamping = true//设置阻尼系数this.controls.dampingFactor = 0.05//元素中插入canvas对象container.appendChild(this.renderer.domElement); if ( WebGL.isWebGLAvailable() ) {this.animate();} else {const warning = WebGL.getWebGLErrorMessage();document.getElementById( document.body ).appendChild( warning );}},//旋转起来animate() {this.controls.update()requestAnimationFrame( this.animate );// this.mesh.rotation.x += 0.01;// this.mesh.rotation.y += 0.01;this.renderer.render( this.scene, this.camera );}}
}
</script>
指数雾:
线性雾:
加载gltf模型和加载压缩过的模型
GLTFLoader资源的加载器
用于载入glTF2.0资源的加载器。
glTF(gl传输格式)是一种开放格式的规范,用于高效的传输,加载3D内容,该类文件以JSON(.gltf)格式或二进制格式提供,外部文件存储贴图(.jps,.png)和额外的二进制数据(.bin)。一个glft组件可以传输一个活多个场景,包括网格,材质,贴图,股价,变形目标,动画,灯光及其摄影。
//gltf素材地址,直接下载使用
https://github.com/mrdoob/three.js/blob/master/examples/models/gltf/SheenChair.glb
//导入场景模型加载器
import {GLTFLoader} from "three/examples/jsm/loaders/GLTFLoader.js"
//实例化gltf加载器const gltgLoader = new GLTFLoader()gltgLoader.load(//模型路径"../SheenChair.glb",//加载完成后的回调函数(gltf)=>{console.log(gltf)this.scene.add( gltf.scene );})this.scene.background=new THREE.Color(0x999999)
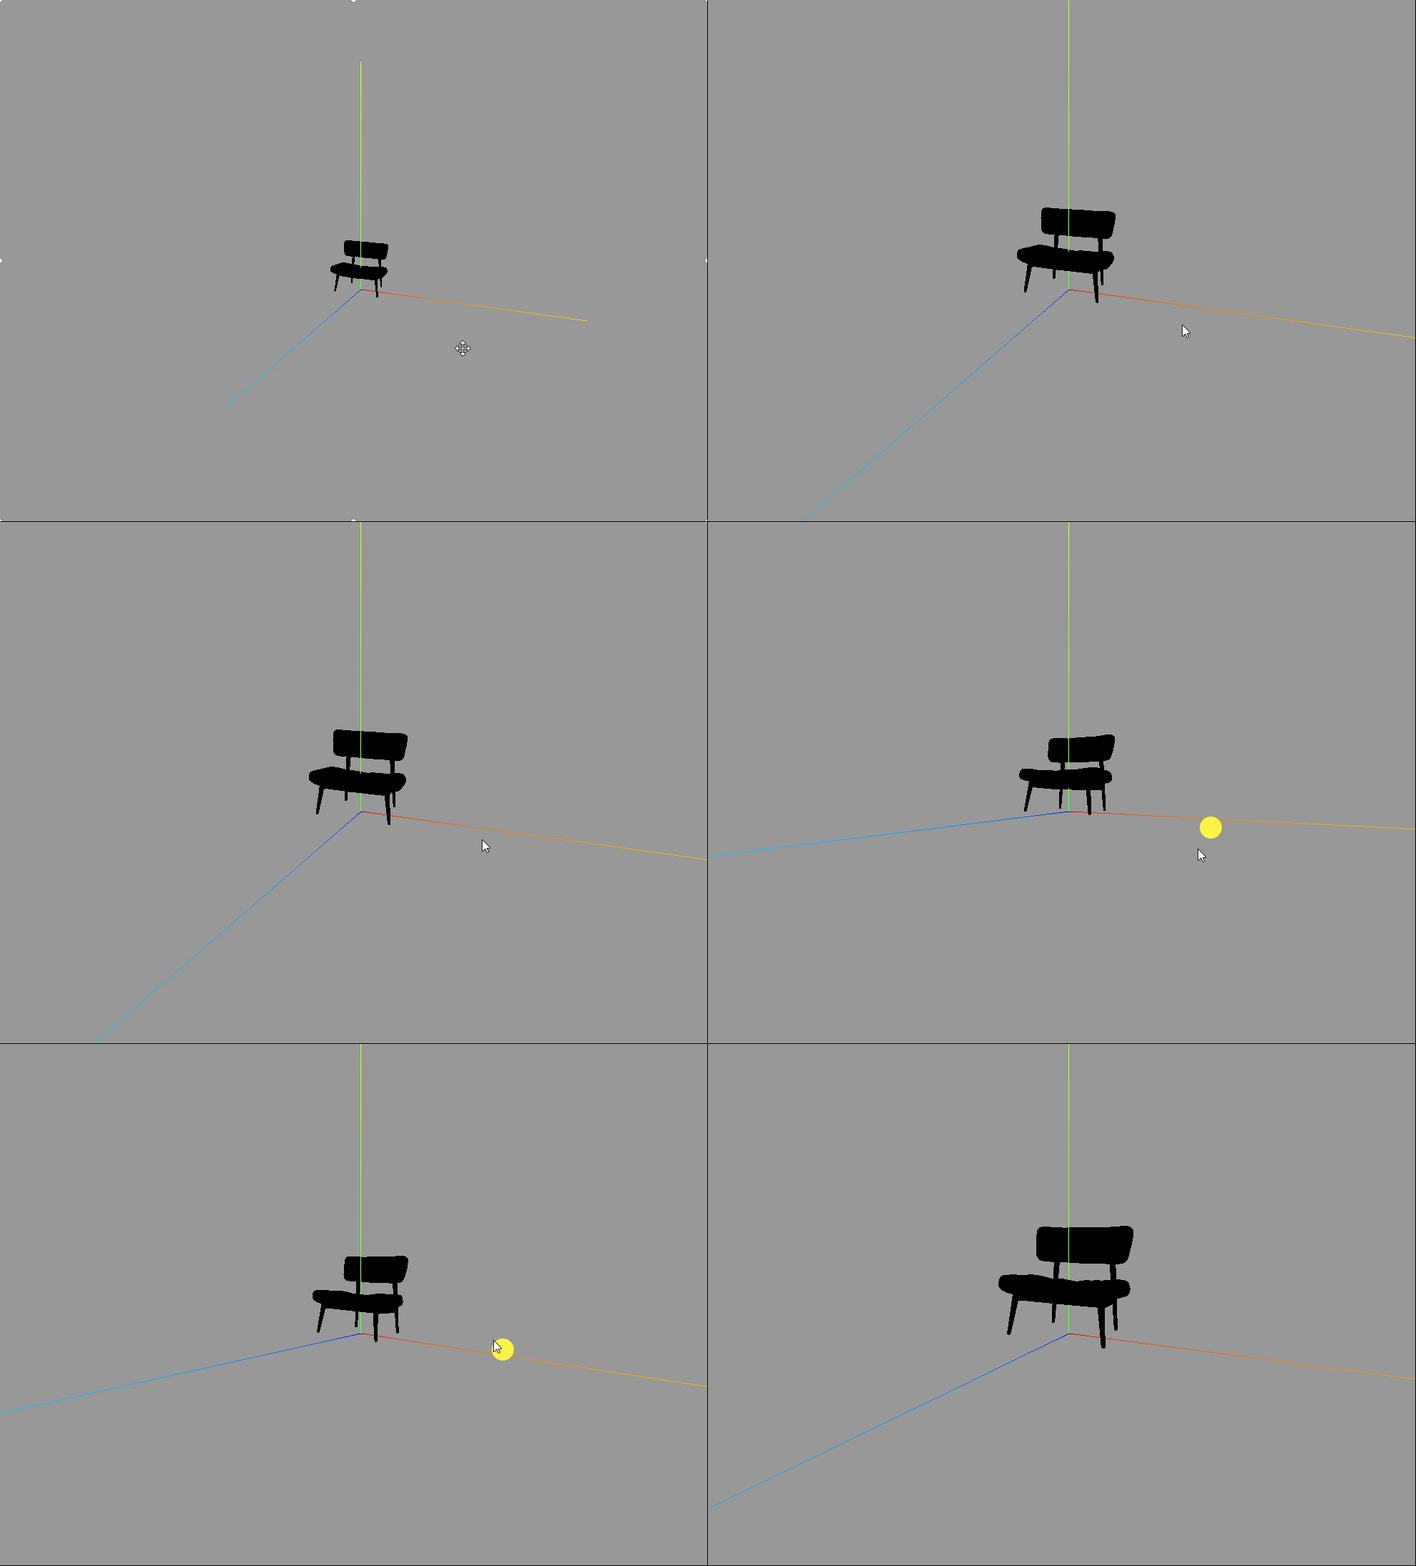
当前所看到的是纯黑色的,如果想要其颜色显示出来,要么设置环境贴图,或者设置光线,就会有四面八方的光照射进来,颜色就会亮起来。
其中HDE贴图上章节已经给出相关资源下载地址
//添加环境贴图
let rgbeLoader = new RGBELoader()
rgbeLoader.loadAsync("../venice_sunset_1k.hdr").then((texture) => {//设置球形贴图texture.mapping = THREE.EquirectangularReflectionMapping;//将加载的材质texture设置给背景和环境this.scene.background = texture;this.scene.environment = texture;
});
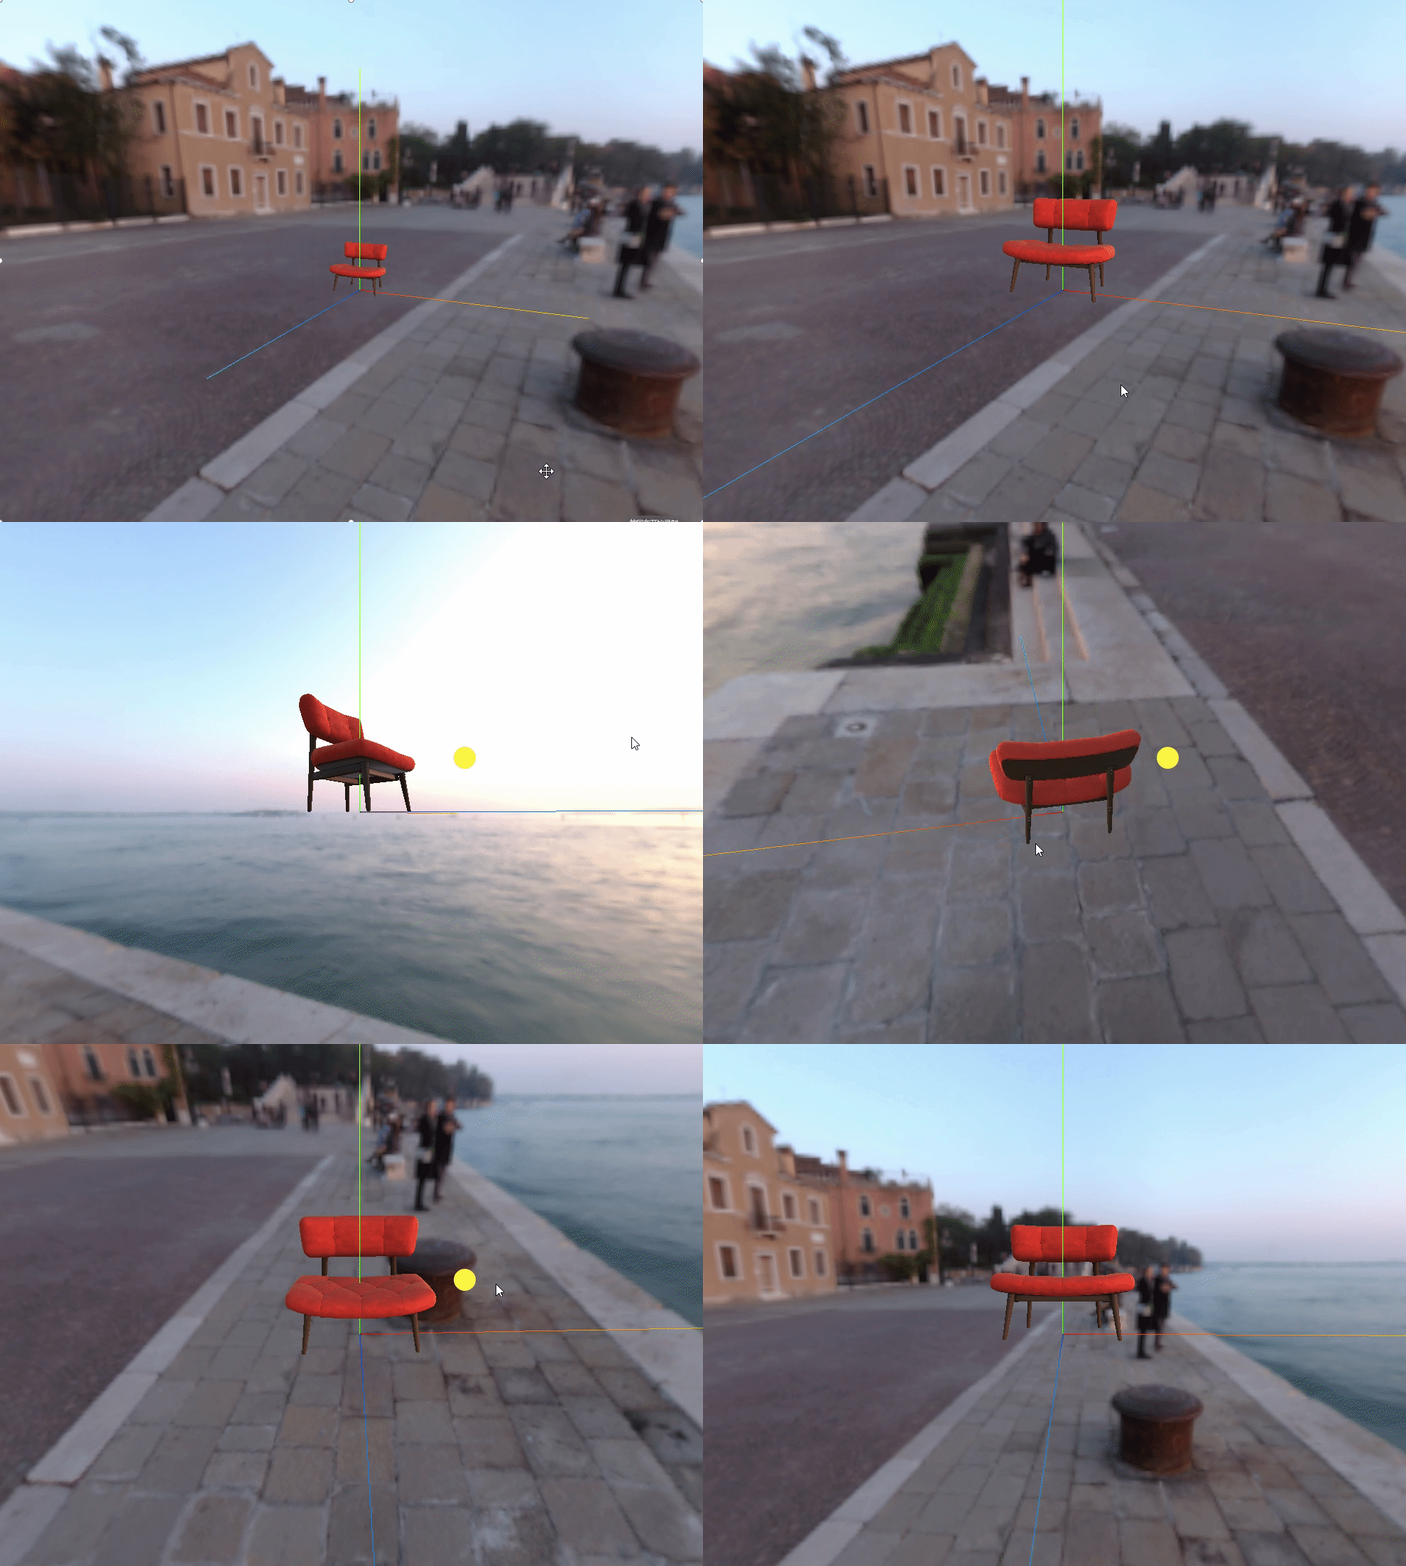 GLTF加载器(GLTFLoader)所有代码
<template><div id="container"></div>
</template><script>
import * as THREE from 'three'
// webGL兼容
import WebGL from 'three/examples/jsm/capabilities/WebGL.js';
import { GUI } from 'three/examples/jsm/libs/lil-gui.module.min.js';
// 轨道控制器
import { OrbitControls } from "three/examples/jsm/controls/OrbitControls.js"
//导入RGBRload加载器
import { RGBELoader } from  "three/examples/jsm/loaders/RGBELoader.js"
//导入场景模型加载器
import {GLTFLoader} from "three/examples/jsm/loaders/GLTFLoader.js"
export default {name: 'HomeView',components: {},mounted(){this.init()},data(){return {camera: null,  //相机对象scene: null,  //场景对象renderer: null,  //渲染器对象mesh: null,  //网格模型对象Meshmesh2:null,controls:null, //轨道控制器material2:null, //父元素planeMesh:null, //平面rgbeLoacer:null,}},methods:{init(){let container = document.body;//创建一个场景this.scene = new THREE.Scene()//透视摄像机this.camera = new THREE.PerspectiveCamera(75,window.innerWidth/window.innerHeight,0.1,700)//创建渲染器this.renderer = new THREE.WebGLRenderer();//渲染器尺寸this.renderer.setSize( window.innerWidth,  window.innerHeight );    //实例化gltf加载器const gltgLoader = new GLTFLoader()gltgLoader.load(//模型路径"../SheenChair.glb",        //加载完成后的回调函数(gltf)=>{console.log(gltf)this.scene.add( gltf.scene );})let rgbeLoader = new RGBELoader()rgbeLoader.loadAsync("../venice_sunset_1k.hdr").then((texture) => {//设置球形贴图texture.mapping = THREE.EquirectangularReflectionMapping;//将加载的材质texture设置给背景和环境this.scene.background = texture;this.scene.environment = texture;});//加载纹理this.scene.background=new THREE.Color(0x999999)// 设置相机位置this.camera.position.z = 5;   this.camera.position.y =2;  this.camera.position.x = 2; // 看的方向 this.camera.lookAt(0,0,0)//添加世界坐标辅助器const axesHelper = new THREE.AxesHelper(3) this.scene.add( axesHelper );//添加轨道控制器this.controls = new OrbitControls(this.camera,this.renderer.domElement)//添加阻尼带有惯性this.controls.enableDamping = true//设置阻尼系数this.controls.dampingFactor = 0.05//元素中插入canvas对象container.appendChild(this.renderer.domElement); if ( WebGL.isWebGLAvailable() ) {this.animate();} else {const warning = WebGL.getWebGLErrorMessage();document.getElementById( document.body ).appendChild( warning );}},//旋转起来animate() {this.controls.update()requestAnimationFrame( this.animate );// this.mesh.rotation.x += 0.01;// this.mesh.rotation.y += 0.01;this.renderer.render( this.scene, this.camera );}}
}
</script>
DracoLoader加载压缩过的模型
将draco文件复制到public静态资源中。
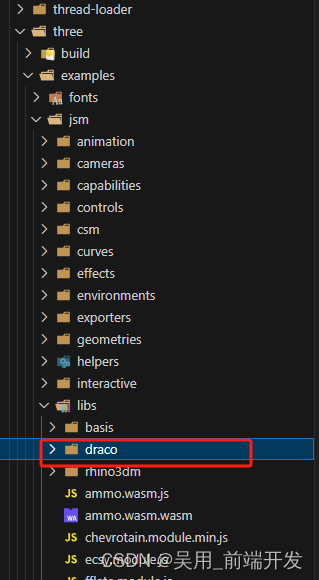

//导入模型解压器
import {DRACOLoader} from "three/examples/jsm/loaders/DRACOLoader.js"
const gltgLoader = new GLTFLoader()
gltgLoader.load(//模型路径"../SheenChair.glb",        //加载完成后的回调函数(gltf)=>{console.log(gltf)this.scene.add( gltf.scene );}
)
// 实例化加载器draco
const dracoLoader = new DRACOLoader()
//设置文件路径
dracoLoader.setDecoderPath("../draco/")
//设置把gltf加载器draco解码器
gltgLoader.setDRACOLoader(dracoLoader)
let rgbeLoader = new RGBELoader()
