1.前言
不久前给公司实现支付功能,折腾了一阵子,终于实现了,微信支付对于小白来说真的很困难,特别是没有接触过企业级别开发的大学生更不用说,因此尝试写一篇我如何从小白实现微信小程序支付功能的吧,使用的后端是SpringBoot。
2.准备工作
首先,要实现支付功能的条件:
(1)小程序是企业级别
(2)拥有微信支付商户号
(3)小程序绑定商户号
(4)拥有域名,并且有SSL证书(也就是HTTPS)
满足以上条件即可开始配置支付功能,这里我实现的是JSAPI支付(也就是小程序直接提供数字金额支付),还有Native支付(也就是弹出二维码进行扫码支付)
3.后端实现
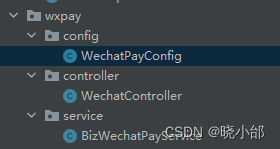
先讲后端,因为后端需要准备的东西比较多,后端差不多就如下图三个类
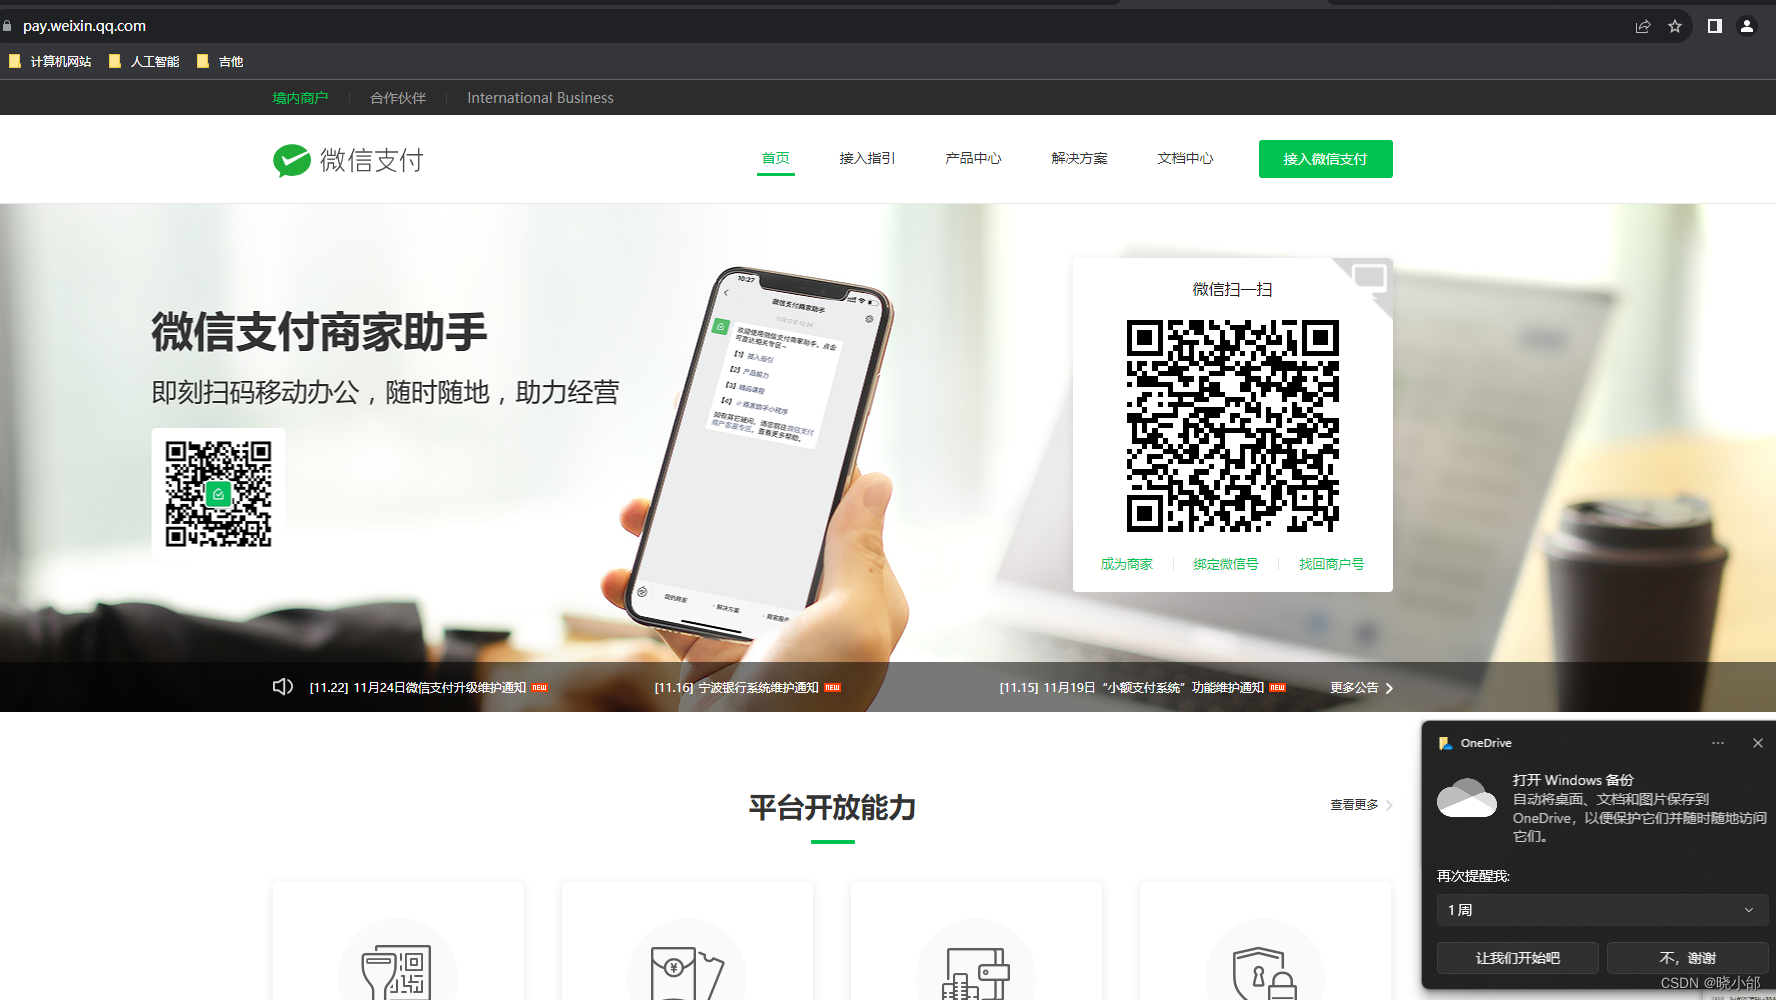
不过要先准备如下东西,这些都需要去微信支付网页登录得到如下图登录,具体去看其他教程
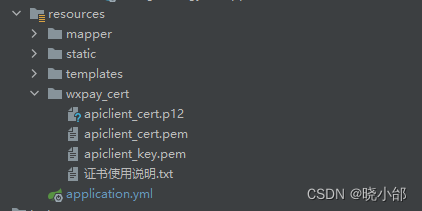
申请证书,然后可以和我一样把证书放在项目的resources文件夹,如下
导入微信支付的pom.xml相关包依赖
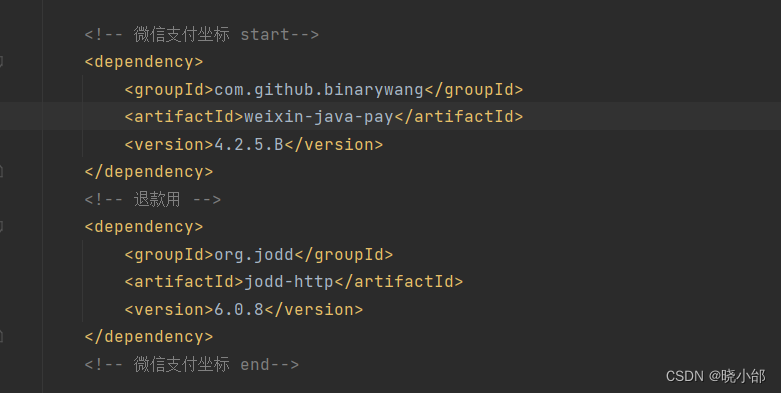
<!-- 微信支付坐标 start--><dependency><groupId>com.github.binarywang</groupId><artifactId>weixin-java-pay</artifactId><version>4.2.5.B</version></dependency><!-- 退款用 --><dependency><groupId>org.jodd</groupId><artifactId>jodd-http</artifactId><version>6.0.8</version></dependency><!-- 微信支付坐标 end-->微信支付在yml文件的相关配置信息,没有的信息就登录商户号申请得到,接下来如果你是小白的话建议直接复制粘贴我的代码。
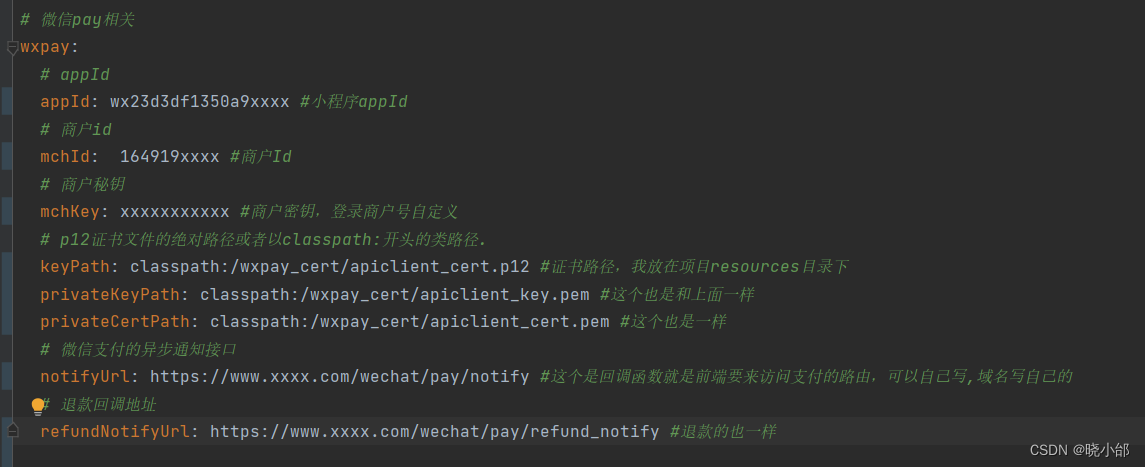
# 微信pay相关
wxpay:# appIdappId: wx23d3df1350a9xxxx #小程序appId# 商户idmchId: 164919xxxx #商户Id# 商户秘钥mchKey: xxxxxxxxxxx #商户密钥,登录商户号自定义# p12证书文件的绝对路径或者以classpath:开头的类路径.keyPath: classpath:/wxpay_cert/apiclient_cert.p12 #证书路径,我放在项目resources目录下privateKeyPath: classpath:/wxpay_cert/apiclient_key.pem #这个也是和上面一样privateCertPath: classpath:/wxpay_cert/apiclient_cert.pem #这个也是一样# 微信支付的异步通知接口notifyUrl: https://www.xxxx.com/wechat/pay/notify #这个是回调函数就是前端要来访问支付的路由,可以自己写,域名写自己的# 退款回调地址refundNotifyUrl: https://www.xxxx.com/wechat/pay/refund_notify #退款的也一样接下来就是获取上面配置信息的Java代码,WechatPayConfig类,注意这里变量名和yml文件的变量名要一样
import lombok.Data;
import org.springframework.boot.context.properties.ConfigurationProperties;@Data
@ConfigurationProperties(prefix = "wxpay")
public class WechatPayConfig {private String appId;private String mchId;private String mchKey;private String keyPath;private String privateKeyPath;private String privateCertPath;private String notifyUrl;private String refundNotifyUrl;}接下来就是人们说的创建支付统一订单,BizWechatPayServic类,直接复制粘贴
import com.example.mengchuangyuan.common.wechat.wxpay.config.WechatPayConfig;
import com.github.binarywang.wxpay.bean.request.WxPayRefundRequest;
import com.github.binarywang.wxpay.bean.request.WxPayUnifiedOrderRequest;
import com.github.binarywang.wxpay.bean.result.WxPayRefundResult;
import com.github.binarywang.wxpay.config.WxPayConfig;
import com.github.binarywang.wxpay.constant.WxPayConstants;
import com.github.binarywang.wxpay.exception.WxPayException;
import com.github.binarywang.wxpay.service.WxPayService;
import com.github.binarywang.wxpay.service.impl.WxPayServiceImpl;
import lombok.AllArgsConstructor;
import lombok.extern.slf4j.Slf4j;
import org.springframework.boot.autoconfigure.condition.ConditionalOnClass;
import org.springframework.boot.context.properties.EnableConfigurationProperties;
import org.springframework.stereotype.Service;import java.net.InetAddress;/*** 微信支付*/
@Slf4j
@Service
@ConditionalOnClass(WxPayService.class)
@EnableConfigurationProperties(WechatPayConfig.class)
@AllArgsConstructor
public class BizWechatPayService {private WechatPayConfig wechatPayConfig;public WxPayService wxPayService() {WxPayConfig payConfig = new WxPayConfig();payConfig.setAppId(wechatPayConfig.getAppId());payConfig.setMchId(wechatPayConfig.getMchId());payConfig.setMchKey(wechatPayConfig.getMchKey());payConfig.setKeyPath(wechatPayConfig.getKeyPath());payConfig.setPrivateKeyPath(wechatPayConfig.getPrivateKeyPath());payConfig.setPrivateCertPath(wechatPayConfig.getPrivateCertPath());// 可以指定是否使用沙箱环境payConfig.setUseSandboxEnv(false);payConfig.setSignType("MD5");WxPayService wxPayService = new WxPayServiceImpl();wxPayService.setConfig(payConfig);return wxPayService;}/*** 创建微信支付订单** @param productTitle 商品标题* @param outTradeNo   订单号* @param totalFee     总价* @param openId     openId* @return*/public Object createOrder(String productTitle, String outTradeNo, Integer totalFee, String openId) {log.info(openId);log.info(wechatPayConfig.toString());try {WxPayUnifiedOrderRequest request = new WxPayUnifiedOrderRequest();// 支付描述request.setBody(productTitle);// 订单号request.setOutTradeNo(outTradeNo);// 请按照分填写request.setTotalFee(totalFee);// 小程序需要传入 openidrequest.setOpenid(openId);// 回调链接request.setNotifyUrl(wechatPayConfig.getNotifyUrl());// 终端IP.request.setSpbillCreateIp(InetAddress.getLocalHost().getHostAddress());// 设置类型为JSAPIrequest.setTradeType(WxPayConstants.TradeType.JSAPI);// 一定要用 createOrder 不然得自己做二次校验Object order = wxPayService().createOrder(request);return order;} catch (Exception e) {return "未知错误!";}}/*** 退款** @param tradeNo 订单号* @param totalFee 总价* @return*/public WxPayRefundResult refund(String tradeNo, Integer totalFee) {WxPayRefundRequest wxPayRefundRequest = new WxPayRefundRequest();wxPayRefundRequest.setTransactionId(tradeNo);wxPayRefundRequest.setOutRefundNo(String.valueOf(System.currentTimeMillis()));wxPayRefundRequest.setTotalFee(totalFee);wxPayRefundRequest.setRefundFee(totalFee);wxPayRefundRequest.setNotifyUrl(wechatPayConfig.getRefundNotifyUrl());try {WxPayRefundResult refund = wxPayService().refundV2(wxPayRefundRequest);if (refund.getReturnCode().equals("SUCCESS") && refund.getResultCode().equals("SUCCESS")) {return refund;}} catch (WxPayException e) {e.printStackTrace();}return null;}
}然后到提供前端调用支付路由的类,WechatController类,注意我这里路由拼接的有/wechat/pay/notify,这个要和之前配置yml文件的支付回调函数一样,要不然不行。这里也可以看到需要用户的openid,获取openid我就不多说了,有疑问的同学直接私信我或者评论区
package com.example.mengchuangyuan.common.wechat.wxpay.controller;import com.example.mengchuangyuan.common.wechat.wxpay.service.BizWechatPayService;
import com.github.binarywang.wxpay.bean.notify.WxPayNotifyResponse;
import com.github.binarywang.wxpay.bean.notify.WxPayOrderNotifyResult;
import com.github.binarywang.wxpay.bean.result.WxPayRefundResult;
import com.github.binarywang.wxpay.exception.WxPayException;
import lombok.AllArgsConstructor;
import lombok.extern.slf4j.Slf4j;
import org.slf4j.Logger;
import org.slf4j.LoggerFactory;
import org.springframework.web.bind.annotation.*;@Slf4j
@RestController
@RequestMapping("/wechat/pay")
@AllArgsConstructor
public class WechatController {BizWechatPayService wechatPayService;private static Logger logger = LoggerFactory.getLogger(WechatController.class);/*** 创建微信订单** @return 统一下单参数*/
//    @GetMapping("/unified/request")
//    public Object appPayUnifiedRequest(@RequestParam("openid") String openid,@RequestParam("totalFee") Integer totalFee) {
//        log.info(openid);
//        // totalFee 必须要以分为单位
//
//        Object createOrderResult = wechatPayService.createOrder("报名支付", String.valueOf(System.currentTimeMillis()), totalFee*100, openid);
//        log.info("统一下单的生成的参数:{}", createOrderResult);
//        return createOrderResult;
//    }@GetMapping("/unified/request")public Object appPayUnifiedRequest(@RequestParam("openid") String openid,@RequestParam("totalFee") Integer totalFee) {log.info(openid);// totalFee 必须要以分为单位Object createOrderResult = wechatPayService.createOrder("报名支付", String.valueOf(System.currentTimeMillis()), totalFee*100, openid);log.info("统一下单的生成的参数:{}", createOrderResult);return createOrderResult;}@PostMapping("/notify")public String notify(@RequestBody String xmlData) {try {WxPayOrderNotifyResult result = wechatPayService.wxPayService().parseOrderNotifyResult(xmlData);// 支付返回信息if ("SUCCESS".equals(result.getReturnCode())) {// 可以实现自己的业务逻辑logger.info("来自微信支付的回调:{}", result);}return WxPayNotifyResponse.success("成功");} catch (WxPayException e) {logger.error(e.getMessage());return WxPayNotifyResponse.fail("失败");}}/*** 退款** @param transaction_id*/@PostMapping("/refund")public void refund(@RequestBody String transaction_id) {// totalFee 必须要以分为单位,退款的价格可以这里只做的全部退款WxPayRefundResult refund = wechatPayService.refund(transaction_id, 1);// 实现自己的逻辑logger.info("退款本地回调:{}", refund);}/*** 退款回调** @param xmlData* @return*/@PostMapping("/refund_notify")public String refundNotify(@RequestBody String xmlData) {// 实现自己的逻辑logger.info("退款远程回调:{}", xmlData);// 必须要返回 SUCCESS 不过有 WxPayNotifyResponse 给整合成了 xml了return WxPayNotifyResponse.success("成功");}}
到此后端完成,说明一下,我只实现了支付功能,接下来前端没有退款功能
4.前端(小程序端)
前端相对简单,就是小程序给后端金额并且向后端发起支付请求弹出支付界面输入密码就OK,就一个方法。
goPay(e) {var that = this//用户openid,我之前缓存有的,这里根据你是如何获取用户openidvar openid = app.globalData.userInfo.openid sendRequest({url: "/wechat/pay/unified/request", //后端支付请求路由method: 'GET',data: {openid: openid,totalFee: that.data.money //支付金额,注意是以分为单位,要么在前端处理乘100,要么在后端,在我后端代码中,可以看出我选择的是后端处理// totalFee: 1},}).then(res => {// console.log(res);let obj = { //这里的数据就是之前后端生成的统一订单appid: res.data.appId,noncestr: res.data.nonceStr,package: res.data.packageValue,// partnerid: res.data.partnerId,prepayid: res.data.prepayId,timestamp: res.data.timeStamp,signType: res.data.signType,paySign: res.data.paySign,};// console.log(obj);这里就是小程序弹出支付界面了wx.requestPayment({ //下面参数为必传provider: 'wxpay', //支付类型appId: obj.appid, //小程序AppidtimeStamp: obj.timestamp, //创建订单时间戳nonceStr: obj.noncestr, // 随机字符串,长度为32个字符以下。package: obj.package, // 统一下单接口返回的 prepay_id 参数值,格式如“prepay_id=*”signType: obj.signType, // 加密方式统一'MD5'paySign: obj.paySign, // 后台支付签名返回success: function (res) {// 支付成功后的回调函数, res.errMsg = 'requestPayment:ok'// console.log(res);if (res.errMsg === 'requestPayment:ok') {that.signStart(e)}},fail: function (res) {// console.log(res);// 支付失败或取消支付后的回调函数, res.errMsg = 'requestPayment:fail cancel' 取消支付;res.errMsg = 'requestPayment:fail (detail error message)'}})}).catch(err => {wx.showModal({content: "支付失败,请重试!",showCancel: false})})},sendRequest函数包装在request.js如下

request.js代码内容如下
const baseUrl = 'https://www.xxxx.com'const sendRequest = (params) => {//   console.log(params); return new Promise((resolve, reject) => {wx.request({url: baseUrl + params.url,method: params.method || 'GET',header: {'Content-Type': 'application/json' // 设置请求的Content-Type},data: params.data || '',success: res => {// console.log(res);resolve(res)},fail: err => {reject(err)}})})
}export default sendRequest
效果如下,这里因为我的手机不能截图支付页面,所以用的开发者工具支付的效果,都是一样的。
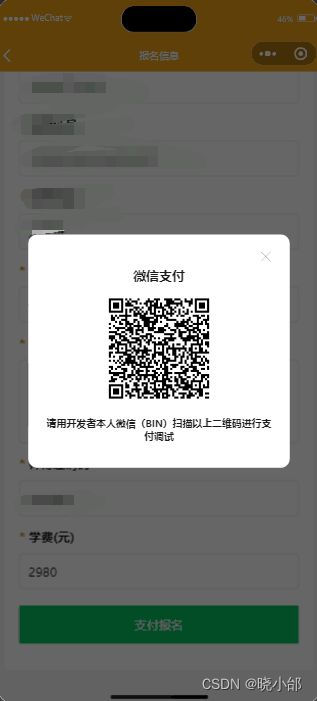
到此为止,微信小程序支付功能就完成了,看似简单,但是应该还有一些细节要处理,希望大家有耐心处理。
