潜在一致性模型 (LCM) 通常可以通过 2-4 个步骤生成高质量图像,从而可以在几乎实时的设置中使用扩散模型。
来自官方网站:
LCM 只需 4,000 个训练步骤(约 32 个 A100 GPU 小时)即可从任何预训练的稳定扩散 (SD) 中提取出来,只需 2~4 个步骤甚至一步即可生成高质量的 768 x 768 分辨率图像,从而显着加速文本转换 -图像生成。 我们使用 LCM 在短短 4,000 次训练迭代中提取了 Dreamshaper-V7 版本的 SD。
有关 LCM 的更多技术概述,请参阅论文。
然而,每个模型需要单独蒸馏以进行潜在一致性蒸馏。 LCM-LoRA 的核心思想是只训练几个适配器层,在本例中适配器是 LoRA。 这样,我们就不必训练完整的模型并保持可训练参数的数量可控。 然后,生成的 LoRA 可以应用于模型的任何微调版本,而无需单独蒸馏它们。 此外,LoRA 还可应用于图像到图像、ControlNet/T2I-Adapter、修复、AnimateDiff 等。LCM-LoRA 还可以与其他 LoRA 结合,只需很少的步骤 (4-8) 即可生成样式图像。

NSDT在线工具推荐: Three.js AI纹理开发包 - YOLO合成数据生成器 - GLTF/GLB在线编辑 - 3D模型格式在线转换 - 可编程3D场景编辑器
LCM-LoRA 可用于 stable-diffusion-v1-5、stable-diffusion-xl-base-1.0 和 SSD-1B 模型。 所有的检查点都可以在这个集合中找到。
有关LCM-LoRA的更多详细信息,请参阅技术报告。
本指南展示了如何使用 LCM-LoRA 进行推理:
- 文本到图像
- 图像到图像
- 与风格化的 LoRA 相结合
- ControlNet/T2I 适配器
- 图像修复
- 动画差异
在阅读本指南之前,我们将先了解一下使用 LCM-LoRA 执行推理的一般工作流程。 LCM-LoRA 与其他稳定扩散 LoRA 类似,因此它们可以与任何支持 LoRA 的 DiffusionPipeline 一起使用。
- 加载任务特定的管道和模型。
- 将调度程序设置为 LCMScheduler。
- 加载模型的 LCM-LoRA 权重。
- 减少 [1.0, 2.0] 之间的guiding_scale,并在 [4, 8] 之间设置 num_inference_steps。
- 使用常用参数对管道进行推理。
让我们看看如何使用 LCM-LoRA 对不同的任务进行推理。
首先,确保已安装 peft,以获得更好的 LoRA 支持。
pip install -U peft1、文本转图像
我们将使用 StableDiffusionXLPipeline 和调度程序:LCMScheduler,然后加载 LCM-LoRA。 该管道与 LCM-LoRA 和调度程序一起,可实现快速推理工作流程,克服扩散模型的缓慢迭代特性。
import torch
from diffusers import DiffusionPipeline, LCMSchedulerpipe = DiffusionPipeline.from_pretrained("stabilityai/stable-diffusion-xl-base-1.0",variant="fp16",torch_dtype=torch.float16
).to("cuda")# set scheduler
pipe.scheduler = LCMScheduler.from_config(pipe.scheduler.config)# load LCM-LoRA
pipe.load_lora_weights("latent-consistency/lcm-lora-sdxl")prompt = "Self-portrait oil painting, a beautiful cyborg with golden hair, 8k"generator = torch.manual_seed(42)
image = pipe(prompt=prompt, num_inference_steps=4, generator=generator, guidance_scale=1.0
).images[0]
结果如下:
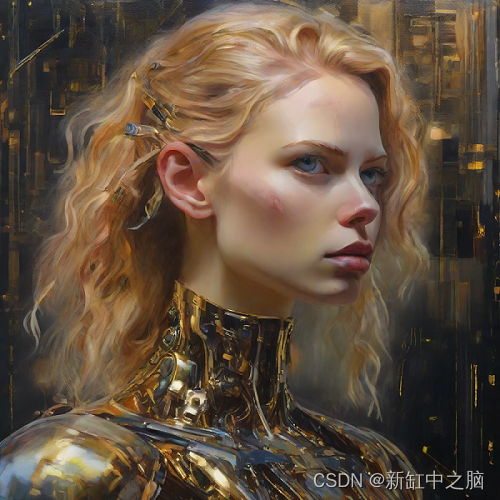
请注意,我们仅使用 4 个步骤进行生成,这比标准 SDXL 通常使用的步骤要少得多。
你可能已经注意到,我们设置guidance_scale=1.0,这会禁用classifer-free-guidance。 这是因为 LCM-LoRA 是在指导下进行训练的,因此在这种情况下批量大小不必加倍。 这会导致更快的推理时间,但缺点是负面提示对去噪过程没有任何影响。
还可以使用 LCM-LoRA 的指导,但由于训练的性质,模型对guiding_scale 值非常敏感,高值可能会导致生成的图像中出现伪影。 在我们的实验中,我们发现最佳值在 [1.0, 2.0] 范围内。
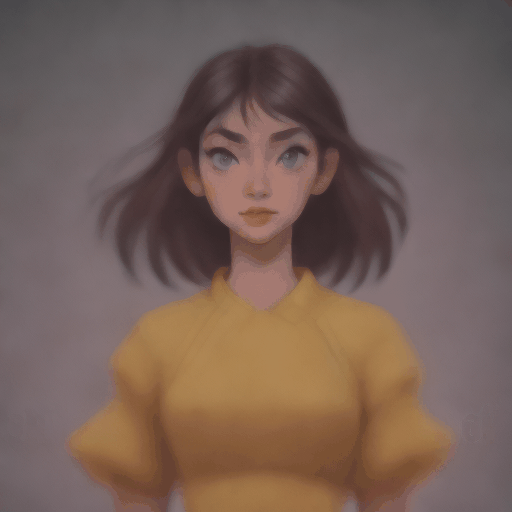
2、使用微调模型进行推理
如上所述,LCM-LoRA 可以应用于模型的任何微调版本,而无需单独提取它们。 让我们看看如何使用微调模型进行推理。 在此示例中,我们将使用 animagine-xl 模型,它是用于生成动画的 SDXL 模型的微调版本。
from diffusers import DiffusionPipeline, LCMSchedulerpipe = DiffusionPipeline.from_pretrained("Linaqruf/animagine-xl",variant="fp16",torch_dtype=torch.float16
).to("cuda")# set scheduler
pipe.scheduler = LCMScheduler.from_config(pipe.scheduler.config)# load LCM-LoRA
pipe.load_lora_weights("latent-consistency/lcm-lora-sdxl")prompt = "face focus, cute, masterpiece, best quality, 1girl, green hair, sweater, looking at viewer, upper body, beanie, outdoors, night, turtleneck"generator = torch.manual_seed(0)
image = pipe(prompt=prompt, num_inference_steps=4, generator=generator, guidance_scale=1.0
).images[0]
结果如下:

3、图像到图像
LCM-LoRA 也可以应用于图像到图像的任务。 让我们看看如何使用 LCM 执行图像到图像的生成。 在本例中,我们将使用 dreamshaper-7 模型和 LCM-LoRA 来实现 stable-diffusion-v1-5 。
import torch
from diffusers import AutoPipelineForImage2Image, LCMScheduler
from diffusers.utils import make_image_grid, load_imagepipe = AutoPipelineForImage2Image.from_pretrained("Lykon/dreamshaper-7",torch_dtype=torch.float16,variant="fp16",
).to("cuda")# set scheduler
pipe.scheduler = LCMScheduler.from_config(pipe.scheduler.config)# load LCM-LoRA
pipe.load_lora_weights("latent-consistency/lcm-lora-sdv1-5")# prepare image
url = "https://huggingface.co/datasets/huggingface/documentation-images/resolve/main/diffusers/img2img-init.png"
init_image = load_image(url)
prompt = "Astronauts in a jungle, cold color palette, muted colors, detailed, 8k"# pass prompt and image to pipeline
generator = torch.manual_seed(0)
image = pipe(prompt,image=init_image,num_inference_steps=4,guidance_scale=1,strength=0.6,generator=generator
).images[0]
make_image_grid([init_image, image], rows=1, cols=2)
结果如下:
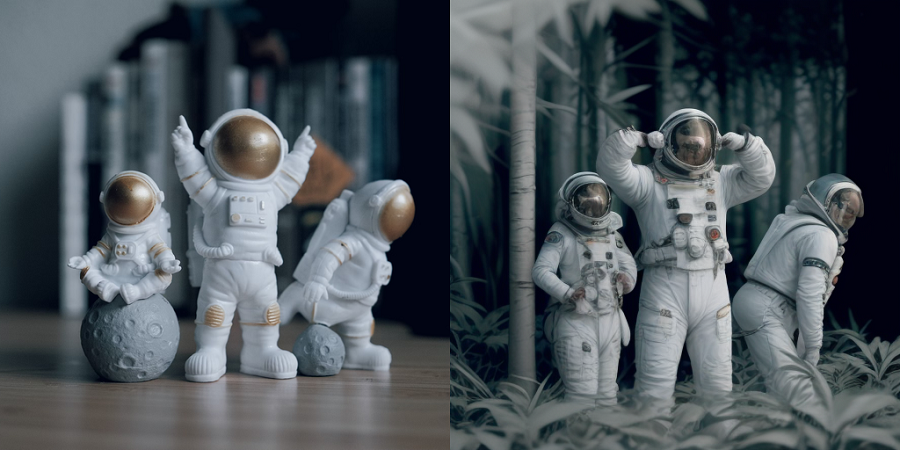
你可以根据提示和提供的图像获得不同的结果。 为了获得最佳结果,我们建议尝试 num_inference_steps、strength 和guiding_scale 参数的不同值并选择最佳值。
4、与风格化的 LoRA 结合
LCM-LoRA 可以与其他 LoRA 结合使用,只需很少的步骤即可生成样式图像 (4-8)。 在下面的示例中,我们将使用 LCM-LoRA 和剪纸 LoRA。 要了解有关如何组合 LoRA 的更多信息,请参阅这个指南。
import torch
from diffusers import DiffusionPipeline, LCMSchedulerpipe = DiffusionPipeline.from_pretrained("stabilityai/stable-diffusion-xl-base-1.0",variant="fp16",torch_dtype=torch.float16
).to("cuda")# set scheduler
pipe.scheduler = LCMScheduler.from_config(pipe.scheduler.config)# load LoRAs
pipe.load_lora_weights("latent-consistency/lcm-lora-sdxl", adapter_name="lcm")
pipe.load_lora_weights("TheLastBen/Papercut_SDXL", weight_name="papercut.safetensors", adapter_name="papercut")# Combine LoRAs
pipe.set_adapters(["lcm", "papercut"], adapter_weights=[1.0, 0.8])prompt = "papercut, a cute fox"
generator = torch.manual_seed(0)
image = pipe(prompt, num_inference_steps=4, guidance_scale=1, generator=generator).images[0]
image
结果如下:

5、ControlNet/T2I 适配器
让我们看看如何使用 ControlNet/T2I-Adapter 和 LCM-LoRA 进行推理。
在本例中,我们将使用 SD-v1-5 模型和 SD-v1-5 的 LCM-LoRA 以及 canny ControlNet。
import torch
import cv2
import numpy as np
from PIL import Imagefrom diffusers import StableDiffusionControlNetPipeline, ControlNetModel, LCMScheduler
from diffusers.utils import load_imageimage = load_image("https://hf.co/datasets/huggingface/documentation-images/resolve/main/diffusers/input_image_vermeer.png"
).resize((512, 512))image = np.array(image)low_threshold = 100
high_threshold = 200image = cv2.Canny(image, low_threshold, high_threshold)
image = image[:, :, None]
image = np.concatenate([image, image, image], axis=2)
canny_image = Image.fromarray(image)controlnet = ControlNetModel.from_pretrained("lllyasviel/sd-controlnet-canny", torch_dtype=torch.float16)
pipe = StableDiffusionControlNetPipeline.from_pretrained("runwayml/stable-diffusion-v1-5",controlnet=controlnet,torch_dtype=torch.float16,safety_checker=None,variant="fp16"
).to("cuda")# set scheduler
pipe.scheduler = LCMScheduler.from_config(pipe.scheduler.config)# load LCM-LoRA
pipe.load_lora_weights("latent-consistency/lcm-lora-sdv1-5")generator = torch.manual_seed(0)
image = pipe("the mona lisa",image=canny_image,num_inference_steps=4,guidance_scale=1.5,controlnet_conditioning_scale=0.8,cross_attention_kwargs={"scale": 1},generator=generator,
).images[0]
make_image_grid([canny_image, image], rows=1, cols=2)
结果如下:
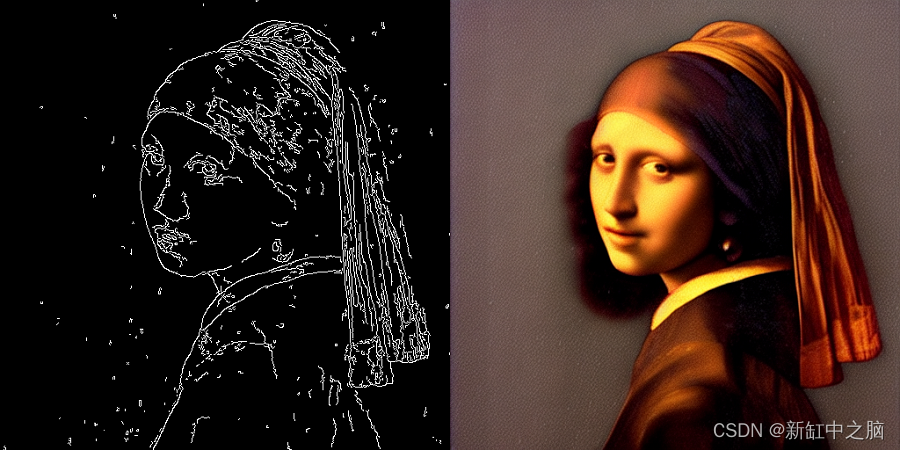
本示例中的推理参数可能不适用于所有示例,因此我们建议你尝试“num_inference_steps”、“guidance_scale”、“controlnet_conditioning_scale”和“cross_attention_kwargs”参数的不同值,并选择最佳的值。
下面的示例展示了如何将 LCM-LoRA 与 Canny T2I 适配器和 SDXL 结合使用。
import torch
import cv2
import numpy as np
from PIL import Imagefrom diffusers import StableDiffusionXLAdapterPipeline, T2IAdapter, LCMScheduler
from diffusers.utils import load_image, make_image_grid# Prepare image
# Detect the canny map in low resolution to avoid high-frequency details
image = load_image("https://huggingface.co/Adapter/t2iadapter/resolve/main/figs_SDXLV1.0/org_canny.jpg"
).resize((384, 384))image = np.array(image)low_threshold = 100
high_threshold = 200image = cv2.Canny(image, low_threshold, high_threshold)
image = image[:, :, None]
image = np.concatenate([image, image, image], axis=2)
canny_image = Image.fromarray(image).resize((1024, 1024))# load adapter
adapter = T2IAdapter.from_pretrained("TencentARC/t2i-adapter-canny-sdxl-1.0", torch_dtype=torch.float16, varient="fp16").to("cuda")pipe = StableDiffusionXLAdapterPipeline.from_pretrained("stabilityai/stable-diffusion-xl-base-1.0", adapter=adapter,torch_dtype=torch.float16,variant="fp16",
).to("cuda")# set scheduler
pipe.scheduler = LCMScheduler.from_config(pipe.scheduler.config)# load LCM-LoRA
pipe.load_lora_weights("latent-consistency/lcm-lora-sdxl")prompt = "Mystical fairy in real, magic, 4k picture, high quality"
negative_prompt = "extra digit, fewer digits, cropped, worst quality, low quality, glitch, deformed, mutated, ugly, disfigured"generator = torch.manual_seed(0)
image = pipe(prompt=prompt,negative_prompt=negative_prompt,image=canny_image,num_inference_steps=4,guidance_scale=1.5, adapter_conditioning_scale=0.8, adapter_conditioning_factor=1,generator=generator,
).images[0]
make_image_grid([canny_image, image], rows=1, cols=2)
结果如下:

6、图像修复
LCM-LoRA 也可用于修复。
import torch
from diffusers import AutoPipelineForInpainting, LCMScheduler
from diffusers.utils import load_image, make_image_gridpipe = AutoPipelineForInpainting.from_pretrained("runwayml/stable-diffusion-inpainting",torch_dtype=torch.float16,variant="fp16",
).to("cuda")# set scheduler
pipe.scheduler = LCMScheduler.from_config(pipe.scheduler.config)# load LCM-LoRA
pipe.load_lora_weights("latent-consistency/lcm-lora-sdv1-5")# load base and mask image
init_image = load_image("https://huggingface.co/datasets/huggingface/documentation-images/resolve/main/diffusers/inpaint.png")
mask_image = load_image("https://huggingface.co/datasets/huggingface/documentation-images/resolve/main/diffusers/inpaint_mask.png")# generator = torch.Generator("cuda").manual_seed(92)
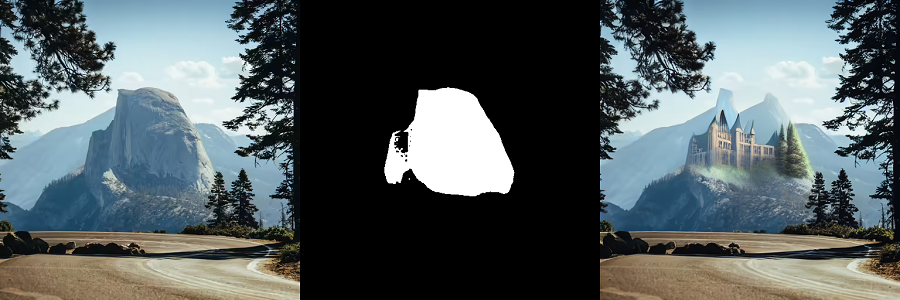
prompt = "concept art digital painting of an elven castle, inspired by lord of the rings, highly detailed, 8k"
generator = torch.manual_seed(0)
image = pipe(prompt=prompt,image=init_image,mask_image=mask_image,generator=generator,num_inference_steps=4,guidance_scale=4,
).images[0]
make_image_grid([init_image, mask_image, image], rows=1, cols=3)结果如下:
7、动画差异
AnimateDiff 允许你使用稳定扩散模型对图像进行动画处理。 为了获得好的结果,我们需要生成多个帧(16-24),而使用标准 SD 模型执行此操作可能会非常慢。 LCM-LoRA 可用于显着加快该过程,因为你只需为每一帧执行 4-8 个步骤。 让我们看看如何使用 LCM-LoRA 和 AnimateDiff 执行动画。
import torch
from diffusers import MotionAdapter, AnimateDiffPipeline, DDIMScheduler, LCMScheduler
from diffusers.utils import export_to_gifadapter = MotionAdapter.from_pretrained("diffusers/animatediff-motion-adapter-v1-5")
pipe = AnimateDiffPipeline.from_pretrained("frankjoshua/toonyou_beta6",motion_adapter=adapter,
).to("cuda")# set scheduler
pipe.scheduler = LCMScheduler.from_config(pipe.scheduler.config)# load LCM-LoRA
pipe.load_lora_weights("latent-consistency/lcm-lora-sdv1-5", adapter_name="lcm")
pipe.load_lora_weights("guoyww/animatediff-motion-lora-zoom-in", weight_name="diffusion_pytorch_model.safetensors", adapter_name="motion-lora")pipe.set_adapters(["lcm", "motion-lora"], adapter_weights=[0.55, 1.2])prompt = "best quality, masterpiece, 1girl, looking at viewer, blurry background, upper body, contemporary, dress"
generator = torch.manual_seed(0)
frames = pipe(prompt=prompt,num_inference_steps=5,guidance_scale=1.25,cross_attention_kwargs={"scale": 1},num_frames=24,generator=generator
).frames[0]
export_to_gif(frames, "animation.gif")
结果如下:
原文链接:LCM-LoRA推理简明教程 - BimAnt