输入

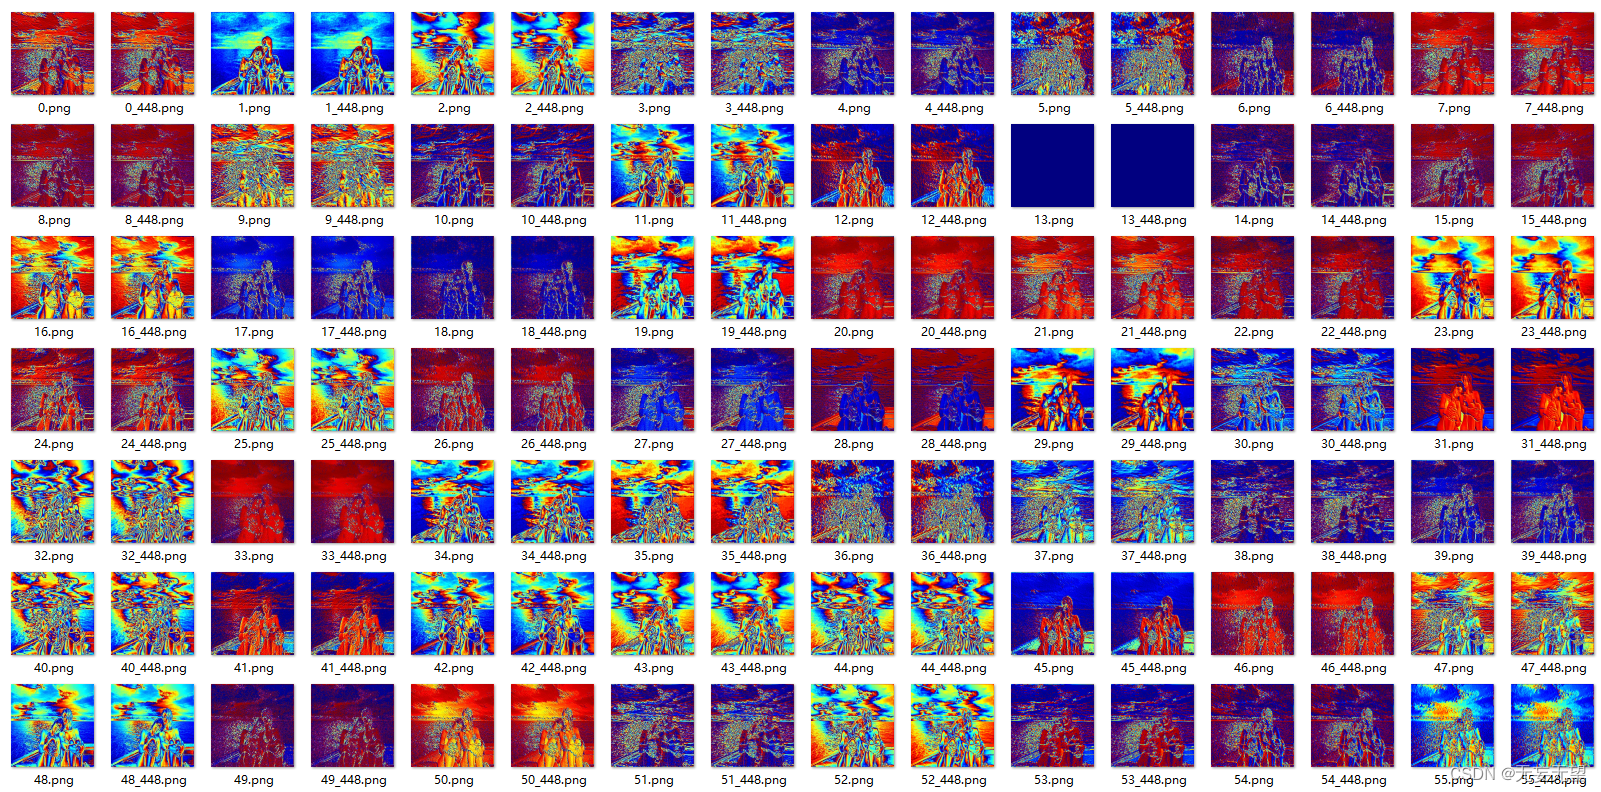
输出
代码
import os
import torch
import torchvision as tv
import torchvision.transforms as transforms
import torch.nn as nn
import torch.optim as optim
import argparse
import skimage.data
import skimage.io
import skimage.transform
import numpy as np
import matplotlib.pyplot as plt
import torchvision.models as models
from PIL import Image
import cv2# 提取某一层网络特征图
class FeatureExtractor(nn.Module):def __init__(self, submodule, extracted_layers):super(FeatureExtractor, self).__init__()self.submodule = submoduleself.extracted_layers = extracted_layersdef forward(self, x):outputs = {}for name, module in self.submodule._modules.items():if "fc" in name:x = x.view(x.size(0), -1)x = module(x)print(name)if (self.extracted_layers is None) or (name in self.extracted_layers and 'fc' not in name):outputs[name] = xreturn outputs
# 这是一个使用PyTorch实现的特征提取器类,可以从一个已经训练好的模型中提取指定层的特征。具体来说,
# 这个类接收两个参数:submodule是一个已经训练好的模型,extracted_layers是一个列表,包含需要
# 提取特征的层的名称。在forward函数中,输入的x首先通过模型的每一层进行前向传播,然后将需要提取的
# 层的输出保存在outputs字典中,最后返回这个字典。需要注意的是,如果需要提取的层的名称
# 不在extracted_layers列表中,那么这个层的输出不会被保存在outputs字典中。
#
# 这个类的实现可以帮助我们更好地理解卷积神经网络中的特征提取过程,同时也可以用于实际的特征
# 提取任务中。def get_picture(pic_name, transform):img = skimage.io.imread(pic_name)img = skimage.transform.resize(img, (448, 448))  # 读入图片时将图片resize成(256,256)的# cv2.inshow(img)img = np.asarray(img, dtype=np.float32)return transform(img)
# 这是一个名为get_picture的函数,它接受两个参数:pic_name和transform。
# 该函数使用scikit-image库读取名为pic_name的图片,并将其resize为(448, 448)的大小。
# 然后将其转换为numpy数组,并将其数据类型设置为float32。最后,该函数将转换后的图像作为
# 参数传递给transform函数,并返回transform函数的输出结果。def make_dirs(path):if os.path.exists(path) is False:os.makedirs(path)
# 这是一个Python函数,用于创建目录。如果目录不存在,则创建目录。如果目录已经存在,则不执行任何操作。pic_dir = r'D:\papercode\experiment\1\mmclassification-master\alldata\data\sadness\sadness_0559.jpg'
transform = transforms.ToTensor()
# 将指定路径下的图片转换为张量(Tensor)格式。其中,transforms.ToTensor()
# 是一个PyTorch中的图像变换函数,用于将PIL Image或者numpy.ndarray类型的图
# 像数据转换为Tensor类型。
img = get_picture(pic_dir, transform)
# 插入维度
img = img.unsqueeze(0)
# PyTorch中,img.unsqueeze(0)的作用是在张量的第0维(即最前面)添加一个维度,使得原来的形状
# 由(H, W)变为(1, H, W)。这个操作通常用于将单张图片转换为批量处理的形式,即将单张图片的形状转
# 换为(1, C, H, W),其中C是通道数。这样做的好处是可以方便地将单张图片和批量图片一起输入到神经
# 网络中进行训练或推理。需要注意的是,img.unsqueeze(0)并不会改变原来张量的形状,而是返回一个
# 新的张量。
device = torch.device("cuda" if torch.cuda.is_available() else "cpu")
img = img.to(device)# net = models.resnet101(pretrained=True).to(device)
net = models.resnet50(pretrained=True).to(device)dst = './feautures'
therd_size = 448myexactor = FeatureExtractor(submodule=net, extracted_layers=None)
output = myexactor(img)
# output是dict
# dict_keys(['conv1', 'bn1', 'relu', 'maxpool', 'layer1', 'layer2', 'layer3', 'layer4', 'avgpool', 'fc'])for idx, val in enumerate(output.items()):k, v = valfeatures = v[0]iter_range = features.shape[0]for i in range(iter_range):# plt.imshow(features.data.cpu().numpy()[i,:,:],cmap='jet')if 'fc' in k:  # 不可视化fc层continue# 这段代码是用于特征可视化的,其中使用了enumerate()# 函数来遍历output字典中的每个键值对,并使用val来存储每个键值对的值。# 然后,将val中的第一个元素赋值给features,并使用features.shape获# 取features的第一个维度的大小,即iter_range。接下来,使用for循环遍# 历iter_range,并在每次迭代中,使用if语句来判断k中是否包含# 'fc',如果包含,则跳过本次迭代,否则执行plt.imshow()# 函数来可视化features中的数据。feature = features.data.cpu().numpy()# 数据转换为numpy数组feature_img = feature[i, :, :]# 获取第i个特征图像feature_img = np.asarray(feature_img * 447, dtype=np.uint8)# 将特征图像转换为numpy数组,并进行数据类型转换# 这段代码的作用是将神经网络中的特征转换为图像,并将其保存为numpy数组。dst_path = os.path.join(dst, str(idx) + '-' + k)# 这行代码是将文件的保存路径设置为dst目录下的一个名为“idx - k”的文件。其中,idx是文件# 的编号,k是文件的名称。os.path.join()# 函数用于将多个路径组合成一个完整的路径名。在这里,它将dst和“idx - k”组合成了一个完整# 的路径名。这个路径名将被用于保存文件。make_dirs(dst_path)feature_img = cv2.applyColorMap(feature_img, cv2.COLORMAP_JET)# 这行代码的作用是将灰度图像着色,使其更加直观。其中,feature_img是输入的灰度图像,# cv2.COLORMAP_JET是颜色映射表,它将灰度值映射到不同的颜色上。具体来说,# COLORMAP_JET将灰度值映射到蓝色、绿色、黄色和红色等颜色上,灰度值越高,颜色越接近红色。if feature_img.shape[0] < therd_size:tmp_file = os.path.join(dst_path, str(i) + '_' + str(therd_size) + '.png')tmp_img = feature_img.copy()tmp_img = cv2.resize(tmp_img, (therd_size, therd_size), interpolation=cv2.INTER_NEAREST)cv2.imwrite(tmp_file, tmp_img)# 这是一个Python代码片段,它的作用是将输入的feature_img图像进行缩放,并将缩放后的图像保存# 到指定的路径dst_path中。如果feature_img的高度小于therd_size,则将其缩放为therd_size# 大小。缩放后的图像将被保存为PNG格式。具体来说,代码中使用了OpenCV库中的cv2.resize()# 函数来进行图像缩放,使用cv2.imwrite()# 函数将缩放后的图像保存到指定路径中dst_file = os.path.join(dst_path, str(i) + '.png')cv2.imwrite(dst_file, feature_img)# 这段代码使用OpenCV库将feature_img保存为png格式的图像文件。其中,dst_file是保存的文件路径,os.path.join()# 函数用于将文件名和路径拼接在一起。cv2.imwrite()# 函数用于将feature_img保存为png格式的图像文件。
