一、共识原理:
1. 文件=内容+属性,内容与属性都是数据,都要在磁盘中保存。
2. 文件分为打开的文件和没打开的文件。
3. 研究打开的文件:本质是研究进程和文件的关系,因为是进程负责打开文件。
4. 没打开的文件在存储介质(如磁盘上)存储。没有被打开的文件非常多,所以文件如何被分门别类地归置好成为了我们需要重视的问题,我们要快速地进行找到并增删查改文件。
二、研究被打开的文件:
1、文件被打开,必须先被加载到内存。而文件的属性必须先加载到内存,而内容是否加载取决于用户后续是否要将文件写入读取。
2、系统启动时默认以文件形式(文件指针/文件句柄file*)打开三个输入输出流。由此观之,一个进程可以打开多个文件。显然,操作系统内部,一定存在大量的被打开的文件!
3、那么OS(操作系统)如何管理这些被打开的文件呢?
先描述,再组织:在内核中,一个被打开的文件都必须有自己的文件打开对象(struct结构体),其中包含文件的很多属性。所有定义的数据结构对象在内核里就可以以链表的形式管理起来,从而对打开文件的管理就转变为对链表的增删查改。
4、常用接口:
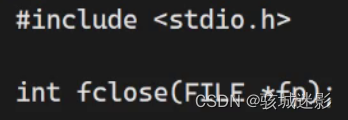

①先打开一个文件试试:
#include <stdio.h>int main()
{//打开文件的路径和文件名,默认在当前路径下新建一个文件。FILE *fp = fopen("log.txt", "w");if(fp == NULL){perror("fopen");return 1;}fclose(fp);return 0;
}
②打开文件的路径和文件名,默认在当前路径下新建一个文件。(如果打开文件不存在,则会新建一个文件。)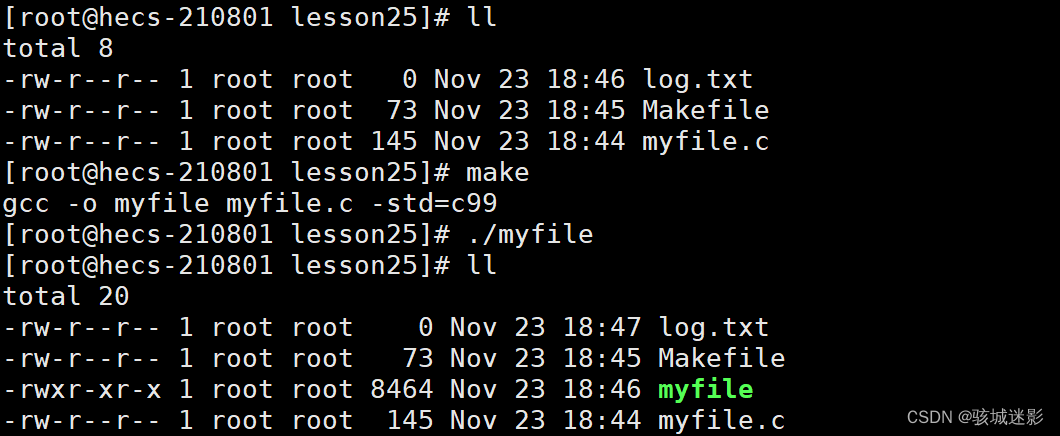
当前路径即为进程当前路径cwd.
那让我们实操一下寻找一下进程的当前路径吧~
#include <stdio.h>
#include <unistd.h>int main()
{printf("Pid: %d\n", getpid());//打开文件的路径和文件名,默认在当前路径下新建一个文件。FILE *fp = fopen("log.txt", "w");if(fp == NULL){perror("fopen");return 1;}fclose(fp);sleep(1000);return 0;
}

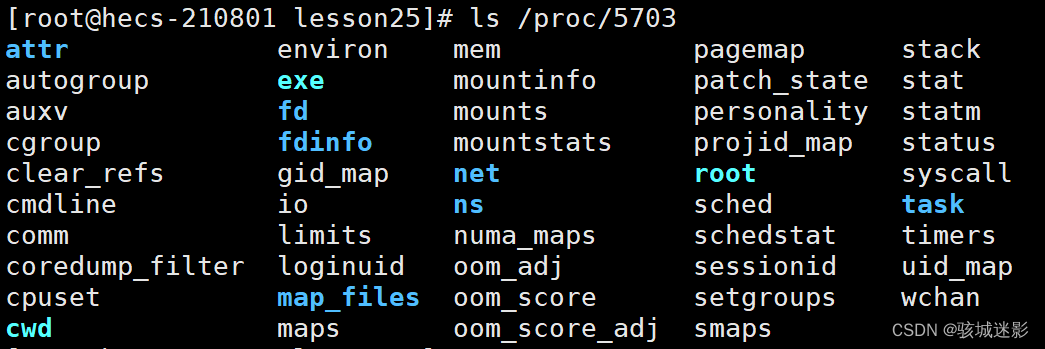
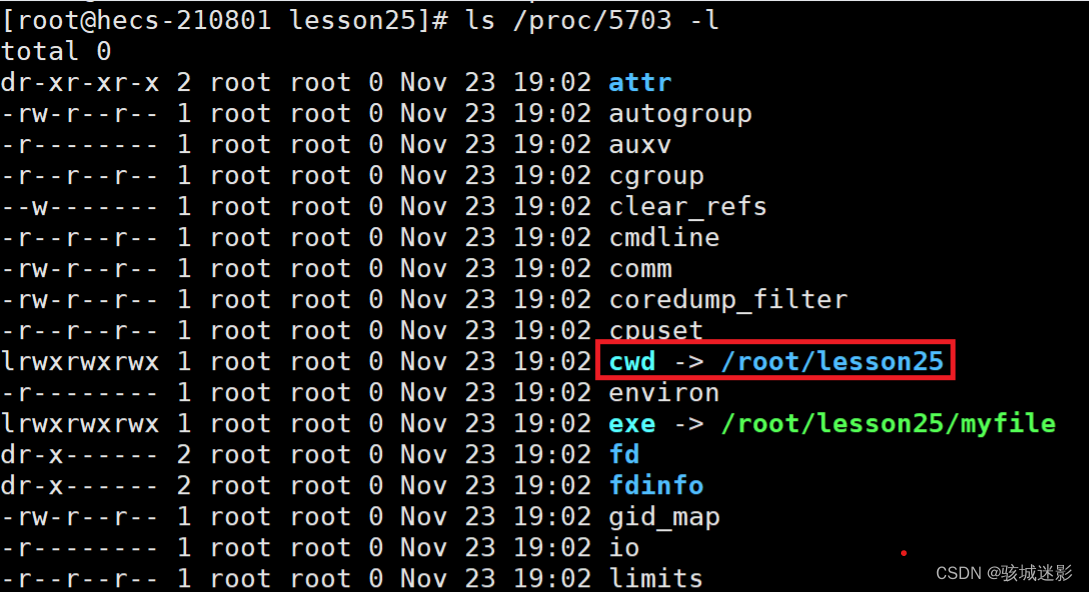
如果用户更改了当前进程的cwd,就可以把文件新建到其他目录。
可以使用chdir()修改路径。

#include <stdio.h>
#include <unistd.h>int main()
{chdir("/home/aaa");//更改当前路径printf("Pid: %d\n", getpid());//打开文件的路径和文件名,默认在当前路径下新建一个文件。FILE *fp = fopen("log.txt", "w");if(fp == NULL){perror("fopen");return 1;}fclose(fp);sleep(1000);return 0;
}
![]()
③ 写入(注:该接口返回值为实际写入基本单位个数,而非总大小):

#include <stdio.h>
#include <unistd.h>
#include <string.h>int main()
{printf("Pid: %d\n", getpid());//打开文件的路径和文件名,默认在当前路径下新建一个文件。FILE *fp = fopen("log.txt", "w");if(fp == NULL){perror("fopen");return 1;}const char *message = "hello Linux message";    //strlen(message)无需+1 ,因为/0是一种不可显字符,会被vim这样的文本编辑器解释成乱码。fwrite(message, strlen(message), 1, fp);        fclose(fp);return 0;
}
w:清空并写入。
重定向写入等同于fopen("log.txt", "w"):
echo "hello Linux" > log.txta:追加写入。
注:在c标准库里,fopen在语言层为用户malloc(FILE),故返回值为FILE*。
④
C语言默认在启动的时候会打开三个标准输入输出流文件:
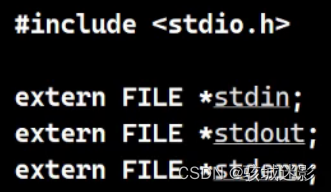
stdin:键盘文件
stdout:显示器文件
stderr:显示器文件
C++默认在启动的时候会打开三个标准输入输出流文件:
cin:键盘文件
cout:显示器文件
cerr:显示器文件
#include <stdio.h>
#include <unistd.h>
#include <string.h>int main()
{printf("Pid: %d\n", getpid());FILE *fp = fopen("log.txt", "w");if(fp == NULL){perror("fopen");return 1;}const char *message = "hello Linux message";//strlen(message)无需+1 fwrite(message, strlen(message), 1, stdout);fclose(fp);return 0;
}

三、过渡到系统,认识文件系统调用
文件其实是在磁盘上的,磁盘是外部设备,访问磁盘文件实际上是访问硬件!几乎所有的库只要是访问硬件设备,必定要封装系统调用接口!

1、open:返回文件描述符表下标
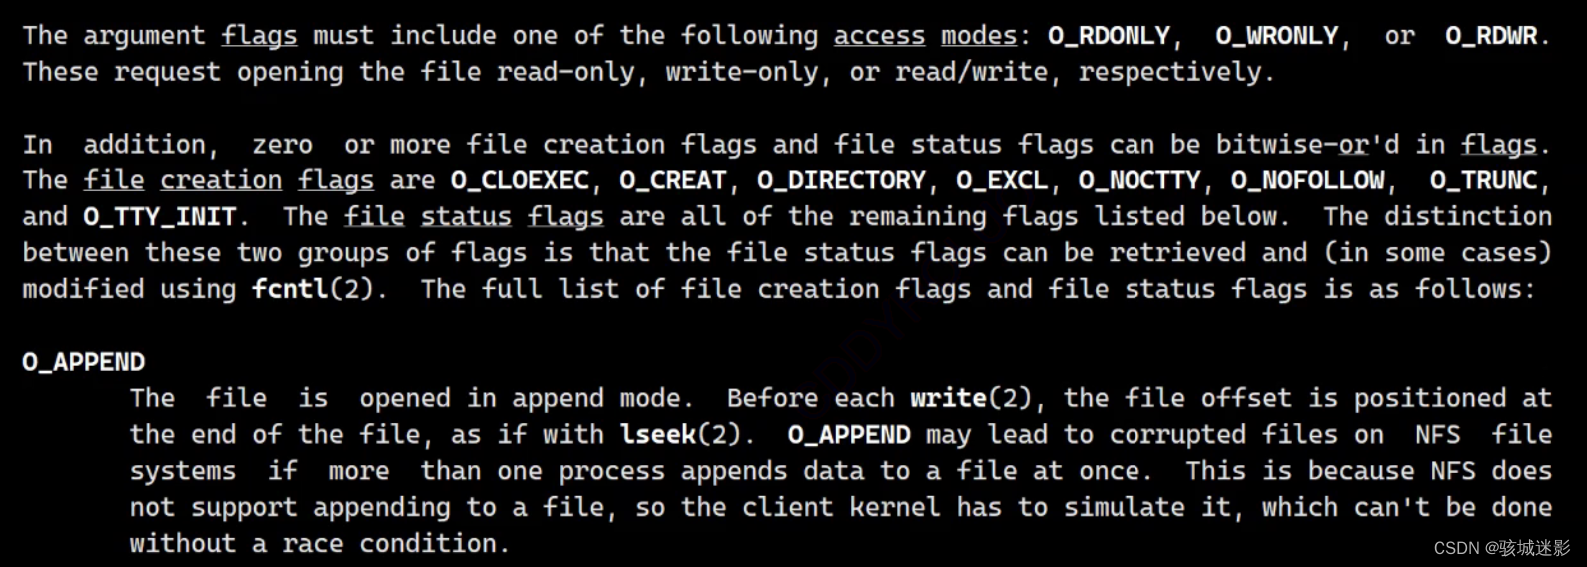
上图的大写选项均为宏,一个整数有32个比特位,一个比特位就能表示一种状态,所以在Linux中仅用一个整数就能同时传递多个比特位,向系统传递多个选项。接下来就让我们用代码阐述比特位级别的标志位传递方式:
#include <stdio.h>
//#include <unistd.h>
//#include <string.h>#define ONE (1<<0)// 1
#define TWO (1<<1)// 2
#define THREE (1<<2)// 4
#define FOUR (1<<3)// 8void show(int flags)
{if(flags&ONE) printf("hello function1\n");if(flags&TWO) printf("hello function2\n");if(flags&THREE) printf("hello function3\n");if(flags&FOUR) printf("hello function4\n");
}int main()
{show(ONE);printf("-----------------\n");show(TWO);printf("-----------------\n");show(ONE|TWO);printf("-----------------\n");show(ONE|TWO|THREE);printf("-----------------\n");show(ONE|TWO|THREE|FOUR);printf("-----------------\n");
}
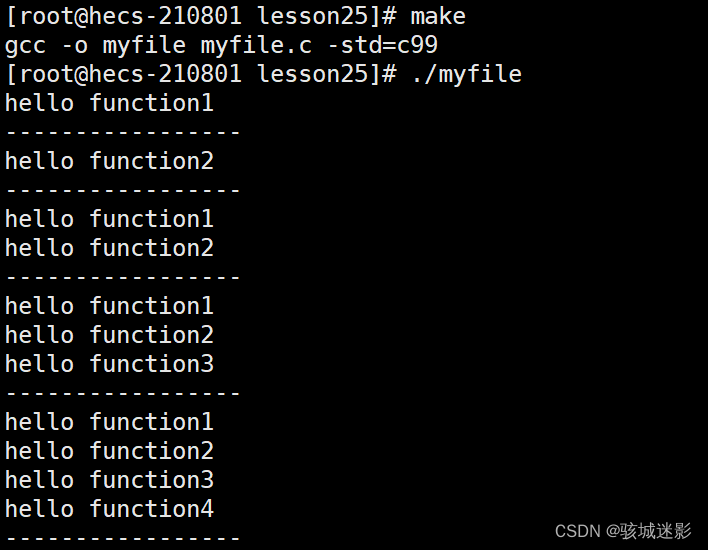
接下来让我们实战演练一下吧:
#include <stdio.h>
#include <unistd.h>
#include <string.h>
#include <sys/types.h>
#include <sys/stat.h>
#include <fcntl.h>int main()
{int fd = open("log.txt", O_WRONLY|O_CREAT, 0666);if(fd < 0){printf("open file error\n");return 1;}return 0;
}

我们会发现一个奇怪的现象,我们打开文件时设置权限为0666,可为何log.txt的权限为0664呢?

这当然是因为当前文件的权限掩码为0022

那要是我们一定要创建文件权限为0666呢?main函数中umask清零即可。
#include <stdio.h>
#include <unistd.h>
#include <string.h>
#include <sys/types.h>
#include <sys/stat.h>
#include <fcntl.h>int main()
{umask(0);//权限掩码清零int fd = open("log.txt", O_WRONLY|O_CREAT, 0666);if(fd < 0){printf("open file error\n");return 1;}return 0;
}
2、close
3、write(覆盖式向文件写入,但不会清空)
#include <stdio.h>
#include <unistd.h>
#include <string.h>
#include <sys/types.h>
#include <sys/stat.h>
#include <fcntl.h>int main()
{umask(0);//file descriptor: 文件描述符,fd,intint fd = open("log.txt",O_WRONLY|O_CREAT,0666);if(fd < 0){printf("open file error\n");return 1;}const char *message = "hello file system call";write(fd, message, strlen(message));//无需+1close(fd);return 0;
}

其余库函数的底层原理都是对系统调用接口的封装。
四、访问文件的本质
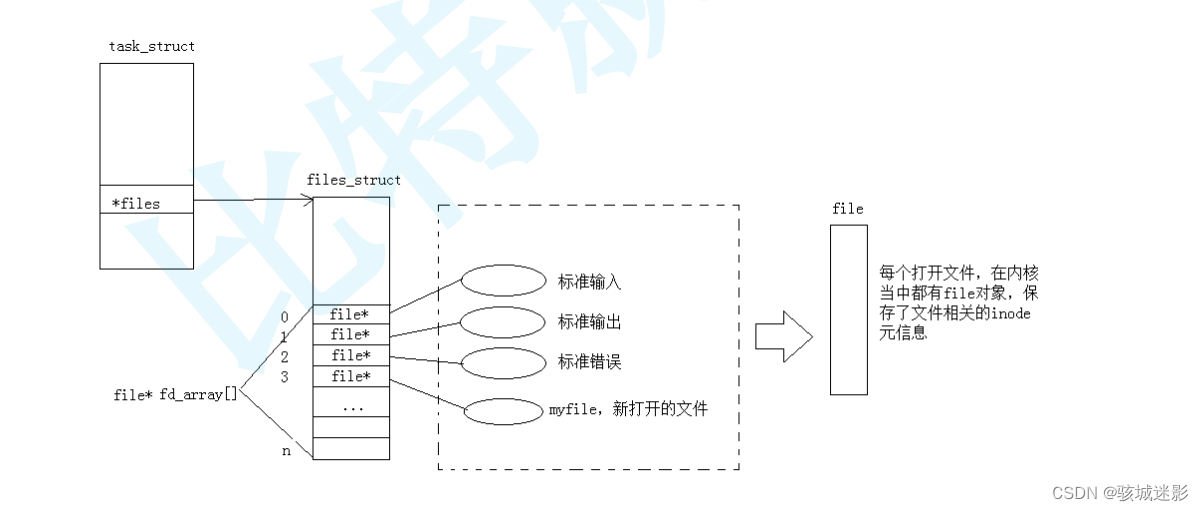
1、操作系统内描述一个被打开文件信息的结构体:struct file。
直接或者间接包含如下属性:在磁盘的位置,文件基本属性(权限,大小,读写位置,打开者),文件的内核缓冲区信息,struct file *next指针,引用计数count,文件描述符表,对应打开文件的缓冲区字段和维护信息。(该结构体对象属于用户,不属于操作系统)
#include <stdio.h>
#include <unistd.h>
#include <string.h>
#include <sys/types.h>
#include <sys/stat.h>
#include <fcntl.h>int main()
{umask(0);//file descriptor: 文件描述符,fd,intint fd = open("log.txt",O_WRONLY|O_CREAT,0666);if(fd < 0){printf("open file error\n");return 1;}printf("fd: %d\n", fd);const char *message = "hello file system call";write(fd, message, strlen(message));//无需+1close(fd);return 0;
}
可是文件描述符表的下标为什么是从三开始呢?

以下对应的文件描述符为:
stdio:键盘文件 0
stdout:显示器文件 1
stderr:显示器文件 2
4、所以这只是C语言的特性吗?不是,这是操作系统的特性进程,默认会打开键盘,显示器,显示器。
5、FILE是C库自己封装的结构体,这里面必须封装文件描述符。
6、文件描述符的分配规则:从0下标开始,寻找最小的没有使用的数组位置,它的下标就是新文件的文件描述符。
总结:两层封装:①库函数封装系统调用接口 ②文件FILE*类型必定包含文件描述符
7、关闭文件的核心动作①引用计数--②文件描述符表数组下标置空。
五、输入输出重定向
1、重定向:
①
#include <stdio.h>
#include <sys/types.h>
#include <sys/stat.h>
#include <fcntl.h>
#include <string.h>
#include <unistd.h>
#define filename "log.txt"int main()
{//close();int fd = open(filename, O_CREAT|O_WRONLY|O_TRUNC, 0666);if(fd < 0){perror("open");return 1;}printf("fd: %d\n", fd);const char *msg = "hello Linux\n";int cnt = 5;while(cnt){write(fd, msg, strlen(msg));cnt--;}close(fd);return 0;
}
以下是关闭不同fd的结果:
close(0);
close(1);
close(2);
由此观之,文件描述符表的分配规则为:从0下标开始,寻找最小的没使用的数组位置,它的下标就是新文件的文件描述符。
②再来做个小实验:
#include <stdio.h>
#include <sys/types.h>
#include <sys/stat.h>
#include <fcntl.h>
#include <string.h>
#include <unistd.h>
#define filename "log.txt"int main()
{//close(1);int fd = open(filename, O_CREAT|O_WRONLY|O_TRUNC, 0666);if(fd < 0){perror("open");return 1;}//printf("fd: %d\n", fd);       const char *msg = "hello Linux\n";int cnt = 5;while(cnt){write(1, msg, strlen(msg));cnt--;}close(fd);return 0;
}
如上代码的结果是这样的:
[root@hecs-210801 lesson21]# ./mytest
hello Linux
hello Linux
hello Linux
hello Linux
hello Linux
关闭下标为1的fd:
#include <stdio.h>
#include <sys/types.h>
#include <sys/stat.h>
#include <fcntl.h>
#include <string.h>
#include <unistd.h>
#define filename "log.txt"int main()
{close(1);int fd = open(filename, O_CREAT|O_WRONLY|O_TRUNC, 0666);//该文件的fd变为1if(fd < 0){perror("open");return 1;}//printf("fd: %d\n", fd);       const char *msg = "hello Linux\n";int cnt = 5;while(cnt){write(1, msg, strlen(msg));cnt--;}close(fd);return 0;
}
[root@hecs-210801 lesson21]# ./mytest
[root@hecs-210801 lesson21]# cat log.txt
hello Linux
hello Linux
hello Linux
hello Linux
hello Linux
本该打印在显示器上的内容转而打印在了普通文件中,这就叫做输出重定向!
重定向的本质:是对进程的指定描述符表进行内核级别的文件对象地址作拷贝的工作。
2、重定向的接口:dup2


①输入重定向:
#include <stdio.h>
#include <sys/types.h>
#include <sys/stat.h>
#include <fcntl.h>
#include <string.h>
#include <unistd.h>#define filename "log.txt"int main()
{//close(1);int fd = open(filename, O_CREAT|O_WRONLY|O_TRUNC, 0666);if(fd < 0){perror("open");return 1;}//printf("fd: %d\n", fd);       //重定向dup2(fd, 1);close(fd);const char *msg = "hello Linux\n";int cnt = 5;while(cnt){write(1, msg, strlen(msg));cnt--;}close(fd);return 0;
}

②输出重定向:
int main()
{int fd = open(filename, O_RDONLY);if(fd < 0){perror("open");return 1;}dup2(fd, 0);char inbuffer[1024];ssize_t s = read(0, inbuffer, sizeof(inbuffer)-1);if(s>0){inbuffer[s] = '\0';printf("echo %s\n", inbuffer);}close(fd);return 0;
}

3、 内存管理和文件操作解耦:进程历史打开的文件与进行的各种重定向关系都和未来进行程序替换无关!程序替换并不影响文件访问!
4、将stdout中内容写到stderr:
[root@hecs-210801 lesson21]# 2>&1
六、如何理解“一切皆文件”:
1、所有操作计算机的动作,都是以进程的形式进行操作的,所有访问文件的操作,最终都是由进程来访问文件的。
2、文件都可以以文件的形式被操作系统用open打开,每一个文件都要在内核中创建一个结构体对象(struct file),还创建了一个方法级对象(struct operation_func)(分为基类与派生类),通过struct file中的指针指向struct operation_func,其中的函数指针指向底层方法。
3、上层统一使用一个read接口,直接通过一个数据结构调用读方法写方法,它可以根据指针指向的不同,动态的根据不同的设备,使用不同的方法。(多态)
4、以上的设计称为VFS(虚拟文件系统)
七、重定向缓冲区
1、观察下列两组代码:
①C接口
#include <stdio.h>
#include <string.h>
#include <unistd.h>int main()
{//C接口const char *fstr = "hello fwrite";printf("hello printf"); // stout ->1fprintf(stdout, "hello fprintf");// stout -> 1fwrite (fstr, strlen(fstr), 1, stdout);// fread, stout->1close(1);return 0;
}
输出结果:不打印任何内容
[root@hecs-210801 lesson24]# make
gcc -o myfile myfile.c -std=c99
[root@hecs-210801 lesson24]# ./myfile
②系统调用接口
#include <stdio.h>
#include <string.h>
#include <unistd.h>int main()
{//操作系统提供的systemcallconst char *str = "hello write";write(1, str, strlen(str));close(1);return 0;
}
输出结果:打印
[root@hecs-210801 lesson24]# make
gcc -o myfile myfile.c -std=c99
[root@hecs-210801 lesson24]# ./myfile
hello write[root@hecs-210801 lesson24]#
2、为什么会出现这种现象呢?
系统调用接口能直接通过进程找到数据对象将数据写到了系统内部缓冲区中,close自动将数据刷新打印。而C语言缓冲区是用户级缓冲区,不是系统级别的缓冲区,一定不在操作系统内部!只有在合适的时候,c库才会调用对应的write接口,将数据写入到操作系统里面。(语言都属于用户层,不属于操作系统。)
而调用close把1号文件描述符关闭,进程退出时无法刷新C语言缓冲区,所以C程序没有对应的显示结果。而系统接口通过操作系统直接写到系统级缓冲区内部,直接交给操纵系统的数据自然而然就能被刷新出来啦!(目前我们认为,只要将数据刷新到了内核,数据就可以到硬件了。)(一般情况下,在进程退出的时候也会刷新完成区。)
当然,使用\n能够立刻清空缓冲区,显示器的文件的刷新方案是行刷新,所以在printf执行遇到\n的时候,将数据进行刷新。(刷新的本质就是将数据通过1号文件描述符和write写入到内核中)。
这不由得让我们想起了之前所讲的exit和_exit,感兴趣的同学请自行阅读上一篇文章——进程控制哦。
3、(应用层)缓冲区刷新策略:
①无缓冲--直接刷新。
②行缓冲--不刷新,直到碰到\n。
③全缓冲--缓冲区满了,才刷新(普通文件写入)(重定向:若将显示器打印变成向文件打印,缓冲方案变成了全缓冲,遇到\n不再刷新)。
4、为什么要有这个缓冲区?
①解决效率问题-用户的效率问题。
②配合格式化。
5、fork创建子进程时:
操作系统在对这个缓冲区做写入的时候,发生写时拷贝,父子进程各自私有一份,最后被系统向文件刷新了两份同样的数据。
①重定向刷新方案发生更改
②数据在写入时在缓冲区由刷新改为暂存,因为缓冲区没有被写满。
③fork后父子退出时均要刷新缓冲区,且共享该缓冲区,各自刷新一次。
八、模拟实现
Mystdio.h
//Mystdio.h//#pragma once
#ifndef __MYSTDIO_H__
#define __MYSTDIO_H__#include <string.h>#define SIZE 1024#define FLUSH_NOW 1 //立即刷新
#define FLUSH_LINE 2 //行刷新
#define FLUSH_ALL 4 //全刷新typedef struct IO_FILE{int fileno;int flag;char inbuffer[SIZE];//输入缓冲区char outbuffer[SIZE];//输出缓冲区int in_pos;int out_pos;
}_FILE;_FILE *_fopen(const char*filename, const char* flag);
int _fwrite(_FILE *fp, const char *s, int len);
void _fclose(_FILE *fp);#endif
Mystdio.c
//Mystdio.c#include "Mystdio.h"#include <sys/types.h>
#include <sys/stat.h>
#include <fcntl.h>
#include <stdlib.h>
#include <unistd.h>
#include <assert.h>#define FILE_MODE 0666//"w","a","r"
_FILE *_fopen(const char*filename, const char* flag)
{assert(filename);assert(flag);int f = 0;int fd = -1;if(strcmp(flag,"w") == 0){f = (O_CREAT|O_WRONLY|O_TRUNC);fd = open(filename, f, FILE_MODE);}else if(strcmp(flag,"a") == 0){f = (O_CREAT|O_WRONLY|O_APPEND);fd = open(filename, f, FILE_MODE);}else if(strcmp(flag,"w") == 0){f = O_RDONLY;fd = open(filename, f);}else{return NULL;}if(fd == -1) return NULL;_FILE* fp =  (_FILE*)malloc(sizeof(_FILE));if(fp == NULL) return NULL;fp->fileno = fd;fp->flag = FLUSH_LINE;fp->out_pos = 0;return fp;}int _fwrite(_FILE *fp, const char *s, int len)
{memcpy(&fp->outbuffer[fp->out_pos], s, len);//没有做异常处理,也不考虑局部问题。fp->out_pos += len;if(fp->flag & FLUSH_NOW){write(fp->fileno, fp->outbuffer, fp->out_pos);fp->out_pos = 0;}else if(fp->flag & FLUSH_LINE){if(fp->outbuffer[fp->out_pos-1] == '\n'){write(fp->fileno, fp->outbuffer, fp->out_pos);fp->out_pos = 0;}}else if(fp->flag & FLUSH_ALL){if(fp->out_pos == SIZE){write(fp->fileno, fp->outbuffer, fp->out_pos);fp->out_pos = 0;}}return len;
}void _fflush(_FILE *fp)
{if(fp->out_pos > 0){write(fp->fileno, fp->outbuffer, fp->out_pos);fp->out_pos = 0;}
}void _fclose(_FILE *fp)
{if(fp == NULL) return;_fflush(fp);close(fp->fileno);free(fp);
}
main.c
//main.c
#include "Mystdio.h"
#include <unistd.h>
#define myfile "test.txt"int main()
{_FILE * fp = _fopen(myfile, "w");if(fp == NULL) return 1;const char *msg = "hello world\n";int cnt = 10;while(cnt){_fwrite(fp, msg, strlen(msg));//fflush(fp);sleep(5);cnt--;}_fclose(fp);return 0;
}



![[黑皮系列] 计算机网络:自顶向下方法(第8版)](https://img-blog.csdnimg.cn/direct/459fe81a9f264dfd9483a468e5702892.jpeg#pic_center)

