背景
在完成代码后,想做一个较低层级的代码自检,来完善自己代码的质量
技术选型
在结合现有项目情况下,结合Jenkins走CI CD过程,选择了sonarqube
安装
下载地址:自己搜
安装教程我来出,首先sonarqube完整的过程分了两部分,第一部分也就是服务部分,以此来说明sonr服务是有了,但是要对自己代码进行检查还得结合sonarScanner,这个作为扫描本地代码的执行入口。
正文
第一部分-sonarqube
这里采用的docker进行安装,所以相对来将比较容易。(docker安装应用很丝滑,强烈安利),安装成功后,在浏览器中输入IP地址+端口(1.1.1.1:9000)类似这种,端口号可以在安装的时候进行指明。
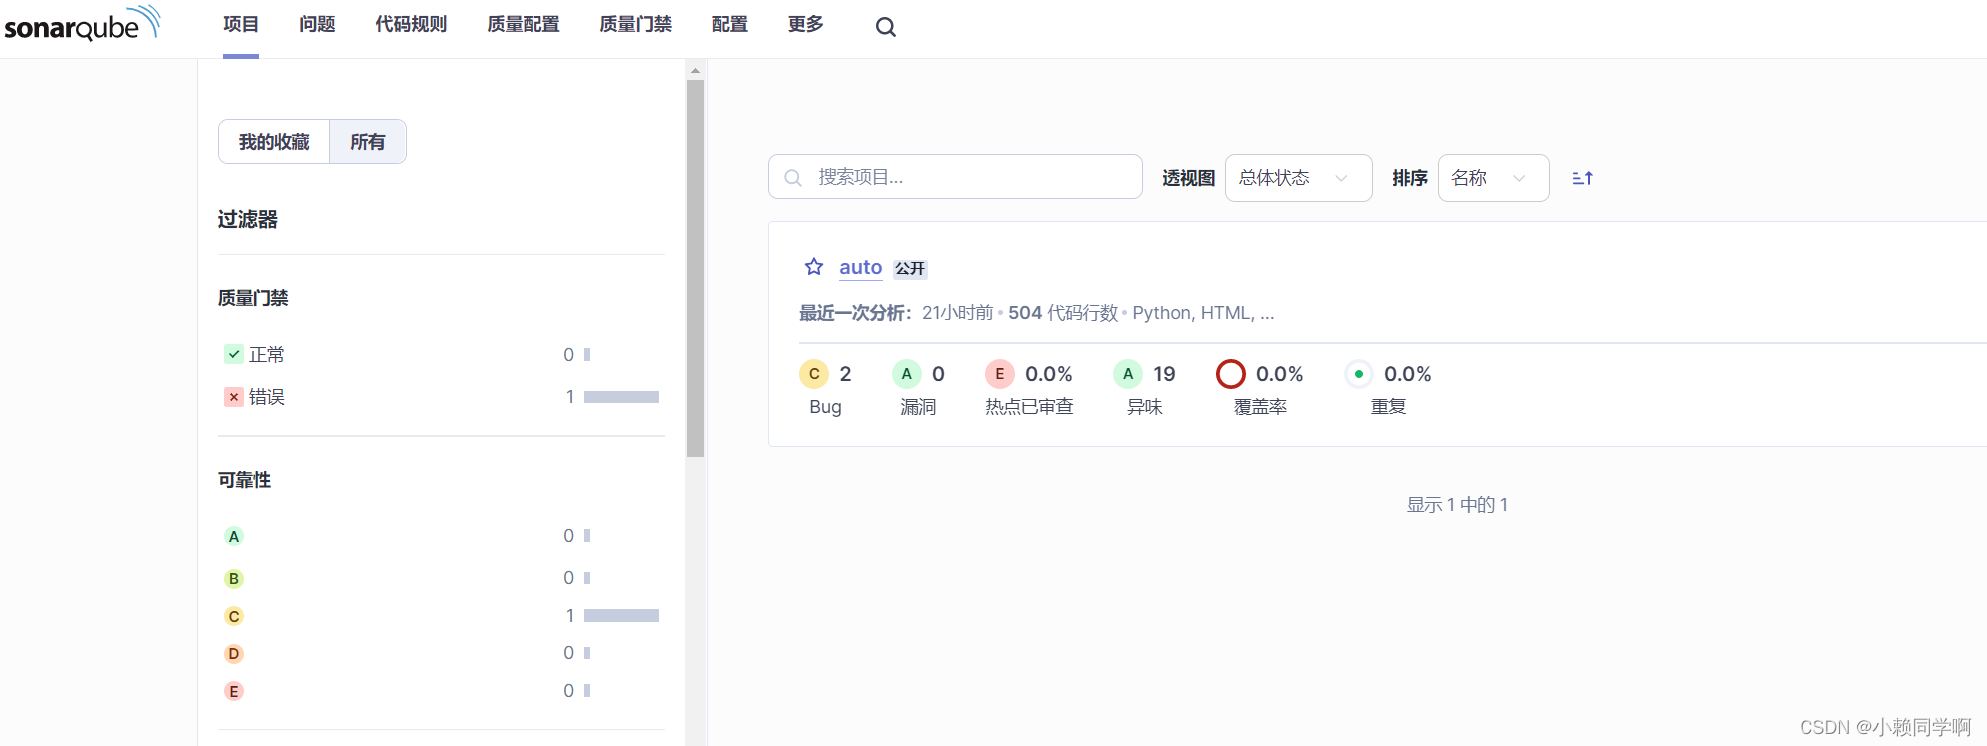
成功登录,并访问,说明sonarqub已经安装成功,这里需要特别说明的一点是:
- Community Edition
- 版本 10.3 (build 82913)
- 在这版本之前 已经不清楚是那个版本了,还支持mysql的,现在这个版本已经不再支持mysql作为底层数据库,不过这样也好,之前为它安装mysql 很费劲。这里采用的PostgreSQL
如果不为sonar安装数据库,在执行sonarScanner的时候,不会报错,但是在Scanner执行成功后,在首页是看不到对应执行结果的可视化。而且页面也会提示"主分支没有代码"和页面底部会提示"内部数据库仅支持测试用,若需要高级测试,请为此安装外部数据库"
PostgreSQL的用法
列出所有数据库:\l
创建数据库:create databases 数据库名;
其他命令自己百度查看。
还需要特别说明一点的时,在sonar.properties配置数据库的时候,由localhost改为ip。不然提示来连接拒绝。如下进行配置
# User credentials.
# Permissions to create tables, indices and triggers must be granted to JDBC user.
# The schema must be created first.
sonar.jdbc.username=postgres
sonar.jdbc.password=123456#sonar.jdbc.url=jdbc:mysql://192.168.40.64:3306/sonarqube?useUnicode=true&characterEncoding=utf8&rewriteBatchedStatements=true&useConfigs=maxPerformance&useSSL=false#----- Embedded Database (default)
# H2 embedded database server listening port, defaults to 9092
#sonar.embeddedDatabase.port=9092#----- Oracle 19c/21c
# The Oracle JDBC driver must be copied into the directory extensions/jdbc-driver/oracle/.
# Only the thin client is supported, and we recommend using the latest Oracle JDBC driver. See
# https://jira.sonarsource.com/browse/SONAR-9758 for more details.
# If you need to set the schema, please refer to http://jira.sonarsource.com/browse/SONAR-5000
#sonar.jdbc.url=jdbc:oracle:thin:@localhost:1521/XE#----- PostgreSQL 11 or greater
# By default the schema named "public" is used. It can be overridden with the parameter "currentSchema".
sonar.jdbc.url=jdbc:postgresql://192.168.40.64/sonarqube?currentSchema=public
至此,sonarqube部分的安装就已经安装成功,值得注意的时,为它安装新的数据后,重启生效且登录名和密码变为初始密码和账户。
第二部分-sonarScanner
如果扫描本地代买需要在指定项目的根目录创建一个 sonar-project.properties
# must be unique in a given SonarQube instance
sonar.projectKey=auto
sonar.findbugs.allowuncompiledcode=true
# --- optional properties ---# defaults to project key  这个必须要
sonar.projectName=auto
# defaults to 'not provided'  这个用于版本说明
sonar.projectVersion=1.0# Path is relative to the sonar-project.properties file. Defaults to . 用于指定扫描代码路径
sonar.sources=C:/devlopePath/new_nergeryApp_auto# Encoding of the source code. Default is default system encoding
#sonar.sourceEncoding=UTF-8
#
#sonar.host.url=http://localhost:9000
#
#sonar.login=admin  开了鉴权或者安装的时候需要
#
#sonar.password=adminadmin
#
#sonar.language=python
#
#sonar.scm.provider=git#sonar.python.binaries=C:\\devlopePath\\new_nergeryApp_auto
然后去下载对应的sonarScanner下载好后,可以将其路径作为环境变量写入到系统环境变量中,我这里就没有这要操作,所以执行命令的时候需要指明Scanner启动命令的位置
C:\applicationloadPath\sonar-scanner-5.0.1.3006-windows\bin\sonar-scanner.bat -D"sonar.projectKey=localPython" -D"sonar.sources=." -D"sonar.host.url=http://192.168.40.64:9000" -D"sonar.token=sqp_a0d5d4f686d3f817ad9d2242c05cd2b9b0de997b"需要特别说明的是,需要在项目根目录中执行这条命令,里面的参数值更具实际情况变动。执行完毕后,刷新页面。就可以看到对应的扫描结果

留点悬念
1.在Jenkins中完成同样操作的实现过程,我也知道啊!


