微信小程序第三章
文章目录
- 微信小程序第三章
- 3. API
- 3.1 分类
- 3.2 常用 API 的使用方法
- 3.2.1 小程序生命周期
- 3.2.1.1 onLaunch
- 3.2.1.2 onShow
- 3.2.1.3 onHide
- 3.2.1.4 onError
- 3.2.2 路由
- 3.2.2.1 wx.navigateTo
- 3.2.2.2 wx.redirectTo
- 3.2.2.3 wx.reLaunch
- 3.2.2.4 wx.switchTab
- 3.2.3 网络请求
- 3.2.3.1 wx.request
- 3.2.3.2 wx.downloadFile
- 3.2.3.3 wx.uploadFile
- 3.2.4 webSocket
- 3.2.4.1 wx.connectSocket
- 3.2.4.2 wx.onSocketOpen
- 3.2.4.3 wx.onSocketMessage
- 3.2.4.4 wx.sendSocketMessage
- 3.2.4.5 wx.closeSocket
- 3.2.5 本地存储
- 3.2.5.1 wx.setStorageSync
- 3.2.5.2 wx.getStorageSync
- 3.2.5.3 wx.removeStorageSync
- 3.2.5.4 wx.clearStorageSync
- 3.2.6 文件操作
- 3.2.6.1 wx.saveFile
- 3.2.6.2 wx.getSavedFileList
- 3.2.6.3 wx.getSavedFileInfo
- 3.2.6.4 wx.removeSavedFile
- 3.2.6.5 wx.openDoc
- 3.2.7 位置信息
- 3.2.7.1 wx.getLocation
- 3.2.7.2 wx.chooseLocation
- 3.2.7.3 wx.openLocation
- 3.2.8 动画
- 3.2.8.1 wx.createAnimation
- 3.2.8.2 animation.translate
- 3.2.8.3 animation.rotate
- 3.2.8.4 animation.scale
- 3.2.8.5 animation.opacity
- 3.2.8.6 animation.step
- 3.2.9 交互反馈
- 3.2.10.1 wx.showToast
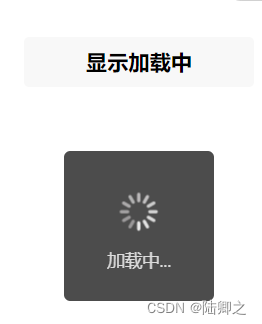
- 3.2.10.2 wx.showLoading
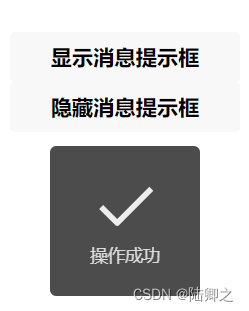
- 3.2.10.3 wx.hideToast
- 3.2.10.4 wx.hideLoading
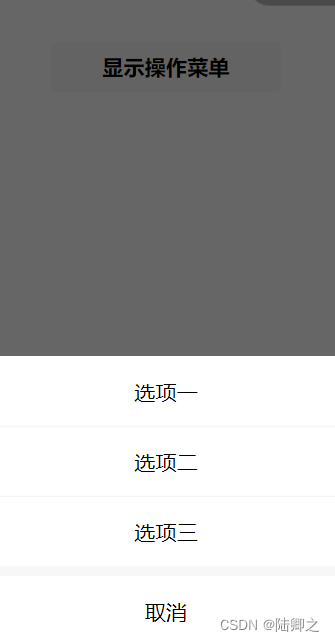
- 3.2.10.5 wx.showActionSheet
- 3.2.10 导航栏
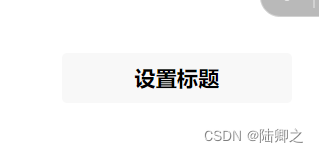
- 3.2.10.1 wx.setNavigationBarTitle
- 3.2.10.2 wx.setNavigationBarColor
- 3.2.10.3 wx.showNavigationBarLoading
- 3.2.11 下拉刷新
- 3.2.11.1 enablePullDownRefresh
- 3.2.11.2 onPullDownRefresh
- 3.2.11.3 stopPullDownRefresh
- 3.2.12 摄像头
- 3.2.12.1 wx.chooseImage
- 3.2.12.2 wx.previewImage
- 3.2.12.3 wx.saveImageToPhotosAlbum
- 3.2.13 扫码
- 3.2.13.1 wx.scanCode
- 3.2.14 蓝牙
- 3.2.14.1 wx.openBluetoothAdapter
- 3.2.14.2 wx.startBluetoothDevicesDiscovery
- 3.2.14.3 wx.stopBluetoothDevicesDiscovery
- 3.2.14.4 wx.getConnectedBluetoothDevices
- 3.2.14.5 wx.createBLEConnection
- 3.2.14.6 wx.closeBLEConnection
- 3.2.14.7 wx.writeBLECharacteristicValue
- 3.2.14.8 wx.readBLECharacteristicValue
- 3.2.15 iBeacon
- 3.2.15.1 wx.startBeaconDiscovery
- 3.2.15.2 wx.stopBeaconDiscovery
- 3.2.16 NFC
- 3.2.16.1 wx.getHCEState
- 3.2.16.2 wx.startHCE
- 3.2.16.3 wx.stopHCE
- 3.2.17 剪贴板
- 3.2.17.1 wx.setClipboardData
- 3.2.17.2 wx.getClipboardData
- 3.2.18 用户信息
- 3.2.18.1 wx.login
- 3.2.18.2 wx.getUserInfo
- 3.2.18.3 wx.checkSession
- 3.2.19 微信支付
- 3.2.19 wx.requestPayment
3. API
微信小程序的API是一组提供给开发者使用的接口,可以帮助开发者快速地构建小程序应用,并提供了丰富地功能和交互效果。
3.1 分类
事件监听API
特点:以on开头,用来监听某些事件的触发
例如:onLaunch、onShow、onHide、onError:用于监听小程序的生命周期事件,例如小程序初始化、显示、隐藏、错误等事件。
同步API
特点:以sync结尾的API都是同步API。同步API的执行结果,可以通过函数返回值直接获取,如果执行出错会抛出异常。
例如:wx.requestSync:发起同步的网络请求。
异步API
特点:类似于jQuery中的$.ajax(options)函数,需要通过success,fail,complete接收调用的结果
例如:wx.request:发起异步的网络请求。
3.2 常用 API 的使用方法
3.2.1 小程序生命周期
| API | 说明 |
|---|---|
| onLaunch | 小程序初始化事件 |
| onShow | 小程序显示事件 |
| onHide | 小程序隐藏事件 |
| onError | 小程序错误事件 |
3.2.1.1 onLaunch
小程序初始化完成时触发一次,在小程序的整个生命周期内只会执行一次

app.js
App({onLaunch:function(){console.log("小程序初始化完成")}
})
3.2.1.2 onShow
小程序启动或从后台进入前台时触发

app.js
App({onShow: function () {console.log('小程序显示');}
})
3.2.1.3 onHide
小程序从前台进入后台时会触发该事件
app.js
App({onHide: function () {console.log('小程序隐藏');}
});
3.2.1.4 onError
捕获小程序运行期间的错误,但它只能捕获到脚本错误和 API 调用失败的情况。对于一些其他类型的错误,比如网络请求失败或资源加载失败,可能无法通过 onError 事件来捕获
App({onError: function (error) {console.log('小程序发生错误:', error);}
});
3.2.2 路由
| API | 说明 |
|---|---|
| wx.navigateTo | 跳转到应用内的某个页面 |
| wx.redirectTo | 关闭当前页面,跳转到应用内的某个页面 |
| wx.reLaunch | 关闭所有页面,打开应用内的某个页面 |
| wx.switchTab | 跳转到tabBar页面,并关闭其他所有非tabBar页面 |
3.2.2.1 wx.navigateTo

demo.wxml
<button bindtap="navigateToNewPage">跳转到新页面</button>
demo.js
Page({navigateToNewPage: function () {wx.navigateTo({url: '/pages/index/index'});}
});
3.2.2.2 wx.redirectTo

demo.wxml
<button bindtap="navigateToNewPage">跳转到新页面</button>
demo.js
Page({navigateToNewPage: function () {wx.redirectTo({url: '/pages/index/index'});}
});
3.2.2.3 wx.reLaunch

demo.wxml
<button bindtap="navigateToNewPage">跳转到新页面</button>
demo.js
Page({navigateToNewPage: function () {wx.reLaunch({url: '/pages/index/index'});}
});
3.2.2.4 wx.switchTab
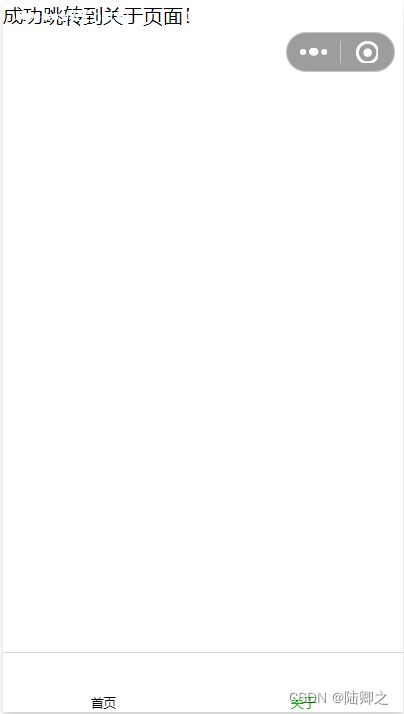
app.json
{"pages": ["pages/demo/demo","pages/index/index","pages/logs/logs","pages/about/about"],
"tabBar": {"list": [{"pagePath": "pages/index/index","text": "首页"},{"pagePath": "pages/about/about","text": "关于"}]}
}
demo.wxml
<button bindtap="switchToAbout">跳转到关于页面</button>
demo.js
Page({switchToAbout() {wx.switchTab({url: '/pages/about/about',});},
});
about.wxml
<text>成功跳转到关于页面!</text>
3.2.3 网络请求
| API | 说明 |
|---|---|
| wx.request | 发起HTTPS网络请求 |
| wx.downloadFile | 下载文件资源到本地 |
| wx.uploadFile | 上传本地资源到服务器 |
3.2.3.1 wx.request

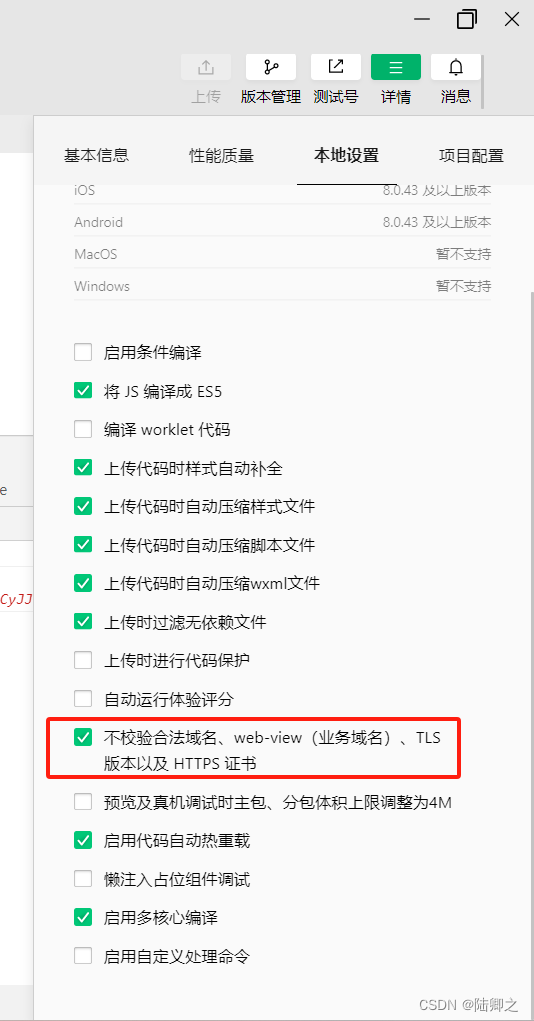
编写之前设置
demo.wxml
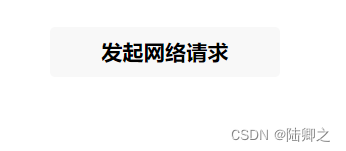
<view class="container"><button bindtap="requestData">发起网络请求</button>
</view>
demo.js
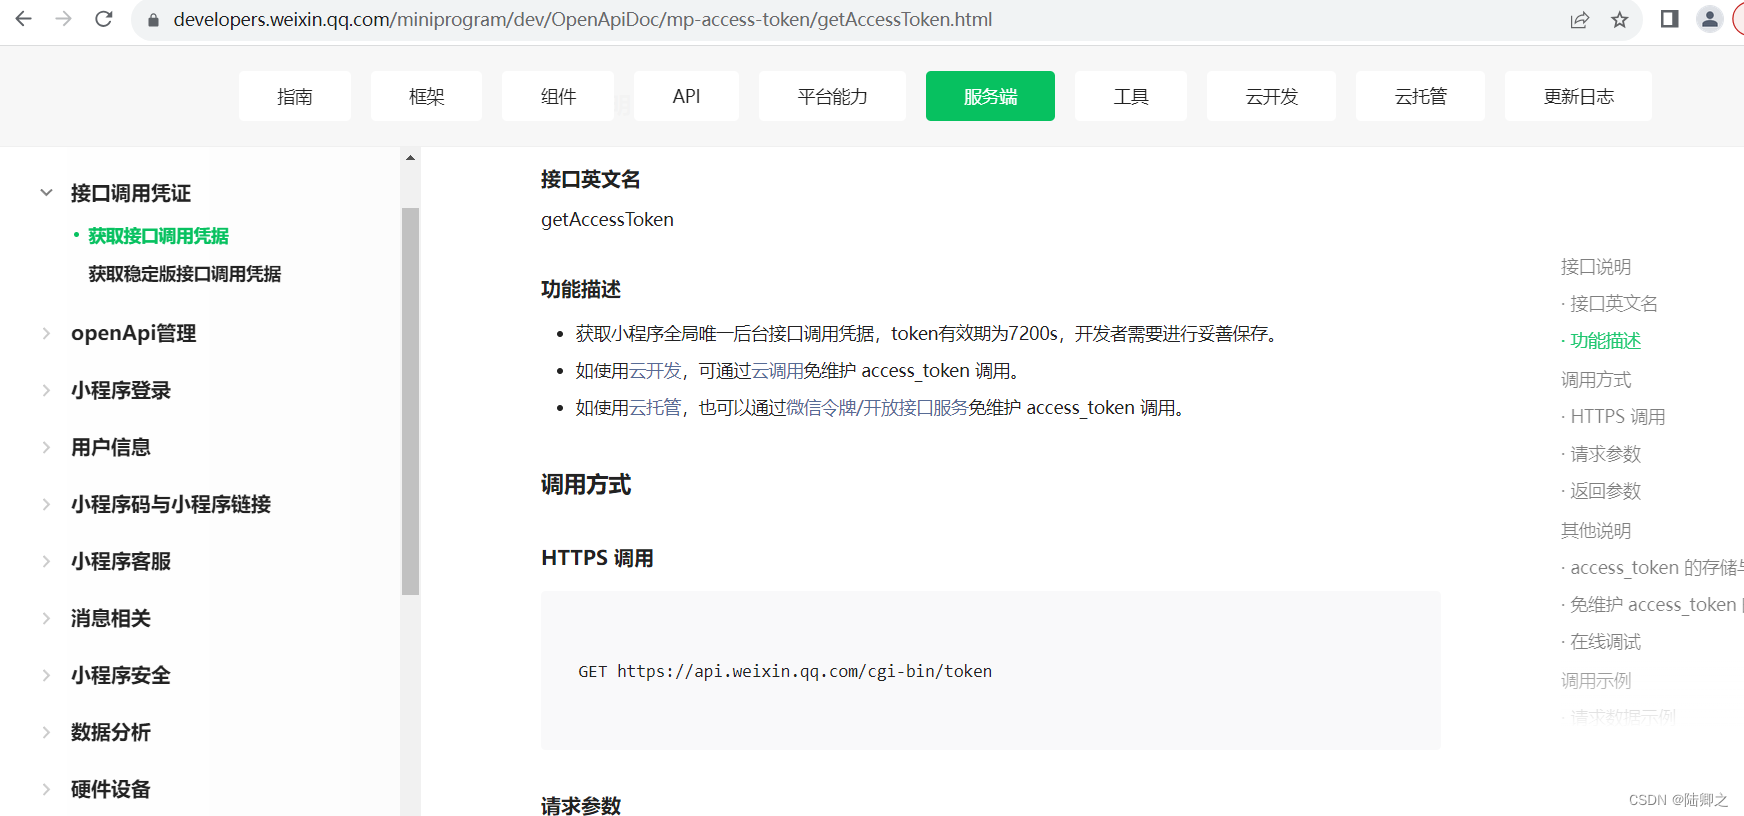
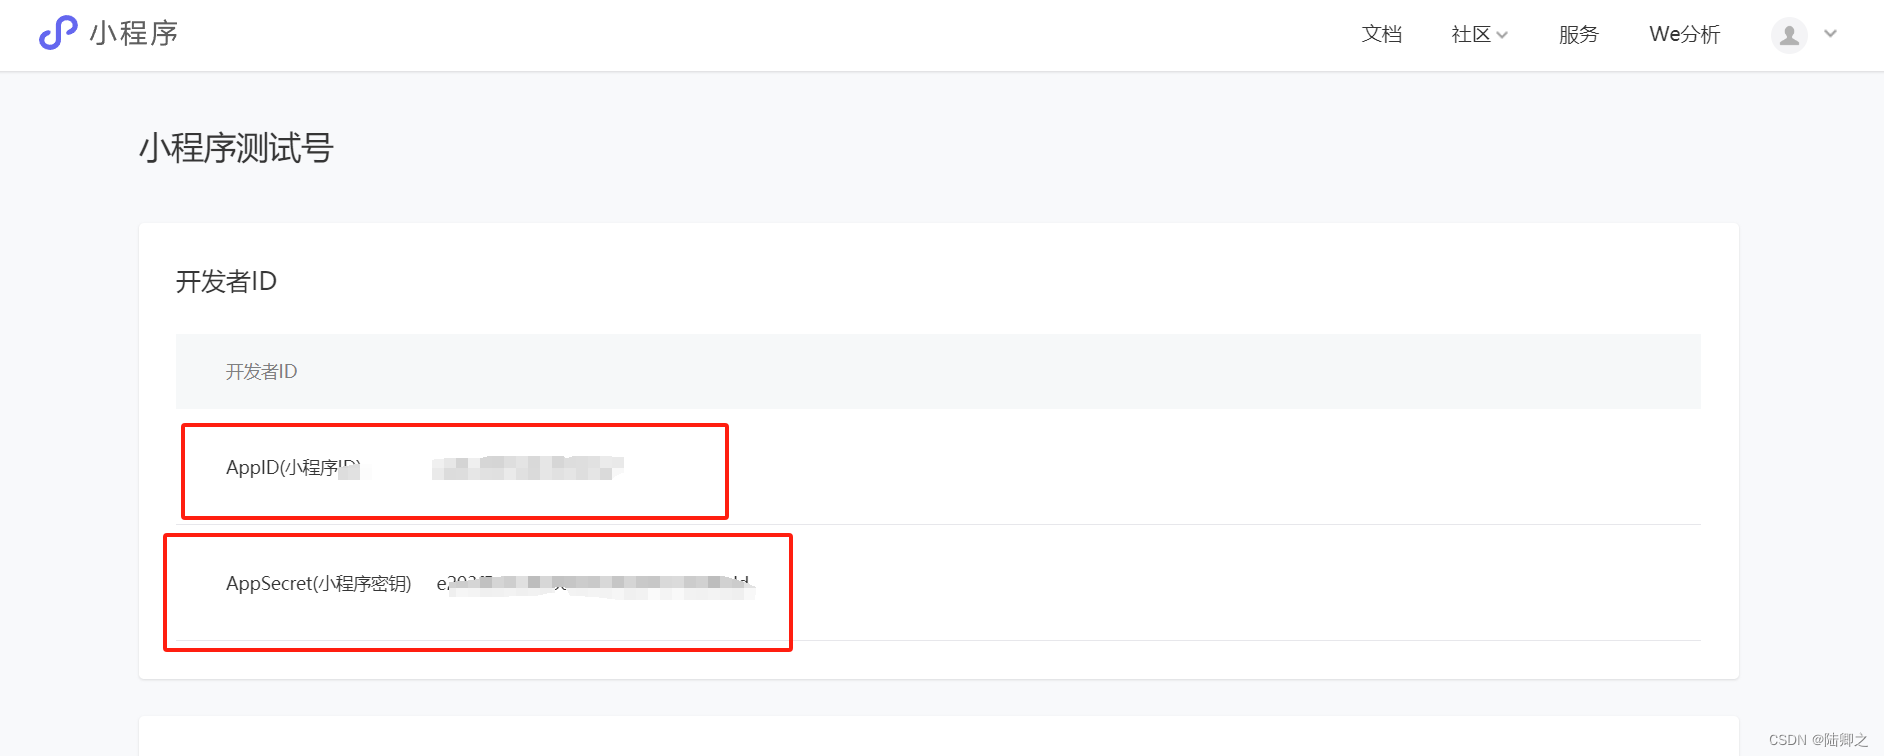
Page({requestData() {wx.request({url: 'https://api.weixin.qq.com/cgi-bin/token',method: 'GET',data: {grant_type: 'client_credential',appid: 'AppID',secret: 'AppSecret'},success(res) {console.log("获取到的数据")console.log(res.data); // 打印返回的数据,包括访问令牌// 在这里可以对返回的数据进行处理,例如保存访问令牌到全局变量中},fail(err) {console.error(err); // 打印请求失败的信息// 在这里可以处理请求失败的情况,例如显示错误提示}});},
});
demo.json
{"networkTimeout": { // 网络请求超时时间的配置"request": 10000, // 请求超时时间,单位为毫秒"downloadFile": 10000 // 下载文件超时时间,单位为毫秒},"debug": true, // 是否开启调试模式,开启后可以在开发者工具中查看详细的日志信息"appid": "AppID", // 小程序的 AppID,这里的 "touristappid" 是示例值,请替换为真实的 AppID"setting": {"urlCheck": true, // 是否开启请求域名校验,开启后每个请求都会进行域名校验"mpSafeAreaInsetBottom": true // 是否适配 iPhone X 底部安全区域},"onReachBottomDistance": 50, // 页面上拉触底事件触发时距离底部的距离,单位为像素"permission": { // 小程序需要申请的权限列表"scope.userLocation": { // 用户位置信息权限"desc": "效果展示" // 提示用户授权位置信息的说明文本}},"requiredBackgroundModes": ["audio"], // 需要在后台运行的能力列表,这里指定需要音频播放能力"navigateToMiniProgramAppIdList": ["touristappid"] // 可以跳转到的其他小程序的 AppID 列表,这里只有一个示例值,请替换为真实的 AppID
}
3.2.3.2 wx.downloadFile

demo.wxml
<view><button bindtap="handleDownloadImage">下载图片</button>
</view>
demo.json
"permission": { // 小程序需要申请的权限列表"scope.userLocation": { // 用户位置信息权限"desc": "保存图片到相册"  // 提示用户授权位置信息的说明文本
}
demo.js
Page({// 点击按钮触发下载并保存图片的操作handleDownloadImage() {// 图片的网络地址const imageUrl = 'https://img1.baidu.com/it/u=1699929707,733321099&fm=253&fmt=auto&app=120&f=JPEG?w=1422&h=800';// 下载图片文件wx.downloadFile({url: imageUrl, // 图片的网络地址success: (res) => { // 下载成功的回调函数if (res.statusCode === 200) { // 判断下载是否成功const tempFilePath = res.tempFilePath; // 下载的临时文件路径// 将图片保存到相册wx.saveImageToPhotosAlbum({filePath: tempFilePath, // 需要保存的文件路径success: (res) => { // 保存成功的回调函数wx.showToast({ // 显示保存成功的提示title: '图片保存成功', // 提示的内容icon: 'success', // 成功的图标duration: 2000 // 提示显示的时间});},fail: (error) => { // 保存失败的回调函数wx.showToast({ // 显示保存失败的提示title: '图片保存失败', // 提示的内容icon: 'none', // 失败的图标duration: 2000 // 提示显示的时间});}});} else {// 下载失败时的提示wx.showToast({title: '图片路径错误', // 提示的内容icon: 'none', // 错误的图标duration: 2000 // 提示显示的时间});}console.log(res);},fail: (error) => { // URL路径错误wx.showToast({ // 显示保存失败的提示title: '路径错误', // 提示的内容icon: 'none', // 失败的图标duration: 2000 // 提示显示的时间});}});}
});
3.2.3.3 wx.uploadFile
注意:
小程序无法直接将图片上传到项目文件夹,因为小程序的文件系统是受限的,只能访问小程序的临时文件夹和本地缓存等
demo.wxml
<view><button bindtap="uploadImage">上传图片</button>
</view>
demo.js
Page({/*** 上传图片*/uploadImage: function() {var that = this;wx.chooseImage({count: 1, // 最多可选择的图片张数sizeType: ['compressed'], // 所选的图片的尺寸压缩类型sourceType: ['album', 'camera'], // 选择图片的来源,相册或相机success: function(res) { // 图片选择成功的回调函数const tempFilePaths = res.tempFilePaths; // 图片的临时文件路径列表const tempFilePath = tempFilePaths[0]; // 获取第一个临时文件路径console.log('tempFilePath:', tempFilePath);wx.uploadFile({ // 调用上传文件的 APIurl: 'https://example.com/upload', // 修改为实际的上传地址filePath: tempFilePath, // 要上传的文件的临时路径name: 'file', // 文件对应的 key,服务器可以通过这个 key 获取文件的二进制数据formData: {'user': 'binjie' // 额外的 formData 数据,可根据需求自定义},header: {'Content-Type': 'multipart/form-data' // 设置请求头的 Content-Type},success: function(res) { // 上传成功的回调函数console.log('upload image success:', res);wx.showToast({ // 显示一个提示框,表示上传成功title: '上传成功',icon: 'success',duration: 2000});// 上传成功后处理逻辑},fail: function(error) { // 上传失败的回调函数console.error('upload image error:', error);wx.showToast({ // 显示一个提示框,表示上传失败title: '上传失败',icon: 'none',duration: 2000});}});}});}
})
3.2.4 webSocket
| API | 说明 |
|---|---|
| wx.connectSocket | 创建一个 WebSocket 连接 |
| wx.onSocketOpen | 监听 WebSocket 连接打开事件 |
| wx.onSocketMessage | 监听 WebSocket 接收到服务器的消息事件 |
| wx.sendSocketMessage | 通过 WebSocket 发送数据 |
| wx.closeSocket | 关闭 WebSocket 连接 |
3.2.4.1 wx.connectSocket
WebSocket 是一种基于 TCP 的全双工通信协议,在小程序中可以使用它实现实时通信功能。
demo.wxml
<view><button bindtap="webSocketConnection">连接服务器</button>
</view>
demo.js
Page({/*** 连接服务器*/webSocketConnection: function() {wx.connectSocket({url: 'wss://localhost:8081', // WebSocket 服务器地址header: {'content-type': 'application/json' // 设置请求头},protocols: [], // 子协议数组,可以指定多个子协议success: function() {console.log('WebSocket 连接成功');},fail: function() {console.error('WebSocket 连接失败');}});}
})
3.2.4.2 wx.onSocketOpen
wx.onSocketOpen 是 WebSocket 中的一个回调函数,用于监听 WebSocket 连接成功的事件。当 WebSocket 连接成功后,会触发 wx.onSocketOpen 回调函数,
demo.wxml
<view><button bindtap="webSocketConnection">连接服务器</button>
</view>
demo.js
Page({/*** 连接服务器*/webSocketConnection: function() {wx.connectSocket({url: 'wss://localhost:8081', // WebSocket 服务器地址header: {'content-type': 'application/json' // 设置请求头},protocols: [], // 子协议数组,可以指定多个子协议success: function() {console.log('WebSocket 连接成功');},fail: function() {console.error('WebSocket 连接失败');}});wx.onSocketOpen(function () {console.log('WebSocket 已打开');});}
})
3.2.4.3 wx.onSocketMessage
wx.onSocketMessage 是 WebSocket 中的一个回调函数,用于监听 WebSocket 接收到消息的事件。当 WebSocket 接收到服务器发来的消息时,会触发 wx.onSocketMessage 回调函数,
demo.wxml
<view><button bindtap="webSocketConnection">连接服务器</button>
</view>
demo.js
Page({/*** 连接服务器*/webSocketConnection: function() {wx.connectSocket({url: 'wss://localhost:8081', // WebSocket 服务器地址header: {'content-type': 'application/json' // 设置请求头},protocols: [], // 子协议数组,可以指定多个子协议success: function() {console.log('WebSocket 连接成功');},fail: function() {console.error('WebSocket 连接失败');}});wx.onSocketOpen(function () {console.log('WebSocket 已打开');});wx.onSocketMessage(function (res) {console.log('收到服务器消息:', res.data);// 在接收到服务器消息后,可以在这里编写需要执行的逻辑代码});}
})
3.2.4.4 wx.sendSocketMessage
wx.sendSocketMessage 是WebSocket 中的一个方法,用于向服务器发送消息
demo.wxml
<view><button bindtap="webSocketConnection">连接服务器</button>
</view>
demo.js
Page({/*** 连接服务器*/webSocketConnection: function() {wx.connectSocket({url: 'wss://localhost:8081', // WebSocket 服务器地址header: {'content-type': 'application/json' // 设置请求头},protocols: [], // 子协议数组,可以指定多个子协议success: function() {console.log('WebSocket 连接成功');},fail: function() {console.error('WebSocket 连接失败');}});wx.onSocketOpen(function () {console.log('WebSocket 已打开');// 在连接成功后发送消息wx.sendSocketMessage({data: 'Hello, server!' // 要发送的消息内容});});wx.onSocketMessage(function (res) {console.log('收到服务器消息:', res.data);// 在接收到服务器消息后,可以在这里编写需要执行的逻辑代码});}
})
3.2.4.5 wx.closeSocket
wx.closeSocket 是 WebSocket 中的一个方法,用于关闭 WebSocket 连接
let socketOpen = false;
let socketTask = wx.connectSocket({url: 'ws://localhost:8081', // WebSocket 服务器地址success: function () {console.log('WebSocket 连接成功');socketOpen = true;},fail: function (error) {console.error('WebSocket 连接失败', error);}
});// 监听 WebSocket 开启事件
wx.onSocketOpen(function () {console.log('WebSocket 已打开');socketOpen = true;
});// 关闭 WebSocket 连接
function closeSocket() {if (socketOpen) {wx.closeSocket({success: function () {console.log('WebSocket 连接已关闭');},fail: function (error) {console.error('WebSocket 连接关闭失败', error);}});} else {console.log('WebSocket 连接未打开');}
}
3.2.5 本地存储
| API | 说明 |
|---|---|
| wx.setStorageSync | 同步方式将数据存储在本地缓存中 |
| wx.getStorageSync | 同步方式从本地缓存中异步获取数据 |
| wx.removeStorageSync | 从本地缓存中删除指定 key 对应的内容 |
| wx.clearStorageSync | 清空本地缓存数据 |
3.2.5.1 wx.setStorageSync
本地缓存数据

demo.js
// 页面初始化时,存储用户信息到本地缓存
Page({data: {userInfo: {name: 'John',age: 25,gender: 'male'}},onLoad: function () {wx.setStorageSync('userInfo', this.data.userInfo);console.log('用户信息已存储到本地缓存');}
});
3.2.5.2 wx.getStorageSync
本地缓存中获取存储的用户信息,并将其打印出来

demo.js
// 页面初始化时,存储用户信息到本地缓存
Page({data: {userInfo: {name: 'John',age: 25,gender: 'male'}},onLoad: function () {wx.setStorageSync('userInfo', this.data.userInfo);console.log('用户信息已存储到本地缓存');// 获取缓存中的用户信息let cachedUserInfo = wx.getStorageSync('userInfo');console.log('从缓存中获取的用户信息:', cachedUserInfo);}
});
3.2.5.3 wx.removeStorageSync
根据指定的 key 删除对应的数据

demo.js
// 在页面的逻辑部分(.js 文件)编写以下代码// 页面初始化时,存储用户信息到本地缓存
Page({data: {userInfo: {name: 'John',age: 25,gender: 'male'}},onLoad: function () {wx.setStorageSync('userInfo', this.data.userInfo);console.log('用户信息已存储到本地缓存');// 获取缓存中的用户信息let cachedUserInfo = wx.getStorageSync('userInfo');console.log('从缓存中获取的用户信息:', cachedUserInfo);wx.removeStorageSync('userInfo');let cachedUserInfo1 = wx.getStorageSync('userInfo');console.log('删除之后从缓存中获取的用户信息:', cachedUserInfo1);}
});
3.2.5.4 wx.clearStorageSync

demo.js
// 在页面的逻辑部分(.js 文件)编写以下代码// 页面初始化时,存储用户信息到本地缓存
Page({data: {userInfo: {name: 'John',age: 25,gender: 'male'}},onLoad: function () {wx.setStorageSync('userInfo', this.data.userInfo);console.log('用户信息已存储到本地缓存');// 获取缓存中的用户信息let cachedUserInfo = wx.getStorageSync('userInfo');console.log('从缓存中获取的用户信息:', cachedUserInfo);// 清除所有本地缓存数据wx.clearStorageSync();		let cachedUserInfo1 = wx.getStorageSync('userInfo');console.log('清除之后从缓存中获取的用户信息:', cachedUserInfo1);}
});
3.2.6 文件操作
| API | 说明 |
|---|---|
| wx.saveFile | 保存文件到本地 |
| wx.getSavedFileList | 获取本地已保存的文件列表 |
| wx.getSavedFileInfo | 获取本地已保存的文件信息 |
| wx.removeSavedFile | 删除本地已保存的文件 |
| wx.openDocument | 打开本地文档 |
3.2.6.1 wx.saveFile

demo.wxml
<view class="container"><button bindtap="saveFile">保存文件</button>
</view>
demo.js
Page({saveFile: function() { // 定义一个名为 saveFile 的方法wx.downloadFile({ // 调用下载文件 APIurl: 'https://img1.baidu.com/it/u=4270144465,1604793144&fm=253&fmt=auto&app=120&f=JPEG?w=1280&h=800', // 文件的网络地址success: function(res) { // 下载成功的回调函数if (res.statusCode === 200) { // 如果下载成功wx.saveFile({ // 调用保存文件 APItempFilePath: res.tempFilePath, // 下载的临时文件路径success: function(saveRes) { // 保存成功的回调函数var savedFilePath = saveRes.savedFilePath; // 保存后的文件路径console.log('文件保存成功,路径为:', savedFilePath); // 打印保存后的文件路径wx.showToast({ // 显示成功提示信息title: '文件保存成功',icon: 'success',duration: 2000});},fail: function(error) { // 保存失败的回调函数console.log('文件保存失败:', error); // 打印保存失败的错误信息wx.showToast({ // 显示失败提示信息title: '文件保存失败',icon: 'none',duration: 2000});}});} else { // 如果下载失败console.log('文件下载失败'); // 打印下载失败的提示信息wx.showToast({ // 显示失败提示信息title: '文件下载失败',icon: 'none',duration: 2000});}},fail: function(error) { // 下载失败的回调函数console.log('文件下载失败:', error); // 打印下载失败的错误信息wx.showToast({ // 显示失败提示信息title: '文件下载失败',icon: 'none',duration: 2000});}});}
});
3.2.6.2 wx.getSavedFileList

demo.wxml
<view class="container"><button bindtap="saveFile">保存文件</button>
</view>
demo.js
Page({saveFile: function() { // 定义一个名为 saveFile 的方法wx.downloadFile({ // 调用下载文件 APIurl: 'https://img1.baidu.com/it/u=4270144465,1604793144&fm=253&fmt=auto&app=120&f=JPEG?w=1280&h=800', // 文件的网络地址success: function(res) { // 下载成功的回调函数if (res.statusCode === 200) { // 如果下载成功wx.saveFile({ // 调用保存文件 APItempFilePath: res.tempFilePath, // 下载的临时文件路径success: function(saveRes) { // 保存成功的回调函数var savedFilePath = saveRes.savedFilePath; // 保存后的文件路径console.log('文件保存成功,路径为:', savedFilePath); // 打印保存后的文件路径wx.showToast({ // 显示成功提示信息title: '文件保存成功',icon: 'success',duration: 2000});},fail: function(error) { // 保存失败的回调函数console.log('文件保存失败:', error); // 打印保存失败的错误信息wx.showToast({ // 显示失败提示信息title: '文件保存失败',icon: 'none',duration: 2000});}});} else { // 如果下载失败console.log('文件下载失败'); // 打印下载失败的提示信息wx.showToast({ // 显示失败提示信息title: '文件下载失败',icon: 'none',duration: 2000});}},fail: function(error) { // 下载失败的回调函数console.log('文件下载失败:', error); // 打印下载失败的错误信息wx.showToast({ // 显示失败提示信息title: '文件下载失败',icon: 'none',duration: 2000});}});wx.getSavedFileList({success: function(res) {console.log("获取到的文件列表")console.log(res.fileList);},fail: function(error) {console.log('获取文件列表失败:', error);}});}
});
3.2.6.3 wx.getSavedFileInfo

demo.js
wx.getSavedFileInfo({filePath: 'http://store/13xlJewGZdPue9027195446751de420cdd3f9064d5dc.jpeg', // 必填,要获取信息的文件路径success: function(res) {console.log('文件大小:', res.size);console.log('文件创建时间:', new Date(res.createTime));console.log('文件最近修改时间:', new Date(res.updateTime));},fail: function(error) {console.log('获取文件信息失败:', error);}});
3.2.6.4 wx.removeSavedFile

demo.js
wx.removeSavedFile({filePath: 'http://store/13xlJewGZdPue9027195446751de420cdd3f9064d5dc.jpeg', // 必填,要删除的文件路径success: function(res) {console.log('文件删除成功');},fail: function(error) {console.log('文件删除失败:', error);}});
3.2.6.5 wx.openDoc
demo.js
wx.openDocument({filePath: '文件路径', // 要打开的文件路径,仅支持本地文件success: function(res) {console.log('打开文档成功');},fail: function(error) {console.log('打开文档失败:', error);}
});
3.2.7 位置信息
| API | 说明 |
|---|---|
| wx.getLocation | 获取当前用户位置信息 |
| wx.chooseLocation | 打开地图选择位置 |
| wx.openLocation | 使用微信内置地图查看位置 |
3.2.7.1 wx.getLocation
app.json
"requiredPrivateInfos": ["getLocation"],"permission": {"scope.userLocation": {"desc": "你的位置信息将用于小程序位置接口的效果展示"}},
demo.wxml
<view class="container"><button bindtap="showLocation">查看位置</button>
</view>
demo.wxml
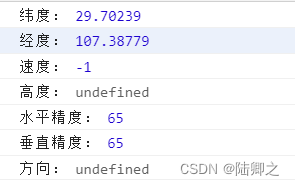
Page({showLocation: function() { // 定义一个名为 saveFile 的方法wx.getLocation({type: 'wgs84', // 可选,默认为 wgs84 返回 gps 坐标,gcj02 返回可用于 wx.openLocation 的坐标success: function(res) {console.log('纬度:', res.latitude);console.log('经度:', res.longitude);console.log('速度:', res.speed);console.log('高度:', res.altitude);console.log('水平精度:', res.accuracy);console.log('垂直精度:', res.verticalAccuracy);console.log('方向:', res.direction);},fail: function(error) {console.log('获取地理位置失败:', error);}});}
});
3.2.7.2 wx.chooseLocation

app.json
"requiredPrivateInfos": ["chooseLocation"],
demo.wxml
<view class="container"><button bindtap="showLocation">选择位置</button>
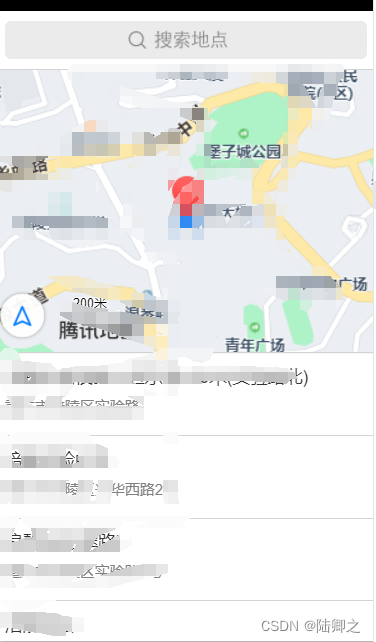
</view>Page({showLocation: function() { // 定义一个名为 saveFile 的方法wx.chooseLocation({success: function(res) {console.log('选择地点成功:', res);var latitude = res.latitude; // 选定地点的纬度var longitude = res.longitude; // 选定地点的经度var name = res.name; // 选定地点的名称var address = res.address; // 选定地点的地址wx.showToast({title: '选择地点成功',icon: 'success',duration: 2000});},fail: function(error) {console.log('选择地点失败:', error);wx.showToast({title: '选择地点失败',icon: 'none',duration: 2000});}}); }
});3.2.7.3 wx.openLocation
demo.js
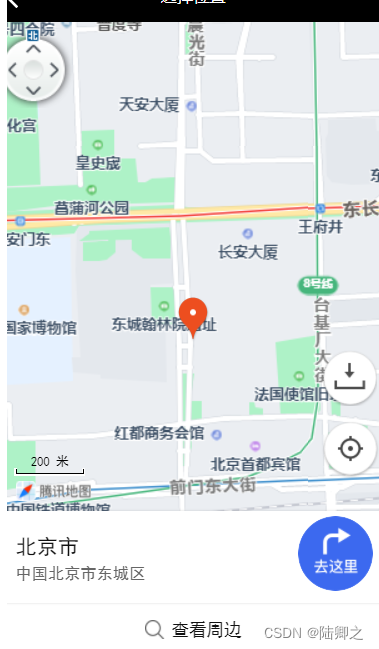
Page({showLocation: function() { // 定义一个名为 saveFile 的方法wx.openLocation({latitude: 39.90469, // 纬度,范围为-90~90,负数表示南纬longitude: 116.40717, // 经度,范围为-180~180,负数表示西经scale: 18, // 缩放比例,范围1~28,默认为18name: '北京市', // 位置名address: '中国北京市东城区', // 地址的详细说明success: function(res) {console.log('打开地图成功:', res);},fail: function(error) {console.log('打开地图失败:', error);wx.showToast({title: '打开地图失败',icon: 'none',duration: 2000});}});}
});
3.2.8 动画
| API | 说明 |
|---|---|
| wx.createAnimation | 创建一个动画实例 |
| animation.translate | 平移动画 |
| animation.rotate | 旋转动画 |
| animation.scale | 缩放动画 |
| animation.opacity | 透明度动画 |
| animation.step | 每次修改动画属性时调用 |
3.2.8.1 wx.createAnimation
demo.wxml
<!-- 在小程序页面的WXML文件中使用动画数据进行动画渲染 -->
<view animation="{{animationData}}" style="width: 100px; height: 100px; background-color: red;"></view>
demo.js
Page({data: {animationData: {}, // 存储动画数据的对象},onLoad: function() {// 创建动画对象const animation = wx.createAnimation({duration: 1000, // 动画持续时间,单位mstimingFunction: 'ease', // 动画的时间曲线,可选值:linear、ease、ease-in、ease-in-out、ease-outdelay: 1000, // 动画延迟时间,单位mstransformOrigin: '50% 50% 0', // 设置transform-origin属性,用于指定动画变换的基点,默认值为"50% 50% 0"})// 使用动画对象进行动画操作animation.translateX(100).rotate(45).step()// 将动画对象的状态导出为动画数据,并更新data中的animationDatathis.setData({animationData: animation.export()})},
})
3.2.8.2 animation.translate
demo.wxml
<!-- 在小程序页面的WXML文件中使用动画数据进行动画渲染 -->
<view animation="{{animationData}}" style="width: 100px; height: 100px; background-color: red;"></view>
demo.js
// 在小程序页面的JS文件中使用wx.createAnimation创建动画对象
Page({data: {animationData: {}, // 存储动画数据的对象},onLoad: function() {// 创建动画对象const animation = wx.createAnimation({duration: 1000, // 动画持续时间,单位mstimingFunction: 'ease', // 动画的时间曲线,可选值:linear、ease、ease-in、ease-in-out、ease-outdelay: 0, // 动画延迟时间,单位mstransformOrigin: '50% 50% 0', // 设置transform-origin属性,用于指定动画变换的基点,默认值为"50% 50% 0"})// 使用动画对象进行动画操作animation.translate(100, 200).step()// 将动画对象的状态导出为动画数据,并更新data中的animationDatathis.setData({animationData: animation.export()})},
})
3.2.8.3 animation.rotate
demo.wxml
<!-- 在小程序页面的WXML文件中使用动画数据进行动画渲染 -->
<view animation="{{animationData}}" style="width: 100px; height: 100px; background-color: red;"></view>
demo.js
// 在小程序页面的JS文件中使用wx.createAnimation创建动画对象
Page({data: {animationData: {}, // 存储动画数据的对象},onLoad: function() {// 创建动画对象const animation = wx.createAnimation({duration: 1000, // 动画持续时间,单位mstimingFunction: 'ease', // 动画的时间曲线,可选值:linear、ease、ease-in、ease-in-out、ease-outdelay: 0, // 动画延迟时间,单位mstransformOrigin: '50% 50% 0', // 设置transform-origin属性,用于指定动画变换的基点,默认值为"50% 50% 0"})// 使用动画对象进行动画操作animation.rotate(180).step()// 将动画对象的状态导出为动画数据,并更新data中的animationDatathis.setData({animationData: animation.export()})},
})
3.2.8.4 animation.scale
demo.wxml
<!-- 在小程序页面的WXML文件中使用动画数据进行动画渲染 -->
<view animation="{{animationData}}" style="width: 100px; height: 100px; background-color: red;"></view>
demo.js
// 在小程序页面的JS文件中使用wx.createAnimation创建动画对象
Page({data: {animationData: {}, // 存储动画数据的对象},onLoad: function() {// 创建动画对象const animation = wx.createAnimation({duration: 1000, // 动画持续时间,单位mstimingFunction: 'ease', // 动画的时间曲线,可选值:linear、ease、ease-in、ease-in-out、ease-outdelay: 0, // 动画延迟时间,单位mstransformOrigin: '50% 50% 0', // 设置transform-origin属性,用于指定动画变换的基点,默认值为"50% 50% 0"})// 使用动画对象进行动画操作animation.scale(2).step()// 将动画对象的状态导出为动画数据,并更新data中的animationDatathis.setData({animationData: animation.export()})},
})
3.2.8.5 animation.opacity
与其他动画方法进行链式调用
demo.wxml
<!-- 在小程序页面的WXML文件中使用动画数据进行动画渲染 -->
<view animation="{{animationData}}" style="width: 100px; height: 100px; background-color: red;"></view>
demo.js
// 在小程序页面的JS文件中使用wx.createAnimation创建动画对象
Page({data: {animationData: {}, // 存储动画数据的对象},onLoad: function() {// 创建动画对象const animation = wx.createAnimation({duration: 1000, // 动画持续时间,单位mstimingFunction: 'ease', // 动画的时间曲线,可选值:linear、ease、ease-in、ease-in-out、ease-outdelay: 0, // 动画延迟时间,单位mstransformOrigin: '50% 50% 0', // 设置transform-origin属性,用于指定动画变换的基点,默认值为"50% 50% 0"})// 使用动画对象进行动画操作animation.opacity(0).step()// 将动画对象的状态导出为动画数据,并更新data中的animationDatathis.setData({animationData: animation.export()})},
})
3.2.8.6 animation.step
标记动画的一帧。通过多次调用animation.step()可以将多个动画帧连接在一起形成一个完整的动画序列。
demo.wxml
<!-- 在小程序页面的WXML文件中使用动画数据进行动画渲染 -->
<view animation="{{animationData}}" style="width: 100px; height: 100px; background-color: red;"></view>
demo.js
// 在小程序页面的JS文件中使用wx.createAnimation创建动画对象
Page({data: {animationData: {}, // 存储动画数据的对象},onLoad: function() {// 创建动画对象const animation = wx.createAnimation({duration: 1000, // 动画持续时间,单位mstimingFunction: 'ease', // 动画的时间曲线,可选值:linear、ease、ease-in、ease-in-out、ease-outdelay: 0, // 动画延迟时间,单位mstransformOrigin: '50% 50% 0', // 设置transform-origin属性,用于指定动画变换的基点,默认值为"50% 50% 0"})// 第一帧动画animation.scale(2).step()// 第二帧动画animation.rotate(45).step()// 将动画对象的状态导出为动画数据,并更新data中的animationDatathis.setData({animationData: animation.export()})},
})
3.2.9 交互反馈
| API | 说明 |
|---|---|
| wx.showToast | 显示消息提示框 |
| wx.showLoading | 显示 loading 提示框 |
| wx.hideToast | 隐藏消息提示框 |
| wx.hideLoading | 隐藏 loading 提示框 |
| wx.showActionSheet | 显示操作菜单 |
3.2.10.1 wx.showToast


demo.wxml
<view><button bindtap="showToast">点击展示Toast</button>
</view>
demo.js
Page({showToast: function() {wx.showToast({title: '操作成功', // 提示的文本内容icon: 'success', // 提示的图标,可选值:'success(成功图标)', 'loading(加载图标)', 'none(无图标)'duration: 2000, // 提示的延迟时间,单位毫秒mask: true, // 是否显示透明蒙层,防止触摸穿透,默认值为falsesuccess: function (res) { // 提示框显示成功的回调函数console.log('toast显示成功', res)},fail: function (res) { // 提示框显示失败的回调函数console.log('toast显示失败', res)},complete: function (res) { // 提示框显示完成的回调函数console.log('toast显示完成', res)}})}
})
3.2.10.2 wx.showLoading
demo.wxml
<view class="container"><button bindtap="showLoading">显示加载中</button>
</view>
demo.js
Page({showLoading: function() {wx.showLoading({title: '加载中...',mask: true,success: function(res) {console.log('显示加载中成功', res);},fail: function(res) {console.log('显示加载中失败', res);}});// 模拟耗时操作setTimeout(function() {wx.hideLoading(); // 隐藏加载中提示框}, 2000);}
});
3.2.10.3 wx.hideToast
demo.wxml
<view class="container"><button bindtap="showToast">显示消息提示框</button><button bindtap="hideToast">隐藏消息提示框</button>
</view>
demo.js
Page({showToast: function() {wx.showToast({title: '操作成功',icon: 'success',duration: 2000});},hideToast: function() {wx.hideToast();}
});
3.2.10.4 wx.hideLoading
demo.wxml
<view class="container"><button bindtap="showToast">显示消息提示框</button><button bindtap="hideToast">隐藏消息提示框</button>
</view>
demo.js
Page({showToast: function() {wx.showLoading({title: '加载中...',duration: 2000});},hideToast: function() {wx.hideLoading();}
});
3.2.10.5 wx.showActionSheet
demo.wxml
<view class="container"><button bindtap="showActionSheet">显示操作菜单</button>
</view>
demo.js
Page({showActionSheet: function() {wx.showActionSheet({itemList: ['选项一', '选项二', '选项三'],success: function(res) {console.log(res.tapIndex); // 用户点击的选项索引if (res.tapIndex === 0) {console.log('用户选择了选项一');} else if (res.tapIndex === 1) {console.log('用户选择了选项二');} else if (res.tapIndex === 2) {console.log('用户选择了选项三');}},fail: function(res) {console.error(res.errMsg); // 错误信息}});}
});
3.2.10 导航栏
| API | 说明 |
|---|---|
| wx.setNavigationBarTitle | 设置当前页面标题 |
| wx.setNavigationBarColor | 设置导航栏颜色 |
| wx.showNavigationBarLoading | 在当前页面显示导航栏加载动画 |
3.2.10.1 wx.setNavigationBarTitle
demo.wxml
<view class="container"><button bindtap="setTitle">设置标题</button>
</view>
demo.js
Page({setTitle: function() {wx.setNavigationBarTitle({title: '新标题'});}
});
3.2.10.2 wx.setNavigationBarColor
demo.wxml
<view class="container"><button bindtap="setColors">设置颜色</button>
</view>
demo.js
Page({setColors: function() {wx.setNavigationBarColor({frontColor: '#ffffff',backgroundColor: '#ff0000',success: function(res) {console.log('设置导航栏颜色成功');},fail: function(res) {console.error('设置导航栏颜色失败:' + res.errMsg);}});}
});
3.2.10.3 wx.showNavigationBarLoading
demo.wxml
<view class="container"><button bindtap="showLoading">显示加载动画</button><button bindtap="hideLoading">隐藏加载动画</button>
</view>
demo.js
Page({showLoading: function() {wx.showNavigationBarLoading();},hideLoading: function() {wx.hideNavigationBarLoading();}
});
3.2.11 下拉刷新
| API | 说明 |
|---|---|
| enablePullDownRefresh | 开启下拉刷新 |
| onPullDownRefresh | 监听下拉刷新事件 |
| stopPullDownRefresh | 停止当前页面下拉刷新 |
3.2.11.1 enablePullDownRefresh
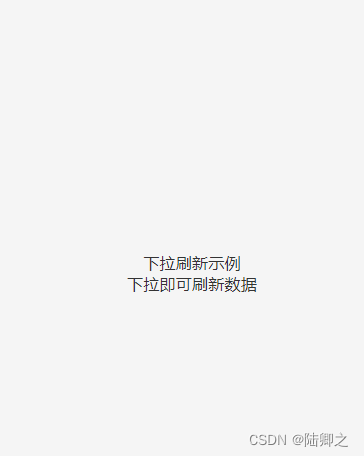
demo.wxml
<view class="container" style="height: 100vh;"><scroll-view scroll-y="{{scrollEnabled}}" style="height: 100vh;" bindscrolltoupper="onScrollToUpper"><!-- 此处为页面内容 --><view class="content"><text>下拉刷新示例</text><text>下拉即可刷新数据</text></view></scroll-view>
</view>
demo.wxss
.container {display: flex;flex-direction: column;align-items: center;justify-content: center;background-color: #f5f5f5;
}
.content {display: flex;flex-direction: column;align-items: center;justify-content: center;height: 100vh;font-size: 32rpx;color: #333;
}
demo.js
Page({data: {scrollEnabled: false},onPullDownRefresh: function() {// 模拟数据加载setTimeout(function() {wx.stopPullDownRefresh(); // 停止下拉刷新wx.showToast({title: '刷新成功',icon: 'success'});}, 2000);},onScrollToUpper: function() {this.setData({scrollEnabled: true});},onLoad: function() {wx.showNavigationBarLoading(); // 显示导航栏加载动画// 模拟数据加载setTimeout(function() {wx.hideNavigationBarLoading(); // 隐藏导航栏加载动画}, 2000);}
});
3.2.11.2 onPullDownRefresh
demo.wxml
<view class="container"><scroll-view class="scroll-view" scroll-y="{{scrollEnabled}}"><view class="content"><text>下拉刷新示例</text><text>下拉即可刷新数据</text><view wx:for="{{items}}" wx:key="{{index}}"><text>{{item}}</text></view></view></scroll-view>
</view>
demo.wxss
.container {display: flex;flex-direction: column;align-items: center;justify-content: center;background-color: #f5f5f5;
}
.content {display: flex;flex-direction: column;align-items: center;justify-content: center;height: 100vh;font-size: 32rpx;color: #333;
}
demo.js
Page({data: {items: [],scrollEnabled: false},onPullDownRefresh() {// 模拟数据加载setTimeout(() => {this.setData({items: [1, 2, 3, 4, 5],scrollEnabled: true});wx.stopPullDownRefresh();wx.showToast({title: '刷新成功',icon: 'success'});}, 2000);}
});
3.2.11.3 stopPullDownRefresh
demo.wxml
<view class="container"><scroll-view class="scroll-view" scroll-y="{{scrollEnabled}}"><view class="content"><text>下拉刷新示例</text><text>下拉即可刷新数据</text><view wx:for="{{items}}" wx:key="{{index}}"><text>{{item}}</text></view></view></scroll-view>
</view>
demo.wxss
.container {display: flex;flex-direction: column;align-items: center;justify-content: center;background-color: #f5f5f5;
}
.content {display: flex;flex-direction: column;align-items: center;justify-content: center;height: 100vh;font-size: 32rpx;color: #333;
}
demo.js
Page({data: {items: [],scrollEnabled: true},onPullDownRefresh() {// 模拟数据加载setTimeout(() => {this.setData({items: [1, 2, 3, 4, 5],scrollEnabled: false});wx.showToast({title: '刷新成功',icon: 'success'});wx.stopPullDownRefresh();}, 2000);}
});
3.2.12 摄像头
| API | 说明 |
|---|---|
| wx.chooseImage | 从相册选择图片或拍摄照片 |
| wx.previewImage | 在当前页面预览图片 |
| wx.saveImageToPhotosAlbum | 将图片保存到系统相册 |
3.2.12.1 wx.chooseImage

demo.wxml
<view class="container"><button type="primary" bindtap="chooseImage">选择图片</button><image wx:if="{{imageSrc}}" src="{{imageSrc}}" mode="aspectFit"></image>
</view>
demo.js
Page({data: {imageSrc: '' // 页面数据,用于保存选择的图片临时路径},chooseImage: function () { // 点击按钮选择图片的方法const self = this; // 保存当前页面对象wx.chooseImage({ // 调用小程序 API 选择图片count: 1, // 最多可以选择的图片张数,默认值为9sizeType: ['compressed'], // 可以指定是原图还是压缩图,默认二者都有sourceType: ['album', 'camera'], // 可以指定来源是相册还是相机,默认二者都有success: function (res) { // 用户选择图片后的回调函数const tempFilePath = res.tempFilePaths[0]; // 选择的图片临时路径self.setData({ // 更新页面数据,将选择的图片显示在页面上imageSrc: tempFilePath});wx.previewImage({ // 预览选择的图片urls: [tempFilePath] // 预览的图片路径列表});wx.uploadFile({ // 上传图片到服务器url: 'http://localhost:8081/upload', // 服务器接口地址filePath: tempFilePath, // 选择的图片临时路径name: 'file', // 上传的文件名称success: function (res) { // 上传成功后的回调函数console.log(res); // 在控制台输出服务器返回的结果}});}});}
});
3.2.12.2 wx.previewImage
demo.wxml
<view class="container"><button type="primary" bindtap="chooseImage">选择图片</button><image wx:if="{{imageSrc}}" src="{{imageSrc}}" mode="aspectFit"></image>
</view>
demo.js
Page({data: {imageSrc: '' // 页面数据,用于保存选择的图片临时路径},chooseImage: function () { // 点击按钮选择图片的方法const self = this; // 保存当前页面对象wx.chooseImage({ // 调用小程序 API 选择图片count: 1, // 最多可以选择的图片张数,默认值为9sizeType: ['compressed'], // 可以指定是原图还是压缩图,默认二者都有sourceType: ['album', 'camera'], // 可以指定来源是相册还是相机,默认二者都有success: function (res) { // 用户选择图片后的回调函数const tempFilePath = res.tempFilePaths[0]; // 选择的图片临时路径self.setData({ // 更新页面数据,将选择的图片显示在页面上imageSrc: tempFilePath});wx.previewImage({ // 预览选择的图片current: tempFilePath,urls: [tempFilePath] // 预览的图片路径列表});wx.uploadFile({ // 上传图片到服务器url: 'http://localhost:8081/upload', // 服务器接口地址filePath: tempFilePath, // 选择的图片临时路径name: 'file', // 上传的文件名称success: function (res) { // 上传成功后的回调函数console.log(res); // 在控制台输出服务器返回的结果}});}});}
});
3.2.12.3 wx.saveImageToPhotosAlbum

demo.wxml
<view class="container"><button type="primary" bindtap="chooseImage">选择图片</button><image wx:if="{{imageSrc}}" src="{{imageSrc}}" mode="aspectFit"></image><button type="primary" bindtap="saveImage">保存图片</button>
</view>
demo.js
Page({data: {imageSrc: '', // 用于保存选择的图片路径},// 选择图片chooseImage: function () {const self = this; // 保存当前页面对象wx.chooseImage({count: 1, // 最多可以选择的图片张数,默认值为9sizeType: ['compressed'], // 可以指定是原图还是压缩图,默认二者都有sourceType: ['album', 'camera'], // 可以指定来源是相册还是相机,默认二者都有success: function (res) { // 用户选择图片后的回调函数const tempFilePath = res.tempFilePaths[0]; // 选择的图片临时路径self.setData({ // 更新页面数据,将选择的图片显示在页面上imageSrc: tempFilePath});wx.previewImage({ // 预览选择的图片current: tempFilePath,urls: [tempFilePath] // 预览的图片路径列表});}});},// 保存图片到相册saveImage: function () {const self = this; // 保存当前页面对象wx.saveImageToPhotosAlbum({filePath: self.data.imageSrc, // 图片文件路径,即要保存的图片临时路径success: function (res) {wx.showToast({title: '保存成功',icon: 'success',duration: 2000});console.log("保存成功!!")},fail: function (error) {wx.showToast({title: '保存失败',icon: 'none',duration: 2000});}});}
});
3.2.13 扫码
| API | 说明 |
|---|---|
| wx.scanCode | 调起客户端扫码界面进行扫码 |
3.2.13.1 wx.scanCode
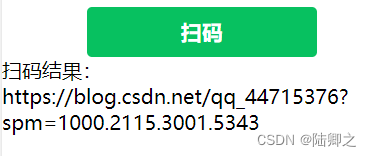
demo.wxml
<view class="container"><button type="primary" bindtap="scanCode">扫码</button><view>扫码结果:{{scanResult}}</view>
</view>
demo.js
Page({data: {scanResult: '' // 扫码结果},// 扫码按钮点击事件scanCode: function () {const self = this; // 保存当前页面对象wx.scanCode({success: function (res) {// 扫码成功,获取扫码结果self.setData({ // 更新页面数据scanResult: res.result});wx.showToast({title: '扫码成功',icon: 'success',duration: 2000});console.log('扫码结果:', self.data.scanResult);},fail: function (error) {// 扫码失败wx.showToast({title: '扫码失败',icon: 'none',duration: 2000});console.log('扫码失败:', error);}});}
});
3.2.14 蓝牙
| API | 说明 |
|---|---|
| wx.openBluetoothAdapter | 初始化蓝牙适配器 |
| wx.startBluetoothDevicesDiscovery | 开始搜寻附近的蓝牙外围设备 |
| wx.stopBluetoothDevicesDiscovery | 停止搜寻附近的蓝牙外围设备 |
| wx.getConnectedBluetoothDevices | 获取已经连接的蓝牙设备 |
| wx.createBLEConnection | 连接低功耗蓝牙设备 |
| wx.closeBLEConnection | 断开与低功耗蓝牙设备的连接 |
| wx.writeBLECharacteristicValue | 向低功耗蓝牙设备特征值中写入数据 |
| wx.readBLECharacteristicValue | 读取低功耗蓝牙设备的特征值 |
3.2.14.1 wx.openBluetoothAdapter
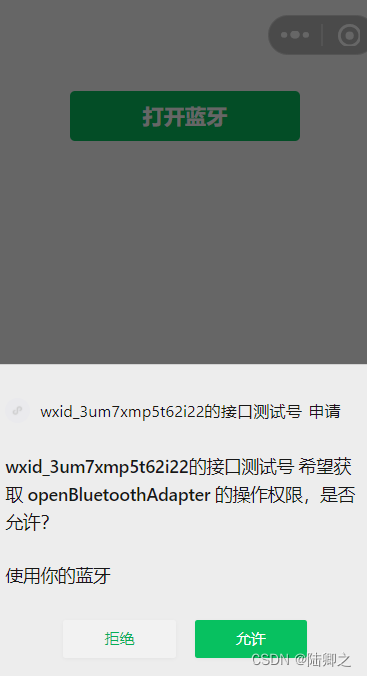
demo.wxml
<view class="container"><button type="primary" bindtap="openBluetooth">打开蓝牙</button>
</view>
demo.js
Page({openBluetooth: function () { // 点击按钮打开蓝牙适配器的方法const self = this; // 保存当前页面对象wx.openBluetoothAdapter({success: function (res) {console.log('蓝牙适配器已打开');},fail: function (error) {console.log('打开蓝牙适配器失败', error);}});}
});
3.2.14.2 wx.startBluetoothDevicesDiscovery
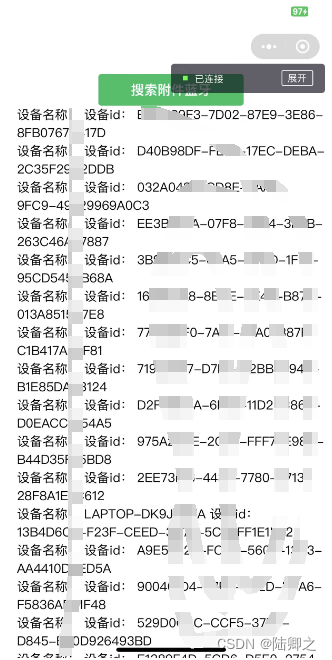
demo.wxml
<view class="container"><button type="primary" bindtap="startDiscovery">搜索附件蓝牙</button><view wx:for="{{devices}}" wx:key="index">设备名称:<text>{{item.name}}</text>设备id:<text>{{item.deviceId}}</text></view>
</view>
demo.js
Page({data: {devices: [] // 存储发现的蓝牙设备列表},startDiscovery: function () {const self = this; // 保存当前上下文,以在回调函数中使用const discoveredDevices = {}; // 存储已经发现的蓝牙设备wx.openBluetoothAdapter({ // 打开蓝牙适配器success: function (res) { // 如果成功打开蓝牙适配器,则执行以下代码console.log('蓝牙适配器已打开');wx.startBluetoothDevicesDiscovery({ // 开始搜索蓝牙设备success: function (res) { // 如果成功开始搜索设备,则执行以下代码console.log('开始搜索设备');// 监听设备发现事件wx.onBluetoothDeviceFound(function (devices) { // 当发现设备时触发该事件console.log('发现设备', devices);// 处理发现的设备const newDevices = devices.devices.filter(function (device) { // 过滤掉已经发现过的设备return !discoveredDevices[device.deviceId];});if (newDevices.length > 0) { // 如果有新设备被发现,则执行以下代码self.setData({ // 更新页面的设备列表devices: self.data.devices.concat(newDevices)});// 获取并显示设备名称for (let i = 0; i < newDevices.length; i++) {const device = newDevices[i];if (device.name) { // 如果设备有名称,则执行以下代码self.setData({ // 更新页面的设备名称deviceName: device.name});}}// 标记已经发现的设备newDevices.forEach(function (device) {discoveredDevices[device.deviceId] = true;});}});},fail: function (error) {console.log('开始搜索设备失败', error);}});},fail: function (error) {console.log('打开蓝牙适配器失败', error);}});}
});
3.2.14.3 wx.stopBluetoothDevicesDiscovery
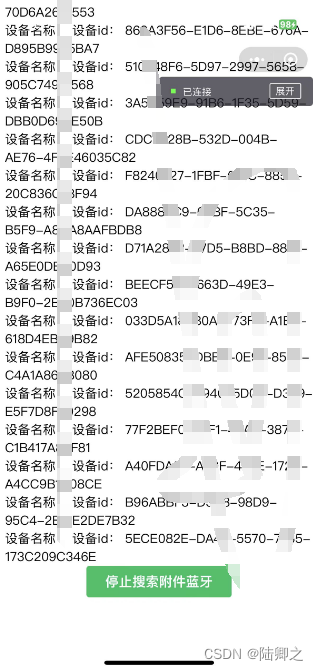

demo.wxml
<view class="container"><button type="primary" bindtap="startDiscovery">搜索附件蓝牙</button><view wx:for="{{devices}}" wx:key="index">设备名称:<text>{{item.name}}</text>设备id:<text>{{item.deviceId}}</text></view><button type="primary" bindtap="stopDiscovery">停止搜索附件蓝牙</button></view>demo.js
Page({data: {devices: [] // 存储发现的蓝牙设备列表},startDiscovery: function () {const self = this; // 保存当前上下文,以在回调函数中使用const discoveredDevices = {}; // 存储已经发现的蓝牙设备wx.openBluetoothAdapter({ // 打开蓝牙适配器success: function (res) { // 如果成功打开蓝牙适配器,则执行以下代码console.log('蓝牙适配器已打开');wx.startBluetoothDevicesDiscovery({ // 开始搜索蓝牙设备success: function (res) { // 如果成功开始搜索设备,则执行以下代码console.log('开始搜索设备');// 监听设备发现事件wx.onBluetoothDeviceFound(function (devices) { // 当发现设备时触发该事件console.log('发现设备', devices);// 处理发现的设备const newDevices = devices.devices.filter(function (device) { // 过滤掉已经发现过的设备return !discoveredDevices[device.deviceId];});if (newDevices.length > 0) { // 如果有新设备被发现,则执行以下代码self.setData({ // 更新页面的设备列表devices: self.data.devices.concat(newDevices)});// 获取并显示设备名称for (let i = 0; i < newDevices.length; i++) {const device = newDevices[i];if (device.name) { // 如果设备有名称,则执行以下代码self.setData({ // 更新页面的设备名称deviceName: device.name});}}// 标记已经发现的设备newDevices.forEach(function (device) {discoveredDevices[device.deviceId] = true;});}});},fail: function (error) {console.log('开始搜索设备失败', error);}});},fail: function (error) {console.log('打开蓝牙适配器失败', error);}});},stopDiscovery:function(){wx.stopBluetoothDevicesDiscovery({success: function(res) {console.log('停止搜索设备成功', res)},fail: function(error) {console.log('停止搜索设备失败', error)}})}
});
3.2.14.4 wx.getConnectedBluetoothDevices
demo.wxml
<view class="container"><button type="primary" bindtap="getConnectedDevices">获取连接到的蓝牙</button><text>{{ connectedDevices }}</text>
</view>
demo.js
Page({data: {connectedDevices: "" // 用于显示已连接的设备信息},// 获取连接到的蓝牙设备列表getConnectedDevices: function() {const self = this; // 保存当前页面对象wx.openBluetoothAdapter(), // 打开蓝牙适配器wx.getConnectedBluetoothDevices({ // 获取已连接的蓝牙设备列表success: function(res) { // 成功回调函数console.log('获取已连接设备列表成功', res) // 打印已连接设备列表信息self.setData({connectedDevices: JSON.stringify(res.devices) // 将设备列表转为字符串并存储在页面数据中})},fail: function(error) { // 失败回调函数console.log('获取已连接设备列表失败', error) // 打印错误信息}})}
});
3.2.14.5 wx.createBLEConnection
demo.wxml
<view class="container"><button type="primary" bindtap="connectToDevice">获取连接到的蓝牙</button><text>{{ connectedDeviceId }}</text>{{connectedDeviceName}}
</view>
demo.js
Page({data: {connectedDeviceId: "", // 用于存储已连接设备的IDconnectedDeviceName: "" // 用于存储已连接设备的名称},// 扫描并连接蓝牙设备connectToDevice: function() {const self = this; // 保存当前页面对象wx.openBluetoothAdapter({success: function(res) { // 成功打开蓝牙适配器回调函数console.log('成功打开蓝牙适配器', res)// 开始搜索蓝牙设备wx.startBluetoothDevicesDiscovery({success: function(res) { // 开始搜索蓝牙设备回调函数console.log('开始搜索蓝牙设备', res)// 监听蓝牙设备列表变化wx.onBluetoothDeviceFound(function(res) { // 蓝牙设备列表变化回调函数// 判断是否找到目标设备,根据设备名称或设备ID进行判断if (res.devices[0].name === "目标设备名称" || res.devices[0].deviceId === "目标设备ID") {// 停止搜索设备wx.stopBluetoothDevicesDiscovery({success: function(res) { // 停止搜索蓝牙设备回调函数console.log('停止搜索蓝牙设备', res)// 连接到蓝牙设备wx.createBLEConnection({deviceId: res.devices[0].deviceId,success: function(res) { // 连接蓝牙设备成功回调函数console.log('连接蓝牙设备成功', res)self.setData({connectedDeviceId: res.deviceId, // 存储已连接设备的IDconnectedDeviceName: res.name // 存储已连接设备的名称})},fail: function(error) { // 连接蓝牙设备失败回调函数console.log('连接蓝牙设备失败', error)}})},fail: function(error) { // 停止搜索蓝牙设备失败回调函数console.log('停止搜索蓝牙设备失败', error)}})}})},fail: function(error) { // 开始搜索蓝牙设备失败回调函数console.log('开始搜索蓝牙设备失败', error)}})},fail: function(error) { // 打开蓝牙适配器失败回调函数console.log('打开蓝牙适配器失败', error)}})}
});
3.2.14.6 wx.closeBLEConnection
demo.wxml
<view class="container"><button type="primary" bindtap="stopConnectToDevice">断开蓝牙连接</button>
</view>
demo.js
// 停止蓝牙设备连接stopConnectToDevice:function(){wx.closeBLEConnection({deviceId: "填写自己的蓝牙设备id",success: function(res) {console.log("断开蓝牙连接成功", res);},fail: function(error) {console.log("断开蓝牙连接失败", error);}});}3.2.14.7 wx.writeBLECharacteristicValue
向蓝牙设备的特征值中写入二进制数据
demo.wxml
<view class="container"><button type="primary" bindtap="insertToDevice">写入蓝牙数据</button>
</view>
demo.js
Page({insertToDevice:function(){wx.writeBLECharacteristicValue({deviceId: "蓝牙设备的 ID ",serviceId: "服务 UUID",characteristicId: "数据的特征值 UUID",value: ArrayBuffer.from("Hello, BLE!"),// 写入的二进制数据success: function(res) {console.log("写入数据成功", res);},fail: function(error) {console.log("写入数据失败", error);}});}});3.2.14.8 wx.readBLECharacteristicValue
读取蓝牙设备的特征值中的数据
demo.wxml
<view class="container"><button type="primary" bindtap="selectToDevice">获取蓝牙数据</button>
</view>
demo.js
Page({// 停止蓝牙设备连接selectToDevice:function(){wx.readBLECharacteristicValue({deviceId: "蓝牙设备的 ID ",characteristicId: "特征值 UUID",success: function(res) {console.log("读取数据成功", res);// 可以通过 res.value 获取到读取到的数据},fail: function(error) {console.log("读取数据失败", error);}});}});3.2.15 iBeacon
| API | 说明 |
|---|---|
| wx.startBeaconDiscovery | 开始搜索附近的 iBeacon 设备 |
| wx.stopBeaconDiscovery | 停止搜索附近的 iBeacon 设备 |
3.2.15.1 wx.startBeaconDiscovery
开始搜索周边的 iBeacon 设备。iBeacon 是一种基于蓝牙低功耗技术的设备,能够向周围的设备广播特定的标识信息。
demo.wxml
<view class="container"><button type="primary" bindtap="selectToDevice">搜索IBeacon</button>
</view>
demo.js
Page({selectToDevice:function(){wx.startBeaconDiscovery({uuids: ["UUID_1", "UUID_2"],success: function(res) {console.log("开始搜索 iBeacon 设备成功", res);},fail: function(error) {console.log("开始搜索 iBeacon 设备失败", error);}});}});3.2.15.2 wx.stopBeaconDiscovery
demo.wxml
<view class="container"><button type="primary" bindtap="stopToDevice">停止搜索IBeacon</button>
</view>
demo.js
Page({stopToDevice:function(){wx.stopBeaconDiscovery({success: function(res) {console.log("停止搜索 iBeacon 设备成功", res);},fail: function(error) {console.log("停止搜索 iBeacon 设备失败", error);}});}
});
3.2.16 NFC
| API | 说明 |
|---|---|
| wx.getHCEState | 获取本机支持的 HCE 卡片类型 |
| wx.startHCE | 初始化 NFC 模块并启动 HCE 模式 |
| wx.stopHCE | 关闭当前 HCE 模式 |
3.2.16.1 wx.getHCEState
HCE 是指手机模拟成智能卡,通过近场通信技术实现与读卡器的通信
demo.wxml
<view class="container"><button class="login-btn" bindtap="getHCEState">获取本机支持的卡片类型</button>
</view>
demo.js
Page({getHCEState: function() {wx.getHCEState({success: function(res) {console.log("获取 HCE 状态成功");console.log("是否支持 HCE:" + res.errCode);},fail: function(error) {console.log("获取 HCE 状态失败",error);}});}
})
3.2.16.2 wx.startHCE
近场通信技术实现与读卡器的通信
Page({startHCE: function() {// 点击按钮触发的事件处理函数wx.startHCE({aid_list: ['F0010203040506'],success: function(res) {console.log("开启 HCE 功能成功");console.log("返回值:" + res.errCode);},fail: function() {console.log("开启 HCE 功能失败");}});}
})
3.2.16.3 wx.stopHCE
近场通信技术实现与读卡器的通信
Page({stopHCE: function() {// 点击按钮触发的事件处理函数wx.stopHCE({success: function(res) {console.log("停止 HCE 功能成功");console.log("返回值:" + res.errCode);},fail: function() {console.log("停止 HCE 功能失败");}});}
})
3.2.17 剪贴板
| API | 说明 |
|---|---|
| wx.setClipboardData | 设置系统剪贴板的内容 |
| wx.getClipboardData | 获取系统剪贴板的内容 |
3.2.17.1 wx.setClipboardData
demo.wxml
<view class="container"><button class="login-btn" bindtap="copyText">设置剪贴板</button>
</view>
demo.js
Page({copyText: function() {// 点击按钮触发的事件处理函数wx.setClipboardData({data: '要复制的文本内容',success: function() {console.log("设置剪贴板数据成功");},fail: function() {console.log("设置剪贴板数据失败");}});}
})
3.2.17.2 wx.getClipboardData
demo.wxml
<view class="container"><button class="login-btn" bindtap="copyText">设置剪贴板数据</button><button class="login-btn" bindtap="pasteText">获取剪贴板数据</button>
</view>
demo.js
Page({copyText: function() {// 点击按钮触发的事件处理函数wx.setClipboardData({data: '要复制的文本内容',success: function() {console.log("设置剪贴板数据成功");},fail: function() {console.log("设置剪贴板数据失败");}});},pasteText: function() {// 点击按钮触发的事件处理函数wx.getClipboardData({success: function(res) {console.log("获取剪贴板数据成功");console.log("剪贴板数据:", res.data);},fail: function() {console.log("获取剪贴板数据失败");}});}
})
3.2.18 用户信息
| API | 说明 |
|---|---|
| wx.login | 登录凭证校验 |
| wx.getUserInfo | 获取用户信息 |
| wx.checkSession | 检查登录态是否过期 |
3.2.18.1 wx.login
demo.wxml
<view class="container"><button class="login-btn" bindtap="login">点击登录</button>
</view>
demo.js
Page({// 点击登录按钮的事件处理函数login: function() {// 调用 wx.login 进行用户登录wx.login({success: function(res) {if (res.code) {// 登录成功,获取到用户登录凭证 codeconsole.log("登录成功,code: ", res.code);wx.request({url: 'https://localhost:8081/login', // 后端接口地址method: 'POST',data: {code: res.code // 将 code 作为请求参数发送给后端接口},success: function(res) {// 后端返回的登录结果console.log("后端登录结果", res.data);// 处理后端返回的登录结果,根据实际需求进行业务操作// 在这里可以保存用户信息、授权等操作},fail: function(error) {console.log("后端登录请求失败", error);}});} else {// 登录失败console.log("登录失败", res.errMsg);}},fail: function(error) {console.log("登录请求失败", error);}});}
})
3.2.18.2 wx.getUserInfo
demo.wxml
<view class="container"><button class="login-btn" bindtap="getUserInfo">获取用户信息</button>
</view>
demo.js
Page({// 点击按钮获取用户信息的事件处理函数getUserInfo: function() {// 调用 wx.getUserInfo 获取用户信息wx.getUserInfo({success: function(res) {// 获取到用户信息var userInfo = res.userInfo;console.log("用户信息", userInfo);// 可以在这里将用户信息保存到本地或发送给后端接口进行处理等操作},fail: function(error) {console.log("获取用户信息失败", error);}});}
})
3.2.18.3 wx.checkSession
demo.js
Page({onLoad: function(options) {// 页面加载时调用 checkSession 检查登录态wx.checkSession({success: function() {// 登录态未过期,可以直接使用小程序功能console.log("登录态未过期");},fail: function() {// 登录态已过期,需要重新登录console.log("登录态已过期,需要重新登录");// 跳转到登录页面进行重新登录wx.navigateTo({url: '/pages/demo/demo'});}});}
})
3.2.19 微信支付
| API | 说明 |
|---|---|
| wx.requestPayment | 发起微信支付 |
3.2.19 wx.requestPayment
demo.js
wx.requestPayment({timeStamp: '1574839255', // 时间戳,需与后端接口提供的一致nonceStr: '1234567890', // 随机字符串,需与后端接口提供的一致package: 'prepay_id=xxxxx', // 预支付会话标识,需与后端接口提供的一致signType: 'MD5', // 签名算法,需与后端接口提供的一致paySign: 'xxxxxxxxxxxxxx', // 签名,需与后端接口提供的一致success: function(res) {// 支付成功回调console.log("支付成功", res);},fail: function(error) {// 支付失败回调console.log("支付失败", error);}
});