该笔记来源于网络,仅用于搜索学习,不保证所有内容正确。
文章目录
- 1、Presto安装使用
- 2、事件分析
- 3、漏斗分析
- 4、漏斗分析UDAF开发
- 开发UDF插件
- 开发UDAF插件
- 5、漏斗测试
1、Presto安装使用
参考官方文档:https://prestodb.io/docs/current/
Presto是一个高效的查询分析引擎,支持多种数据源,例如(Hive、MySQL、MD、Kafka等),内部查询是基于内存操作的,相比较Spark效率更高,而且更大的特点在于可以自定义内存空间,设置内存使用大小。
安装部署
# 创建目录
mkdir -p /opt1/soft/presto
# 下载presto-server
wget -P /opt1/soft/presto http://doc.yihongyeyan.com/qf/project/soft/presto/presto-server-0.236.tar.gz
# 解压
tar -zxvf presto-server-0.236.tar.gz
# 创建软连
ln -s  /opt1/soft/presto/presto-server-0.236 /opt1/soft/presto/presto-server
# 安装目录下创建etc目录
cd /opt1/soft/presto/presto-server/ && mkdir etc
# 创建节点数据目录
mkdir -p /data1/presto/data
# 接下来创建配置文件
cd /opt/soft/presto/presto-server/etc/
# config.properties  persto server的配置
cat << EOF > config.properties
coordinator=true
node-scheduler.include-coordinator=true
http-server.http.port=8080
# 单个查询在整个集群上够使用的最大用户内存
query.max-memory=3GB
# 单个查询在每个节点上可以使用的最大用户内存
query.max-memory-per-node=1GB
# 单个查询在每个节点上可以使用的最大用户内存+系统内存(user memory: hash join,agg等,system memory:input/output/exchange buffers等)
query.max-total-memory-per-node=2GB
discovery-server.enabled=true
discovery.uri=http://0.0.0.0:8080
EOF# node.properties 节点配置
cat << EOF > node.properties
node.environment=production
node.id=node01
node.data-dir=/data1/presto/data
EOF#jvm.config 配置,注意-DHADOOP_USER_NAME配置,替换为你需要访问hdfs的用户
cat << EOF > jvm.config
-server
-Xmx3G
-XX:+UseG1GC
-XX:G1HeapRegionSize=32M
-XX:+UseGCOverheadLimit
-XX:+ExplicitGCInvokesConcurrent
-XX:+HeapDumpOnOutOfMemoryError
-XX:+ExitOnOutOfMemoryError
-DHADOOP_USER_NAME=root
EOF#log.properties
#default level is INFO. `ERROR`,`WARN`,`DEBUG`
cat << EOF > log.properties
com.facebook.presto=INFO
EOF# catalog配置,就是各种数据源的配置,我们使用hive,注意替换为你自己的thrift地址
mkdir /opt1/soft/presto/presto-server/etc/catalog
cat <<EOF > catalog/hive.properties
connector.name=hive-hadoop2
hive.metastore.uri=thrift://192.168.10.99:9083
hive.parquet.use-column-names=true
hive.allow-rename-column=true
hive.allow-rename-table=true
hive.allow-drop-table=true
EOF# 添加hudi支持
wget -P /opt1/soft/presto/presto-server/plugin/hive-hadoop2 http://doc.yihongyeyan.com/qf/project/soft/hudi/hudi-presto-bundle-0.5.2-incubating.jar# 客户端安装
wget -P /opt1/soft/presto/ http://doc.yihongyeyan.com/qf/project/soft/presto/presto-cli-0.236-executable.jar
cd /opt1/soft/presto/
mv presto-cli-0.236-executable.jar presto
chmod u+x presto
ln -s /opt1/soft/presto/presto /usr/bin/presto
# 至此presto 安装完毕
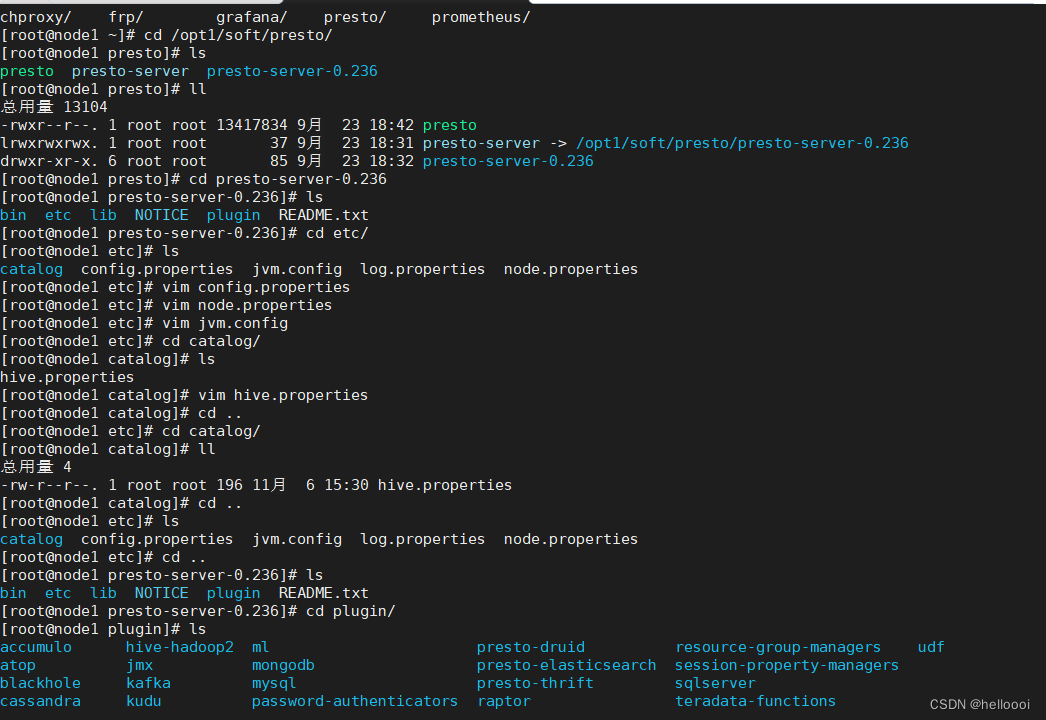
测试
# 启动persto-server, 注意下方命令是在后台启动,日志文件在node.properties中配置的 /data2/presto/data/var/log/ 目录下
/opt1/soft/presto/presto-server/bin/launcher start
# presot 连接hive metastore
presto --server 192.168.10.99:8080 --catalog hive --schema ods_news1
# 执行查询你会看到我们hive中的表
show tables;
进入客户端后,查询数据很多,需要用end键查看下拉,如果想退出按q键退出查看
2、事件分析
在这里我们先确定实施方案,也就是我们接下来开发的各种模型要怎么使用,给你大家提供了三种方案,第一种就是使用可视化工具superset,第二种就是使用hue、第三种使用自研Web平台,我们选择的是第三种方式,这种方式需要编写JDBC连接操作Presto,然后根据每个模型查询出来的不同结果集,提供不同的接口,客户端可以用过访问HTTP请求来调用接口拿到每个不同模型的不同数据。
-- 2. 分版本各APP页面访问次数(PV)的TOP-3, [当日准实时数据,当下时间延迟5分钟]with t1 as(selectlogday,app_version,element_page,count(1) as pvfrom ods_news1.eventwhere logday='20201227' and app_version!=''group by 1,2,3
),
t2 as(select logday,app_version,element_page,pv,row_number() over(partition by app_version order by pv desc) as rankfrom t1
)
select * from t2 where t2.rank<=3 order by app_version desc;/*类似结果如下:logday  | app_version | element_page | pv | rank
----------+-------------+--------------+----+------20200619 | 2.3         | 我的         | 48 |    120200619 | 2.3         | 活动页       | 40 |    220200619 | 2.3         | 新闻列表页   | 39 |    320200619 | 2.2         | 搜索页       | 40 |    120200619 | 2.2         | 新闻列表页   | 38 |    220200619 | 2.2         | 活动页       | 37 |    320200619 | 2.1         | 首页         | 41 |    120200619 | 2.1         | 活动页       | 37 |    220200619 | 2.1         | 注册登录页   | 35 |    3
*/
-- 3. 天,小时,分钟 级别的APP页面点击的UV数,并保证每一列降序输出 [注意使用上卷函数,当日准实时数据,当下时间延迟5分钟]
--上卷(汇总数据)
上卷就是乘坐电梯上升观测人的过程。数据的汇总聚合,细粒度到粗粒度的过程,会无视某些维度
按城市汇总的人口数据上卷,观察按国家人口的数据。就是由细粒度到粗粒度观测数据的过程,应该还会记录相应变化。--下钻(明细数据)
上卷的反向操作,数据明细,粗粒度到细粒度的过程,会细化某些维度
可以按照城市汇总的人口数据下钻,观察按城镇人口汇总的数据。由粗粒度变为细粒度。--例
select * from table group by A;
select * from table group by A,B;
select * from table group by A,B,C;
自上而下粒度变细,为下钻;
自下而上粒度变粗,为上卷with t1 as(
select
format_datetime(from_unixtime(ctime/1000),'yyyy-MM-dd') as log_day,
format_datetime(from_unixtime(ctime/1000),'yyyy-MM-dd HH') as log_hour,
format_datetime(from_unixtime(ctime/1000),'yyyy-MM-dd HH:mm') as log_minute,
distinct_id
from ods_news1.event
where logday='20201227' and event='AppClick'
)
select
log_day,log_hour,log_minute,
count(distinct distinct_id) uv,
grouping(log_day,log_hour,log_minute) group_id
from t1
group by
rollup(log_day,log_hour,log_minute)
order by group_id desc,log_day desc ,log_hour desc ,log_minute desc
/*类似结果如下:log_day   |   log_hour    |    log_minute    |  uv  | group_id
------------+---------------+------------------+------+----------NULL       | NULL          | NULL             | 2341 |        72020-06-19 | NULL          | NULL             | 2341 |        32020-06-19 | 2020-06-19 18 | NULL             |  584 |        12020-06-19 | 2020-06-19 17 | NULL             |  585 |        12020-06-19 | 2020-06-19 16 | NULL             |  562 |        12020-06-19 | 2020-06-19 15 | NULL             |  571 |        12020-06-19 | 2020-06-19 14 | NULL             |  298 |        12020-06-19 | 2020-06-19 18 | 2020-06-19 18:59 |    7 |        02020-06-19 | 2020-06-19 18 | 2020-06-19 18:58 |   13 |        02020-06-19 | 2020-06-19 18 | 2020-06-19 18:57 |   11 |        02020-06-19 | 2020-06-19 18 | 2020-06-19 18:56 |    8 |        02020-06-19 | 2020-06-19 18 | 2020-06-19 18:55 |   14 |        02020-06-19 | 2020-06-19 18 | 2020-06-19 18:54 |   12 |        02020-06-19 | 2020-06-19 18 | 2020-06-19 18:53 |   10 |        0
*/
3、漏斗分析
sql实现
# 我们漏斗分析中定义的需求如下
注册-> 点击新闻-> 进入详情页-> 发布评论
# 转换成事件
SignUp -> AppClick[element_page='新闻列表页'] -> AppClick[element_page='内容详情页']->NewsAction[action_type='评论']# 接下来我们用SQL实现这个需求
# 我们来查询 20201227到20201230 事件范围内,并且窗口时间是3天的漏斗
注意:我们这里数据就三天,所以窗口期也就是不用判断,但是我们以后可能会拿到N天数据,所以要加窗口期判断
-- 分析sql,首先我们可以先把每一个事件的数据按照条件查询出来,然后在将每一个事件中的时间拿到,进行关联查询,通过时间进行判断该事件是否在窗口期以内,并且还要和上一个事件判断,一定要大于它
-- 拿到三天内每一个事件数据
with t1 as(selectdistinct_id,ctime,eventfrom  ods_news1.eventwhere event='SignUp'and format_datetime(from_unixtime(ctime/1000),'yyyyMMdd') >='20200923'and format_datetime(from_unixtime(ctime/1000),'yyyyMMdd') <='20200925'
),
t2 as(selectdistinct_id,ctime,eventfrom  ods_news1.eventwhere event='AppClick' and element_page='新闻列表页'and format_datetime(from_unixtime(ctime/1000),'yyyyMMdd') >='20200923'and format_datetime(from_unixtime(ctime/1000),'yyyyMMdd') <='20200925'
),
t3 as(selectdistinct_id,ctime,eventfrom  ods_news1.eventwhere event='NewsAction' and element_page='评论'and format_datetime(from_unixtime(ctime/1000),'yyyyMMdd') >='20200923'and format_datetime(from_unixtime(ctime/1000),'yyyyMMdd') <='20200925'
),
t4 as(selectdistinct_id,ctime,eventfrom  ods_news1.eventwhere event='SignIn'and format_datetime(from_unixtime(ctime/1000),'yyyyMMdd') >='20200923'and format_datetime(from_unixtime(ctime/1000),'yyyyMMdd') <='20200925'
)
select
count(distinct t1.distinct_id) step1,
count(t2.event) step2,
count(t3.event) step3,
count(t4.event) step4
from t1
left join t2
on t1.distinct_id=t2.distinct_id
and t1.ctime<t2.ctime and t2.ctime-t1.ctime<86400*3*1000
left join t3
on t2.distinct_id=t3.distinct_id
and t2.ctime<t3.ctime and t3.ctime-t1.ctime<86400*3*1000
left join t4
on t3.distinct_id=t4.distinct_id
and t3.ctime<t4.ctime and t4.ctime-t1.ctime<86400*3*1000
# 执行上述查询可以看到如下类似结果step1 | step2 | step3 | step4
-------+-------+-------+-------3154 |    79 |     2 |     1
# 代表着我们的漏斗的每一步的人数
4、漏斗分析UDAF开发
分析:UDAF开发我们分为两步处理,第一步处理数据,求出用户深度即可,第二步根据每一个用户的深度将其转换成数组,集合每一个数组中对应下标值,然后求sum。
Presto使用操作:
需要掌握内容:
1、开辟内存空间大小
2、合理设置存入数据大小,保证别越界,超出内存
3、内存地址结合使用
开发UDF插件
开发完成代码后,然后将插件要部署到Presto上面,前提先打Jar,然后上传到Presto,最后重启,使用函数
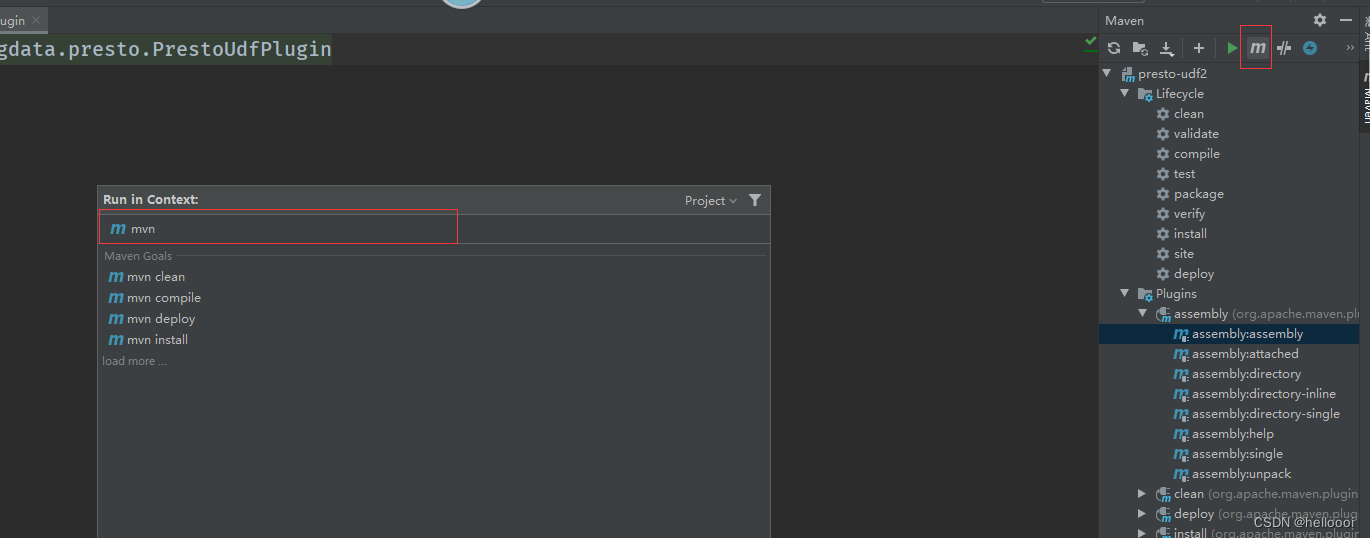
@ScalarFunction("my_upper") // 固定参数,这里面表示函数名的意思,也就我们在使用Presto的时候用的函数名
@Description("我的大小写转换函数") // 函数的注释
@SqlType(StandardTypes.VARCHAR) // 表示数据类型
开发UDAF插件
@AggregationFunction("sumDouble") // 函数名
@Description("this is a sum double") // 注释
@InputFunction  输入的方法注释
@CombineFunction  合并方法注释
@OutputFunction()  输出方法注释
同理,打包上传即可,然后重启Presto就可以使用。
5、漏斗测试
用户深度
select funnel(ctime, 86400*1000*3, event, 'SignUp,AppClick,AppClick,NewsAction') as user_depth
from ods_news1.event
where  (
event in ('SignUp')
or (event='AppClick' and element_page='新闻列表页' )
or (event='AppClick' and element_page='内容详情页' )
or (event='NewsAction' and action_type='评论' )
)
and logday>='20201227' and logday<'20201230'
group by distinct_id
完整sql
select funnel_merger(user_depth, 4) as funnel_array from(
select funnel(ctime, 86400*1000*3, event, 'SignUp,AppClick,NewsAction,SignIn') as user_depth
from ods_news1.event
where  (
event in ('SignUp')
or (event='AppClick' and element_page='新闻列表页' )
or (event='NewsAction' and action_type='评论' )
or (event='SignIn')
)
and logday>='20200923' and logday<'20200925'
group by distinct_id
);
注意:我的数据里面没有AppPageView数据,所以我在执行的时候没有添加它,但是我添加了两个AppClick就不对了,因为我们在开发UDAF的时候里面设置的是Map类型结构,我们获取Event名称的时候,发现相同Key了,而Map的Key是唯一的,所以你写入Key值得时候,会被覆盖,那么数据就乱了,所以这里我选择了一个SignIn,这个字段也没有的,只是代替一下,所以大家在操作的时候要看一下你的数据是否有这几个事件,不然结果就有可能不对。

