在刚才的“树莓派5试用体会-CSDN博客”这篇博文中提到了之前想用树莓派做minio单节点多驱动器的实验,这次终于在有奇葩的官方5V5A电源加持的树莓派5中找到了测试的可能性了。
Minio是一种开源对象存储。支持单节点单盘部署(入门体验)、单节点多盘部署(4盘起步。相当于有了软RAID,灭失1/2的磁盘仍可读。可读写需要N/2 + 1块好盘)、多节点多盘部署(生产环境用)。家用的话也可以看作一个私有的云盘。为了这个实验特地找出来一个四口Usb Hub,还买了4个U盘。
首先将U盘都插入USB HUB,并将HUB接入树莓派。然后下载minio软件。就一个可执行文件,先下载备用:
wget https://dl.min.io/server/minio/release/linux-arm64/minio第二步,使用lsblk命令检查一下四个盘是否都已认到,应该是要全部认到。如果有缺失需要进一步检查供电、盘或者HUB的质量问题。下图仅供参考,重点是想说明出现了sdb、sdc、sdd、sde(以你的实际情况为准)即可,说明四个新盘都认到了。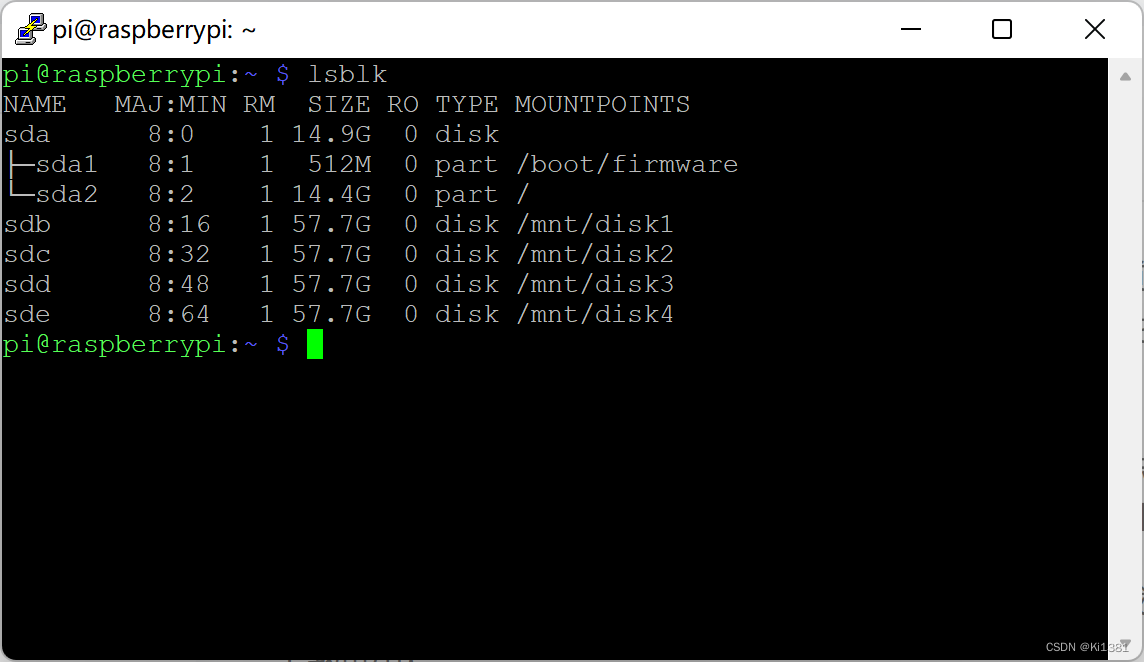
第三步(可选)。如果mountpoints上已有挂载,可运行umount 你的挂载点 卸载挂载。对每个新盘都如此操作。
第四步,fdisk。对于大于2T的盘使用gdisk。指令顺序仅供参考。
sudo fdisk /dev/sdb #(指令顺序:d n p 凡是让输数字一路默认,最后w)
sudo fdisk /dev/sdc # 同上
sudo fdisk /dev/sdd # 同上
sudo fdisk /dev/sde # 同上第五步,格式化。可能先要执行下sudo apt install xfsprogs,不然不认xfs:
sudo mkfs.xfs /dev/sdb -L diskB -f
sudo mkfs.xfs /dev/sdc -L diskC -f
sudo mkfs.xfs /dev/sdd -L diskD -f
sudo mkfs.xfs /dev/sde -L diskE -f
第六步,创建挂载点目录。注意,这些目录会在后续配置文件中出现。强烈建议就用自然数列编号。
sudo mkdir -p /mnt/disk1
sudo mkdir -p /mnt/disk2
sudo mkdir -p /mnt/disk3
sudo mkdir -p /mnt/disk4
第七步,编辑fstab文件:sudo /etc/fstab,追加以下内容:
LABEL=diskB     /mnt/disk1      xfs     defaults,nofail,noatime 0       2
LABEL=diskC     /mnt/disk2      xfs     defaults,nofail,noatime 0       2
LABEL=diskD     /mnt/disk3      xfs     defaults,nofail,noatime 0       2
LABEL=diskE     /mnt/disk4      xfs     defaults,nofail,noatime 0       2
第八步,创建挂载点:
sudo mount /dev/sdb /mnt/disk1
sudo mount /dev/sdc /mnt/disk2
sudo mount /dev/sdd /mnt/disk3
sudo mount /dev/sde /mnt/disk4
第九步,到这里强烈建议重启一次。不方便重启可以尝试 sudo systemctl daemon-reload
第二阶段,配置minio本身了:
第十步:转移minio可执行文件到指定目录:
sudo mv minio /usr/local/bin/
sudo chmod +x minio
第十一步:编辑 /etc/systemd/system/minio.service 文件:
[Unit]
Description=MinIO
Documentation=https://min.io/docs/minio/linux/index.html
Wants=network-online.target
After=network-online.target
AssertFileIsExecutable=/usr/local/bin/minio[Service]
WorkingDirectory=/usr/localUser=minio-user
Group=minio-user
ProtectProc=invisibleEnvironmentFile=-/etc/default/minio
ExecStartPre=/bin/bash -c "if [ -z \"${MINIO_VOLUMES}\" ]; then echo \"Variable MINIO_VOLUMES not set in /etc/default/minio\"; exit 1; fi"
ExecStart=/usr/local/bin/minio server $MINIO_OPTS $MINIO_VOLUMES# MinIO RELEASE.2023-05-04T21-44-30Z adds support for Type=notify (https://www.freedesktop.org/software/systemd/man/systemd.service.html#Type=)
# This may improve systemctl setups where other services use `After=minio.server`
# Uncomment the line to enable the functionality
# Type=notify# Let systemd restart this service always
Restart=always# Specifies the maximum file descriptor number that can be opened by this process
LimitNOFILE=65536# Specifies the maximum number of threads this process can create
TasksMax=infinity# Disable timeout logic and wait until process is stopped
TimeoutStopSec=infinity
SendSIGKILL=no[Install]
WantedBy=multi-user.target# Built for ${project.name}-${project.version} (${project.name})
按官方文档的说法,它是推荐放在/usr/lib/systemd/system下的,但我这边测试遇到了个权限问题,先放一放吧。反正放在/etc/systemd/system/下肯定可以。
第十二步,编辑 /etc/default/minio 文件:
# MINIO_ROOT_USER and MINIO_ROOT_PASSWORD sets the root account for the MinIO server.
# This user has unrestricted permissions to perform S3 and administrative API operations on any resource in the deployment.
# Omit to use the default values 'minioadmin:minioadmin'.
# MinIO recommends setting non-default values as a best practice, regardless of environment.MINIO_ROOT_USER=minioadmin
MINIO_ROOT_PASSWORD=minioadmin# MINIO_VOLUMES sets the storage volumes or paths to use for the MinIO server.
# The specified path uses MinIO expansion notation to denote a sequential series of drives between 1 and 4, inclusive.
# All drives or paths included in the expanded drive list must exist *and* be empty or freshly formatted for MinIO to start successfully.MINIO_VOLUMES="/mnt/disk{1...4}"# MINIO_SERVER_URL sets the hostname of the local machine for use with the MinIO Server.
# MinIO assumes your network control plane can correctly resolve this hostname to the local machine.# Uncomment the following line and replace the value with the correct hostname for the local machine.#MINIO_SERVER_URL="http://minio.example.net"
这里指定了管理控制台的用户名和密码,以及实际的磁盘挂载点。这里我偷懒用了弱密码,好孩子不要学。。。
第十三步,创建专用账号(组)并赋权:
sudo groupadd -r minio-user
sudo useradd -M -r -g minio-user minio-user
sudo chown minio-user:minio-user /mnt/disk1 /mnt/disk2 /mnt/disk3 /mnt/disk4
好了,可以见证奇迹了:
#启动服务
sudo systemctl start minio.service
#设置服务自动运行
sudo systemctl enable minio.service#查看服务状态是否正常
sudo systemctl status minio.service
journalctl -f -u minio.service
systemctl status里看到有Active: active (running) 基本上就没啥大问题了。
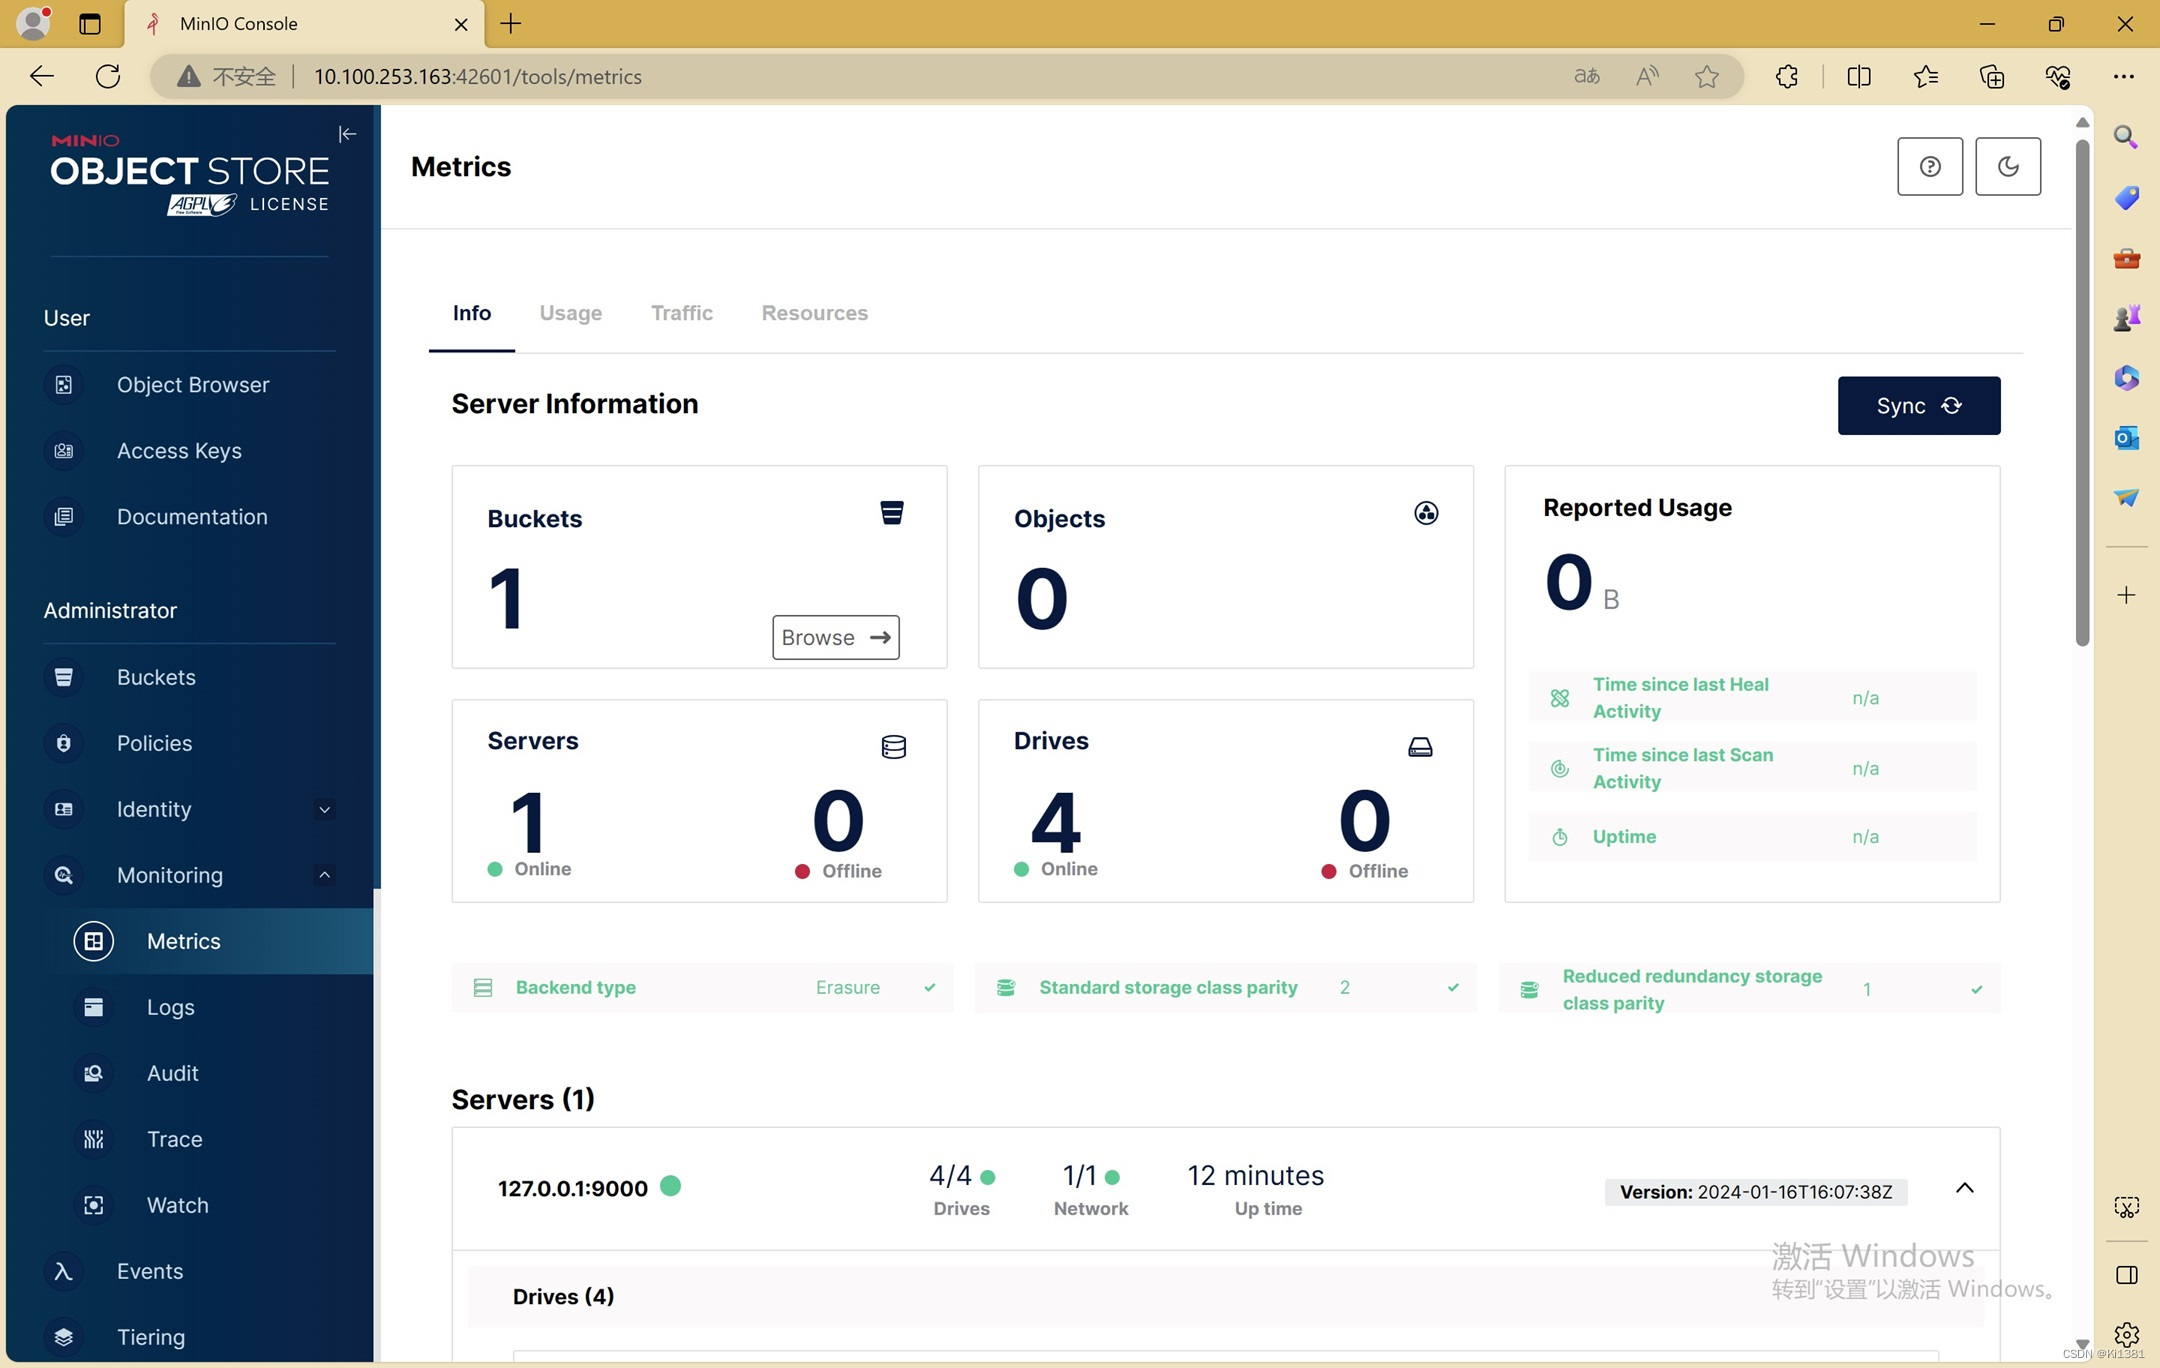
可以用http://IP地址:9000测试。用户名密码都是minioadmin(参见/etc/default/mini 文件。再次强调弱密码家里玩玩就算了,公司里千万别偷着个懒,哪怕是开发测试环境)
突然有个想法,接下来研究下使用c#和python去访问minio存储。。。


