客户端使用RestSharp库调用WebApi 动态加载数据

在MyDoTo客户端中,使用NuGet 安装两个库
- RestSharp
- Newtonsoft.Json


一. RestSharp 简单的使用测试例子
当前章节主要目的是:对RestSharp 库,根据项目需求再次进行封装。下面先做个简单的使用测试例子。
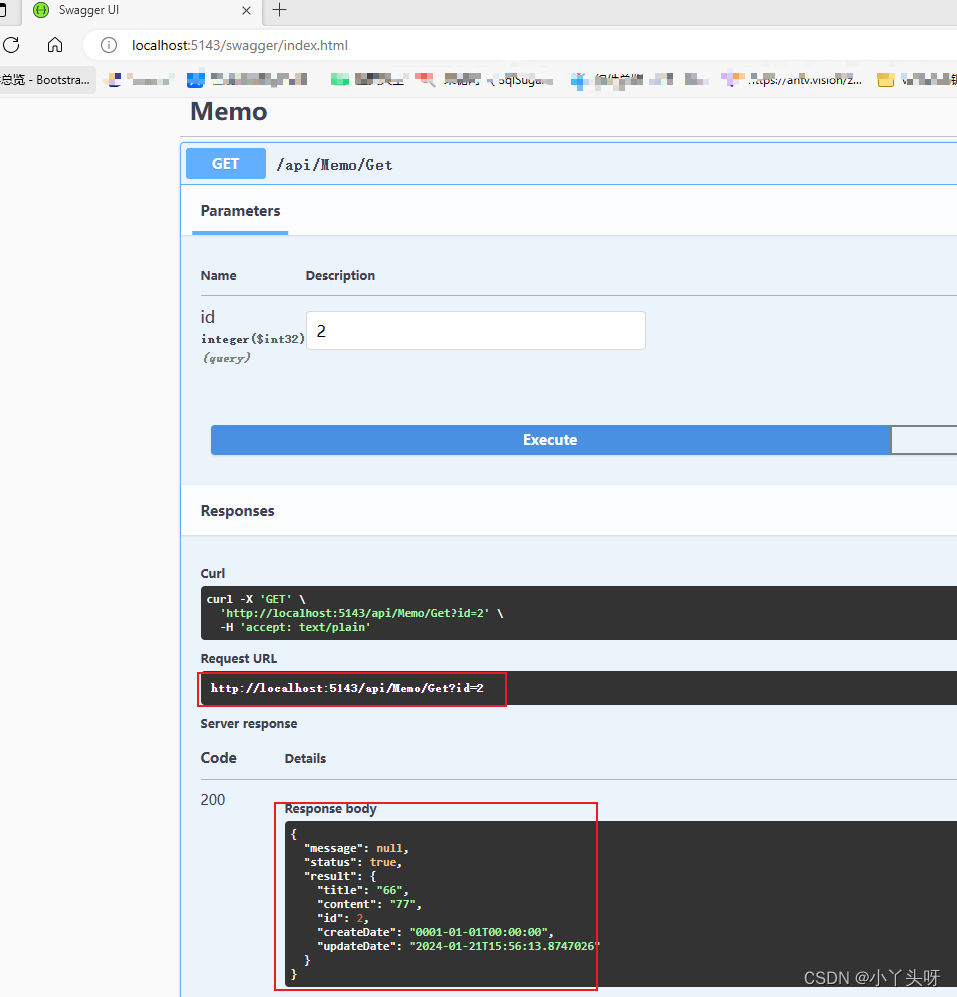
1.首先运行WebApi 项目,获取Memo 单条数据
请求成功后,可以看到请求的URL和返回的Response body(响应内容)
2.在MyToDo客户端的 MemoViewModel中 ,CreateMemoList 方法加载数据时进行以下修改测试
var client = new RestSharp.RestClient("http://localhost:5143");
var requestGet = new RestRequest("api/Memo/Get",Method.Get);
requestGet.AddParameter("id","2");
var response= client.Execute(requestGet);
var con= response.Content;
如果需要解析拿到的具体对象数据,需对结果进行 JsonConvert.DeserializeObject 反序列化。具体的解析步骤就是:
- 拿到对象数据,把JSON 生成C# 实体类。进行反序列化的时候把当前数据实体类传进去就OK了。
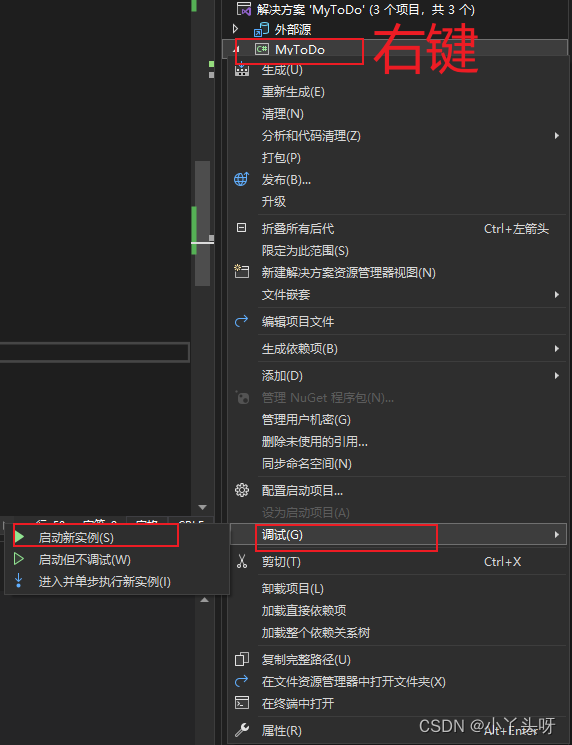
3.先把WebApi项目已经启动后,再选择 MyToDo 客户端项目,右键,启动一个新实例
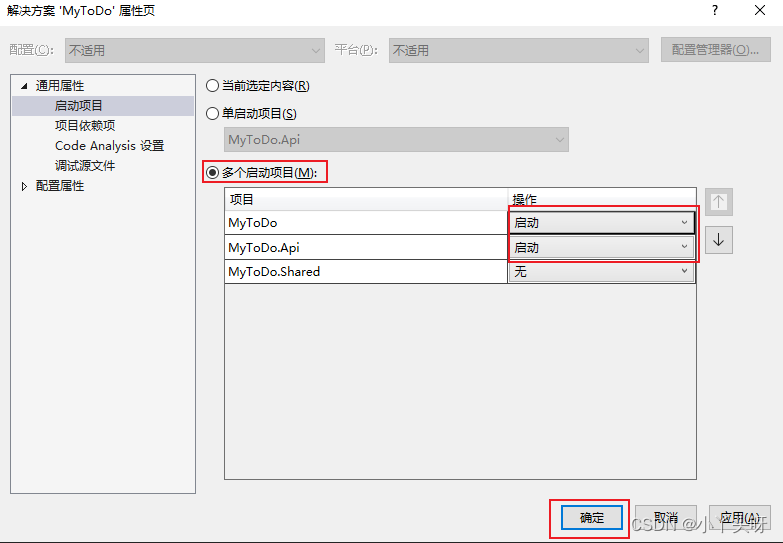
或者右键解决方案==》属性,配置多个启动项目
4.最后在MyToDo客户端打断点调试。运行起来后,命中断点,可以看到请求的接口有数据返回了
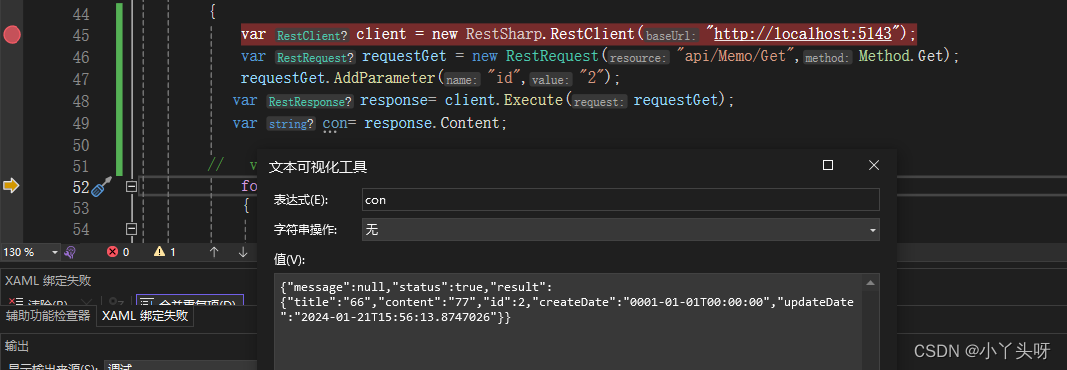
基本的简单使用就是这样。在RestSharp 官网 有各种使用实例,复杂的涉到Token 身份认证等都有。
二.对 RestSharp 进行封装使用,集成到客户端中
新建一个服务层文件夹(Service),用于存放封装对WebApi 接口的访问等处理逻辑
1. 首先把 ApiResponse 共用类,移到MyToDo.Shared 中,并且再添加请求结果泛型的ApiResponse 类
public class ApiResponse{/// <summary>/// 失败/// </summary>/// <param name="message"></param>/// <param name="status"></param>public ApiResponse(string message, bool status = false){ this.Message = message;this.Status = status;}/// <summary>/// 成功/// </summary>/// <param name="status"></param>/// <param name="result"></param>public ApiResponse(bool status,object result) {this.Status = status;this.Result = result;}/// <summary>/// 返回消息/// </summary>public string Message { get; set; }/// <summary>/// 返回状态/// </summary>public bool Status { get; set; }/// <summary>/// 结果/// </summary>public object Result { get; set; }}public class ApiResponse<T>{/// <summary>/// 返回消息/// </summary>public string Message { get; set; }/// <summary>/// 返回状态/// </summary>public bool Status { get; set; }/// <summary>/// 结果/// </summary>public T Result { get; set; }}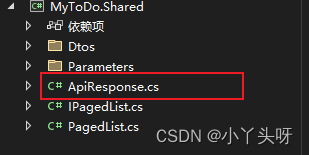
且MyToDo 客户端要引用MyToDo.Shared 项目。

2. 在 MyToDo 项目Service 文件夹中,封装一个通用的请求类型类(BaseRequest)主要用于构造请求接口的时候,传递的参数。
public class BaseRequest{/// <summary>/// 请求类型/// </summary>public Method Method { get; set; }/// <summary>/// 路由,也就是Url/// </summary>public string Route { get; set; }/// <summary>/// 数据类型描述/// </summary>public string ContentType { get; set; } = "application/json";/// <summary>/// 请求参数/// </summary>public object Paramenter { get; set; }}3.同样,接着再封装一个访问WebApi 的共用类(HttpRestClient)
public class HttpRestClient
{private readonly string apiUrl;protected readonly RestClient clinet;public HttpRestClient(string apiUrl) {this.apiUrl = apiUrl;clinet = new RestClient(apiUrl);}//通用请求public async Task<ApiResponse> ExecuteAsync(BaseRequest baseRequest){var request = new RestRequest(baseRequest.Route, baseRequest.Method);//添加请求头request.AddHeader("Content-Type", baseRequest.ContentType);//添加请求参数if (baseRequest.Paramenter != null){//把请求参数进行序列化后,添加进来。并且设置序列化的类型request.AddParameter("param",JsonConvert.SerializeObject(baseRequest.Paramenter),ParameterType.RequestBody);}var response=await clinet.ExecuteAsync(request);//把结果进行反序列化后,返回出去return JsonConvert.DeserializeObject<ApiResponse>(response.Content);}//通用带泛型请求public async Task<ApiResponse<T>> ExecuteAsync<T>(BaseRequest baseRequest){var request = new RestRequest(baseRequest.Route, baseRequest.Method);//添加请求头request.AddHeader("Content-Type", baseRequest.ContentType);//添加请求参数if (baseRequest.Paramenter != null){//把请求参数进行序列化后,添加进来。并且设置序列化的类型request.AddParameter("param", JsonConvert.SerializeObject(baseRequest.Paramenter), ParameterType.RequestBody);}var response = await clinet.ExecuteAsync(request);//把结果进行反序列化后,返回出去return JsonConvert.DeserializeObject<ApiResponse<T>>(response.Content);}
}
4.创建通用的请求服务类(IBaseService)
public interface IBaseService<TEntity> where TEntity : class{//添加Task<ApiResponse<TEntity>> AddAsync(TEntity entity);//更新Task<ApiResponse<TEntity>> UpdateAsync(TEntity entity);//删除Task<ApiResponse> DeleteAsync(int id);//根据id,取第一条数据Task<ApiResponse<TEntity>> GetFirstOfDefaultAsync(int id);//获取所有数据Task<ApiResponse<PagedList<TEntity>>> GetAllAsync(QueryParameter parameter);}5. 实现(BaseService)通用服务类。继承 IBaseService
public class BaseService<TEntity> : IBaseService<TEntity> where TEntity : class{private readonly HttpRestClient client;private readonly string serverName;public BaseService(HttpRestClient client,string serverName){this.client = client;this.serverName = serverName;}public async Task<ApiResponse<TEntity>> AddAsync(TEntity entity){var request = new BaseRequest() {Method = Method.Post,Route=$"api/{serverName}/Add",Paramenter=entity};return await client.ExecuteAsync<TEntity>(request);}public async Task<ApiResponse> DeleteAsync(int id){var request = new BaseRequest(){Method = Method.Delete,Route = $"api/{serverName}/Delete?id={id}"};return await client.ExecuteAsync(request);}public async Task<ApiResponse<PagedList<TEntity>>> GetAllAsync(QueryParameter parameter){var request = new BaseRequest(){Method = Method.Get,Route = $"api/{serverName}/GetAll?pageIndex={parameter.PageIndex}&pageSize={parameter.PageSize}&Search={parameter.Search}"};return await client.ExecuteAsync<PagedList<TEntity>> (request);}public async Task<ApiResponse<TEntity>> GetFirstOfDefaultAsync(int id){var request = new BaseRequest(){Method = Method.Delete,Route = $"api/{serverName}/Get?id={id}"};return await client.ExecuteAsync<TEntity>(request);}public async Task<ApiResponse<TEntity>> UpdateAsync(TEntity entity){var request = new BaseRequest(){Method = Method.Post,Route = $"api/{serverName}/Update",Paramenter = entity};return await client.ExecuteAsync<TEntity>(request);}}三.待办事项调用WebApi服务接口获取数据
1.首先创建(待办事项服务接口类) IToDoService ,继承IBaseService 基类
public interface IToDoService:IBaseService<ToDoDto>{}2.接着,要实现(待办事项服务接口类)ToDoService。继承BaseService和IToDoService
public class ToDoService : BaseService<ToDoDto>, IToDoService{/// <summary>/// 构造中,直接传控制器名称进去。因为在Web Api项目中,待办事项控制器的名称,就是叫ToDo/// </summary>/// <param name="client"></param>/// <param name="serverName"></param>public ToDoService(HttpRestClient client, string serverName= "ToDo") : base(client, serverName){}}3.最后,需要在 App.xaml.cs 中,进行依赖注入
/// <summary>/// Interaction logic for App.xaml/// </summary>public partial class App : PrismApplication{/// <summary>/// 创建启动页面/// </summary>/// <returns></returns>protected override Window CreateShell(){return Container.Resolve<MainView>();}/// <summary>/// 依懒注入的方法/// </summary>/// <param name="containerRegistry"></param>protected override void RegisterTypes(IContainerRegistry containerRegistry){//对封装的http请求类,进行注入。并且设置一个默认参数containerRegistry.GetContainer().Register<HttpRestClient>(made:Parameters.Of.Type<string>(serviceKey:"webUrl"));//注册默认的服务地址containerRegistry.GetContainer().RegisterInstance(@"http://localhost:5143/",serviceKey: "webUrl");//注册服务containerRegistry.Register<IToDoService, ToDoService>();containerRegistry.RegisterForNavigation<AboutView>();containerRegistry.RegisterForNavigation<SkinView, SkinViewModel>();containerRegistry.RegisterForNavigation<IndexView, IndexViewModel>();containerRegistry.RegisterForNavigation<MemoView, MemoViewModel>();containerRegistry.RegisterForNavigation<ToDoView, ToDoViewModel>();containerRegistry.RegisterForNavigation<SettingsView, SettingsViewModel>();}}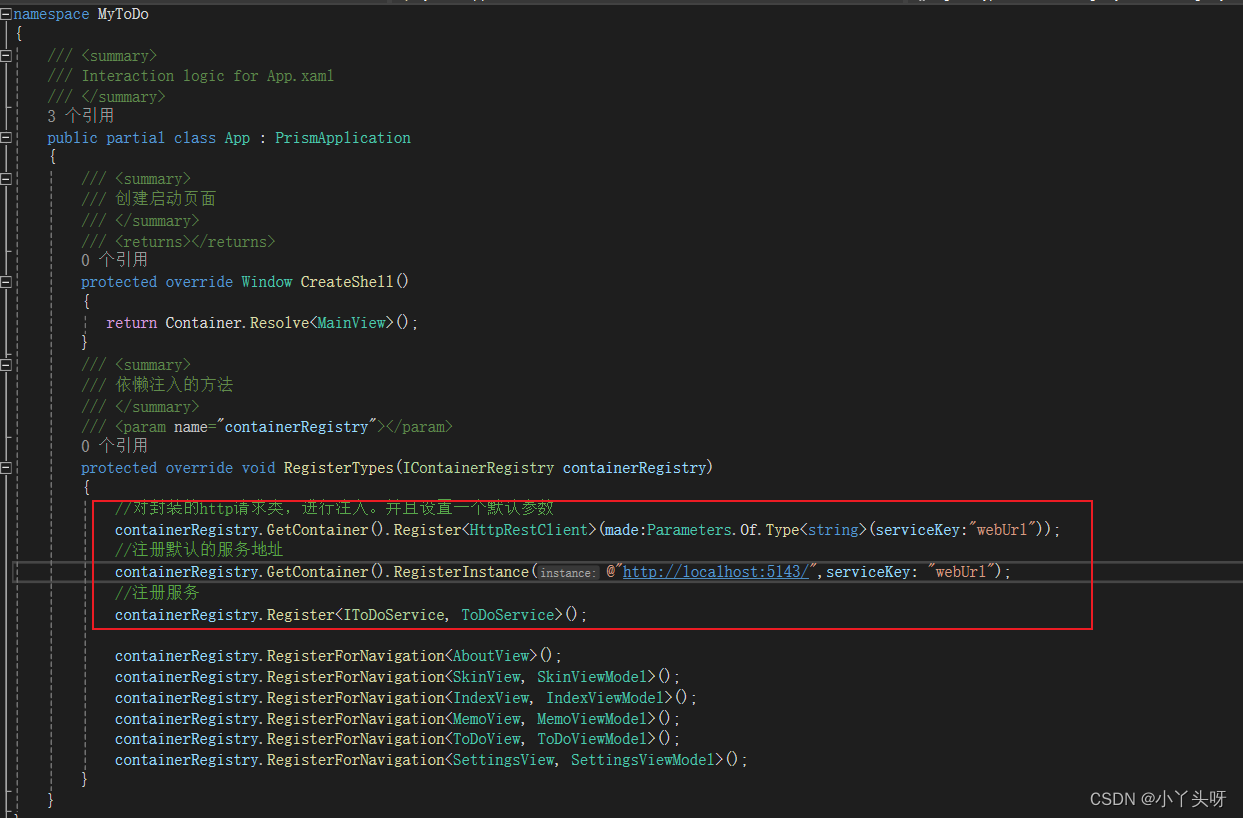
4.最后,在ViewModels 中,去使用 待办事项服务
public class ToDoViewModel:BindableBase{public ToDoViewModel(IToDoService toDoService){ToDoDtos = new ObservableCollection<ToDoDto>();AddCommand = new DelegateCommand(Add);this.toDoService = toDoService;CreateTodoList();}private bool isRightDrawerOpen;/// <summary>/// 右侧编辑窗口是否展开/// </summary>public bool IsRightDrawerOpen{get { return isRightDrawerOpen; }set { isRightDrawerOpen = value; RaisePropertyChanged(); }}public DelegateCommand AddCommand{ get; private set; }private ObservableCollection<ToDoDto> toDoDtos;private readonly IToDoService toDoService;/// <summary>/// 创建数据的动态集合/// </summary>public ObservableCollection<ToDoDto> ToDoDtos{get { return toDoDtos; }set { toDoDtos = value;RaisePropertyChanged(); }}async void CreateTodoList(){//添加查询条件var todoResult=await toDoService.GetAllAsync(new Shared.Parameters.QueryParameter(){PageIndex = 0,PageSize = 100,});if (todoResult.Status){toDoDtos.Clear();foreach (var item in todoResult.Result.Items){toDoDtos.Add(item);}}//for (int i = 0; i < 20; i++)//{// toDoDtos.Add(new ToDoDto()// {// Title="标题"+i,// Content="测试数据..."// });//}}/// <summary>/// 添加待办/// </summary>/// <exception cref="NotImplementedException"></exception>private void Add(){IsRightDrawerOpen=true;}}四.代码结构
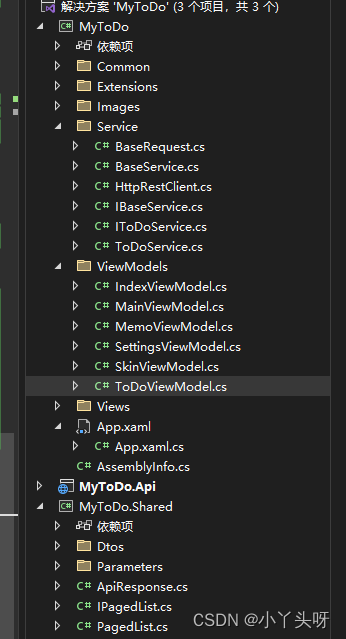
![[SpingBoot] 3个扩展点](https://img-blog.csdnimg.cn/direct/af4af2bc98a449babec7d7cfab429290.png)
