文章目录
- 什么是 MyBatis?
- 前期准备
- 依赖
- 配置文件
- mapper
- 利用注解
- 增、删、改、查
- 查
- 增
- 改
- 删
- #{} 和 ${} 的区别
- 类型别名
- 动态sql
- where if
- foreach
- sql引用
- 不常用标签
- 多表查询
- 多对一(一对一)
- 一对多
- 多对多
- 多表查询 个人理解
- 延迟加载
- 概念
- 使用场景
- 延迟加载配置
- 延迟加载使用
- 个人理解
- 缓存技术
- 测试一级缓存
- 在这里插入图片描述
- 在这里插入图片描述
- 测试二级缓存
- 二级缓存配置
- 自定义缓存
什么是 MyBatis?
MyBatis 是一款优秀的持久层框架,它支持自定义 SQL、存储过程以及高级映射。MyBatis 免除了几乎所有的 JDBC 代码以及设置参数和获取结果集的工作。MyBatis 可以通过简单的 XML 或注解来配置和映射原始类型、接口和 Java POJO(Plain Old Java Objects,普通老式 Java 对象)为数据库中的记录。
前期准备
依赖
<!--mybatis核心包--><dependency><groupId>org.mybatis</groupId><artifactId>mybatis</artifactId><version>3.4.5</version></dependency><!--mysql驱动包--><dependency><groupId>mysql</groupId><artifactId>mysql-connector-java</artifactId><version>5.1.6</version></dependency>
配置文件
sqlMapConfig.xml:
<?xml version="1.0" encoding="UTF-8"?>
<!DOCTYPE configurationPUBLIC "-//mybatis.org//DTD Config 3.0//EN""http://mybatis.org/dtd/mybatis-3-config.dtd">
<configuration><!-- 配置环境们 --><environments default="mysql"><!-- 配置具体的环境 --><environment id="mysql"><!-- 配置事务管理类型 --><transactionManager type="JDBC"/><!-- 配置是否需要使用连接池,POOLED使用,UNPOOLED不使用 --><dataSource type="POOLED"><property name="driver" value="com.mysql.jdbc.Driver"/><property name="url" value="jdbc:mysql:///mybatis_db"/><property name="username" value="root"/><property name="password" value="2552696563"/></dataSource></environment></environments><!-- 加载映射的配置文件 --><mappers><mapper resource="mappers/UserMapper.xml"/></mappers>
</configuration>
或者用spring去整合
applicationContext.xml:
<!-- jdbc.driver=com.mysql.jdbc.Driverjdbc.url=jdbc:mysql:///mybatis003jdbc.username=rootjdbc.password=root --><!--加载数据库参数文件--><context:property-placeholder location="classpath:jdbc.properties"/><!--配置数据库交给spring管理--><bean id="dataSource" class="com.alibaba.druid.pool.DruidDataSource"><property name="driverClassName" value="${db.driverClassName}"></property><property name="url" value="${db.url}"></property><property name="username" value="${db.username}"></property><property name="password" value="${db.password}"></property></bean><!--创建和数据库交互的工厂--><bean id="sqlSessionFactory" class="org.mybatis.spring.SqlSessionFactoryBean"><property name="dataSource" ref="dataSource"></property><property name="configLocation" value="classpath:sqlMapConfig.xml"></property><!-- 扫描,不用在显式的写映射文件 --></bean><bean id="mapperScan" class="org.mybatis.spring.mapper.MapperScannerConfigurer"><property name="sqlSessionFactoryBeanName" value="sqlSessionFactory"></property><property name="basePackage" value="com.qcby.dao"></property></bean>
mapper
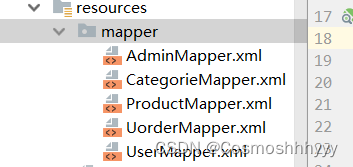
通常我们将写 sql 的 xml 放在 resources/mapper 目录下。
一般一个 dao 对应一个 mapper
namespace要对应对应接口的
<?xml version="1.0" encoding="UTF-8"?>
<!DOCTYPE mapperPUBLIC "-//mybatis.org//DTD Mapper 3.0//EN""http://mybatis.org/dtd/mybatis-3-mapper.dtd">
<mapper namespace="com.qcby.dao.UserDao"><!-- 这里写sql语句 -->
</mapper>
利用注解
基本不用,知道就可以。
public interface UserMapper {@Select("SELECT id, username, email FROM users WHERE id = #{id}")@Results({@Result(property = "userId", column = "id"),@Result(property = "userName", column = "username"),@Result(property = "emailAddress", column = "email")})User getUserById(int id);
}
<configuration><mappers><package name="com.qcby.dao"/><!-- 其他 Mapper 的配置... --></mappers>
</configuration>
- @Select 注解用于指定查询语句。
- #{userId} 是一个参数占位符,通过 @Param 注解指定了参数名称。
增、删、改、查
首先,基本是sql要会编写。
https://blog.csdn.net/Cosmoshhhyyy/article/details/133383339?ops_request_misc=%257B%2522request%255Fid%2522%253A%2522170666553716800215042990%2522%252C%2522scm%2522%253A%252220140713.130102334.pc%255Fblog.%2522%257D&request_id=170666553716800215042990&biz_id=0&utm_medium=distribute.pc_search_result.none-task-blog-2blogfirst_rank_ecpm_v1~rank_v31_ecpm-1-133383339-null-null.nonecase&utm_term=%E6%95%B0%E6%8D%AE%E5%BA%93&spm=1018.2226.3001.4450
假设有这么个类:
com.qcby.model.User:
public class User {private Integer id;private String username;private Date birthday;private String sex;private String address;......
}
查
public User findById(int id);
<select id="findById" resultType="com.qcby.model.User" parameterType="int">select * from user where id = #{id};</select>
- id 对应方法名字映射
- parameterType 参数类型
- resultType 返回值类型
- #{id} 占位符对应传入的参数
增
public int insert(User user);
<insert id="insert" parameterType="com.qcby.model.User"><selectKey keyProperty="id" order="AFTER" resultType="java.lang.Integer">select last_insert_id();</selectKey>insert into user(username,birthday,sex,address) values(#{username},#{birthday},#{sex},#{address})</insert>
- selectKey 处理主键生成的元素,通常用于插入操作
- order 有after before,这里是在插入之后查询插入生成的主键
- select last_insert_id();
改
public int update(User user);
<update id="update" parameterType="com.qcby.model.User">update user set username = #{username},birthday = #{birthday},sex = #{sex},address=#{address} where id = #{id}</update>
删
public void delete(Integer userId);
<delete id="delete" parameterType="int">delete from user where id = #{id};</delete>
#{} 和 ${} 的区别
#{} 占位符:
- 语法是用于预处理 SQL 语句中的参数,MyBatis 会根据参数的类型和属性名安全地将参数插入 SQL 语句中。
- 防止 SQL 注入攻击,因为 MyBatis 会使用预编译的方式将参数值传递给 SQL 引擎,而不是简单地拼接字符串。
- 在 SQL 语句中的位置可以是任意合法的位置,比如在 WHERE 子句、SET 子句等。
${} 占位符:
- 语法是用于将属性值直接插入 SQL 语句中,没有经过预处理。
- 是简单的字符串替换拼接,可以用于替换表名、列名等静态部分。
- 不提供防止 SQL 注入的保护,因此应谨慎使用,尽量避免直接使用用户输入的值。
类型别名
在sqlMapConfig加上:
<typeAliases><package name="com.qcby.model"/></typeAliases>
这样我们parameterType 和 resultType中就不用写完整的路径
像 com.qcby.model.User 可以直接写错user
动态sql
假设有个类:
public class User {private Integer id;private String username;private Date birthday;private String sex;private String address;private List<Integer> ids;........}
where if
根据用户名和性别进行模糊查询。
public List<User> findByIf(User user);
<select id="findByIf" parameterType="user" resultType="user">select * from user<where><if test="username != null and username != ''" >AND username like #{username}</if><if test="sex != null and sex != ''">AND sex = #{sex}</if></where></select>
- where 去掉1=1用的
- test if的判断条件,写载where里
- 里面不能使用 && || 要用 and or
- 如果符合条件,拼接 if 标签中的内容
- %熊% 用#{},熊 用’%${}%’
foreach
查询id 为 user里list ids中所有用户
public List<User> findByForeach(User user);
<!-- select * from user where id in (1, 2, 3, ...) --><select id="findByForeach" parameterType="user" resultType="user">select * from user<where><foreach collection="ids" open="id in (" close=")" separator="," item="i">#{i}</foreach></where></select>
- collection 集合
- open 以什么开头
- close 以什么结尾
- separator 以什么分割
- item 循环中每个元素的别名
select * from user where id = 1 or id = 2 or id = 3 or id = 4
sql引用
使用 refid 的好处在于,它可以让你在多个地方重用相同的 SQL 片段,当 SQL 片段需要修改时,只需要修改一处,不用在多个地方做同样的修改,提高了配置的可维护性和可读性。
<!--SQL--><sql id="findAll">select * from user</sql><!-- select * from user where .. --><select id="findAll" resultType="com.qcby.model.User"><include refid="findAll" /><where>......</where></select>
例如:
<!-- 定义一个 SQL 片段 -->
<sql id="selectColumns">id, username, email
</sql><!-- 引用已定义的 SQL 片段 -->
<select id="getUserById" parameterType="int" resultType="User">SELECT<include refid="selectColumns"/>FROM usersWHERE id = #{userId}
</select>
不常用标签
<choose>, <when>, <otherwise>
<select id="selectUserByCondition" parameterType="User" resultType="User">SELECT * FROM users<where><choose><when test="username != null">AND username = #{username}</when><when test="email != null">AND email = #{email}</when><otherwise>AND status = 'ACTIVE'</otherwise></choose></where>
</select>
- choose:定义一个选择块,其中包含多个 when 和一个可选的 otherwise。
- when:用于定义条件成立时要执行的 SQL 片段。在上述例子中,如果 username 不为 null,则执行 AND username = #{username}。
- otherwise:定义一个默认的 SQL 片段,当所有条件都不成立时执行。在上述例子中,如果 username 和 email 都为 null,则执行 AND status = ‘ACTIVE’。
<trim>
<select id="selectUsers" parameterType="Map" resultType="User">SELECT * FROM users<trim prefix="WHERE" prefixOverrides="AND | OR"><if test="username != null">AND username = #{username}</if><if test="email != null">AND email = #{email}</if></trim>
</select>
- prefix:可选属性,用于在 SQL 片段的前面添加一个字符串。
- prefixOverrides:可选属性,用于指定要从 SQL 片段的开头删除的字符串。
- suffix:可选属性,用于在 SQL 片段的末尾添加一个字符串。
- suffixOverrides:可选属性,用于指定要从 SQL 片段的结尾删除的字符串。
可以用在set,update
<update id="updateUser" parameterType="User">UPDATE users<set><trim suffixOverrides=","><if test="username != null">username = #{username},</if><if test="email != null">email = #{email}</if></trim></set>WHERE id = #{id}
</update>
多表查询
public class User {private Integer id;private String username;private Date birthday;private String sex;private String address;......
}
public class Account {private Integer id;private Integer uid;private Double money;......
}
多对一(一对一)
多个账户 对应 一个用户
在多的一方添加对方属性
这里再acccount 添加 user 属性。
public class Account {private Integer id;private Integer uid;private Double money;private User user; // 这里......
}
现在查询所有账户信息和其拥有者
public List<Account> findAll();
<select id="findAll" resultMap="accountMap">select a.*,u.username,u.address from account a,user u where a.uid = u.id</select><resultMap id="accountMap" type="com.qcby.model.Account"><result property="id" column="id" /><result property="uid" column="uid"/><result property="money" column="money"/><association property="user" javaType="com.qcby.model.User"><result property="username" column="username"/><result property="address" column="address"/></association></resultMap>
- resultMap 结果映射
- property 指定java对象属性
- column 查询出的结果中列名
- association 处理关联关系
一对多
一个用户对应多个账号
在一的一方,加上多的一方的对象集合
这里user加上account的集合list
public class User {private Integer id;private String username;private Date birthday;private String sex;private String address;private List<Account> accounts; // 这里......
}
查询所有用户及其所有账户金额
public List<User> findOneToMany();
<select id="findOneToMany" resultMap="userMap">select u.*,a.money from user u left join account a on u.id = a.uid</select><resultMap id="userMap" type="com.qcby.model.User"><result property="id" column="id"/><result property="username" column="username"/><result property="birthday" column="birthday"/><result property="sex" column="sex"/><result property="address" column="address"/><collection property="accounts" ofType="com.qcby.model.Account"><result property="money" column="money"/></collection></resultMap>
- collection 集合的封装
- ofType 指定集合中元素类型
多对多
和一对多相同
在自己类上加上对方的集合
或者再对方上面加上自己的集合
例如有一个角色类, 一个用户有多个角色,一个角色可以有多个用户。
public class Role {private Integer id;private String role_name;private String role_desc;private List<User> users; // 这里.......
}
public List<Role> findAllRole();
<select id="findAllRole" resultMap="roleMap">SELECT r.*,u.username FROM USER u,user_role ur,role r WHERE u.id = ur.UID AND ur.RID = r.ID</select><resultMap id="roleMap" type="role"><result property="id" column="id"/><result property="role_name" column="role_name"/><result property="role_desc" column="role_desc"/><collection property="users" ofType="user"><result property="username" column="username"/></collection></resultMap>
多表查询 个人理解
无非是两种方法:
- 在自己类上加上对方类属性
- 在自己类上加上对方类的集合
其实就是根据查询的角度来查询,和实际生活是对应的。
而数据库不会因为这个变化,比如无论是一对多、还是多对一,数据库都是多的一方把一的一方的主键作为外键。
而多对多都是建立再建立一个表。
我们的数据库结构从始至终都没有变化就可以印证这一点。所以不要弄混。
延迟加载
概念
延迟加载(Lazy Loading)是一种在对象关系映射(ORM)框架中常见的优化技术,用于提高性能并减少资源消耗。它的核心思想是:不在对象初始化时加载其关联的数据,而是在访问相关属性时才触发数据的加载。
延迟加载的优点:
- 性能优化: 延迟加载可以减少初始化对象时的查询量,提高初始化速度。
- 资源消耗: 可以避免加载不需要的关联数据,减少内存占用。
使用场景
- 直接加载:多对一
- 延迟加载:一对多
例如:
在查账户时,一个账户对应一个用户,可以直接把用户信息查出来,就用直接加载。
再查用户时,一个用户对应多个账户,可能我们用不到账户信息暂时,等用到的时候再去加载,就利用延迟加载。
延迟加载配置
<settings><!-- 开启延迟加载 --><setting name="lazyLoadingEnabled" value="true"/><!-- 将积极加载改为消极加载及按需加载 --><setting name="aggressiveLazyLoading" value="false"/></settings>

延迟加载使用
多对一:
<!-- 查询所有账户 --><select id="findAll" resultMap="accountMap">SELECT * from account</select><!-- 通过用户的id查询账户信息 --><select id="findByUid" parameterType="int" resultType="account">select * from account where uid = #{uid}</select><!-- 映射 --><resultMap type="Account" id="accountMap"><id property="id" column="id"/><result property="uid" column="uid"/><result property="money" column="money"/><!-- 配置延迟加载 --><association property="user" javaType="User" select="com.qcby.dao.UserMapper.findById" column="uid"><id property="id" column="id"/><result property="username" column="username"/><result property="birthday" column="birthday"/><result property="sex" column="sex"/><result property="addresss" column="addresss"/></association></resultMap>
- association 上的select 就是对应的select名字而已
一对多:
<!-- 查询所有用户 --><select id="findAll" resultMap="userMap">select * from user</select><!-- 通过用户的id查询账户信息 --><select id="findByUid" parameterType="int" resultType="account">select * from account where uid = #{uid}</select><!-- 映射 --><resultMap type="user" id="userMap"><id column="id" property="id"/><result column="username" property="username"/><result column="birthday" property="birthday"/><result column="sex" property="sex"/><result column="addresss" property="addresss"/><collection property="accounts" ofType="Account" select="com.qcby.dao.AccountMapper.findByUid" column="id" ><id column="id" property="id"/><result column="uid" property="uid"/><result column="money" property="money"/></collection></resultMap>
个人理解
无非就是把我们之前写的多表查询中的collection 或则 association 对应的sql提取了出来,将select拆分成两个select, 单独设置了一个select方法,只有用到的时候才去调用。
当然多了一个column属性,作为拎出来的方法参数,例如多对一中的通过用户的id查询用户信息, 一对多中的通过账户的id查询账户信息。
缓存技术
-
一级缓存(Local Cache):
一级缓存是 MyBatis 默认开启的本地缓存,它位于 SqlSession 的生命周期内,即在同一个 SqlSession 中执行的多个查询可以共享同一个缓存。一级缓存是基于对象引用的,当执行相同的查询语句时,MyBatis 会将查询结果缓存到一级缓存中。
一级缓存的作用范围是 SqlSession,当 SqlSession 关闭时,缓存也会被清空。 -
二级缓存(Global Cache):
二级缓存是 MyBatis 的全局缓存,它可以被多个 SqlSession 共享。当多个 SqlSession 执行相同的查询语句时,MyBatis 将查询结果缓存到二级缓存中,下次相同的查询可以直接从缓存中获取结果。
二级缓存的作用范围是整个应用程序,因此可以在不同的SqlSession 之间共享数据。
测试一级缓存
顺便讲一下测试方法如何写。
同一sqlSession下,调用两次findById:
/*** 测试缓存* @throws Exception*/@Testpublic void run5() throws Exception {// 加载配置文件InputStream in = Resources.getResourceAsStream("SqlMapperConfig.xml");// 创建工厂对象SqlSessionFactory factory = new SqlSessionFactoryBuilder().build(in);// 构建sessionSqlSession session = factory.openSession();// 通过session创建rMapper接口的代理对象UserMapper mapper = session.getMapper(UserMapper.class);User user = mapper.findById(1); System.out.println(user); // com.qcby.model.User@2a70a3d8User user2 = mapper.findById(1); System.out.println(user2); // com.qcby.model.User@2a70a3d8session.close();in.close();}

不同sqlSession下,调用两次findById:
/*** 测试缓存* @throws Exception*/@Testpublic void run5() throws Exception {// 加载配置文件InputStream in = Resources.getResourceAsStream("SqlMapperConfig.xml");// 创建工厂对象SqlSessionFactory factory = new SqlSessionFactoryBuilder().build(in);// 构建sessionSqlSession session = factory.openSession();// 通过session创建rMapper接口的代理对象UserMapper mapper = session.getMapper(UserMapper.class);User user = mapper.findById(1);System.out.println(user);session.close();SqlSession session2 = factory.openSession();UserMapper mapper2 = session2.getMapper(UserMapper.class);User user2 = mapper2.findById(1);System.out.println(user2);session2.close();in.close();}
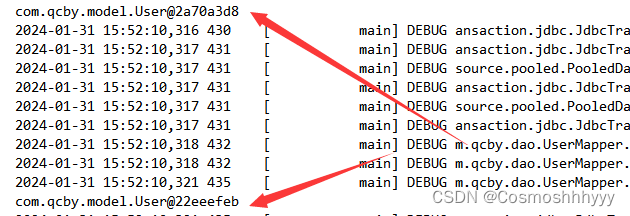
可以发现,再同一session下,两次输出同一对象,而再不同session下,两次输出不同对象。
证明了一级缓存存在,且声明周期是随session。
测试二级缓存
二级缓存配置
mybatis配置文件中:
<!-- 开启二级缓存 -->
<settings><setting name="cacheEnabled" value="true"/>
</settings>
要使用二级缓存的mapper中:
<!-- 配置二级缓存 -->
<cache eviction="FIFO" flushInterval="60000" size="512" readOnly="true"/>
- eviction 属性定义了缓存的清理策略,常用的有 LRU(最近最少使用)和 FIFO(先进先出)。
- flushInterval 属性定义了刷新缓存的时间间隔,单位是毫秒。
- size 属性定义了缓存的大小,超过这个大小时,将会触发清理操作。
- readOnly 属性定义了是否只读,如果设置为 true,表示缓存中的数据不会被修改,可以提高性能。
注意实现对应类的序列化接口
/*** 测试缓存* @throws Exception*/@Testpublic void run5() throws Exception {// 加载配置文件InputStream in = Resources.getResourceAsStream("SqlMapperConfig.xml");// 创建工厂对象SqlSessionFactory factory = new SqlSessionFactoryBuilder().build(in);// 构建sessionSqlSession session = factory.openSession();// 通过session创建rMapper接口的代理对象UserMapper mapper = session.getMapper(UserMapper.class);User user = mapper.findById(1);System.out.println(user);session.close();SqlSession session2 = factory.openSession();UserMapper mapper2 = session2.getMapper(UserMapper.class);User user2 = mapper2.findById(1);System.out.println(user2);session2.close();in.close();}

自定义缓存
实现Cache接口:
package com.example;import org.apache.ibatis.cache.Cache;import java.util.HashMap;
import java.util.Map;
import java.util.concurrent.locks.ReadWriteLock;
import java.util.concurrent.locks.ReentrantReadWriteLock;public class MyCustomCache implements Cache {private final String id;private final Map<Object, Object> cache = new HashMap<>();private final ReadWriteLock readWriteLock = new ReentrantReadWriteLock();public MyCustomCache(String id) {this.id = id;}@Overridepublic String getId() {return id;}@Overridepublic void putObject(Object key, Object value) {readWriteLock.writeLock().lock();try {cache.put(key, value);} finally {readWriteLock.writeLock().unlock();}}@Overridepublic Object getObject(Object key) {readWriteLock.readLock().lock();try {return cache.get(key);} finally {readWriteLock.readLock().unlock();}}@Overridepublic Object removeObject(Object key) {readWriteLock.writeLock().lock();try {return cache.remove(key);} finally {readWriteLock.writeLock().unlock();}}@Overridepublic void clear() {readWriteLock.writeLock().lock();try {cache.clear();} finally {readWriteLock.writeLock().unlock();}}@Overridepublic int getSize() {return cache.size();}@Overridepublic ReadWriteLock getReadWriteLock() {return readWriteLock;}
}