文章目录
- 前言
- 一.需求分析: 分析这个项目含有哪些功能模块
- 二.库表设计(概要设计): 1.分析系统有哪些表 2.分析表与表关系 3.确定表中字段(显性字段 隐性字段(业务字段))
- 2.1 创建一个库: ems-thymeleaf
- 2.2 创建 2张表
- 三.编码(环境搭建)
- 1.创建一个springboot项目 项目名字: ems-thymeleaf
- 2.修改配置文件为 application.yml pom.xml
- 3.修改端口 9999 项目名: ems-thymeleaf
- 4.springboot整合thymeleaf使用
- 5.springboot整合mybatis
- 6.导入项目页面
- 7.配置thymeleaf模版controller统一请求
- 四.编码(业务代码开发)
- 1.验证码实现
- 2.用户注册实现
- 3.用户登录实现
- 3.员工列表实现
- 4.增加员工信息
- 5.更新员工的实现
- 6.删除员工的实现
前言
一.需求分析: 分析这个项目含有哪些功能模块
用户模块:注册登录验证码安全退出真是用户员工模块:添加员工+上传头像展示员工列表+展示员工头像删除员工信息+删除员工头像更新员工信息+更新员工头像
二.库表设计(概要设计): 1.分析系统有哪些表 2.分析表与表关系 3.确定表中字段(显性字段 隐性字段(业务字段))
2.1 创建一个库: ems-thymeleaf
2.2 创建 2张表
1.用户表 user
id username realname password gender
CREATE TABLE `employee` (`id` int(11) unsigned NOT NULL AUTO_INCREMENT,`name` varchar(60) DEFAULT NULL COMMENT '员工姓名',`salary` double(10,2) DEFAULT NULL COMMENT '员工工资',`birthday` datetime DEFAULT NULL COMMENT '员工生日',`photo` varchar(200) DEFAULT NULL COMMENT '头像路径',PRIMARY KEY (`id`)
) ENGINE=InnoDB DEFAULT CHARSET=utf8mb4;
2.员工表 employee
id name salary birthday photo
CREATE TABLE `user` (`id` int(11) unsigned NOT NULL AUTO_INCREMENT,`username` varchar(40) DEFAULT NULL COMMENT '用户名',`realname` varchar(60) DEFAULT NULL COMMENT '真实姓名',`password` varchar(40) DEFAULT NULL COMMENT '密码',`gender` tinyint(1) unsigned DEFAULT NULL COMMENT '性别',PRIMARY KEY (`id`)
) ENGINE=InnoDB DEFAULT CHARSET=utf8mb4;
三.编码(环境搭建)
1.创建一个springboot项目 项目名字: ems-thymeleaf

2.修改配置文件为 application.yml pom.xml
修改poml版本为 springboot版本为2.7.14

把application.properties修改为application.yml
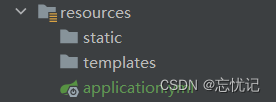
3.修改端口 9999 项目名: ems-thymeleaf

4.springboot整合thymeleaf使用
a.引入依赖
<!-- 引入thymeleaf--><dependency><groupId>org.springframework.boot</groupId><artifactId>spring-boot-starter-thymeleaf</artifactId></dependency>
b.配置文件中指定thymeleaf相关配置
spring:thymeleaf:prefix: classpath:/templates/ #指定thymeleaf模板前缀目录suffix: .html #指定模板的后缀cache: false #是否开启thymeleaf缓存 默认值是true开启缓存 在开发过程中推荐使用false
c.编写控制器测试
@Controller
@RequestMapping("demo")
public class DemoController {private static final Logger log = LoggerFactory.getLogger(DemoController.class);@RequestMapping("demo")public String demo(Model model){log.debug("demo ok");model.addAttribute("msg","hello thymeleaf");return "demo";}}
d.最后访问

5.springboot整合mybatis
a.引入依赖
mysql、druid、mybatis-springboot-stater
<!--mysql--><dependency><groupId>mysql</groupId><artifactId>mysql-connector-java</artifactId><version>5.1.38</version></dependency><!--druid--><dependency><groupId>com.alibaba</groupId><artifactId>druid</artifactId><version>1.2.4</version></dependency><!--myabtis-springboot--><dependency><groupId>org.mybatis.spring.boot</groupId><artifactId>mybatis-spring-boot-starter</artifactId><version>2.1.4</version></dependency>
b.配置文件
# 数据库的配置
# 数据库的配置datasource:type: com.alibaba.druid.pool.DruidDataSourcedriver-class-name: com.mysql.jdbc.Driverurl: jdbc:mysql://localhost:3306/ems-thymeleaf?characterEncoding=UTF-8username: rootpassword: 123456#配置mybatis
mybatis:mapper-locations: classpath:mapper/**Mapper.xmltype-aliases-package: com.demo.entity# 日志配置
logging:level:root: infocom.demo: debug
6.导入项目页面
static 存放静态资源

templates 目录 存放模板文件
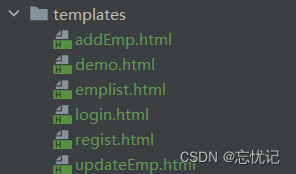
7.配置thymeleaf模版controller统一请求
因为我们thymeleaf模板开发,要访问静态资源的时候,我们必须建controller请求,这样比较麻烦,我们可以统一配置,具体操作如下:
@Configuration
public class MvcConfig implements WebMvcConfigurer {通过这里面配置: 不需要为每一个访问thymeleaf模板页面单独开发一个controller请求了@Overridepublic void addViewControllers(ViewControllerRegistry registry) {//viewController 请求路径    viewName: 跳转视图registry.addViewController("login").setViewName("login");registry.addViewController("register").setViewName("regist");}
}
四.编码(业务代码开发)
1.验证码实现

Controller代码如下:
 @RequestMapping("generateImageCode")public void generateImageCode(HttpSession session, HttpServletResponse response) throws IOException {//1.生成4位随机数String code = VerifyCodeUtils.generateVerifyCode(4);//2.保存到session作用域session.setAttribute("code",code);//3.根据随机数生成图片 && 4.通过response响应图片  && 5.设置响应类型response.setContentType("image/png");ServletOutputStream os = response.getOutputStream();VerifyCodeUtils.outputImage(220,60, os,code);}
}
前端页面改的位置

2.用户注册实现
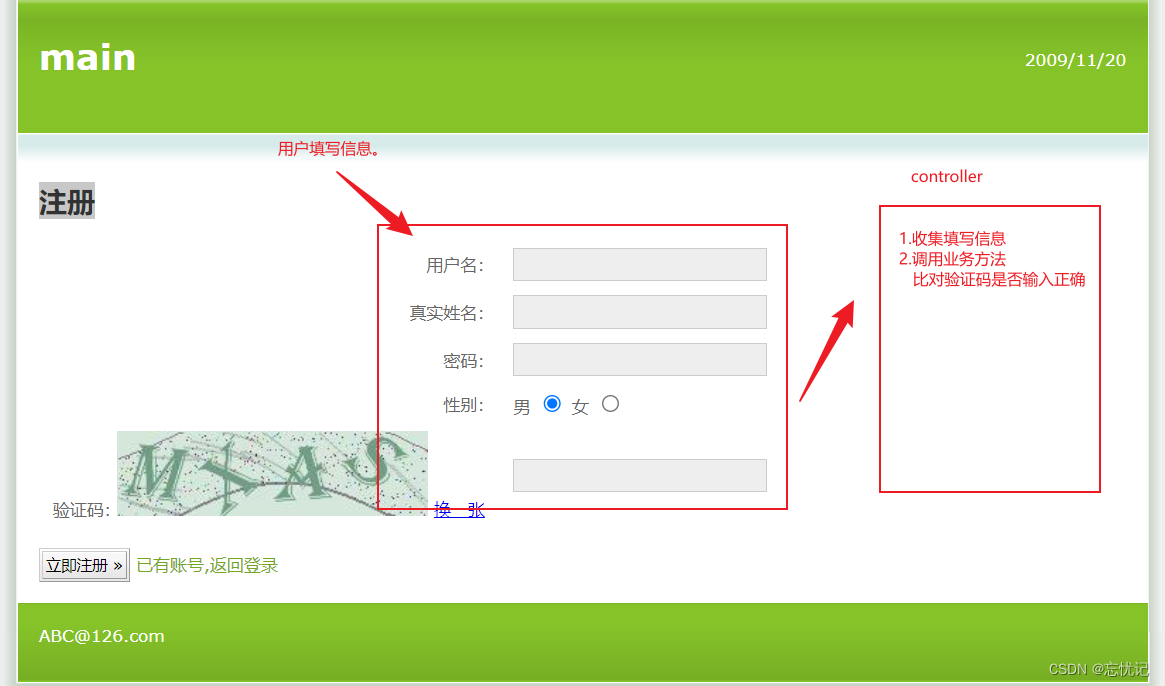
Controller
@RequestMapping("register")public String register(User user, String code,HttpSession session){log.debug("用户名: {},真是姓名: {},密码: {},性别: {},",user.getUsername(),user.getRealname(),user.getPassword(),user.getGender());log.debug("用户输入验证码: {}",code);try {//1.判断用户输入验证码和session中验证码是否一致String sessionCode = session.getAttribute("code").toString();if(!sessionCode.equalsIgnoreCase(code))throw new RuntimeException("验证码输入错误!");//2.注册用户userService.register(user);} catch (RuntimeException e) {e.printStackTrace();return "redirect:/register"; //注册失败回到注册}return "redirect:/login"; //注册成功跳转到登录}
实体类
public class User {private Integer id;private String username;private String realname;private String password;private Boolean gender;}
Service
public class UserService {/*** 注册用户*/private UserMapper userMapper;@Autowiredpublic UserService(UserMapper userMapper){this.userMapper=userMapper;}public void register(User user) {//1.根据用户名查询数据库中是否存在改用户User userDB = userMapper.findByUserName(user.getUsername());//2.判断用户是否存在if(!ObjectUtils.isEmpty(userDB)) throw new RuntimeException("当前用户名已被注册!");//3.注册用户&明文的密码加密  特点: 相同字符串多次使用md5就行加密 加密结果始终是一致String newPassword = DigestUtils.md5DigestAsHex(user.getPassword().getBytes(StandardCharsets.UTF_8));user.setPassword(newPassword);userMapper.save(user);}
}
Mapper
<!--findByUserName--><select id="findByUserName" parameterType="String" resultType="User">select id,username,realname,password,gender from `user`where username = #{username}</select><!--save--><insert id="save" parameterType="User" useGeneratedKeys="true" keyProperty="id">insert into `user` values(#{id},#{username},#{realname},#{password},#{gender})</insert>
3.用户登录实现
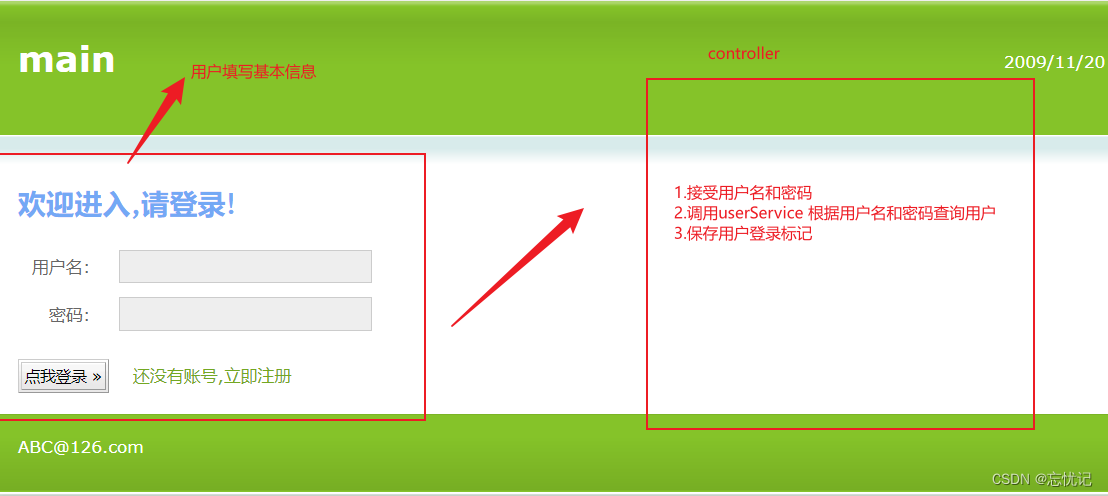
Controller
@RequestMapping("login")public String login(String username,String password,HttpSession session){log.debug("本次登录用户名: {}",username);log.debug("本地登录密码: {}",password);try {//1.调用业务层进行登录User user = userService.login(username,password);//2.保存用户信息session.setAttribute("user",user);} catch (Exception e) {e.printStackTrace();return "redirect:/login";//登录失败回到登录界面}return "redirect:/employee/lists";//登录成功之后,跳转到查询所有员工信息控制器路径}
Service
public User login(String username, String password) {//1.根据用户名查询用户User user = userMapper.findByUserName(username);if(ObjectUtils.isEmpty(user)) throw new RuntimeException("用户名不正确!");//2.比较密码String passwordSecret = DigestUtils.md5DigestAsHex(password.getBytes(StandardCharsets.UTF_8));if(!user.getPassword().equals(passwordSecret)) throw new RuntimeException("密码输入错误!");return user;}
Mapper
<!--findByUserName--><select id="findByUserName" parameterType="String" resultType="User">select id,username,realname,password,gender from `user`where username = #{username}</select>
3.员工列表实现
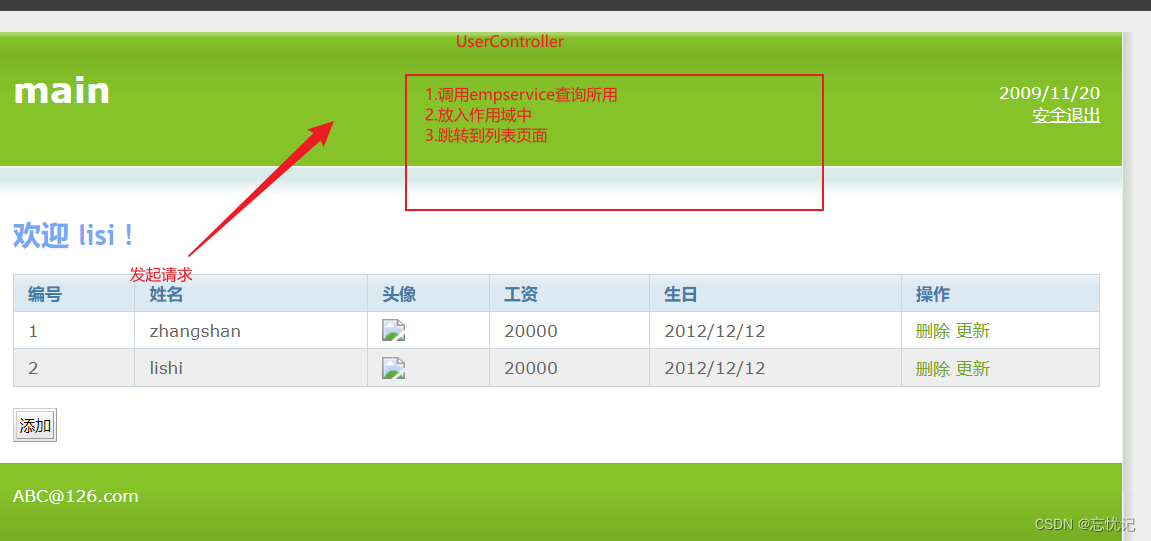
实体类
public class Employee {private Integer id;private String name;private Double salary;private Date birthday;private String photo;//头像路径}
Controller
@RequestMapping("lists")public String lists(Model model){log.debug("查询所有员工信息");List<Employee> employeeList=employeeService.lists();model.addAttribute("employeeList",employeeList);return "emplist";}
Service
public List<Employee> lists(){return employeeMapper.lists();}
Mapper
<!--lists--><select id="lists" resultType="Employee">select id,name,salary,birthday,photo from `employee`</select>
4.增加员工信息
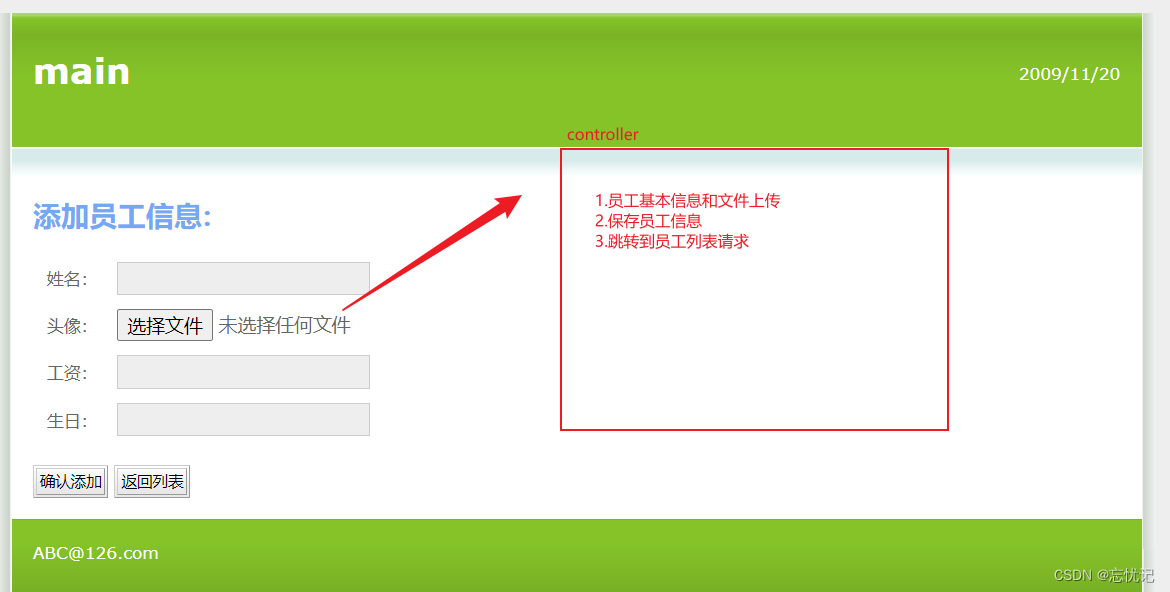
Controller
@RequestMapping("save")public String save(Employee employee, MultipartFile img) throws IOException {log.debug("姓名:{}, 薪资:{}, 生日:{} ", employee.getName(), employee.getSalary(), employee.getBirthday());String originalFilename = img.getOriginalFilename();log.debug("头像名称: {}", originalFilename);log.debug("头像大小: {}", img.getSize());log.debug("上传的路径: {}",realpath);//1.处理头像的上传&& 修改文件名String fileNamePrefix = new SimpleDateFormat("yyyyMMddHHmmsssSSS").format(new Date());String fileNameSuffix = originalFilename.substring(originalFilename.lastIndexOf("."));String newFileName=fileNamePrefix+fileNameSuffix;img.transferTo(new File(realpath,newFileName));//2.保存员工信息employee.setPhoto(newFileName);employeeService.save(employee);return "redirect:/employee/lists";}
Service
public void save(Employee employee) {employeeMapper.save(employee);}
Mapper
<insert id="save" parameterType="Employee" useGeneratedKeys="true" keyProperty="id">insert into `employee` values (#{id},#{name},#{salary},#{birthday},#{photo})</insert>
5.更新员工的实现

Controller
/*** 更新员工信息* @param employee* @param img* @return*/@RequestMapping("update")public String update(Employee employee,MultipartFile img) throws IOException {log.debug("更新之后员工信息: id:{},姓名:{},工资:{},生日:{},", employee.getId(), employee.getName(), employee.getSalary(), employee.getBirthday());//1.判断是否更新头像boolean notEmpty = !img.isEmpty();log.debug("是否更新头像: {}", notEmpty);if (notEmpty) {//1.删除老的头像 根据id查询原始头像String oldPhoto = employeeService.findById(employee.getId()).getPhoto();File file = new File(realpath, oldPhoto);if (file.exists()) file.delete();//删除文件//2.处理新的头像上传String originalFilename = img.getOriginalFilename();String newFileName = uploadPhoto(img, originalFilename);//3.修改员工新的头像名称employee.setPhoto(newFileName);}//2.没有更新头像直接更新基本信息employeeService.update(employee);return "redirect:/employee/lists";//更新成功后,跳转到所有员工列表}//上传头像方法private String uploadPhoto(MultipartFile img, String originalFilename) throws IOException {String fileNamePrefix = new SimpleDateFormat("yyyyMMddHHmmssSSS").format(new Date());String fileNameSuffix = originalFilename.substring(originalFilename.lastIndexOf("."));String newFileName = fileNamePrefix + fileNameSuffix;img.transferTo(new File(realpath, newFileName));return newFileName;}
Service
public void update(Employee employee) {employeeMapper.update(employee);}
Mapper
<update id="update" parameterType="Employee" >update `employee` set name=#{name},salary=#{salary},birthday=#{birthday},photo=#{photo}where id = #{id}</update>
6.删除员工的实现
Controller
@RequestMapping("delete")public String delete(Integer id){log.debug("删除的员工id: {}",id);//1.删除数据String photo = employeeService.findById(id).getPhoto();employeeService.delete(id);//2.删除头像File file = new File(realpath, photo);if (file.exists()) file.delete();return "redirect:/employee/lists";//跳转到员工列表}
Service
public void delete(Integer id) {employeeMapper.delete(id);}
Mapper
<!--delete--><delete id="delete" parameterType="Integer">delete from `employee` where id = #{id}</delete>

