mkdir /usr/local/develop
cd /usr/local/develop

下载
wget http://nginx.org/download/nginx-1.17.4.tar.gz
yum install git
git clone https://github.com/arut/nginx-rtmp-module.git

解压文件
tar zxmf nginx-1.17.4.tar.gz

进入解压目录
cd nginx-1.17.4/
安装编译工具及依赖库 都安装成功后再次执行会有下面提示
yum -y install gcc pcre-devel zlib-devel openssl-devel libxml2-devel libxslt-devel gd-devel GeoIP-devel jemalloc-devel libatomic_ops-devel perl-devel perl-ExtUtils-Embed

编译所有功能模块 可能根据操作系统不同需要指定在./configure --prefix=/usr/local/nginx 加上后面的模块 来指定 我这里不需要
./configure --add-module=/usr/local/develop/nginx-rtmp-module --with-threads --with-file-aio --with-http_ssl_module --with-http_v2_module --with-http_realip_module --with-http_addition_module --with-http_xslt_module=dynamic --with-http_image_filter_module=dynamic --with-http_geoip_module=dynamic --with-http_sub_module --with-http_dav_module --with-http_flv_module --with-http_mp4_module --with-http_gunzip_module --with-http_gzip_static_module --with-http_auth_request_module --with-http_random_index_module --with-http_secure_link_module --with-http_degradation_module --with-http_slice_module --with-http_stub_status_module --with-stream=dynamic --with-stream_ssl_module --with-stream_realip_module --with-stream_geoip_module=dynamic --with-stream_ssl_preread_module --with-compat --with-pcre-jit
用上面的 下面的我做个记录
./configure --with-threads \
--with-file-aio \
--with-http_ssl_module \
--with-http_v2_module \
--with-http_realip_module \
--with-http_addition_module \
--with-http_xslt_module=dynamic \
--with-http_image_filter_module=dynamic \
--with-http_geoip_module=dynamic \
--with-http_sub_module \
--with-http_dav_module \
--with-http_flv_module \
--with-http_mp4_module \
--with-http_gunzip_module \
--with-http_gzip_static_module \
--with-http_auth_request_module \
--with-http_random_index_module \
--with-http_secure_link_module \
--with-http_degradation_module \
--with-http_slice_module \
--with-http_stub_status_module \
--with-stream=dynamic \
--with-stream_ssl_module \
--with-stream_realip_module \
--with-stream_geoip_module=dynamic \
--with-stream_ssl_preread_module \
--with-compat \
--with-pcre-jit

make && make install 如果出现下面这种情况说明上面编译没有成功


编译后默认安装目录为 /usr/local/nginx
cd /usr/local/nginx
ll

进入sbin目录
cd sbin/
nginx的常用命令
在 /usr/local/nginx/sbin目录下
./nginx 启动nginx
./nginx -s stop 关闭nginx
./nginx -s quit 优雅关闭
./nginx -s reload 在启动情况下重启nginx 默认加载的是/usr/local/nginx/conf/nginx.conf配置文件
./nginx -s reload -c /path/to/your/nginx.conf 后面可以指定你配置文件位置
./nginx -s reopen 重新打开日志文件
这样每次都需要在/usr/local/nginx/sbin目录下进行操做,比较麻烦
配置Nginx全局环境变量
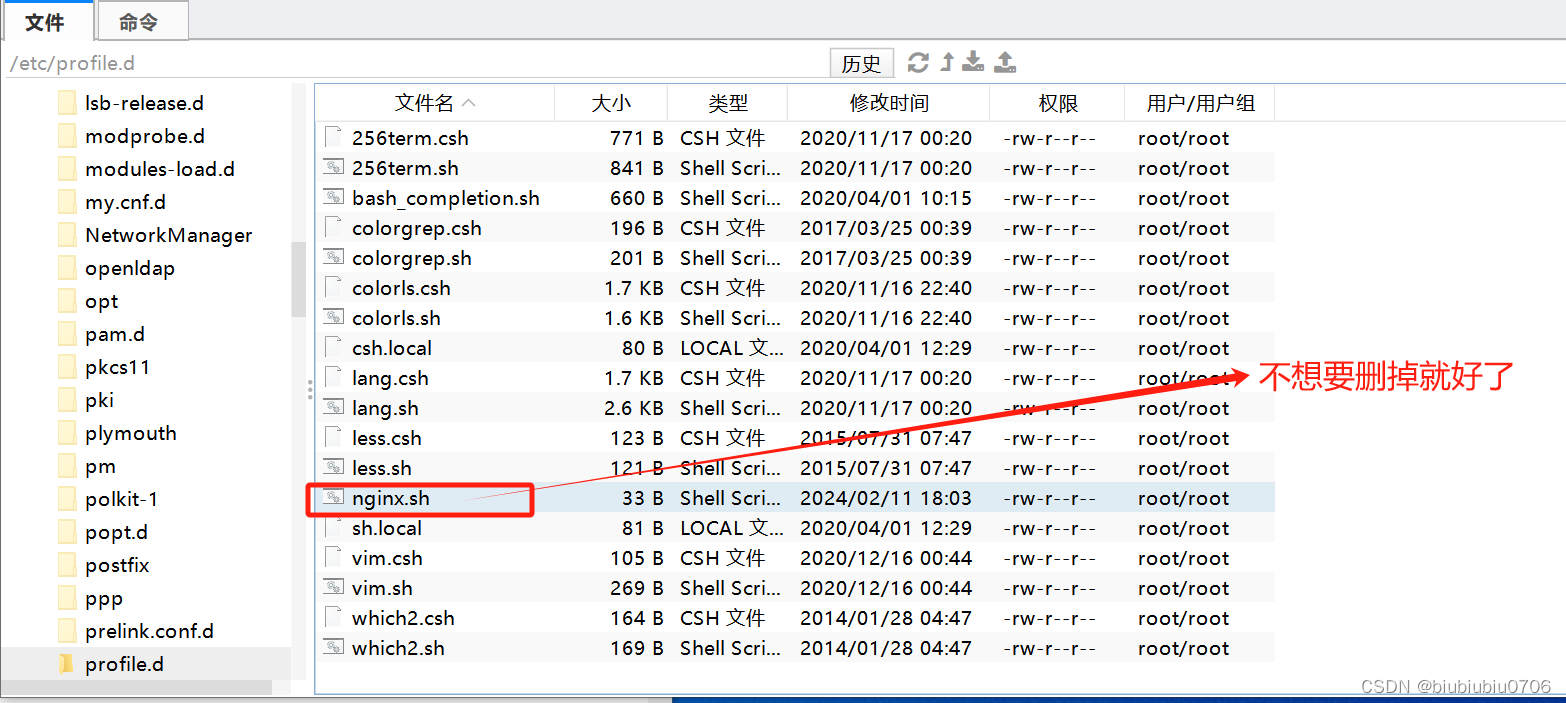
vim /etc/profile.d/nginx.sh(用这个) 和vim /etc/profile
说明:vim /etc/profile.d/nginx.sh 配置PATH=$PATH:/usr/local/nginx/sbin 和vim /etc/profile里配置PATH=$PATH:/usr/local/nginx/sbin 效果是一样的,只不过在/etc/profile.d更加有组织性
PATH=$PATH:/usr/local/nginx/sbin
:wq是保存退出
:q是退出不保存
:q!是强制退出不保存

配置完成后 更新环境变量
source /etc/profile
这样你就可以在任何目录执行nginx的命令
nginx 启动nginx
nginx -s stop 关闭nginx
nginx -s quit 优雅关闭
nginx -s reload 在启动情况下重启nginx 默认加载的是/usr/local/nginx/conf/nginx.conf配置文件
nginx -s reload -c /path/to/your/nginx.conf 后面可以指定你配置文件位置
nginx -s reopen 重新打开日志文件
nginx -t 检查配置文件
nginx -V 大写v看安装的模块
nginx -v 小写v看版本
把Nginx注册为系统服务
vim /etc/systemd/system/nginx.service(这里不要选这个 可以查下两者区别)
vim /usr/lib/systemd/system/nginx.service
[Unit]
Description=The NGINX HTTP and reverse proxy server
After=network.target remote-fs.target nss-lookup.target[Service]
Type=forking
PIDFile=/run/nginx.pid
ExecStartPre=/usr/bin/rm -f /run/nginx.pid
ExecStartPre=/usr/local/nginx/sbin/nginx -t -q
ExecStart=/usr/local/nginx/sbin/nginx -g "pid /run/nginx.pid;"
ExecReload=/usr/local/nginx/sbin/nginx -t -q
ExecReload=/usr/local/nginx/sbin/nginx -s reload -g "pid /run/nginx.pid;"ExecStop=/bin/kill -s HUP $MAINPID
KillSignal=SIGQUIT
TimeoutStopSec=5
KillMode=process
PrivateTmp=true[Install]
WantedBy=multi-user.target

重新加载系统服务
system daemon-reload(我这里 这一步不需要执行)
系统启动后自动启动(注意不要多空格)
systemctl enable nginx

启动Nginx
systemctl start nginx
重启
systemctl reload nginx
停止
systemctl stop nginx
查看状态
systemctl status nginx
安全组开通80端口
现在你可以通过
http://你的公网IP访问nginx 因为此时nginx的配置文件只配了80端口

基本认证模块(如果需要使用的话,一般不需要安装)
htpasswd -c /usr/local/nginx/htpasswd 你的登录名

安装依赖
yum -y install httpd-tools

再次执行
htpasswd -c /usr/local/nginx/htpasswd 你的登录名 需要确认密码


再次登录时要求你输入用户名密码

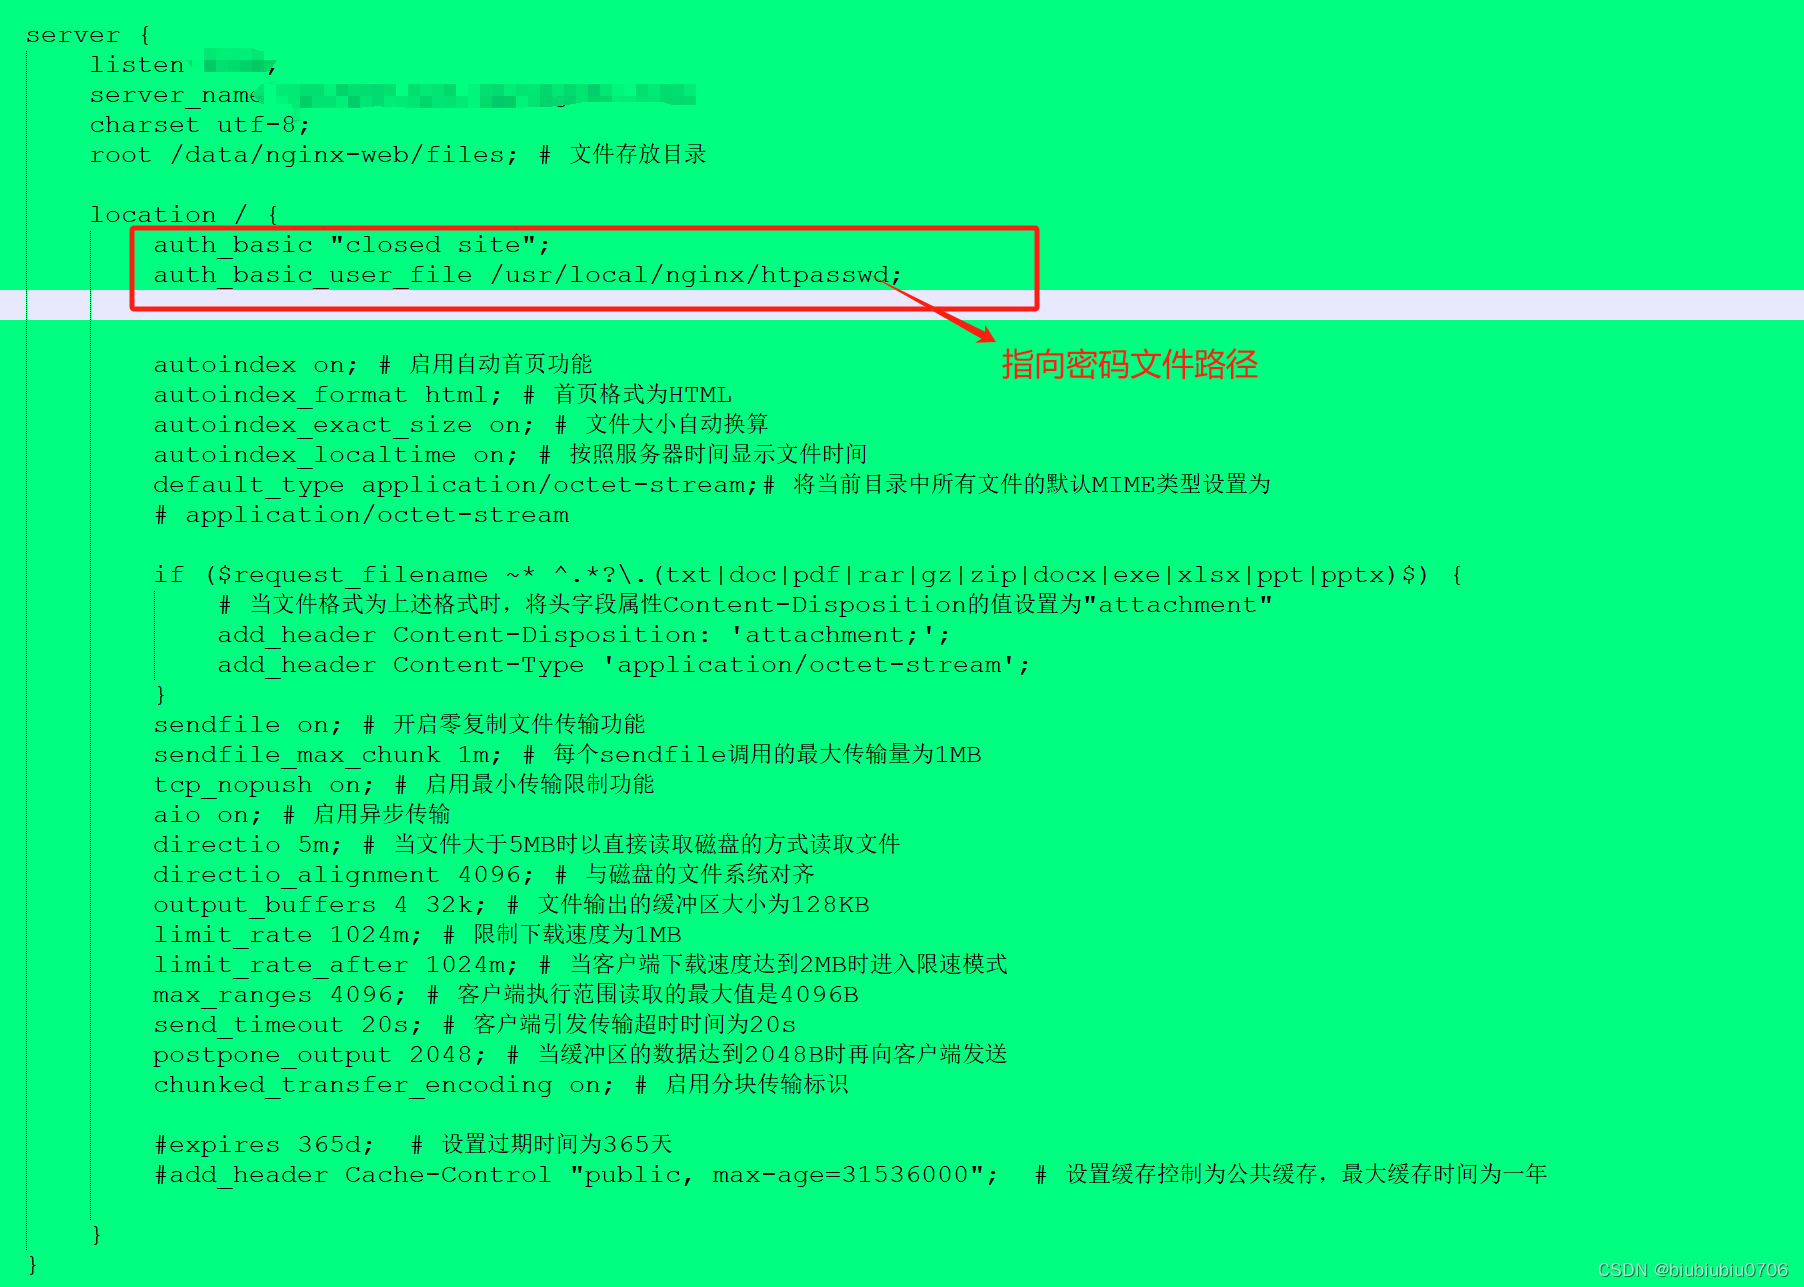
文件下载服务器配置
root指令和proxy_pass指令不要写在同一个块中,写了只会执行一个,谁在前执行谁
#user  nobody;
#error_log  logs/error.log;
#error_log  logs/error.log  notice;
#error_log  logs/error.log  info;#pid        logs/nginx.pid;# 工作进程:根据需要进行设置,一般设置为CPU核心数的2倍或直接设置为auto由程序自动调整
worker_processes 1;
events {# 每个工作进程的连接数,默认为1024个worker_connections 1024;
}
http {include mime.types;default_type application/octet-stream;sendfile on;keepalive_timeout 65;gzip on;server {listen 80;server_name localhost;charset utf-8;root /data/nginx-web/files; # 文件存放目录location / {autoindex on; # 启用自动首页功能autoindex_format html; # 首页格式为HTMLautoindex_exact_size on; # 文件大小自动换算autoindex_localtime on; # 按照服务器时间显示文件时间default_type application/octet-stream;# 将当前目录中所有文件的默认MIME类型设置为# application/octet-streamif ($request_filename ~* ^.*?\.(txt|doc|pdf|rar|gz|zip|docx|exe|xlsx|ppt|pptx)$) {# 当文件格式为上述格式时,将头字段属性Content-Disposition的值设置为"attachment"add_header Content-Disposition: 'attachment;';
#注意加上下面的,不知什么原因 会导致失效问题(就是变成在线浏览或者在线播放了)add_header Content-Type 'application/octet-stream';}sendfile on; # 开启零复制文件传输功能sendfile_max_chunk 1m; # 每个sendfile调用的最大传输量为1MBtcp_nopush on; # 启用最小传输限制功能aio on; # 启用异步传输directio 5m; # 当文件大于5MB时以直接读取磁盘的方式读取文件directio_alignment 4096; # 与磁盘的文件系统对齐output_buffers 4 32k; # 文件输出的缓冲区大小为128KBlimit_rate 1m; # 限制下载速度为1MBlimit_rate_after 2m; # 当客户端下载速度达到2MB时进入限速模式max_ranges 4096; # 客户端执行范围读取的最大值是4096Bsend_timeout 20s; # 客户端引发传输超时时间为20spostpone_output 2048; # 当缓冲区的数据达到2048B时再向客户端发送chunked_transfer_encoding on; # 启用分块传输标识#加了好像也没效果#expires 365d;  # 设置过期时间为365天#add_header Cache-Control "public, max-age=31536000";  # 设置缓存控制为公共缓存,最大缓存时间为一年}}
}
注意:一个IP可以绑定多个域名
如果有多个server监听同一个端口 当用IP访问时候 server_name首先匹配server_name 是对应IP的那个server 如果没有server_name是那个IP 那么哪个server在前就匹配哪个server 当用域名访问时候 哪个server_name和域名相同就用哪个 这里和用localhost或者127.0.0.1无关 只会和请求的host匹配 匹配不到哪个server在前就用哪个
有点绕 在多个域名绑定同一个IP时候
就是说nginx首先会用server_name和请求的host做匹配 匹配上了 就用哪个server
匹配不上的话,哪个server在前就用哪个 和写localhost 127.0.0.1 没半毛钱关系 除非你在本地测试时候,写了localhost或者127.0.0.1 此时也是因为和请求的host匹配
伪装流媒体配置示例
重新编译下
cd /usr/local/develop/nginx-1.17.4 主要是这个--with-http_xslt_module
./configure --add-module=/usr/local/develop/nginx-rtmp-module --with-threads --with-file-aio --with-http_ssl_module --with-http_v2_module --with-http_realip_module --with-http_addition_module --with-http_xslt_module --with-http_image_filter_module=dynamic --with-http_geoip_module=dynamic --with-http_sub_module --with-http_dav_module --with-http_flv_module --with-http_mp4_module --with-http_gunzip_module --with-http_gzip_static_module --with-http_auth_request_module --with-http_random_index_module --with-http_secure_link_module --with-http_degradation_module --with-http_slice_module --with-http_stub_status_module --with-stream=dynamic --with-stream_ssl_module --with-stream_realip_module --with-stream_geoip_module=dynamic --with-stream_ssl_preread_module --with-compat --with-pcre-jit
make && make install
下面是当1个IP地址有多个域名的情况下 SSL部署文件下载服务器示例
如果你希望把对应IP也写上可以在对应的一个域名上的80和443加上对应IP 不然Nginx不知道你具体要访问的是哪个
#user  nobody;
worker_processes  1;
#error_log  logs/error.log;
#error_log  logs/error.log  notice;
#error_log  logs/error.log  info;
#pid        logs/nginx.pid;
events {worker_connections  1024;
}
http {include       mime.types;default_type  application/octet-stream;sendfile        on;keepalive_timeout  65;server {listen 80;#填写证书绑定的域名server_name www.example.com example.com;#将所有HTTP请求通过rewrite指令重定向到HTTPS。rewrite ^(.*)$ https://$host$1;location / {index index.html index.htm;}}server {#HTTPS的默认访问端口443。#如果未在此处配置HTTPS的默认访问端口,可能会造成Nginx无法启动。listen 443 ssl;#填写证书绑定的域名server_name www.example.com example.com;#填写证书文件绝对路径ssl_certificate /usr/local/nginx/cert/www.example.com.pem;#填写证书私钥文件绝对路径ssl_certificate_key /usr/local/nginx/cert/www.example.com.key;ssl_session_cache shared:SSL:1m;ssl_session_timeout 5m;#自定义设置使用的TLS协议的类型以及加密套件(以下为配置示例,请您自行评估是否需要配置)#TLS协议版本越高,HTTPS通信的安全性越高,但是相较于低版本TLS协议,高版本TLS协议对浏览器的兼容性较差。ssl_ciphers ECDHE-RSA-AES128-GCM-SHA256:ECDHE:ECDH:AES:HIGH:!NULL:!aNULL:!MD5:!ADH:!RC4;ssl_protocols TLSv1.1 TLSv1.2 TLSv1.3;#表示优先使用服务端加密套件。默认开启ssl_prefer_server_ciphers on;root /data/nginx-web/files2; # 文件存放目录	## 白名单设置,只允许下面的ip的客户端以及本地能访问。##allow 123.123.123.1;##deny all;#location是匹配IP+端口或者是域名后面的location / {autoindex on; # 启用自动首页功能autoindex_format html; # 首页格式为HTMLautoindex_exact_size on; # 文件大小自动换算autoindex_localtime on; # 按照服务器时间显示文件时间default_type application/octet-stream;# 将当前目录中所有文件的默认MIME类型设置为# application/octet-streamif ($request_filename ~* ^.*?\.(txt|doc|pdf|rar|gz|zip|docx|exe|xlsx|ppt|pptx)$) {# 当文件格式为上述格式时,将头字段属性Content-Disposition的值设置为"attachment"add_header Content-Disposition: 'attachment;';
#注意加上下面的,不知什么原因 会导致失效问题(就是变成在线浏览或者在线播放了)add_header Content-Type 'application/octet-stream';}sendfile on; # 开启零复制文件传输功能sendfile_max_chunk 1m; # 每个sendfile调用的最大传输量为1MBtcp_nopush on; # 启用最小传输限制功能aio on; # 启用异步传输directio 5m; # 当文件大于5MB时以直接读取磁盘的方式读取文件directio_alignment 4096; # 与磁盘的文件系统对齐output_buffers 4 32k; # 文件输出的缓冲区大小为128KBlimit_rate 1m; # 限制下载速度为1MBlimit_rate_after 2m; # 当客户端下载速度达到2MB时进入限速模式max_ranges 4096; # 客户端执行范围读取的最大值是4096Bsend_timeout 20s; # 客户端引发传输超时时间为20spostpone_output 2048; # 当缓冲区的数据达到2048B时再向客户端发送chunked_transfer_encoding on; # 启用分块传输标识}}server {listen 80;#填写证书绑定的域名server_name www.example2.com example2.com;#将所有HTTP请求通过rewrite指令重定向到HTTPS。rewrite ^(.*)$ https://$host$1;location / {index index.html index.htm;}	}server {#HTTPS的默认访问端口443。#如果未在此处配置HTTPS的默认访问端口,可能会造成Nginx无法启动。listen 443 ssl;#填写证书绑定的域名server_name www.example2.com example2.com;#填写证书文件绝对路径ssl_certificate /usr/local/nginx/cert/www.example2.com.pem;#填写证书私钥文件绝对路径ssl_certificate_key /usr/local/nginx/cert/www.example2.com.key;ssl_session_cache shared:SSL:1m;ssl_session_timeout 5m;#自定义设置使用的TLS协议的类型以及加密套件(以下为配置示例,请您自行评估是否需要配置)#TLS协议版本越高,HTTPS通信的安全性越高,但是相较于低版本TLS协议,高版本TLS协议对浏览器的兼容性较差。ssl_ciphers ECDHE-RSA-AES128-GCM-SHA256:ECDHE:ECDH:AES:HIGH:!NULL:!aNULL:!MD5:!ADH:!RC4;ssl_protocols TLSv1.1 TLSv1.2 TLSv1.3;#表示优先使用服务端加密套件。默认开启ssl_prefer_server_ciphers on;root /data/nginx-web/files; # 文件存放目录		## 白名单设置,只允许下面的ip的客户端以及本地能访问。##allow 123.123.123.1;##deny all;location / {autoindex on; # 启用自动首页功能autoindex_format html; # 首页格式为HTMLautoindex_exact_size on; # 文件大小自动换算autoindex_localtime on; # 按照服务器时间显示文件时间default_type application/octet-stream;# 将当前目录中所有文件的默认MIME类型设置为# application/octet-streamif ($request_filename ~* ^.*?\.(txt|doc|pdf|rar|gz|zip|docx|exe|xlsx|ppt|pptx)$) {# 当文件格式为上述格式时,将头字段属性Content-Disposition的值设置为"attachment"add_header Content-Disposition: 'attachment;';
#注意加上下面的,不知什么原因 会导致失效问题(就是txt变成在线浏览)add_header Content-Type 'application/octet-stream';}sendfile on; # 开启零复制文件传输功能sendfile_max_chunk 1m; # 每个sendfile调用的最大传输量为1MBtcp_nopush on; # 启用最小传输限制功能aio on; # 启用异步传输directio 5m; # 当文件大于5MB时以直接读取磁盘的方式读取文件directio_alignment 4096; # 与磁盘的文件系统对齐output_buffers 4 32k; # 文件输出的缓冲区大小为128KBlimit_rate 1m; # 限制下载速度为1MBlimit_rate_after 2m; # 当客户端下载速度达到2MB时进入限速模式max_ranges 4096; # 客户端执行范围读取的最大值是4096Bsend_timeout 20s; # 客户端引发传输超时时间为20spostpone_output 2048; # 当缓冲区的数据达到2048B时再向客户端发送chunked_transfer_encoding on; # 启用分块传输标识}}
}
输入域名访问: 浏览器首先会检查本地缓存,看是否有对应域名的解析记录。 如果本地缓存没有,浏览器会查找操作系统的 hosts 文件,看是否有对应的 IP 地址。 如果 hosts 文件中没有,浏览器会向 DNS 服务器发起域名解析请求,获取对应的 IP 地址。 输入 IP 访问: 浏览器会直接使用输入的 IP 地址进行访问,不再进行 DNS 解析。此时不会再向 DNS 服务器发起域名解析请求。 总体来说,如果你直接输入 IP 地址访问,浏览器会跳过 DNS 解析的步骤,直接使用输入的 IP 地址
hosts文件地址:C:\Windows\System32\drivers\etc 目录下
负载均衡:
package com.example.demo16.controller;import org.springframework.beans.factory.annotation.Value;
import org.springframework.web.bind.annotation.RequestMapping;
import org.springframework.web.bind.annotation.RestController;/*** @author hrui* @date 2024/2/9 19:17*/
@RestController
public class TestController {@Value("${server.port}")private String port;@RequestMapping("/test1")public Object test(String name,String age){return "端口"+port+","+"name="+name+","+"age="+age;}}
端口一个设置为8081,一个设置为8082,一个设置为8083


需要JDK环境
启动命令:分别启动3个jar包
nohup java -jar backend8081.jar > backend8081.log 2>&1 &
nohup java -jar backend8082.jar > backend8082.log 2>&1 &
nohup java -jar backend8083.jar > backend8083.log 2>&1 &

server {listen 80;#填写证书绑定的域名server_name www.example.com example.com;#将所有HTTP请求通过rewrite指令重定向到HTTPS。rewrite ^(.*)$ https://$host$1; location / {index index.html index.htm;} }server {#HTTPS的默认访问端口443。#如果未在此处配置HTTPS的默认访问端口,可能会造成Nginx无法启动。listen 443 ssl;#填写证书绑定的域名server_name www.example.com example.com;#填写证书文件绝对路径ssl_certificate /usr/local/nginx/cert/www.example.com.pem;#填写证书私钥文件绝对路径ssl_certificate_key /usr/local/nginx/cert/www.example.com.key;ssl_session_cache shared:SSL:1m;ssl_session_timeout 5m;#自定义设置使用的TLS协议的类型以及加密套件(以下为配置示例,请您自行评估是否需要配置)#TLS协议版本越高,HTTPS通信的安全性越高,但是相较于低版本TLS协议,高版本TLS协议对浏览器的兼容性较差。ssl_ciphers ECDHE-RSA-AES128-GCM-SHA256:ECDHE:ECDH:AES:HIGH:!NULL:!aNULL:!MD5:!ADH:!RC4;ssl_protocols TLSv1.1 TLSv1.2 TLSv1.3;#表示优先使用服务端加密套件。默认开启ssl_prefer_server_ciphers on;## 白名单设置,只允许下面的ip的客户端以及本地能访问。##allow 123.123.123.1;##deny all;location / {proxy_pass http://backend;}}upstream backend{server 127.0.0.1:8081;server 127.0.0.1:8082;server 127.0.0.1:8083;}每次访问它都会切换不通端口


此种方式叫轮询策略

IP哈希策略

它会根据你你客户端IP计算得出该访问那台服务器,如果IP不换,就会一致访问同一个端口(服务器)

最少连接策略
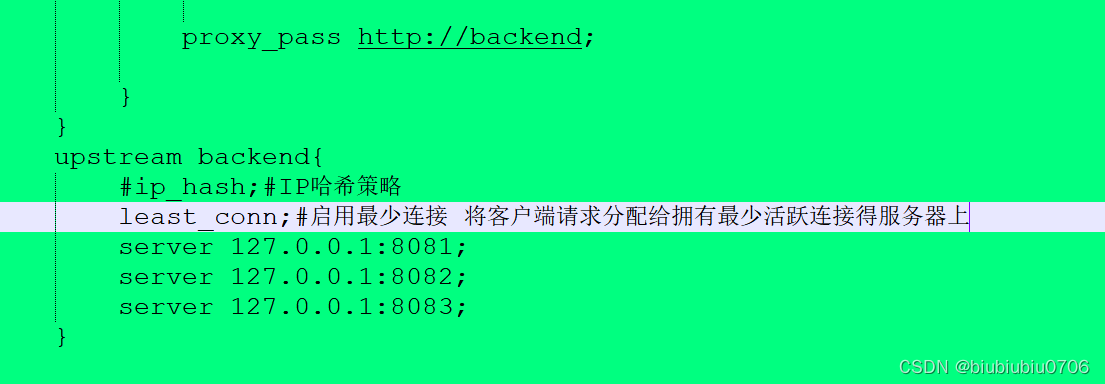
随机负载策略
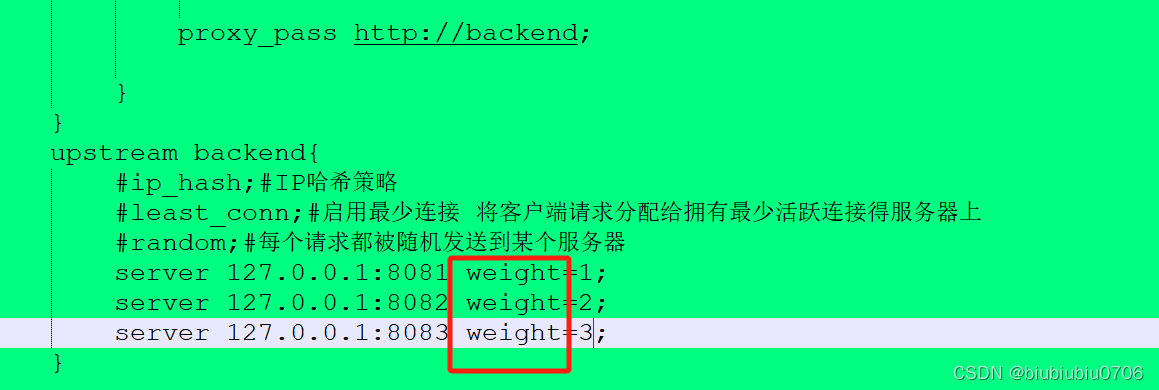
权重负载策略 简单说就是81->1次 82->2次 83->3次 此种方式在服务器性能有差距时使用合适
