文章目录
- 1、简介
- 2、Qt + QOpenGLWidget + gl函数
- 3、Qt + QOpenGLWidget + qt函数
- 4、Qt + QOpenGLWindow
- 5、Qt + glut
- 6、Qt + glfw
- 结语
1、简介
Qt提供了与OpenGL实现集成的支持,使开发人员有机会在更传统的用户界面的同时显示硬件加速的3D图形。
Qt有两种主要的UI开发方法:QtQuick和QtWidgets。它们的存在是为了支持不同类型的用户界面,并建立在针对每种类型进行了优化的独立图形引擎上。

可以将在OpenGL图形API中编写的代码与Qt中的这两种用户界面类型结合起来。当应用程序有自己的OpenGL相关代码时,或者当它与基于OpenGL的第三方渲染器集成时,这可能很有用。
Qt OpenGL模块包含方便类,使这种类型的集成更容易、更快。
QOpenGLWidget提供了三个方便的虚拟函数,您可以在子类中重新实现这些函数来执行典型的OpenGL任务:
- paintGL()-渲染OpenGL场景。每当需要更新小部件时调用。
- resizeGL()-设置OpenGL视口、投影等。每当小部件被调整大小时(以及当它第一次显示时,因为所有新创建的小部件都会自动获得调整大小事件),都会调用它。
- initializeGL()-设置OpenGL资源和状态。在第一次调用resizeGL()或paintGL()之前调用一次。
最简单的QOpenGLWidget子类可能如下所示:
class MyGLWidget : public QOpenGLWidget
{
public:MyGLWidget(QWidget *parent) : QOpenGLWidget(parent) { }protected:void initializeGL() override{// Set up the rendering context, load shaders and other resources, etc.:QOpenGLFunctions *f = QOpenGLContext::currentContext()->functions();f->glClearColor(1.0f, 1.0f, 1.0f, 1.0f);...}void resizeGL(int w, int h) override{// Update projection matrix and other size related settings:m_projection.setToIdentity();m_projection.perspective(45.0f, w / float(h), 0.01f, 100.0f);...}void paintGL() override{// Draw the scene:QOpenGLFunctions *f = QOpenGLContext::currentContext()->functions();f->glClear(GL_COLOR_BUFFER_BIT);...}};
或者,可以通过从QOpenGLFunctions派生来避免每个OpenGL调用的前缀:
class MyGLWidget : public QOpenGLWidget, protected QOpenGLFunctions
{...void initializeGL() override{initializeOpenGLFunctions();glClearColor(...);...}...
};
2、Qt + QOpenGLWidget + gl函数
- untitled4.pro
QT       += core guigreaterThan(QT_MAJOR_VERSION, 4): QT += widgetsCONFIG += c++11
DEFINES += QT_DEPRECATED_WARNINGSSOURCES += \main.cpp \qopenglwidgettest.cppHEADERS += \qopenglwidgettest.hFORMS += \qopenglwidgettest.ui# Default rules for deployment.
qnx: target.path = /tmp/$${TARGET}/bin
else: unix:!android: target.path = /opt/$${TARGET}/bin
!isEmpty(target.path): INSTALLS += targetRESOURCES += \res.qrc
- main.cpp
#include "qopenglwidgettest.h"
#include <QApplication>int main(int argc, char *argv[])
{QApplication a(argc, argv);QOpenGLWidgetTest w;w.show();return a.exec();
}
- qopenglwidgettest.h
#ifndef QOPENGLWIDGETTEST_H
#define QOPENGLWIDGETTEST_H#include <QOpenGLWidget>
#include <QOpenGLFunctions_3_3_Core>
#include <QOpenGLShaderProgram>QT_BEGIN_NAMESPACE
namespace Ui { class QOpenGLWidgetTest; }
QT_END_NAMESPACEclass QOpenGLWidgetTest : public QOpenGLWidget, protected /*QOpenGLExtraFunctions*/QOpenGLFunctions_3_3_Core
{Q_OBJECTpublic:QOpenGLWidgetTest(QWidget *parent = nullptr);~QOpenGLWidgetTest();protected:virtual void initializeGL();virtual void resizeGL(int w, int h);virtual void paintGL();private:Ui::QOpenGLWidgetTest *ui;QOpenGLShaderProgram shaderProgram;
};
#endif // QOPENGLWIDGETTEST_H- qopenglwidgettest.cpp
#include "qopenglwidgettest.h"
#include "ui_qopenglwidgettest.h"static GLuint VBO, VAO, EBO;QOpenGLWidgetTest::QOpenGLWidgetTest(QWidget *parent): QOpenGLWidget(parent), ui(new Ui::QOpenGLWidgetTest)
{ui->setupUi(this);
}QOpenGLWidgetTest::~QOpenGLWidgetTest()
{delete ui;glDeleteVertexArrays(1, &VAO);glDeleteBuffers(1, &VBO);glDeleteBuffers(1, &EBO);
}void QOpenGLWidgetTest::initializeGL(){this->initializeOpenGLFunctions();bool success = shaderProgram.addShaderFromSourceFile(QOpenGLShader::Vertex, ":/new/prefix1/triangle.vert");if (!success) {qDebug() << "shaderProgram addShaderFromSourceFile failed!" << shaderProgram.log();return;}success = shaderProgram.addShaderFromSourceFile(QOpenGLShader::Fragment, ":/new/prefix1/triangle.frag");if (!success) {qDebug() << "shaderProgram addShaderFromSourceFile failed!" << shaderProgram.log();return;}success = shaderProgram.link();if(!success) {qDebug() << "shaderProgram link failed!" << shaderProgram.log();}//VAO,VBO数据部分float vertices[] = {0.5f,  0.5f, 0.0f,  // top right0.5f, -0.5f, 0.0f,  // bottom right-0.5f, -0.5f, 0.0f,  // bottom left-0.5f,  0.5f, 0.0f   // top left};unsigned int indices[] = {  // note that we start from 0!0, 1, 3,  // first Triangle1, 2, 3   // second Triangle};glGenVertexArrays(1, &VAO);glGenBuffers(1, &VBO);glGenBuffers(1, &EBO);// bind the Vertex Array Object first, then bind and set vertex buffer(s), and then configure vertex attributes(s).glBindVertexArray(VAO);glBindBuffer(GL_ARRAY_BUFFER, VBO);glBufferData(GL_ARRAY_BUFFER, sizeof(vertices), vertices, GL_STATIC_DRAW);  //顶点数据复制到缓冲glBindBuffer(GL_ELEMENT_ARRAY_BUFFER, EBO);glBufferData(GL_ELEMENT_ARRAY_BUFFER, sizeof(indices), indices, GL_STATIC_DRAW);glVertexAttribPointer(0, 3, GL_FLOAT, GL_FALSE, 3 * sizeof(GLfloat), (void*)0);//告诉程序如何解析顶点数据glEnableVertexAttribArray(0);glBindBuffer(GL_ARRAY_BUFFER, 0);//取消VBO的绑定, glVertexAttribPointer已经把顶点属性关联到顶点缓冲对象了//    remember: do NOT unbind the EBO while a VAO is active as the bound element buffer object IS stored in the VAO; keep the EBO bound.
//    glBindBuffer(GL_ELEMENT_ARRAY_BUFFER, 0);//    You can unbind the VAO afterwards so other VAO calls won't accidentally modify this VAO, but this rarely happens. Modifying other
//    VAOs requires a call to glBindVertexArray anyways so we generally don't unbind VAOs (nor VBOs) when it's not directly necessary.glBindVertexArray(0);   //取消VAO绑定
}void QOpenGLWidgetTest::resizeGL(int w, int h){glViewport(0, 0, w, h);
}void QOpenGLWidgetTest::paintGL(){glClearColor(0.5f, 0.5f, 0.5f, 1.0f);glClear(GL_COLOR_BUFFER_BIT);shaderProgram.bind();glBindVertexArray(VAO);
//    glDrawArrays(GL_TRIANGLES, 0, 6);glDrawElements(GL_TRIANGLES, 6, GL_UNSIGNED_INT, 0);shaderProgram.release();
}
- triangle.vert
#version 330 core
layout(location = 0) in vec3 aPos;void main(){gl_Position = vec4(aPos.x, aPos.y, aPos.z, 1.0f);
}
- triangle.frag
#version 330 core
out vec4 FragColor;void main(){FragColor = vec4(1.0f, 0.5f, 0.2f, 1.0f);
}
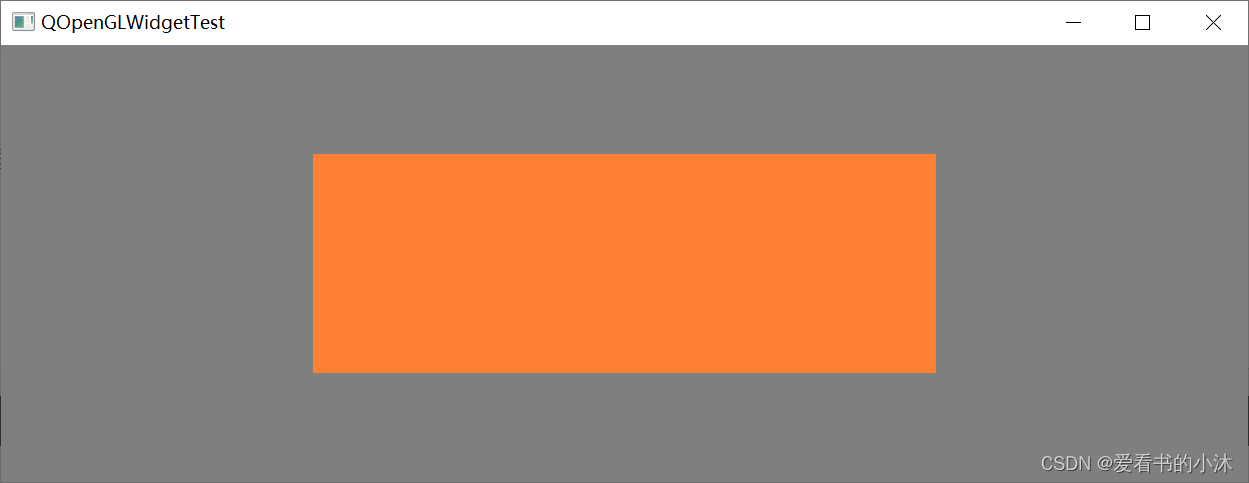
运行如下:
3、Qt + QOpenGLWidget + qt函数
- qtfunctionwidget.h
#ifndef QTFUNCTIONWIDGET_H
#define QTFUNCTIONWIDGET_H#include <QOpenGLWidget>
#include <QOpenGLShader>
#include <QOpenGLShaderProgram>
#include <QDebug>
#include <QOpenGLFunctions>
#include <QOpenGLVertexArrayObject>
#include <QOpenGLBuffer>class QtFunctionWidget : public QOpenGLWidget, protected QOpenGLFunctions
{
public:QtFunctionWidget(QWidget *parent = nullptr);~QtFunctionWidget() Q_DECL_OVERRIDE;protected:virtual void initializeGL() Q_DECL_OVERRIDE;virtual void resizeGL(int w, int h) Q_DECL_OVERRIDE;virtual void paintGL() Q_DECL_OVERRIDE;private:QOpenGLShaderProgram shaderProgram;QOpenGLBuffer vbo, ebo;QOpenGLVertexArrayObject vao;
};#endif // QTFUNCTIONWIDGET_H
- qtfunctionwidget.cpp
#include "QtFunctionWidget.h"
#include <QFile>QtFunctionWidget::QtFunctionWidget(QWidget *parent) : QOpenGLWidget (parent),vbo(QOpenGLBuffer::VertexBuffer),ebo(QOpenGLBuffer::IndexBuffer)
{}QtFunctionWidget::~QtFunctionWidget(){makeCurrent();vbo.destroy();ebo.destroy();vao.destroy();doneCurrent();
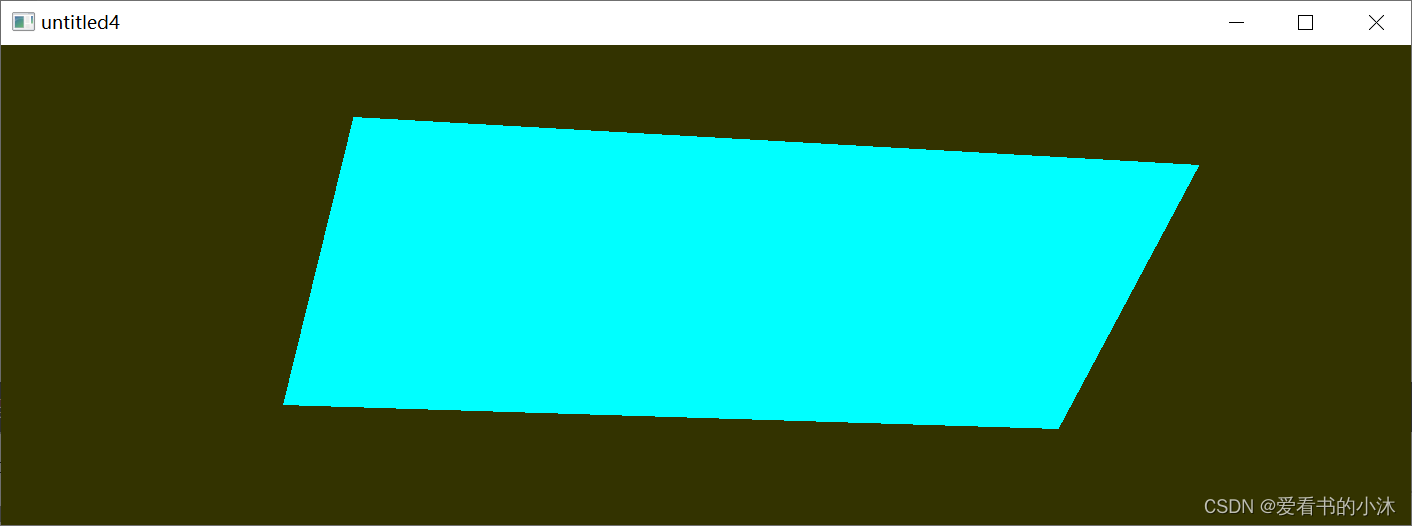
}void QtFunctionWidget::initializeGL(){this->initializeOpenGLFunctions();bool success = shaderProgram.addShaderFromSourceFile(QOpenGLShader::Vertex, ":/new/prefix1/triangle.vert");if (!success) {qDebug() << "shaderProgram addShaderFromSourceFile failed!" << shaderProgram.log();return;}success = shaderProgram.addShaderFromSourceFile(QOpenGLShader::Fragment, ":/new/prefix1/triangle.frag");if (!success) {qDebug() << "shaderProgram addShaderFromSourceFile failed!" << shaderProgram.log();return;}success = shaderProgram.link();if(!success) {qDebug() << "shaderProgram link failed!" << shaderProgram.log();}//VAO,VBO数据部分GLfloat vertices[] = {0.7f,  0.5f, 0.0f,  // top right0.5f, -0.6f, 0.0f,  // bottom right-0.6f, -0.5f, 0.0f,  // bottom left-0.5f,  0.7f, 0.0f   // top left};unsigned int indices[] = {  // note that we start from 0!0, 1, 3,  // first Triangle1, 2, 3   // second Triangle};QOpenGLVertexArrayObject::Binder vaoBind(&vao);vbo.create();vbo.bind();vbo.allocate(vertices, sizeof(vertices));ebo.create();ebo.bind();ebo.allocate(indices, sizeof(indices));int attr = -1;attr = shaderProgram.attributeLocation("aPos");shaderProgram.setAttributeBuffer(attr, GL_FLOAT, 0, 3, sizeof(GLfloat) * 3);shaderProgram.enableAttributeArray(attr);vbo.release();
//    remember: do NOT unbind the EBO while a VAO is active as the bound element buffer object IS stored in the VAO; keep the EBO bound.
//    ebo.release();
}void QtFunctionWidget::resizeGL(int w, int h){glViewport(0, 0, w, h);
}void QtFunctionWidget::paintGL(){glClearColor(0.2f, 0.2f, 0.0f, 1.0f);glClear(GL_COLOR_BUFFER_BIT);shaderProgram.bind();{QOpenGLVertexArrayObject::Binder vaoBind(&vao);glDrawElements(GL_TRIANGLES, 6, GL_UNSIGNED_INT, 0);}shaderProgram.release();
}
4、Qt + QOpenGLWindow
- untitled4.pro
QT       += core gui
greaterThan(QT_MAJOR_VERSION, 4): QT += widgetsTARGET = OpenGL
TEMPLATE = app
CONFIG += c++11SOURCES += \main.cpp \mywindow.cppHEADERS += \mywindow.hLIBS += -lopengl32\-lglu32- main.cpp
#include <QApplication>
#include <MyWindow.h>int main(int argc, char *argv[])
{QApplication a(argc, argv);MyWindow w;w.setWidth(640);w.setHeight(480);w.setTitle(QString::fromLocal8Bit("爱看书的小沐"));w.show();return a.exec();
}
- mywindow.h
#ifndef WINDOW_H
#define WINDOW_H#include <QOpenGLWindow>
#include <QOpenGLFunctions>
#include <QTimer>class MyWindow : public QOpenGLWindow, protected QOpenGLFunctions
{Q_OBJECT
public:MyWindow();~MyWindow();protected:void initializeGL();          //初始化设置void resizeGL(int w, int h);  //窗口尺寸变化响应函数void paintGL();               //重绘响应函数
private:GLfloat angle;                //定义旋转角度QTimer *timer;                //定义新的定时器
};#endif // WINDOW_H
- mywindow.cpp
#include "mywindow.h"MyWindow::MyWindow()
{timer = new QTimer();angle = 0.0;connect(timer, SIGNAL(timeout()), this, SLOT(update()));timer->start(100);
}MyWindow::~MyWindow()
{}void MyWindow::initializeGL()
{initializeOpenGLFunctions();glClearColor(0.0,0.0,0.0,0.0);glClearDepth(1.0);
}void MyWindow::resizeGL(int w, int h)
{Q_UNUSED(w);Q_UNUSED(h);
}void MyWindow::paintGL()
{glClear(GL_COLOR_BUFFER_BIT | GL_DEPTH_BUFFER_BIT);glLoadIdentity();glRotated(angle,0.0,1.0,0.0);glBegin(GL_TRIANGLES);glColor3f(1.0,0.0,0.0);glVertex3f(0.0,0.8,0.0);glColor3f(0.0,0.0,1.0);glVertex3f(0.5,0.0,0.0);glColor3f(0.0,1.0,0.0);glVertex3f(-0.5,0.0,0.0);glEnd();angle+=10.0;
}
程序运行如下:

5、Qt + glut
https://freeglut.sourceforge.net/
freeglut是OpenGL实用工具工具包(GLUT)库的免费软件/开源替代品。GLUT最初由Mark Kilgard编写,用于支持OpenGL“红皮书”第二版中的示例程序。从那时起,GLUT就被广泛应用于各种实际应用中,因为它简单、可用性广、便携性强。
GLUT(以及freeglut)负责创建窗口、初始化OpenGL上下文和处理输入事件所需的所有特定于系统的家务,以实现真正可移植的OpenGL程序。
freeglut是在X-Consortium许可下发布的。

- untitled4.pro
LIBS += -L$$PWD\lib -lfreeglut
CONFIG += c++11
DEFINES += QT_DEPRECATED_WARNINGS
INCLUDEPATH += includeSOURCES += \main.cpp
- main.cpp
#include "GL/glut.h"void display(void)
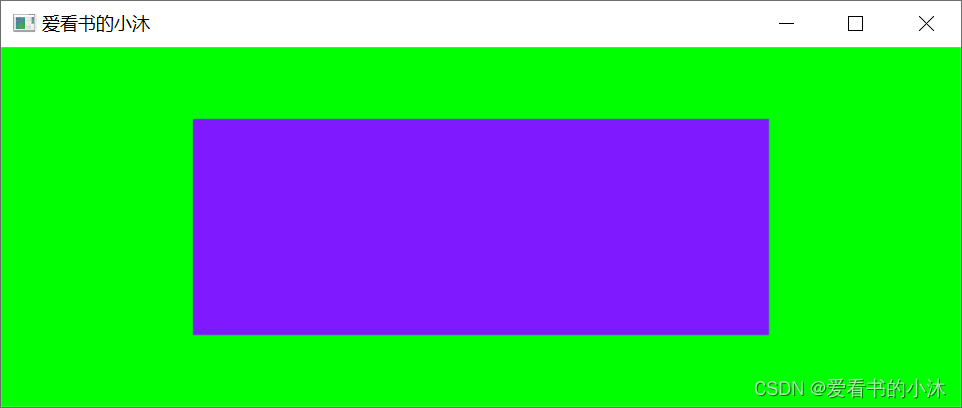
{// clear all pixelsglClear(GL_COLOR_BUFFER_BIT);glColor3f(0.5, 0.1, 1.0);glBegin(GL_POLYGON);glVertex3f(0.20, 0.20, 0.0);glVertex3f(0.80, 0.20, 0.0);glVertex3f(0.80, 0.80, 0.0);glVertex3f(0.20, 0.80, 0.0);glEnd();glFlush();
}void init(void)
{// select clearing color: blueglClearColor(0.0, 1.0, 0.0, 0.0);// initialize viewing valuesglMatrixMode(GL_PROJECTION);glLoadIdentity();glOrtho(0.0, 1.0, 0.0, 1.0, -1.0, 1.0);
}int main(int argc, char *argv[])
{glutInit(&argc, argv);glutInitDisplayMode(GLUT_SINGLE | GLUT_RGB);glutInitWindowSize(640, 240);glutInitWindowPosition(480, 320);glutCreateWindow("爱看书的小沐");init();glutDisplayFunc(display);glutMainLoop();return 0;
}


程序运行后:
6、Qt + glfw
https://www.glfw.org/
GLFW是一个开源、多平台的库,用于OpenGL、OpenGL ES和Vulkan在桌面上的开发。它提供了一个简单的API,用于创建窗口、上下文和表面,接收输入和事件。
GLFW是用C语言编写的,支持Windows、macOS、Wayland和X11。
GLFW是根据zlib/libpng许可证获得许可的。

- untitled4.pro
LIBS += -L$$PWD\lib -lglfw3 -lopengl32 -lGlU32 -luser32 -lkernel32 -lgdi32CONFIG += c++11
DEFINES += QT_DEPRECATED_WARNINGS
INCLUDEPATH += includeSOURCES += \main.cpp
- main.cpp
#include <iostream>
#include "GLFW/glfw3.h"
using namespace std;int main(int argc, char *argv[])
{GLFWwindow* window;/* Initialize the library */if (!glfwInit())return -1;/* Create a windowed mode window and its OpenGL context */window = glfwCreateWindow(640, 480, "Hello World", NULL, NULL);if (!window){glfwTerminate();return -1;}/* Make the window's context current */glfwMakeContextCurrent(window);/* Loop until the user closes the window */while (!glfwWindowShouldClose(window)){/* Render here */glClear(GL_COLOR_BUFFER_BIT);/* Swap front and back buffers */glfwSwapBuffers(window);/* Poll for and process events */glfwPollEvents();}glfwTerminate();return 0;
}


程序运行如下:
结语
如果您觉得该方法或代码有一点点用处,可以给作者点个赞,或打赏杯咖啡;╮( ̄▽ ̄)╭
如果您感觉方法或代码不咋地//(ㄒoㄒ)//,就在评论处留言,作者继续改进;o_O???
如果您需要相关功能的代码定制化开发,可以留言私信作者;(✿◡‿◡)
感谢各位童鞋们的支持!( ´ ▽´ )ノ ( ´ ▽´)っ!!!
