安装了两天,最后终于成功,这里有一些注意事项,版本对应啥的:
- 这里是mmdetection与MMCV的版本对应关系:
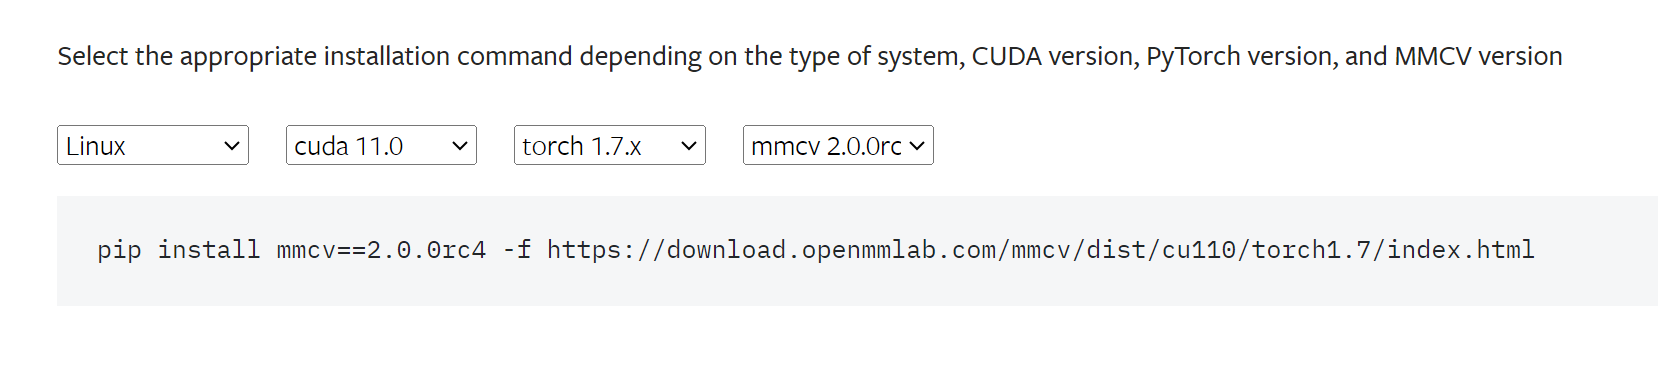
mmdet与mmcv的版本对应 - 有一些包因为版本问题直接pip下载不了,这里直接跑到官网去复制下载命令,这个链接是cuda、pytorch、MMCV版本的对照下载命令,非常方便,我感觉用这一条命令就足够了:
link
下面是我的运行步骤使用过的命令,我的linux驱动是11.2的,然而我下载的是11.0的
1、
conda create -n mmdetection1 python=3.7
2、
conda activate mmdetection13、
conda install pytorch==1.7.0 torchvision==0.8.0 torchaudio==0.7.0 cudatoolkit=11.0 -c pytorch
4、
pip install mmcv-full -f https://download.openmmlab.com/mmcv/dist/cu110/torch1.7.0/index.htm
5、
pip install mmdet -i https://pypi.tuna.tsinghua.edu.cn/simple6、
pip install mmengine
7、
pip install pip install mmcv==2.0.0rc4 -f https://download.openmmlab.com/mmcv/dist/cu110/torch1.7/index.html
8、验证:
下载模型
mim download mmdet --config yolof_r50_c5_8x8_1x_coco --dest
从github把mmdetection拉下来,然后新建测试文件:
from mmdet.apis import init_detector, inference_detectorconfig_file = '/home/111/mmdetection-main/configs/faster_rcnn/faster-rcnn_r50_fpn_1x_coco.py'checkpoint_file = 'checkpoints/faster_rcnn_r50_fpn_1x_coco_20200130-047c8118.pth'
device = 'cuda:0'model = init_detector(config_file, checkpoint_file, device=device)img = 'demo.jpg'
result = inference_detector(model, img)
model.show_result(img, result)model.show_result(img, result, out_file='result.jpg')
正常运行即可!!!