一、前言
虚拟机(Virtual Machine)指通过软件模拟的具有完整硬件系统功能的、运行在一个完全隔离环境中的完整计算机系统。在实体计算机中能够完成的工作在虚拟机中都能够实现。
虚拟机是在一些开发测试工作中常常需要用到的功能,常见的虚拟机软件主要有两款
VMware和VirtualBox。VMware是商付费软件,而VirtualBox是免费软件,对于一般用用的话VirtualBox基本可以应付大多数情况了。这篇文章就讲讲VirtualBox入门使用相关内容。
二、下载与安装
2.1、下载
VirtualBox官网地址如下:Oracle VM VirtualBox
镜像文件下载:
ubuntu官网地址如下:Enterprise Open Source and Linux | Ubuntu
windows官网地址如下:Microsoft Corporation
阿里官网镜像地址如下:阿里巴巴开源镜像站-OPSX镜像站-阿里云开发者社区
你可以在Downloads中找到合适自己当前电脑系统版本的软件安装包下载,下载完成后默认安装即可。
20240313_174300
如果需要用到USB等功能的话可以在下载VirtualBox软件安装包的同时下载下面的 VirtualBox Extension Pack ,注意扩展包和本体软件版本保持一致。
2.2、安装
2.2.1、然后,我们双击打开安装包,开始安装,点击【下一步】按钮

2.2.2、选择安装路径
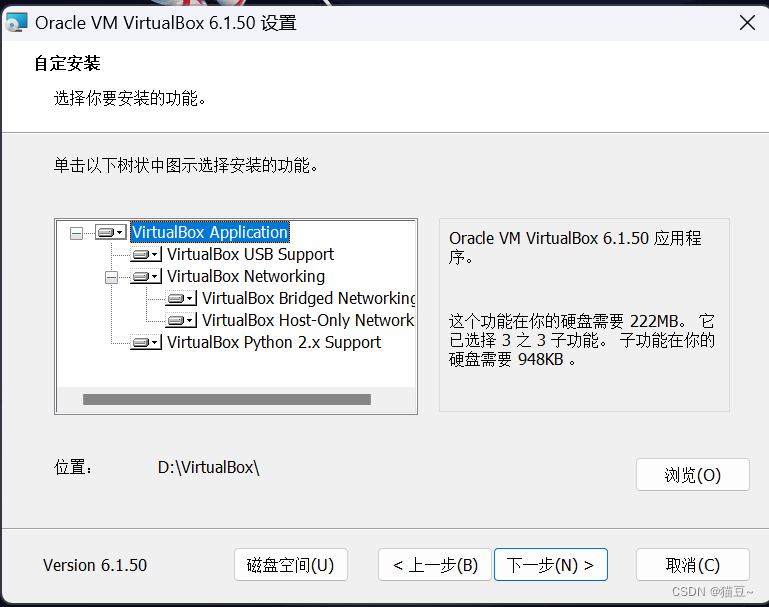
2.2.3、之后出现的默认就行了,出现安装界面就点安装即可。
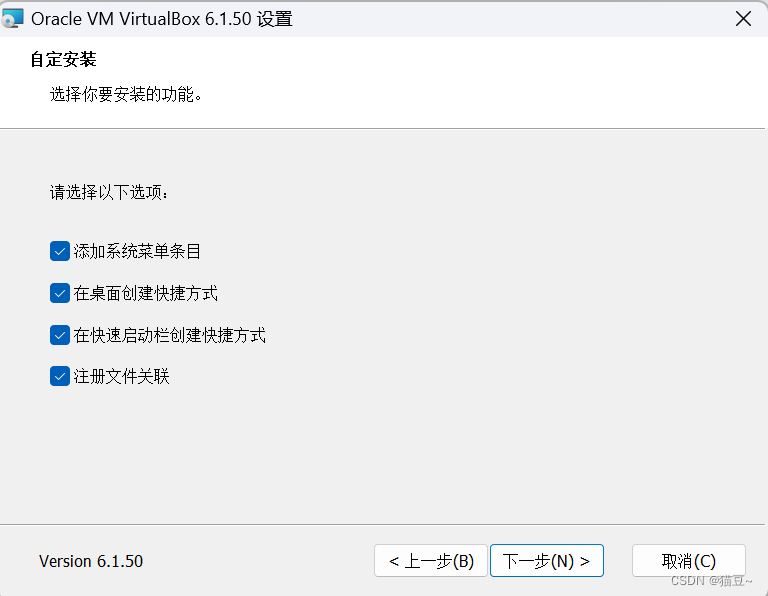
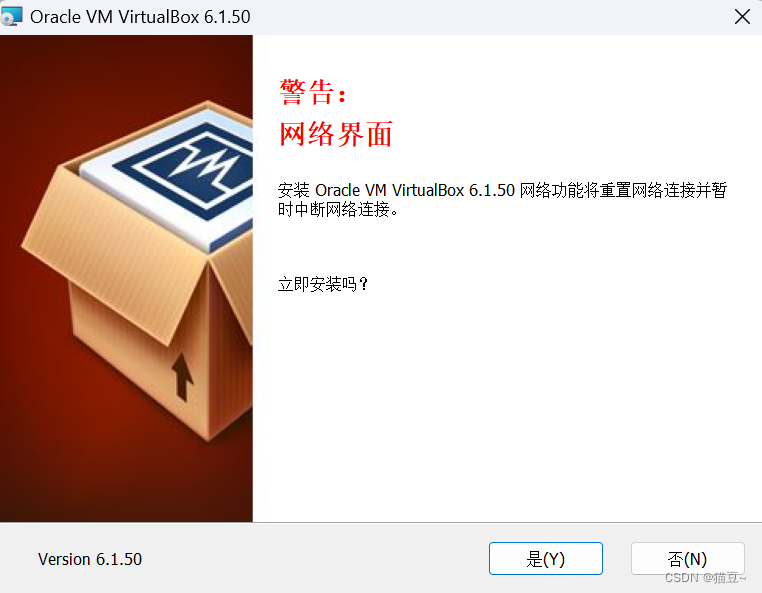
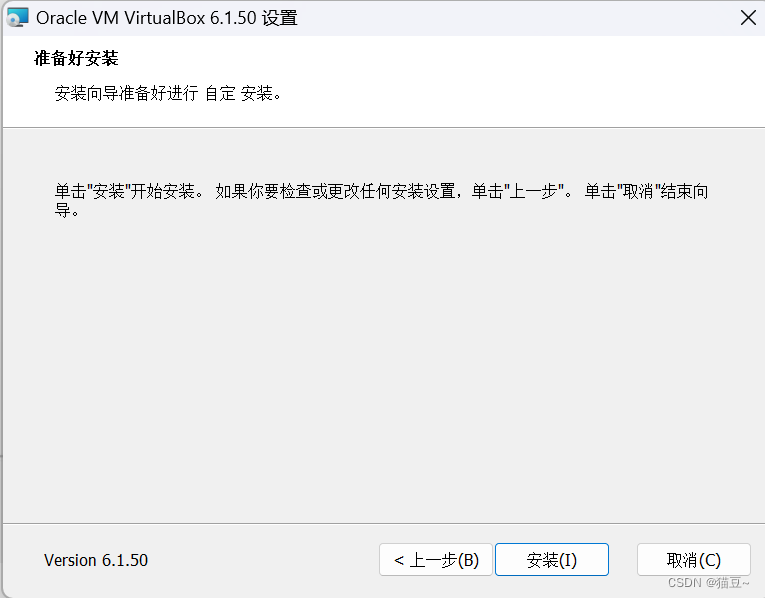
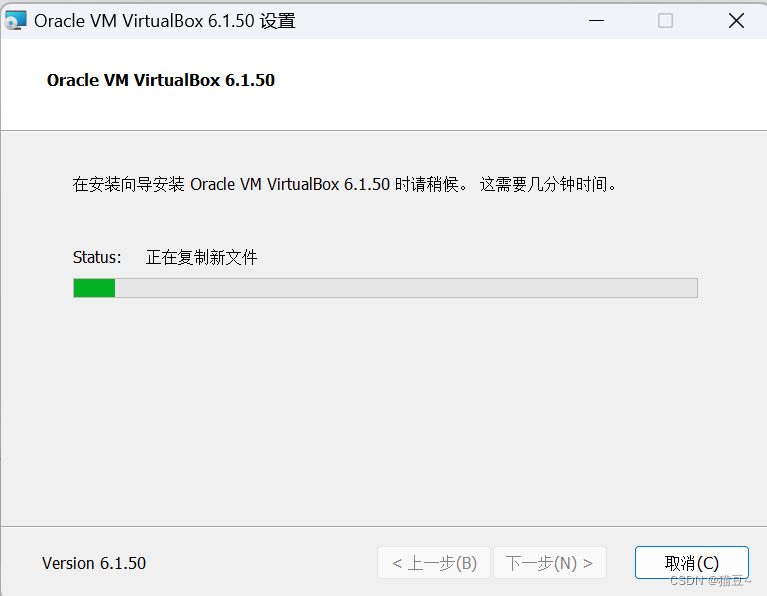
2.2.4、然后,等待最后安装完成,至此,安装过程结束了。

三、使用虚拟机
3.1、ISO文件下载
就像平时给电脑装系统一样,自己需要什么操作系统就去下载什么,这里要安装Ubuntu系统,还是直接bing搜索,找到官方网站。我们这里使用 ubuntu 做为演示 。
ubuntu一年分为两个版本,4月份的版本比较稳定。下载时可以右键下载复制链接,然后打开迅雷,创建新任务,粘贴链接。迅雷速度还行。
3.1.1、ISO 镜像文件下载:
ubuntu官网地址如下:Enterprise Open Source and Linux | Ubuntu
windows官网地址如下:Microsoft Corporation
阿里官网镜像地址如下:阿里巴巴开源镜像站-OPSX镜像站-阿里云开发者社区
3.1.2、ubuntu ISO 镜像文件下载
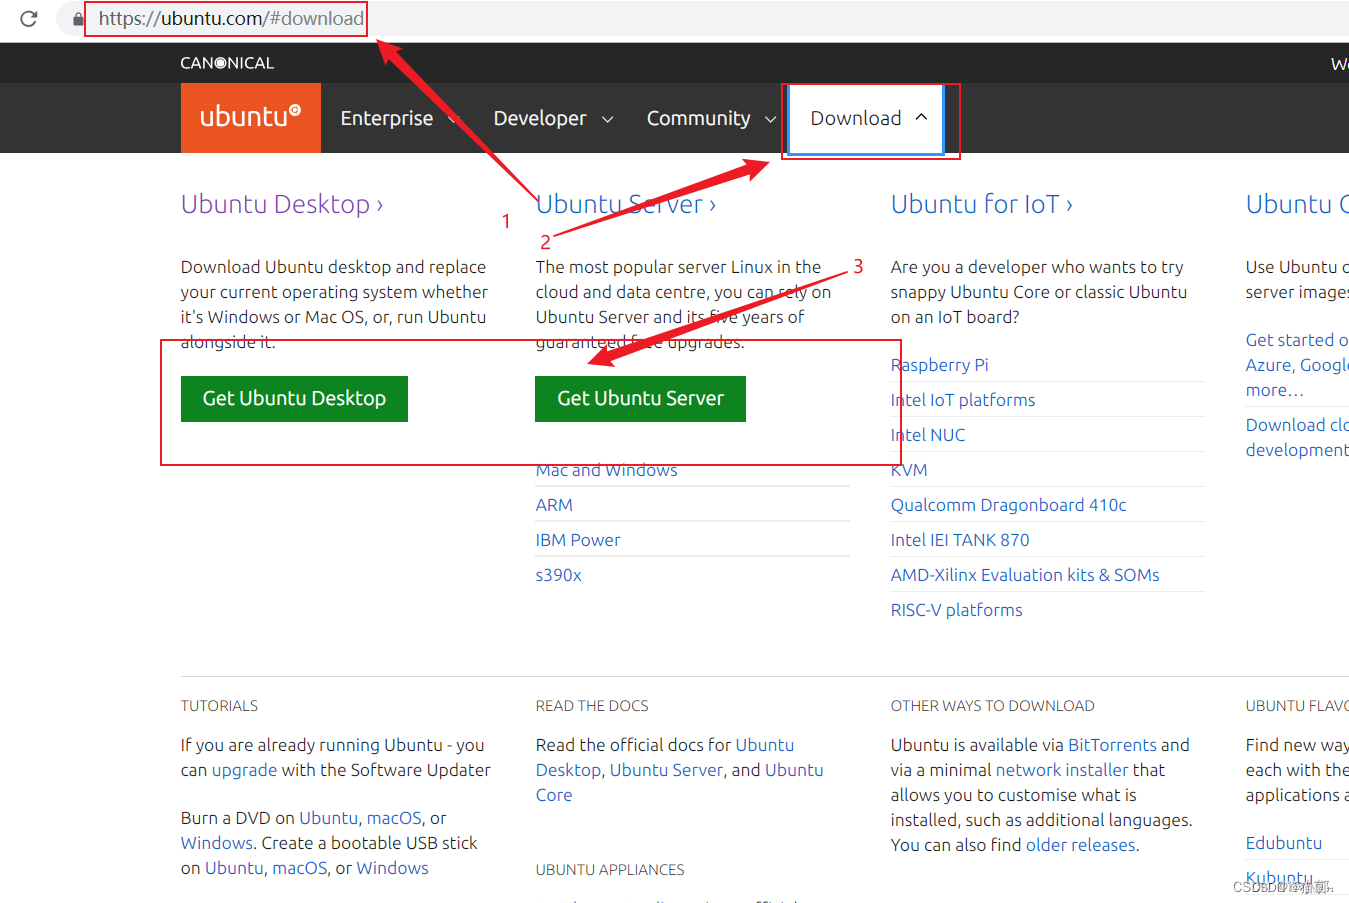


3.2、新建虚拟机
VirtualBox中新建虚拟很简单,确定好虚拟机名称和要安装的操作系统,然后分配内存,选择虚拟硬盘就行。内存大小可以随便选,之后使用中要是不够可以更改。虚拟硬盘最好选择动态分配,大小可以选大点。
1、打开virtualbox,点击欢迎页面的新建——输入名称——选择放置虚拟机文件的文件夹——选择操作系统类型和版本——下一步。

2、内存和cpu线程分配尽可能选大一点,只要指标在绿色区域就行。不过安装完成后觉得不够还可以更改。

3.单击”下一步“按钮,在界面中选中”现在创建虚拟硬盘“单选按钮,然后单击”创建“按钮,如图所示。

4.在打开的界面中默认选中”VDI(Virtual Box磁盘映像)“单选按钮,单击”下一步“按钮,如图所示。

5.在打开的界面中选中”动态分布“单选按钮,单击”下一步“按钮,如图所示。

6.在打开的界面中设置文件的存储位置和大小

7.单击”创建“按钮,虚拟机创建成功,如图所示。

四、Linux操作系统(Ubuntu)的安装
4.1安装Ubuntu
1.打开VirtualBox,设置虚拟光盘文件,选中已经创建好的虚拟机Hadoop,在菜单栏中单击”设置“按钮,如图所示。

2.显示虚拟光盘文件。

3.在设置安装 Ubuntu的光盘文件之后,就需要启动虚拟机了。
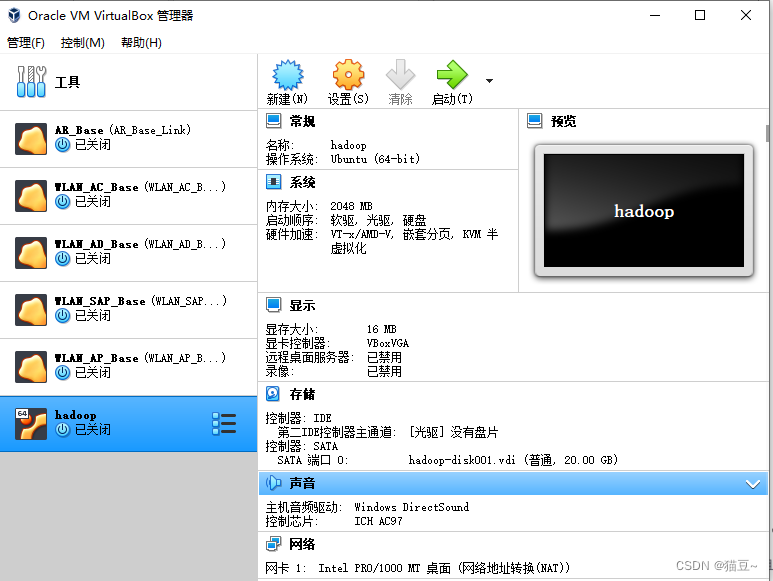


未完待续……
五、JDK的检查与安装
5.1、检查是否安装
1.JDK 打开终端,输入 javac,来检查 JDK 是否可用 new@new-VirtualBox:~$ javac 如果没有安装 JDK,执行结果如下图所示

2.安装 JDK
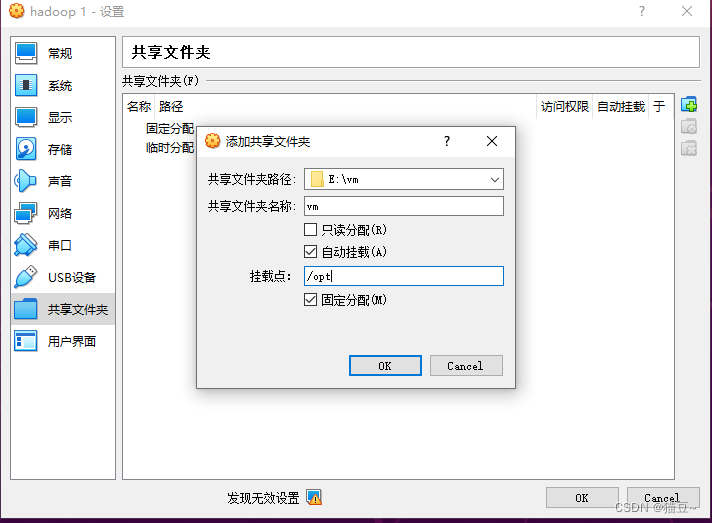
把官网中的 JDK 安装包放到共享文件夹中,从共享文件夹移到任意位置,案例是移动到 Ubuntu 系统的 home 目录(主目录)下的。
new@new-VirtualBox:~/桌面$ sudo usermod -aG vboxsf $(whoami)
[sudo] new 的密码:
new@new-VirtualBox:/root$ ls /opt/
新建文本文档.txt  hadoop-3.3.6.tar.gz  jdk-8u191-linux-x64.tar.gz
new@new-VirtualBox:~/桌面$ sudo -i
root@new-VirtualBox:~# tar -zxvf /opt/jdk-8u191-linux-x64.tar.gz -C /home/new/
root@new-VirtualBox:~# su new
3.下载一些工具
new@new-VirtualBox:/root$ sudo apt update
new@new-VirtualBox:/root$ sudo apt install vim -y
new@new-VirtualBox:~/桌面$ sudo apt install openssh-server -y
4.设置环境变量
new@new-VirtualBox:~/桌面$ sudo cat /etc/profile
# /etc/profile: system-wide .profile file for the Bourne shell (sh(1))
# and Bourne compatible shells (bash(1), ksh(1), ash(1), ...).if [ "${PS1-}" ]; thenif [ "${BASH-}" ] && [ "$BASH" != "/bin/sh" ]; then# The file bash.bashrc already sets the default PS1.# PS1='\h:\w\$ 'if [ -f /etc/bash.bashrc ]; then. /etc/bash.bashrcfielseif [ "`id -u`" -eq 0 ]; thenPS1='# 'elsePS1='$ 'fifi
fiif [ -d /etc/profile.d ]; thenfor i in /etc/profile.d/*.sh; doif [ -r $i ]; then. $ifidoneunset i
fi
export JAVA_HOME=/home/new/jdk1.8.0_191
export JRE_HOME=${JAVA_HOME}/jre
export CLASSPATH=.:${JAVA_HOME}/lib:${JRE_HOME}/lib
export PATH=${JAVA_HOME}/bin:$PATH
5.重新加载配置文件,命令如下。
new@new-VirtualBox:~/桌面$ source /etc/profile
6.验证是否成功安装JDK

5.2 配置SSH无密码登入
1.产生SSH Key。接着输入以下命令。
new@new-VirtualBox:~/桌面$ ssh-keygen -t rsa
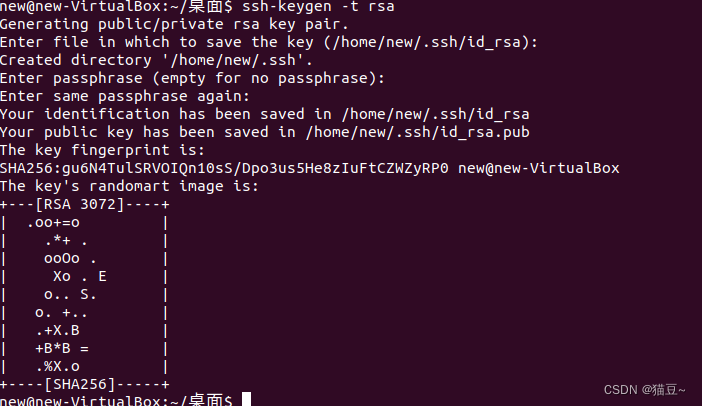
使用如下命令查看产生的SSH Key。
new@new-VirtualBox:~/桌面$ ll ~/.ssh/
总用量 16
drwx------  2 new new 4096 3月  14 09:14 ./
drwxr-xr-x 17 new new 4096 3月  14 09:14 ../
-rw-------  1 new new 2602 3月  14 09:14 id_rsa
-rw-r--r--  1 new new  572 3月  14 09:14 id_rsa.pub
2.将id_rsa.pub(公钥)放到许可证文件(authorized_keys)中,命令如下。
new@new-VirtualBox:~/桌面$ cat ~/.ssh/id_rsa.pub >> ~/.ssh/authorized_keys
3.更改权限,命令如下。
new@new-VirtualBox:~/桌面$ chmod 755 ~
new@new-VirtualBox:~/桌面$ chmod 700 ~/.ssh/
new@new-VirtualBox:~/桌面$ chmod 600 ~/.ssh/authorized_keys
4.验证SSH是否安装成功,输入命令如下。
![]()
接下来,验证是否可以无密码登入本机,命令如下。
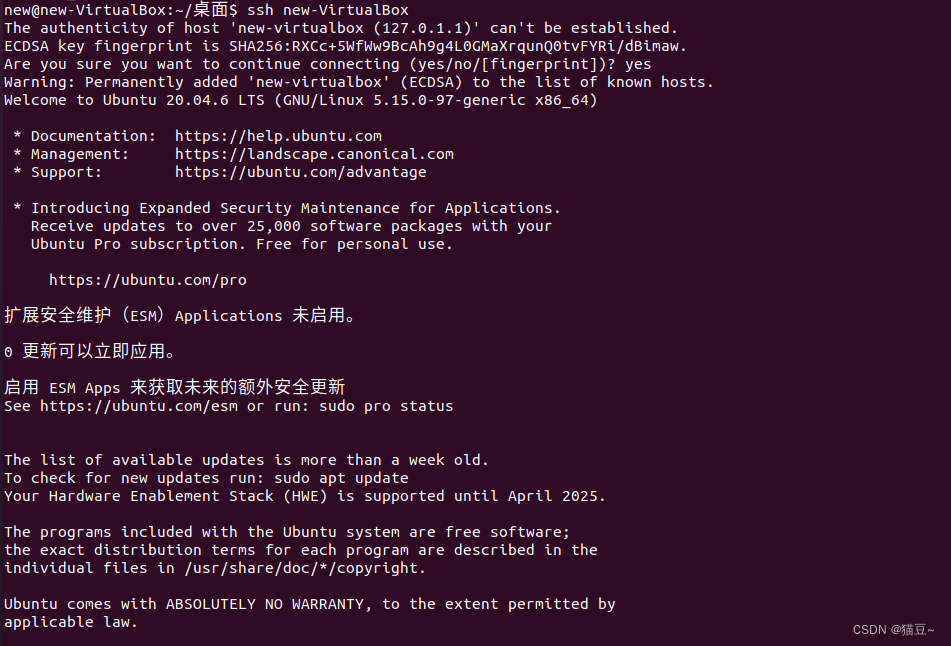
5.退出SSH连接,代码如下。
![]()
六、Hadoop的下载与安装
6.1、Hadoop的安装
1.Hadoop安装包解压缩
![]()
root@new-VirtualBox:~# tar -zxvf /opt/hadoop-3.3.6.tar.gz -C /home/new/
2.查看一下Hadoop安装目录中的安装文件

6.2 配置Hadoop前期准备
1.配置本机的IP地址,命令如下。

2.查看本机的主机名
![]()
3.将IP地址和主机名写进/etc/hosts配置文件,命令如下。

6.3Hadoop环境变量的配置
1.在终端输入以下命令
new@new-VirtualBox:/root$ sudo vim ~/.bashrc
new@new-VirtualBox:/root$ sudo cat ~/.bashrc
# ~/.bashrc: executed by bash(1) for non-login shells.
# see /usr/share/doc/bash/examples/startup-files (in the package bash-doc)
# for examples# If not running interactively, don't do anything
case $- in*i*) ;;*) return;;
esac# don't put duplicate lines or lines starting with space in the history.
# See bash(1) for more options
HISTCONTROL=ignoreboth# append to the history file, don't overwrite it
shopt -s histappend# for setting history length see HISTSIZE and HISTFILESIZE in bash(1)
HISTSIZE=1000
HISTFILESIZE=2000# check the window size after each command and, if necessary,
# update the values of LINES and COLUMNS.
shopt -s checkwinsize# If set, the pattern "**" used in a pathname expansion context will
# match all files and zero or more directories and subdirectories.
#shopt -s globstar# make less more friendly for non-text input files, see lesspipe(1)
[ -x /usr/bin/lesspipe ] && eval "$(SHELL=/bin/sh lesspipe)"# set variable identifying the chroot you work in (used in the prompt below)
if [ -z "${debian_chroot:-}" ] && [ -r /etc/debian_chroot ]; thendebian_chroot=$(cat /etc/debian_chroot)
fi# set a fancy prompt (non-color, unless we know we "want" color)
case "$TERM" inxterm-color|*-256color) color_prompt=yes;;
esac# uncomment for a colored prompt, if the terminal has the capability; turned
# off by default to not distract the user: the focus in a terminal window
# should be on the output of commands, not on the prompt
#force_color_prompt=yesif [ -n "$force_color_prompt" ]; thenif [ -x /usr/bin/tput ] && tput setaf 1 >&/dev/null; then# We have color support; assume it's compliant with Ecma-48# (ISO/IEC-6429). (Lack of such support is extremely rare, and such# a case would tend to support setf rather than setaf.)color_prompt=yeselsecolor_prompt=fi
fiif [ "$color_prompt" = yes ]; thenPS1='${debian_chroot:+($debian_chroot)}\[\033[01;32m\]\u@\h\[\033[00m\]:\[\033[01;34m\]\w\[\033[00m\]\$ '
elsePS1='${debian_chroot:+($debian_chroot)}\u@\h:\w\$ '
fi
unset color_prompt force_color_prompt# If this is an xterm set the title to user@host:dir
case "$TERM" in
xterm*|rxvt*)PS1="\[\e]0;${debian_chroot:+($debian_chroot)}\u@\h: \w\a\]$PS1";;
*);;
esac# enable color support of ls and also add handy aliases
if [ -x /usr/bin/dircolors ]; thentest -r ~/.dircolors && eval "$(dircolors -b ~/.dircolors)" || eval "$(dircolors -b)"alias ls='ls --color=auto'#alias dir='dir --color=auto'#alias vdir='vdir --color=auto'alias grep='grep --color=auto'alias fgrep='fgrep --color=auto'alias egrep='egrep --color=auto'
fi# colored GCC warnings and errors
#export GCC_COLORS='error=01;31:warning=01;35:note=01;36:caret=01;32:locus=01:quote=01'# some more ls aliases
alias ll='ls -alF'
alias la='ls -A'
alias l='ls -CF'# Add an "alert" alias for long running commands.  Use like so:
#   sleep 10; alert
alias alert='notify-send --urgency=low -i "$([ $? = 0 ] && echo terminal || echo error)" "$(history|tail -n1|sed -e '\''s/^\s*[0-9]\+\s*//;s/[;&|]\s*alert$//'\'')"'# Alias definitions.
# You may want to put all your additions into a separate file like
# ~/.bash_aliases, instead of adding them here directly.
# See /usr/share/doc/bash-doc/examples in the bash-doc package.if [ -f ~/.bash_aliases ]; then. ~/.bash_aliases
fi# enable programmable completion features (you don't need to enable
# this, if it's already enabled in /etc/bash.bashrc and /etc/profile
# sources /etc/bash.bashrc).
if ! shopt -oq posix; thenif [ -f /usr/share/bash-completion/bash_completion ]; then. /usr/share/bash-completion/bash_completionelif [ -f /etc/bash_completion ]; then. /etc/bash_completionfi
fi
export JAVA_HOME=/home/new/jdk1.8.0_191
export HADOOP_HOME=/home/new/hadoop-3.3.6
export PATH=$PATH:$HADOOP_HOME/bin
export PATH=$PATH:$HADOOP_HOME/sbin
export HADOOP_MAPRED_HOME=$HADOOP_HOME
export HADOOP_COMMON_HOME=$HADOOP_HOME
export HADOOP_HDFS_HOME=$HADOOP_HOME
export YARN_HOME=$HADOOP_HOME
export HADOOP_COMMON_LIB_NATIVE_DIR=$HADOOP_HOME/lib/native
export HADOOP_OPTS="-Djava.library.path=$HADOOP_HOME/lib:$HADOOP_COMMON_LIB_NATIVE_DIR"
export JAVA_LIBRARY_PATH=$HADOOP_HOME/lib/native:$JAVA_LIBRARY_PATH
2.使设置生效,输入以下命令。
new@new-VirtualBox:/root$ source ~/.bashrc
3.使用hadoop version命令测试是否安装成功。

6.4 修改Hadoop配置文件
1.修改hadoop-env.sh文件
未完待续……


