目录
Day_56-57 k-Means 聚类
一. 基本概念介绍
二. 具体过程
三. 代码实现与解释
1. 导入数据与数据初始化
2. 核心代码
3. 后续信息的补充
4. 距离计算和随机排列
四. 后续的数据分析
五. 运行结果
Day_56-57 k-Means 聚类
一. 基本概念介绍
同我上一篇博客的介绍,机器学习从有无标签的角度有几大分类:监督学习,无监督学习和半监督学习。这里我们介绍的k-Means 算法就是无监督学习里面最具有代表性的一种,与分类(典型knn算法)等任务不同,聚类是在事先并不知道任何样本标签的情况下,通过数据之间的内在关系把样本划分为若干类别,使得同类别样本之间的相似度高,不同类别之间的样本相似度低(即增大类内聚,减少类间距)。
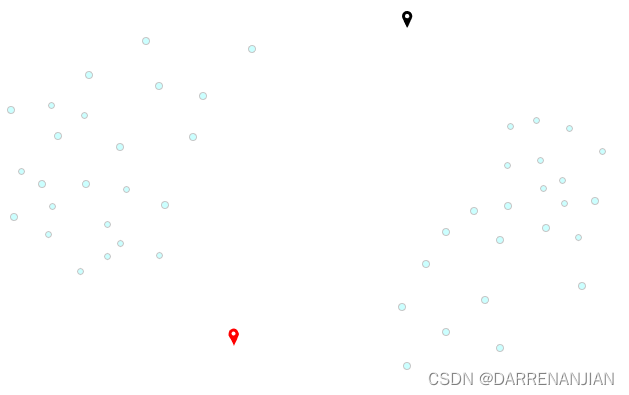
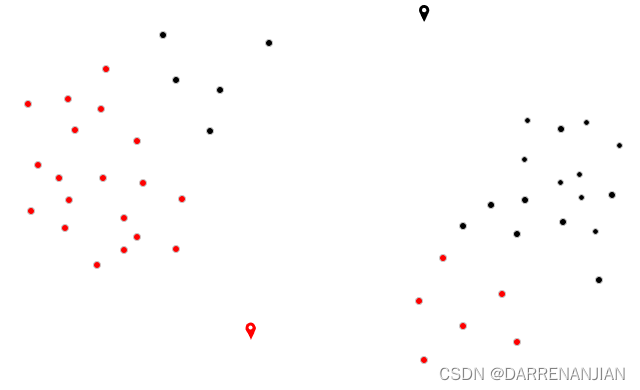
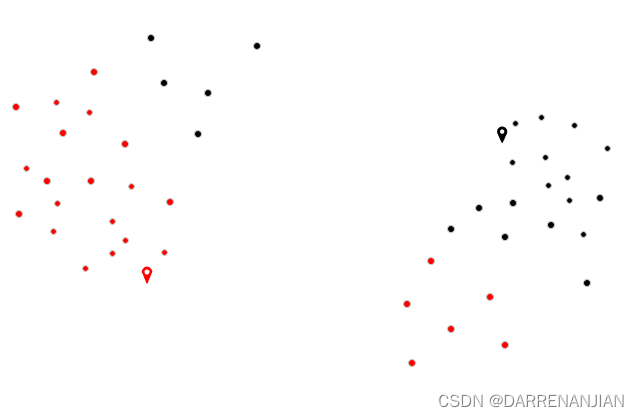
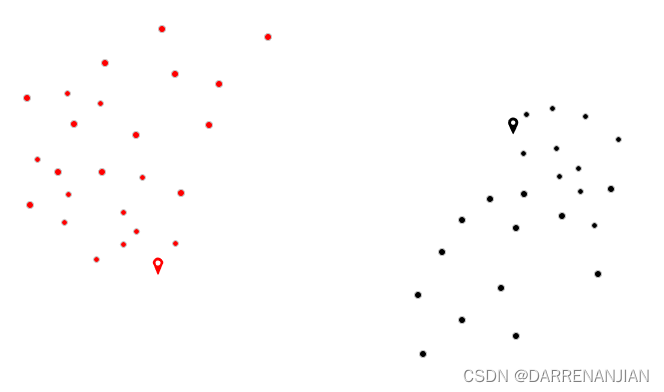
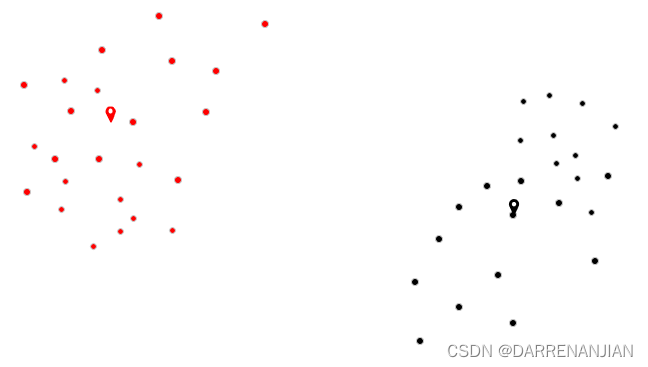
它的基本过程是随机找寻k个节点作为始节点,然后从数据里面计算每个点到始节点的距离,理哪一个始节点比较近则第一次分类将这个节点分为一类。当所有的节点计算完毕(分类完成)之后,重新计算每个类的簇中心,然后继续上述的过程,直到分类的最终结果和每一个簇中心不再发生改变或者迭代次数用尽为止,最终我们将数据分成了k类。
二. 具体过程
KMeans的核心目标是将给定的数据集划分成K个簇(K是超参),并给出每个样本数据对应的中心点。具体步骤非常简单,可以分为4步:
1. 数据预处理,主要是标准化
2. 随机选取k个中心,记为,
......
3. 定义优化目标
4. 令t=1,2...为迭代步数,重复如下过程直到收敛:
4.1 对于每一个样本,将其分配到距离最近的中心
4.2 对于每一个中心k,重新计算该类的中心
三. 代码实现与解释
1. 导入数据与数据初始化
基本的变量设置MANHATTAN = 0表示曼哈顿计算距离方式,EUCLIDEAN = 1表示欧拉计算距离方式,dataset用来存储导入的数据,numClusters即k的数值(分成多少类),KMeans()函数表示导入的数据(路径为"D:/data/iris.arff"),setNumClusters(3)函数表示设置聚类的类的多少(分成多少类)
/*** Manhattan distance.*/public static final int MANHATTAN = 0;/*** Euclidean distance.*/public static final int EUCLIDEAN = 1;/*** The distance measure.*/public int distanceMeasure = EUCLIDEAN;/*** A random instance;*/public static final Random random = new Random();/*** The data.*/Instances dataset;/*** The number of clusters.*/int numClusters = 2;/*** The clusters.*/int[][] clusters;/********************************** The first constructor.** @param paraFilename* The data filename.********************************/public KMeans(String paraFilename) {dataset = null;try {FileReader fileReader = new FileReader(paraFilename);dataset = new Instances(fileReader);fileReader.close();} catch (Exception ee) {System.out.println("Cannot read the file: " + paraFilename + "\r\n" + ee);System.exit(0);} // Of try}// Of the first constructor/********************************** A setter.********************************/public void setNumClusters(int paraNumClusters) {numClusters = paraNumClusters;}// Of the setter2. 核心代码
tempOldClusterArray用于存储每个节点被分为哪一类(1,2,3),tempClusterArray和tempOldClusterArray作用一致,但是是每一轮新的分类,tempOldClusterArray是上一轮的分类结果,tempCenters表示3个中心的位置(第一轮是随机设置中心位置,k=3,属性=4,3×4的一个矩阵),tempClusterLengths用于记录归入每个类的节点个数。
while循环当新的分类和旧的分类一致时,结束循环。接着第二轮第三轮循环,计算一个节点i到各个中心的距离,记录最小值对应类别,保存到tempClusterArray矩阵里面。
又有一个循环,用于累加同一个类的位置信息到tempNewCenters并且用于记录每个类的节点个数到tempClusterLengths。
继续第三个循环,计算每个中心现在的位置到tempNewCenters,将新中心保存到tempCenters矩阵。
public void clustering() {int[] tempOldClusterArray = new int[dataset.numInstances()];tempOldClusterArray[0] = -1;int[] tempClusterArray = new int[dataset.numInstances()];Arrays.fill(tempClusterArray, 0);double[][] tempCenters = new double[numClusters][dataset.numAttributes() - 1];// Step 1. Initialize centers.int[] tempRandomOrders = getRandomIndices(dataset.numInstances());for (int i = 0; i < numClusters; i++) {for (int j = 0; j < tempCenters[0].length; j++) {tempCenters[i][j] = dataset.instance(tempRandomOrders[i]).value(j);} // Of for j} // Of for iint[] tempClusterLengths = null;while (!Arrays.equals(tempOldClusterArray, tempClusterArray)) {System.out.println("New loop ...");tempOldClusterArray = tempClusterArray;tempClusterArray = new int[dataset.numInstances()];// Step 2.1 Minimization. Assign cluster to each instance.int tempNearestCenter;double tempNearestDistance;double tempDistance;for (int i = 0; i < dataset.numInstances(); i++) {tempNearestCenter = -1;tempNearestDistance = Double.MAX_VALUE;for (int j = 0; j < numClusters; j++) {tempDistance = distance(i, tempCenters[j]);if (tempNearestDistance > tempDistance) {tempNearestDistance = tempDistance;tempNearestCenter = j;} // Of if} // Of for jtempClusterArray[i] = tempNearestCenter;} // Of for i// Step 2.2 Mean. Find new centers.tempClusterLengths = new int[numClusters];Arrays.fill(tempClusterLengths, 0);double[][] tempNewCenters = new double[numClusters][dataset.numAttributes() - 1];// Arrays.fill(tempNewCenters, 0);for (int i = 0; i < dataset.numInstances(); i++) {for (int j = 0; j < tempNewCenters[0].length; j++) {tempNewCenters[tempClusterArray[i]][j] += dataset.instance(i).value(j);} // Of for jtempClusterLengths[tempClusterArray[i]]++;} // Of for i// Step 2.3 Now averagefor (int i = 0; i < tempNewCenters.length; i++) {for (int j = 0; j < tempNewCenters[0].length; j++) {tempNewCenters[i][j] /= tempClusterLengths[i];} // Of for j} // Of for iSystem.out.println("Now the new centers are: " + Arrays.deepToString(tempNewCenters));tempCenters = tempNewCenters;} // Of while// Step 3. Form clusters.clusters = new int[numClusters][];int[] tempCounters = new int[numClusters];for (int i = 0; i < numClusters; i++) {clusters[i] = new int[tempClusterLengths[i]];} // Of for ifor (int i = 0; i < tempClusterArray.length; i++) {clusters[tempClusterArray[i]][tempCounters[tempClusterArray[i]]] = i;tempCounters[tempClusterArray[i]]++;} // Of for iSystem.out.println("The clusters are: " + Arrays.deepToString(clusters));}// Of clustering3. 后续信息的补充
clusters为k(聚类的种类数)行矩阵,列还没有确定。接着一个循环创建每一行的长度为一个类的样本数,后面一个循环用于分类每个是哪个类。
// Step 3. Form clusters.clusters = new int[numClusters][];int[] tempCounters = new int[numClusters];for (int i = 0; i < numClusters; i++) {clusters[i] = new int[tempClusterLengths[i]];} // Of for ifor (int i = 0; i < tempClusterArray.length; i++) {clusters[tempClusterArray[i]][tempCounters[tempClusterArray[i]]] = i;tempCounters[tempClusterArray[i]]++;} // Of for iSystem.out.println("The clusters are: " + Arrays.deepToString(clusters));
4. 距离计算和随机排列
这里不再详细说明,欢迎查看第51天博客
/************************ Get a random indices for data randomization.** @param paraLength* The length of the sequence.* @return An array of indices, e.g., {4, 3, 1, 5, 0, 2} with length 6.**********************/public static int[] getRandomIndices(int paraLength) {int[] resultIndices = new int[paraLength];// Step 1. Initialize.for (int i = 0; i < paraLength; i++) {resultIndices[i] = i;} // Of for i// Step 2. Randomly swap.int tempFirst, tempSecond, tempValue;for (int i = 0; i < paraLength; i++) {// Generate two random indices.tempFirst = random.nextInt(paraLength);tempSecond = random.nextInt(paraLength);// Swap.tempValue = resultIndices[tempFirst];resultIndices[tempFirst] = resultIndices[tempSecond];resultIndices[tempSecond] = tempValue;} // Of for ireturn resultIndices;}// Of getRandomIndices/************************ The distance between two instances.** @param paraI* The index of the first instance.* @param paraArray* The array representing a point in the space.* @return The distance.**********************/public double distance(int paraI, double[] paraArray) {int resultDistance = 0;double tempDifference;switch (distanceMeasure) {case MANHATTAN:for (int i = 0; i < dataset.numAttributes() - 1; i++) {tempDifference = dataset.instance(paraI).value(i) - paraArray[i];if (tempDifference < 0) {resultDistance -= tempDifference;} else {resultDistance += tempDifference;} // Of if} // Of for ibreak;case EUCLIDEAN:for (int i = 0; i < dataset.numAttributes() - 1; i++) {tempDifference = dataset.instance(paraI).value(i) - paraArray[i];resultDistance += tempDifference * tempDifference;} // Of for ibreak;default:System.out.println("Unsupported distance measure: " + distanceMeasure);}// Of switchreturn resultDistance;}// Of distance四. 后续的数据分析
1. 时间复杂度分析
首先对于n个样本,聚类为k个类,现在的时间复杂度为O(kn),再加上迭代次数t,故而最终的时间复杂度为O(knt)(k是聚为多少类,n是数据总量个数,t是迭代次数)
2. 对于特殊数据的处理
由于k-means算法是基于"距离"进行计算的,而“距离”却是基于向量的。对于有些数据的某一个向量,若方差较大的话将对数据的聚类结果产生决定性影响,所以对于聚类前的数据进行归一化和单位化相当有必要。此外对于极个别噪声数据应该检测出来,排除它对中心的影响。
3. 对于k值的选择
由于聚类的效果收到初始k值的影响,我们可以用试触法确定最佳的k值,即取k为不同的值,每次计算我们的优化目标的值,最后取一个最合适的值作为k值。
4. 改进初始值的选择
之前我们采取随机选择K个中心的做法,可能导致不同的中心点距离很近,就需要更多的迭代次数才能收敛。如果在选择初始中心点时能让不同的中心尽可能远离,效果往往更好。这类算法中,以K-Means++算法最具影响力。
五. 运行结果


