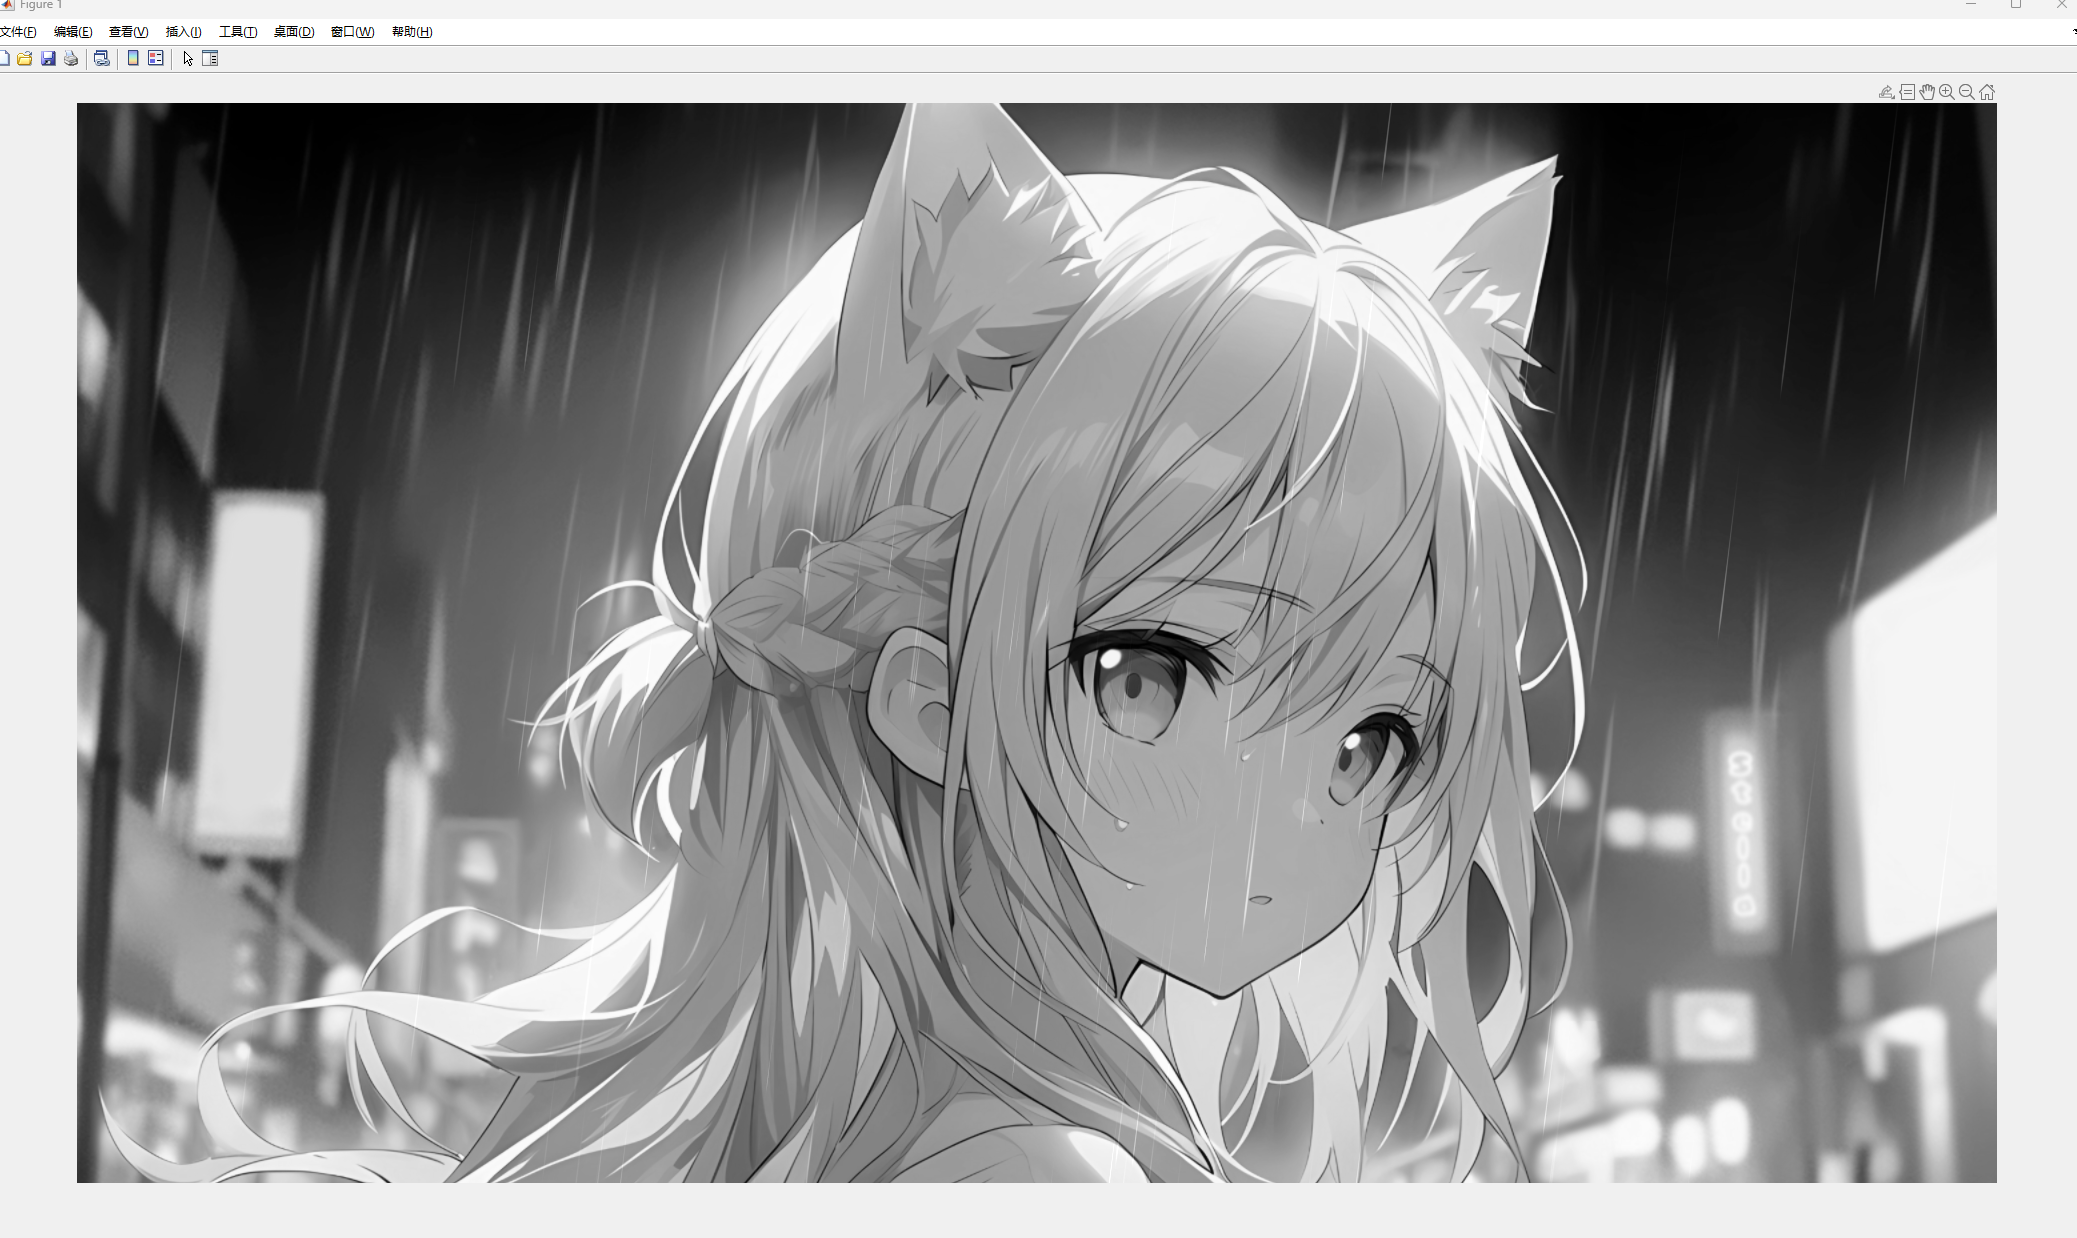
1.方法
RGB转灰度有很多种方式
1.将RGB中任意分量拿出来当做灰度值。
2.取RGB三通道的均值来当灰度值。
3.将RGB转YUV(YCbCr)然后取Y分量作为灰度值。
其余的几种实现方式较为简单,这里不做介绍。重点实现RGB转YCbCr。
1.1 YUV(YCbCr)格式
Y表示亮度,U和V表示色度,用于描述影像的饱和度和色调。RGB转YUV的转换一般是色彩空间的转换。YUV主要用在模拟系统中,而YCbCr是通过YUV信号的发展,并通过校正
的主要应用在数字视频中的一种编码方法。YUV适用于PAL和SECAM彩色电视制式,而YCrCb适用于计算机用的显示器。 一般意义上 YCbCr 即为 YUV 信号,没有严格的划分。 CbCr 分别为蓝色色度分量、红色色度分量。
RGB注重人色彩的感知,YUV则注重亮度的敏感程度。
使用YUV描述图像的好处在于:
(1)亮度(Y)与色度(U、V)是独立的;
(2)人眼能够识别数千种不同的色彩,但只能识别20多种灰阶值,采用YUV标准可以降低数字彩色图像所需的储存容量。
1.1.1 YUV4:4:4
YUV三个通道采样率相同,因此每个分量相互独立。通常一个分量占8bit,一个像素占3byte。
1.1.2 YUV4:2:2
YUV三个通道采样率不同,UV分量只有Y的一半,两个UV共占用一个Y。
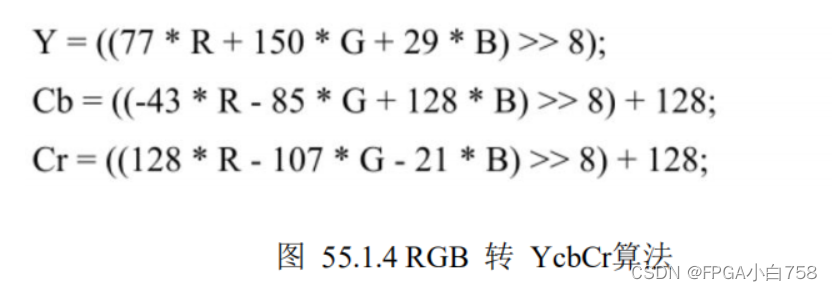
1.2 RGB转YCbCr公式

但是由于Verilog HDL无法进行浮点运算,因此使用扩大256倍,再向右移8Bit的方式来转换公式,(0.083 = 00010101)
2.算法验证平台搭建
2.1 图片转txt文本
首先将图片转化为txt文本格式方便其他模块读取。
clear ;
clc ;
close;
RGB = imread('../img/1920x1080.bmp');
imshow(RGB);
[row,col,chn] = size(RGB);
fid = fopen('../data//pre.txt','w+');
for i = 1:rowfor j = 1:colfor k = 1:chnfprintf(fid,'%02x',RGB(i,j,k));endfprintf(fid,'\n');end
endfclose(fid);
2.2 txt文本数据仿真回传
2.2.1 文本读取
这里首先读取MATLAB生成的pre.txt文本,读取txt文本的模块为img_gen3,表示读取的RGB888的数据。
`timescale 1ns / 1psmodule img_gen3
#(parameter 	ACTIVE_IW 	= 	1920 	,parameter 	ACTIVE_IH 	= 	1080 	,parameter 	TOTAL_IW 	= 	2200 	,parameter 	TOTAL_IH 	= 	1100 	,parameter 	H_START 	= 	100 	,parameter 	V_START 	= 	4
)(input 	wire 				clk 	,input 	wire 				rst_n 	,output 	reg 				vs 		,output 	reg  	 	 		de 		,output 	reg 	[23:0] 		data
);reg 	[23:0] 	raw_array 	[ACTIVE_IW*ACTIVE_IH-1:0];integer 	i;initial 	beginfor(i=0;i<ACTIVE_IW*ACTIVE_IH;i=i+1)raw_array[i] = 0;
endinitial begin$readmemh("H:/picture/Z7/lesson6/data/pre.txt",raw_array);
endreg 	[15:0] 	hcnt 	;
reg 	[15:0] 	vcnt 	;reg 			h_de 	;
reg 			v_de  	;reg  			index_de 	;
reg 	[31:0] 	index 	 	;always @(posedge clk or negedge rst_n)if(!rst_n)hcnt <= 'd0;else if(hcnt == TOTAL_IW - 1)hcnt <= 'd0;else hcnt <= hcnt + 1'b1;always @(posedge clk or negedge rst_n)if(!rst_n)vcnt <= 'd0;else if(hcnt == TOTAL_IW - 1 && vcnt == TOTAL_IH - 1)vcnt <= 'd0;else if(hcnt == TOTAL_IW - 1)vcnt <= vcnt + 1'b1;else vcnt <= vcnt;always @(posedge clk or negedge rst_n)if(!rst_n)vs <= 'd0;else if(vcnt>=2)vs <= 1'b1;else vs <= 1'b0;always @(posedge clk or negedge rst_n)if(!rst_n)h_de <= 'd0;else if(hcnt >= H_START && hcnt < H_START + ACTIVE_IW)h_de <= 1'b1;else h_de <= 1'b0;always @(posedge clk or negedge rst_n)if(!rst_n)v_de <= 'd0;else if(vcnt >= V_START && vcnt < V_START + ACTIVE_IH)v_de <= 1'b1;else v_de <= 1'b0;always @(posedge clk or negedge rst_n)if(!rst_n)index_de <= 'd0;else if(index == ACTIVE_IW * ACTIVE_IH-1)index_de <= 1'b0;else if(h_de == 1'b1 && v_de == 1'b1)index_de <= 1'b1;else index_de <= 1'b0;always @(posedge clk or negedge rst_n)if(!rst_n)index_de <= 'd0;else if(h_de == 1'b1 && v_de == 1'b1)index_de <= 1'b1;else index_de <= 1'b0;always @(posedge clk or negedge rst_n)if(!rst_n)index <= 'd0;else if(index == ACTIVE_IW * ACTIVE_IH-1)index <= 1'b0;else if(index_de == 1'b1)index <= index + 1;else index <= index;always @(posedge clk or negedge rst_n)if(!rst_n)de <= 'd0;else de <= index_de;always @(posedge clk or negedge rst_n)if(index_de == 1'b1)data <= raw_array[index];else data <= 0;
endmodule
2.2.1 读取写入
读取的数据在顶层写入为post.txt。
`timescale 1ns / 1ps
module tb_top();reg 	clk 	;
reg 	rst_n 	;integer 	outfile;initial 	beginclk = 0;rst_n = 0;#20rst_n = 1;outfile = $fopen("H:/picture/Z7/lesson6/data/post.txt","w");
end
always #5 clk = ~clk;wire 	vs ;
wire 	de ;
wire 	[23:0] 	data;img_gen3  #(.ACTIVE_IW 	(1920 	),.ACTIVE_IH 	(1080 	),.TOTAL_IW 	(2200 	),.TOTAL_IH 	(1100 	),.H_START 	(100 	),.V_START 	(4 		)
)u_img_gen3(.clk 	 	(clk 	 	),.rst_n 	 	(rst_n 	 	),.vs 		(vs 		),.de 		(de 		),.data 	 	(data 	 	)
);reg 	vs_r 	;always @(posedge clk)if(rst_n == 0)vs_r 	<= 1'b0;else vs_r 	<= vs;always @(posedge clk)if(~vs&&vs_r)$stop;else if(de == 1)$fdisplay(outfile,"%h\t%h\t%h",data[23:16],data[15:8],data[7:0]);
endmodule
2.2.3 MATLAB数据读取
这里对比pre.txt和post.txt是否相等的方式有很多中,可以直接用文本对比工具,也可以用MATLAB做对比。这里只做一个txt转bmp。
clear ;
clc ;
close;
RGB = imread('../img/1920x1080.bmp');
imshow(RGB);
[row,col,chn] = size(RGB);
fid = fopen('../data//pre.txt','w+');
for i = 1:rowfor j = 1:colfor k = 1:chnfprintf(fid,'%02x',RGB(i,j,k));endfprintf(fid,'\n');end
end
fclose(fid);
搭建后对比pre.txt与post.txt的数据一致。可以开始验证算法了。
3 rgb2ycbcr算法实现与仿真
3.1 rgb2ycbcr算法实现
本算法实现包括三个时钟周期,第一个时钟周期算乘法,第二个时钟周期算加减,第三个时钟周期算触发(截位)。
module	rgb2ycbcr(input	wire				clk				,	//系统时钟input	wire				rst_n			,	//复位信号input	wire				pre_hsync		,	//输入的场同步input	wire				pre_vsync		,	//输入行同步input	wire				pre_de			,	//数据有效信号input	wire	[ 7:0]		pre_r 			,	//输入像素数据input 	wire 	[ 7:0] 		pre_g 			,input 	wire 	[ 7:0] 		pre_b 			,output	reg 				post_hsync 		,	//输出行同步output	reg 				post_vsync 		,	//输出场同步output	reg 				post_de 		,	//输出数据有效信号output	reg 	[7:0]		post_y 			,	//输出y(亮度)分量output	reg 	[7:0]		post_cb 		,	//输出蓝色色度分量output	reg 	[7:0]		post_cr				//输出红色色度分量);reg 	[15:0] 	pre_r0 	;reg 	[15:0] 	pre_r1 	;reg 	[15:0] 	pre_r2 	;reg 	[15:0] 	pre_g0 	;reg 	[15:0] 	pre_g1 	;reg 	[15:0] 	pre_g2 	;reg 	[15:0] 	pre_b0 	;reg 	[15:0] 	pre_b1 	;reg 	[15:0] 	pre_b2 	;reg 	[15:0] 	post_y0 ;reg 	[15:0] 	post_cb0;	reg 	[15:0] 	post_cr0;reg 			pre_hsync_d0;reg 			pre_vsync_d0;reg 			pre_de_d0 	;reg 			pre_hsync_d1;reg 			pre_vsync_d1;reg 			pre_de_d1 	;/*********************************************************
RGB888 to YCbCr
Y = 0.299R +0.587G + 0.114B
Cb = 0.568(B-Y) + 128 = -0.172R-0.339G + 0.511B + 128
CR = 0.713(R-Y) + 128 = 0.511R-0.428G -0.083B + 128Y = (77 *R + 150*G + 29 *B)>>8
Cb = (-43*R - 85 *G + 128*B)>>8 + 128
Cr = (128*R - 107*G - 21 *B)>>8 + 128Y = (77 *R + 150*G + 29 *B )>>8
Cb = (-43*R - 85 *G + 128*B + 32768)>>8
Cr = (128*R - 107*G - 21 *B + 32768)>>8
*********************************************************/
//计算乘法项always @(posedge clk)beginif(rst_n == 0)beginpre_r0 	<= 	'd0;pre_r1 	<= 	'd0;pre_r2 	<= 	'd0;endelse beginpre_r0 	<= 	pre_r *77;pre_r1 	<= 	pre_r *43;pre_r2 	<= 	pre_r *128;		end
endalways @(posedge clk)beginif(rst_n == 0)beginpre_g0 	<= 	'd0;pre_g1 	<= 	'd0;pre_g2 	<= 	'd0;endelse beginpre_g0 	<= 	pre_g *150;pre_g1 	<= 	pre_g *85 ;pre_g2 	<= 	pre_g *107;		end
endalways @(posedge clk)beginif(rst_n == 0)beginpre_b0 	<= 	'd0;pre_b1 	<= 	'd0;pre_b2 	<= 	'd0;endelse beginpre_b0 	<= 	pre_b *29;pre_b1 	<= 	pre_b *128 ;pre_b2 	<= 	pre_b *21;		end
end//计算加减法
always @(posedge clk)beginif(rst_n == 0)beginpost_y0 	<= 	0;post_cb0 	<= 	0;post_cr0 	<= 	0;endelse beginpost_y0 	<= 	 		pre_r0 + pre_g0 + pre_b0;post_cb0 	<= 	32768 - pre_r1 - pre_g1 + pre_b1;post_cr0 	<= 	32768 + pre_r2 - pre_g2 - pre_b2;end
end//移位赋值
always @(posedge clk)beginif(rst_n == 0)beginpost_y 	 	<= 	0;post_cb 	<= 	0;post_cr 	<= 	0;endelse beginpost_y 		<= 	post_y0 /256;post_cb 	<= 	post_cb0/256;post_cr 	<= 	post_cr0/256;end
end//本次计算一共用了三个时钟周期  所以其余的信号需要打三拍出来
always @(posedge clk)beginif(rst_n == 0)beginpre_hsync_d0 	<= 	'd0;pre_vsync_d0 	<= 	'd0;pre_de_d0 	 	<= 	'd0;pre_hsync_d1 	<= 	'd0;pre_vsync_d1 	<= 	'd0;pre_de_d1 	 	<= 	'd0;post_hsync 		<= 	'd0;post_vsync 		<= 	'd0;post_de 	 	<= 	'd0;		endelse beginpre_hsync_d0 	<= 	pre_hsync 		;pre_vsync_d0 	<= 	pre_vsync 		;pre_de_d0 	 	<= 	pre_de 	 		;pre_hsync_d1 	<= 	pre_hsync_d0 	;pre_vsync_d1 	<= 	pre_vsync_d0 	;pre_de_d1 	 	<= 	pre_de_d0 	 	;post_hsync 		<= 	pre_hsync_d1 	;post_vsync 		<= 	pre_vsync_d1 	;post_de 	 	<= 	pre_de_d1 	 	;		end
endendmodule
3.2 算法仿真与验证
3.2.1 算法仿真模块
`timescale 1ns / 1psmodule tb_rgb2ycbcr();reg 	 		clk 			;
reg 	 		rst_n 			;reg 			pre_hsync		;
wire 			pre_vsync		;
wire 			pre_de			;
wire 	[7:0] 	pre_r 			;
wire 	[7:0] 	pre_g 			;
wire 	[7:0] 	pre_b 	 		;
wire 			post_hsync 	 	;
wire 			post_vsync 	 	;
wire 			post_de 		;
wire 	[7:0] 	post_y 		 	;
wire 	[7:0] 	post_cb 		;
wire 	[7:0] 	post_cr			;	integer 	outfile;always #10 clk = ~clk;
initial 	beginclk = 0;rst_n = 0;pre_hsync = 1;#200rst_n = 1;outfile = $fopen("H:/picture/Z7/lesson6/data/post.txt","w");
endimg_gen3#(.ACTIVE_IW 	(1920 	),.ACTIVE_IH 	(1080 	),.TOTAL_IW 	(2200 	),.TOTAL_IH 	(1100 	),.H_START 	(100 	),.V_START 	(4 		)
)u_img_gen3(.clk 	 	(clk 	 			),.rst_n 	 	(rst_n 	 			),.vs 		(pre_vsync 			),.de 		(pre_de 			),.data 	 	({pre_r,pre_g,pre_b})
);rgb2ycbcr u1_rgb2ycbcr(.clk			(clk			),	//系统时钟.rst_n			(rst_n			),	//复位信号.pre_hsync		(pre_hsync		),	//输入的场同步.pre_vsync		(pre_vsync		),	//输入行同步.pre_de			(pre_de			),	//数据有效信号.pre_r 			(pre_r 			),	//输入像素数据.pre_g 			(pre_g 			),.pre_b 			(pre_b 			),.post_hsync 	(post_hsync 	),	//输出行同步.post_vsync 	(post_vsync 	),	//输出场同步.post_de 		(post_de 		),	//输出数据有效信号.post_y 		(post_y 		),	//输出y(亮度)分量.post_cb 		(post_cb 		),	//输出蓝色色度分量.post_cr		(post_cr		)	//输出红色色度分量);reg 	vs_r 	;always @(posedge clk)if(rst_n == 0)vs_r 	<= 1'b0;else vs_r 	<= post_vsync;always @(posedge clk)if(~post_vsync&&vs_r)$stop;else if(post_de == 1)$fdisplay(outfile,"%h",post_y);
endmodule
3.2.2 算法的MATLAB验证
clc;
clear all;
RGB = imread('../img/1920x1080.bmp');
[row,col,chn] = size(RGB);
RGB = double(RGB);
for i = 1:rowfor j = 1:colfor k = 1:chnY(i,j)  = (77*RGB(i,j,1)    + 150*RGB(i,j,2)    + 29*RGB(i,j,3)            )/256;Cb(i,j) = (-43*RGB(i,j,1)   - 85*RGB(i,j,2)     + 128*RGB(i,j,3)   +32768  )/256;Cr(i,j) = (128*RGB(i,j,1)   - 107*RGB(i,j,2)    - 21*RGB(i,j,3)    +32768  )/256;endend
end
matlab_Y = uint8(floor(Y));a = textread('../data/post.txt','%s');
IMdec = hex2dec(a);col = 1920;
row = 1080;IM = reshape(IMdec,col,row);
fpga_Y = uint8(IM)';subplot(1,2,1)
imshow(matlab_Y),title('MATLAB算法图像');
subplot(1,2,2)
imshow(fpga_Y),title('FPGA算法图像');sub = matlab_Y - fpga_Y;min_sub = min(min(sub));
max_sub = max(max(sub));
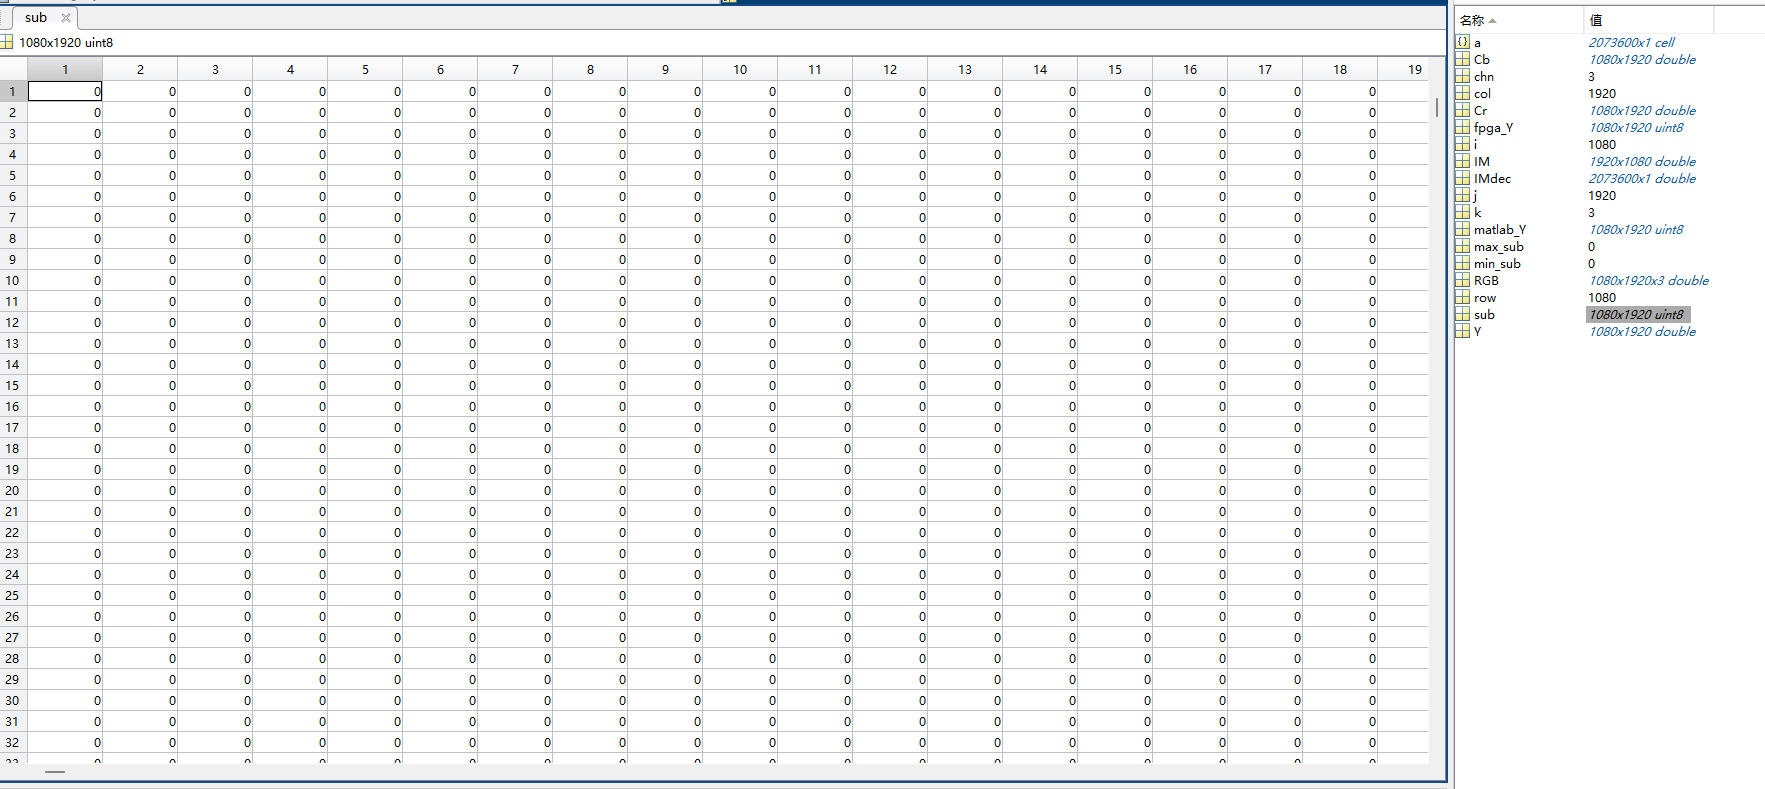
最终MATLAB读取MolelSim的仿真数据以及MATLAN本身实现的rgb2ycbcr算法模块做对比。两者数据完全一样。

3.2.3 TXT转bmp
clear;
clc;
close all;a = textread('../data/post.txt','%s');
IMdec = hex2dec(a);col = 1920;
row = 1080;IM = reshape(IMdec,col,row);
b = uint8(IM)';imwrite(b,'../img/post.bmp');
imshow('../img/post.bmp');
