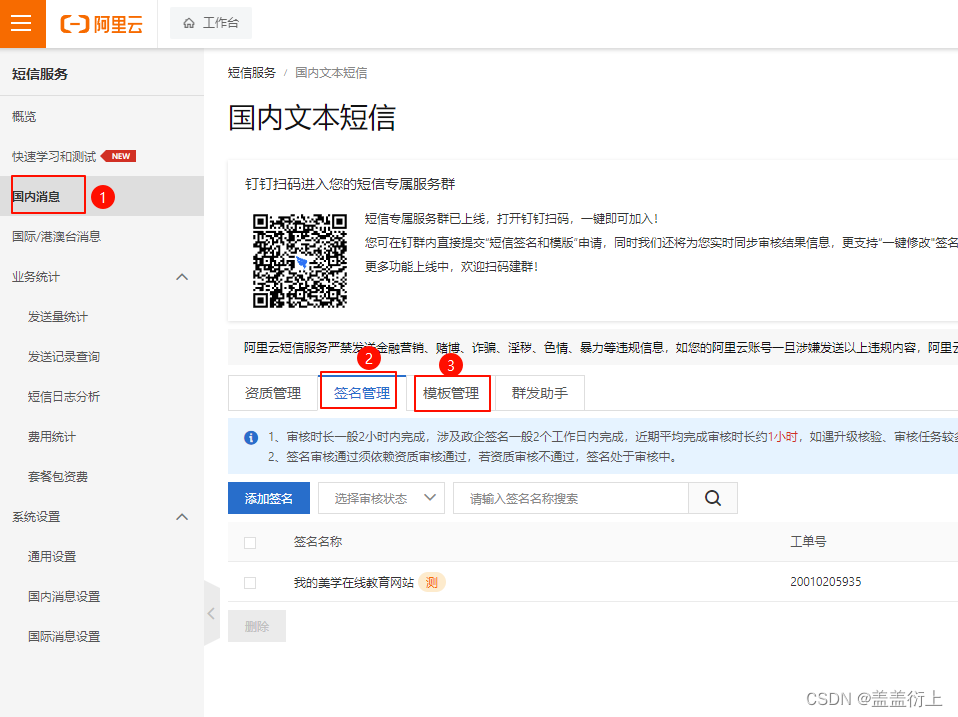
1. 申请服务
如图:
申请签名管理和模板管理
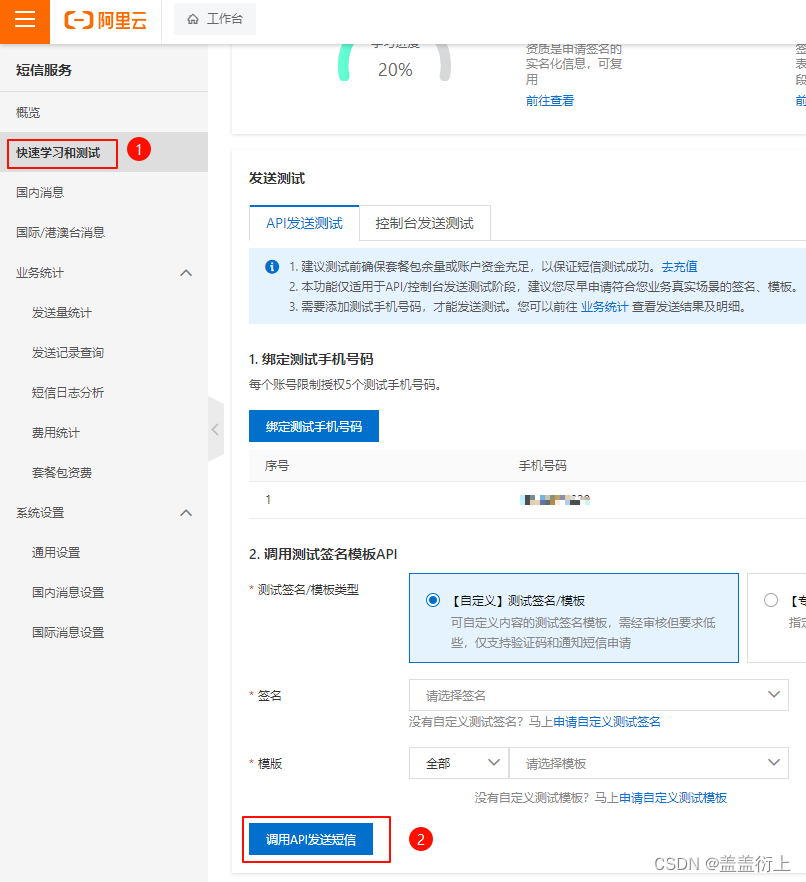
2. 进入快速学习和调试
2.1 进入快速学习
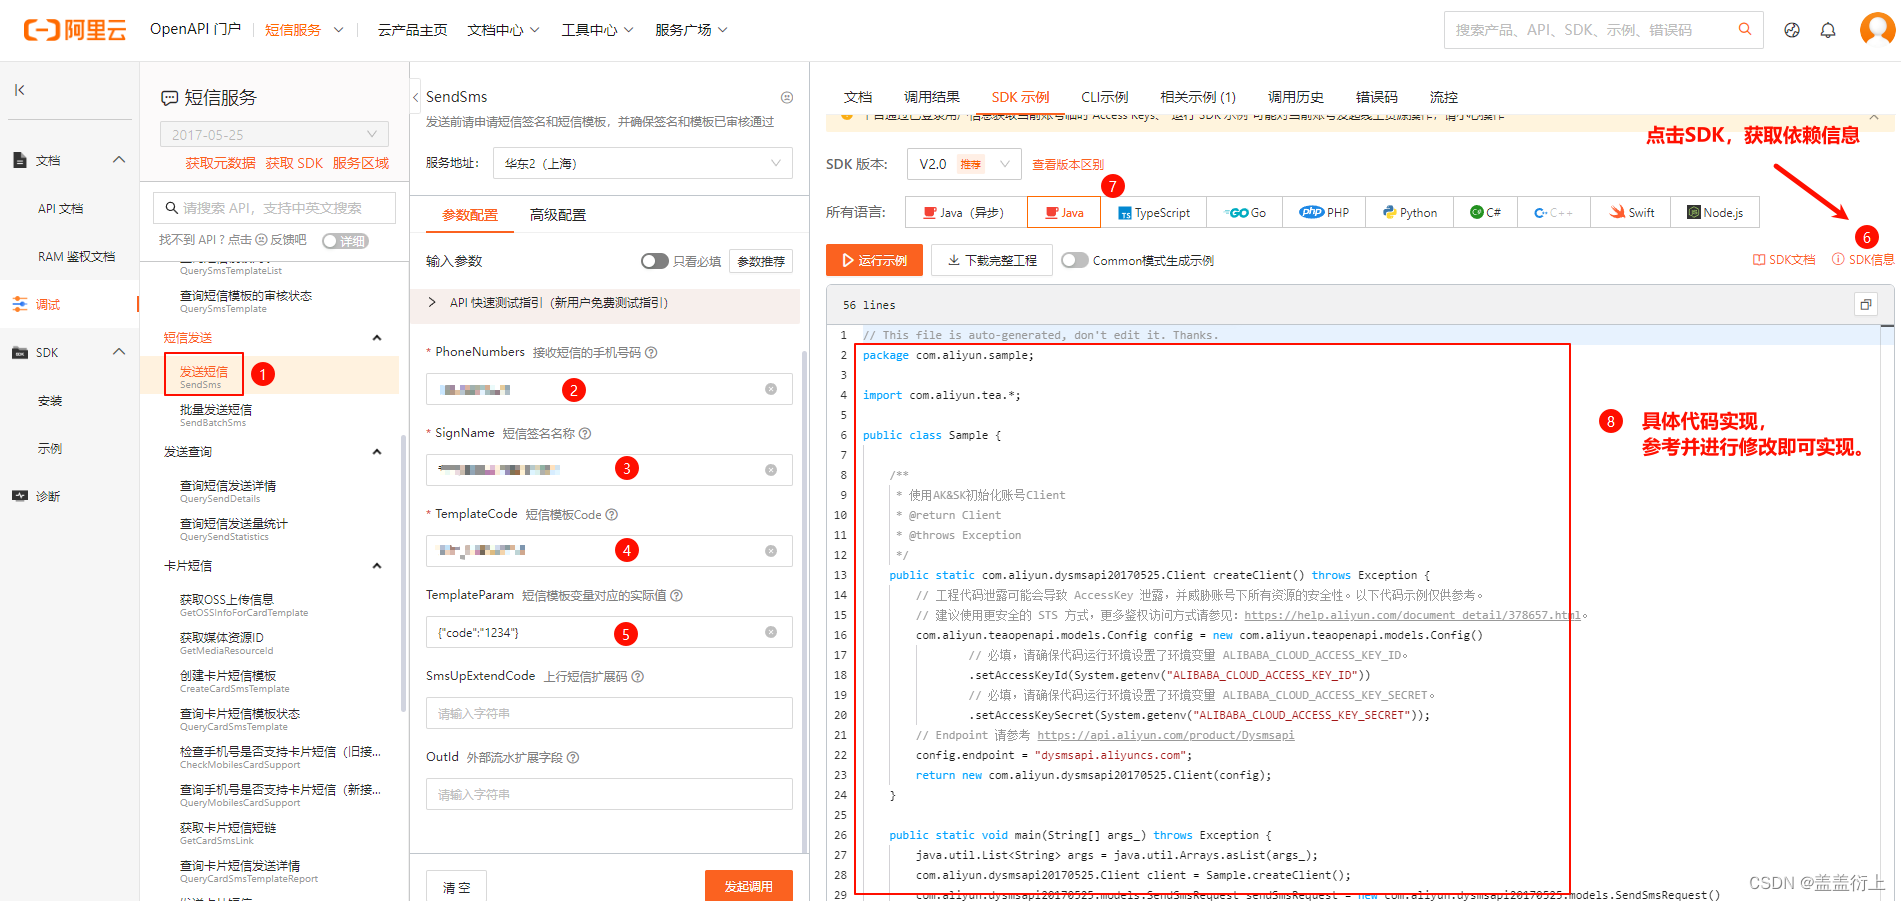
2.2 获取依赖和代码实现
3. 具体实现案例
3.1 添加依赖
<dependency><groupId>com.aliyun</groupId><artifactId>dysmsapi20170525</artifactId><version>2.0.24</version>
</dependency>
<dependency><groupId>com.alibaba</groupId><artifactId>fastjson</artifactId><version>1.2.28</version>
</dependency>
3.4 代码实现
package com.dn.msm.service;import com.alibaba.fastjson.JSONObject;
import com.aliyun.dysmsapi20170525.models.SendSmsResponse;
import com.dn.msm.test.Sample;import java.util.Map;/*** @author xxx* @version 1.0* @date xxx*/
public class MsmServiceImpl implements MsmService {/*** 使用AK&SK初始化账号Client** @return Client* @throws Exception*/public static com.aliyun.dysmsapi20170525.Client createClient() throws Exception {// 工程代码泄露可能会导致 AccessKey 泄露,并威胁账号下所有资源的安全性。以下代码示例仅供参考。// 建议使用更安全的 STS 方式,更多鉴权访问方式请参见:https://help.aliyun.com/document_detail/378657.html。com.aliyun.teaopenapi.models.Config config = new com.aliyun.teaopenapi.models.Config()// 必填,请确保代码运行环境设置了环境变量 ALIBABA_CLOUD_ACCESS_KEY_ID。.setAccessKeyId("填写自己的")// 必填,请确保代码运行环境设置了环境变量 ALIBABA_CLOUD_ACCESS_KEY_SECRET。.setAccessKeySecret("填写自己的");// Endpoint 请参考 https://api.aliyun.com/product/Dysmsapiconfig.endpoint = "dysmsapi.aliyuncs.com";return new com.aliyun.dysmsapi20170525.Client(config);}@Overridepublic boolean send(Map<String, Object> map, String phone) {try {com.aliyun.dysmsapi20170525.Client client = Sample.createClient();com.aliyun.dysmsapi20170525.models.SendSmsRequest sendSmsRequest = new com.aliyun.dysmsapi20170525.models.SendSmsRequest().setPhoneNumbers(phone).setSignName("填写自己的").setTemplateCode("填写自己的").setTemplateParam(JSONObject.toJSONString(map));com.aliyun.teautil.models.RuntimeOptions runtime = new com.aliyun.teautil.models.RuntimeOptions();// 复制代码运行请自行打印 API 的返回值SendSmsResponse sendSmsResponse = client.sendSmsWithOptions(sendSmsRequest, runtime);System.out.println(sendSmsResponse);return true;} catch (Exception error) {throw new RuntimeException("短信发送失败" + error.getMessage());}}}