A.集成
一:添加依赖
在pom.xml文件中添加spring-boot-starter-amqp依赖,以便使用Spring Boot提供的RabbitMQ支持:
<dependency><groupId>org.springframework.boot</groupId><artifactId>spring-boot-starter-amqp</artifactId>
</dependency>
二:配置RabbitMQ连接信息
rabbitmq:host: 13X.9.1XX.7Xport: 5672 #通过控制台可以查看 记得开启这个端口的防护username: adminpassword: admin
三:创建队列
import org.springframework.amqp.core.Queue;
import org.springframework.context.annotation.Bean;
import org.springframework.context.annotation.Configuration;@Configuration
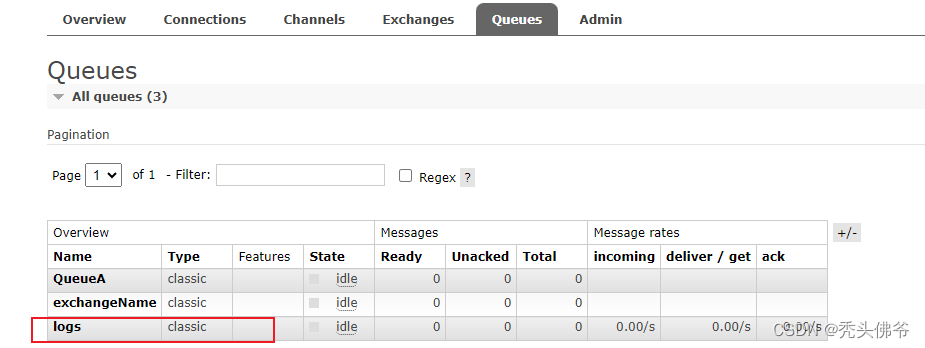
public class RabbitMQConfig {@Beanpublic Queue queue() {//name,名字;durable,是否开启持久化return new Queue("logs",false);}
}启动就可以得到下队列
四:创建控制类来生产数据
import org.slf4j.Logger;
import org.slf4j.LoggerFactory;
import org.springframework.amqp.rabbit.core.RabbitTemplate;
import org.springframework.beans.factory.annotation.Autowired;
import org.springframework.web.bind.annotation.GetMapping;
import org.springframework.web.bind.annotation.RestController;@RestController
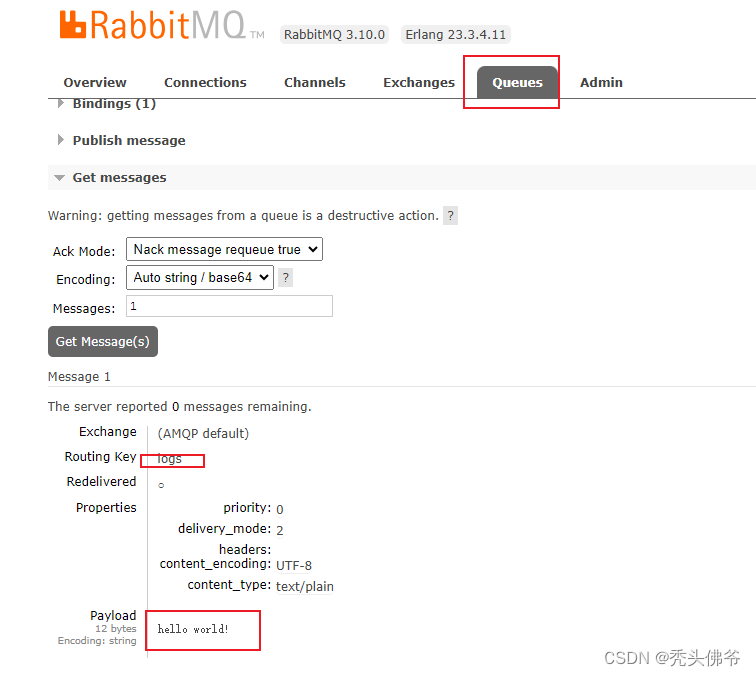
public class RabbitMQController {private static final Logger logger = LoggerFactory.getLogger(RabbitMQController.class);@Autowiredprivate RabbitTemplate rabbitTemplate;@GetMapping("aaa")public void simpleTest() {logger.info("RabbitMQController开始!");rabbitTemplate.convertAndSend("logs","hello world!");logger.info("RabbitMQController结束!");}
}因为只创建了生产,消费者没有创建,所以在RabbitMQ客户端可以查看,然后点击,消费可得数据
五:创建消费者,获取数据
import org.slf4j.Logger;
import org.slf4j.LoggerFactory;
import org.springframework.amqp.rabbit.annotation.RabbitListener;
import org.springframework.stereotype.Component;@Component
public class ConsumeBean {private static final Logger logger = LoggerFactory.getLogger(ConsumeBean.class);@RabbitListener(queues={"logs"})public void getMsg(String message){logger.info("消费者:{}",message);}
}
这样就可以看出,消息自动就被接收,消费掉了

B.消息传递的开放标准协议(AMQP)
AMQP(Advanced Message Queuing Protocol)它定义了一种抽象的消息传递模型,包括以下几个主要组件:
消息(Message):AMQP中的基本单位,是要在消息队列系统中传递的数据。消息通常包括消息体和消息头,消息体是实际要传递的数据,而消息头包含元数据信息,如消息的路由键、优先级等。
生产者(Producer):负责创建并发送消息到消息队列中的实体。生产者将消息发布到交换机(Exchange),交换机根据路由规则将消息路由到一个或多个队列中。
消费者(Consumer):从消息队列中接收并处理消息的实体。消费者订阅一个或多个队列,并在有消息到达时接收并处理它们。
交换机(Exchange):用于接收生产者发送的消息,并根据路由规则将消息路由到一个或多个队列中。AMQP定义了不同类型的交换机,如直连交换机(Direct Exchange)、主题交换机(Topic Exchange)、扇出交换机(Fanout Exchange)等。
队列(Queue):存储消息的容器,消费者从队列中获取消息进行处理。消息可以被一个或多个消费者订阅,但每条消息只会被一个消费者接收。
绑定(Binding):用于将交换机和队列之间建立关联关系的规则。绑定定义了消息如何从交换机路由到队列,通常包括交换机名称、路由键等信息。
连接(Connection):生产者和消费者与消息代理(如RabbitMQ)之间建立的网络连接。连接是长期的、持久的,用于传输消息和管理通信。
通过这些抽象组件,AMQP定义了一个灵活且可扩展的消息传递模型,使得不同的消息队列系统可以遵循相同的协议进行通信和交互。这种抽象模型使得开发者可以更容易地实现消息传递系统,并实现消息的可靠传递和处理。
六大模式
1.简单队列 一个生产者一个队列一个消费者
2.工作队列 一个生产者一个队列多个消费者
3.订阅模式 一个生产者一个交换机 多个队列多个消费者(对与消一对一)
4.路由模式 一个生产者一个交换机 分类进入队列 多个队列多个消费者(对与消一对一)
5.主题模式(通配符模式) 一个生产者一个交换机 通配符分类进入队列 多个队列多个消费者(对与消一对一)
6.RPC 是一种实现远程过程调用的方式,允许客户端应用程序调用远程服务器上的服务,并等待服务端返回结果。
1.简单队列
创建生产者(Producer):
import org.springframework.amqp.rabbit.core.RabbitTemplate;
import org.springframework.beans.factory.annotation.Autowired;
import org.springframework.stereotype.Component;
@Component
public class MessageProducer {@Autowiredprivate RabbitTemplate rabbitTemplate;public void sendMessage(String message) {rabbitTemplate.convertAndSend("queueName", message);}
}
//创建消费者
import org.springframework.amqp.rabbit.annotation.RabbitListener;
import org.springframework.stereotype.Component;
@Component
public class MessageConsumer {@RabbitListener(queues = "queueName")public void receiveMessage(String message) {System.out.println("Received message: " + message);}
}//队列配置
import org.springframework.amqp.core.Queue;
import org.springframework.context.annotation.Bean;
import org.springframework.context.annotation.Configuration;@Configuration
public class RabbitConfig {@Beanpublic Queue queue1() {return new Queue("queueName");}
}
2.工作队列
//队列配置
import org.springframework.amqp.core.Queue;
import org.springframework.context.annotation.Bean;
import org.springframework.context.annotation.Configuration;
@Configuration
public class RabbitConfig2{@Beanpublic Queue taskQueue() {return new Queue("taskQueue");}
}
//创建生产者
import org.springframework.amqp.rabbit.core.RabbitTemplate;
import org.springframework.beans.factory.annotation.Autowired;
import org.springframework.stereotype.Component;
@Component
public class TaskProducer {@Autowiredprivate RabbitTemplate rabbitTemplate;public void sendTask(String task) {rabbitTemplate.convertAndSend("taskQueue", task);}
}//创建消费者
import org.springframework.amqp.rabbit.annotation.RabbitListener;
import org.springframework.stereotype.Component;
@Component
public class TaskConsumer {@RabbitListener(queues = "taskQueue")public void processTask(String task) {System.out.println("Processing task: " + task);// Simulate task processingtry {Thread.sleep(1000); // Simulate task processing time} catch (InterruptedException e) {Thread.currentThread().interrupt();}System.out.println("Task processed: " + task);}
}
3.订阅模式
//创建生产者(Producer)
import org.springframework.amqp.rabbit.core.RabbitTemplate;
import org.springframework.beans.factory.annotation.Autowired;
import org.springframework.stereotype.Component;@Component
public class MessageProducer3 {@Autowiredprivate RabbitTemplate rabbitTemplate;public void sendMessage(String message) {rabbitTemplate.convertAndSend("fanoutExchange", "", message);}
}//创建消费者(Consumer)
import org.springframework.amqp.rabbit.annotation.RabbitListener;
import org.springframework.stereotype.Component;
@Component
public class MessageConsumerA {@RabbitListener(queues = "queueFanout1")public void receiveMessage(String message) {System.out.println("Consumer 1 received message: " + message);}
}
@Component
public class MessageConsumerB {@RabbitListener(queues = "queueFanout2")public void receiveMessage(String message) {System.out.println("Consumer 2 received message: " + message);}
}//配置交换机和队列
import org.springframework.amqp.core.*;
import org.springframework.context.annotation.Bean;
import org.springframework.context.annotation.Configuration;@Configuration
public class RabbitConfig3 {@Beanpublic FanoutExchange fanoutExchange() {return new FanoutExchange("fanoutExchange");}@Beanpublic Queue queueFanout1() {return new Queue("queueFanout1");}@Beanpublic Queue queueFanout2() {return new Queue("queueFanout2");}@Beanpublic Binding binding1() {return BindingBuilder.bind(queueFanout1()).to(fanoutExchange());}@Beanpublic Binding binding2() {return BindingBuilder.bind(queueFanout2()).to(fanoutExchange());}
}
4.路由模式
//创建生产者(Producer)
import org.springframework.amqp.rabbit.core.RabbitTemplate;
import org.springframework.beans.factory.annotation.Autowired;
import org.springframework.stereotype.Component;@Component
public class MessageProducer4 {@Autowiredprivate RabbitTemplate rabbitTemplate;public void sendMessage(String message, String routingKey) {rabbitTemplate.convertAndSend("directExchange", routingKey, message);}
}//创建消费者(Consumer)
import org.springframework.amqp.rabbit.annotation.RabbitListener;
import org.springframework.stereotype.Component;@Component
public class MessageConsumerly1 {@RabbitListener(queues = "queueDirect1")public void receiveMessage(String message) {System.out.println("Consumer 1 received message: " + message);}
}
@Component
public class MessageConsumerly2 {@RabbitListener(queues = "queueDirect2")public void receiveMessage(String message) {System.out.println("Consumer 2 received message: " + message);}
}//配置交换机和队列import org.springframework.amqp.core.Binding;
import org.springframework.amqp.core.BindingBuilder;
import org.springframework.amqp.core.DirectExchange;
import org.springframework.amqp.core.Queue;
import org.springframework.context.annotation.Bean;
import org.springframework.context.annotation.Configuration;@Configuration
public class RabbitConfig4 {@Beanpublic DirectExchange directExchange() {return new DirectExchange("directExchange");}@Beanpublic Queue queueDirect1() {return new Queue("queueDirect1");}@Beanpublic Queue queueDirect2() {return new Queue("queueDirect2");}@Beanpublic Binding bindingDirect1() {return BindingBuilder.bind(queueDirect1()).to(directExchange()).with("routingDirectKey1");}@Beanpublic Binding bindingDirect2() {return BindingBuilder.bind(queueDirect2()).to(directExchange()).with("routingDirectKey2");}
}
5.主题模式
//创建生产者(Producer)
import org.springframework.amqp.rabbit.core.RabbitTemplate;
import org.springframework.beans.factory.annotation.Autowired;
import org.springframework.stereotype.Component;@Component
public class MessageProducer5 {@Autowiredprivate RabbitTemplate rabbitTemplate;public void sendMessage(String message, String routingKey) {rabbitTemplate.convertAndSend("topicExchange", routingKey, message);}
}//创建消费者(Consumer)
import org.springframework.amqp.rabbit.annotation.RabbitListener;
import org.springframework.stereotype.Component;@Component
public class MessageConsumer5 {@RabbitListener(queues = "queueTopic5")public void receiveMessage(String message) {System.out.println("Received message: " + message);}
}//配置交换机和队列import org.springframework.amqp.core.Binding;
import org.springframework.amqp.core.BindingBuilder;
import org.springframework.amqp.core.TopicExchange;
import org.springframework.amqp.core.Queue;
import org.springframework.context.annotation.Bean;
import org.springframework.context.annotation.Configuration;@Configuration
public class RabbitConfig5 {@Beanpublic TopicExchange topicExchange() {return new TopicExchange("topicExchange");}@Beanpublic Queue queueTopic5() {return new Queue("queueTopic5");}@Beanpublic Binding bindingTopic5() {return BindingBuilder.bind(queueTopic5()).to(topicExchange()).with("topic.*");}
}
6.RPC模式
//创建RPC客户端(Client)
import org.springframework.amqp.rabbit.core.RabbitTemplate;
import org.springframework.beans.factory.annotation.Autowired;
import org.springframework.stereotype.Component;@Component
public class RpcClient {@Autowiredprivate RabbitTemplate rabbitTemplate;public String sendMessageAndReceiveResponse(String message) {return (String) rabbitTemplate.convertSendAndReceive("rpcExchange", "rpcQueue", message);}
}//创建RPC服务端(Server)
import org.springframework.amqp.rabbit.annotation.RabbitListener;
import org.springframework.stereotype.Component;@Component
public class RpcServer {@RabbitListener(queues = "rpcQueue")public String processMessage(String message) {// Perform some processing based on the messagereturn "Processed: " + message;}
}//配置交换机和队列
import org.springframework.amqp.core.Binding;
import org.springframework.amqp.core.BindingBuilder;
import org.springframework.amqp.core.DirectExchange;
import org.springframework.amqp.core.Queue;
import org.springframework.context.annotation.Bean;
import org.springframework.context.annotation.Configuration;@Configuration
public class RabbitConfig6 {@Beanpublic DirectExchange rpcExchange() {return new DirectExchange("rpcExchange");}@Beanpublic Queue rpcQueue() {return new Queue("rpcQueue");}@Beanpublic Binding rpcBinding() {return BindingBuilder.bind(rpcQueue()).to(rpcExchange()).with("rpcQueue");}
}