| 时间 | 版本 | 修改人 | 描述 |
|---|---|---|---|
| 2024年5月8日20:41:03 | V0.1 | 宋全恒 | 新建文档 |
简介
由于FastBuild之前花费了大概5天的时间优化,但最近重新部署,又发现了一些问题,就很痛苦,五一之后,自己又花了三天的时间系统的进行了优化。
上一波优化位于05-07 周二 Python使用并行程序取代串行加速运行,样例程序演示.
而这一波优化,则主要集中在Python的并发执行和全局捕获异常
问题
这次的主要问题是如下所示:
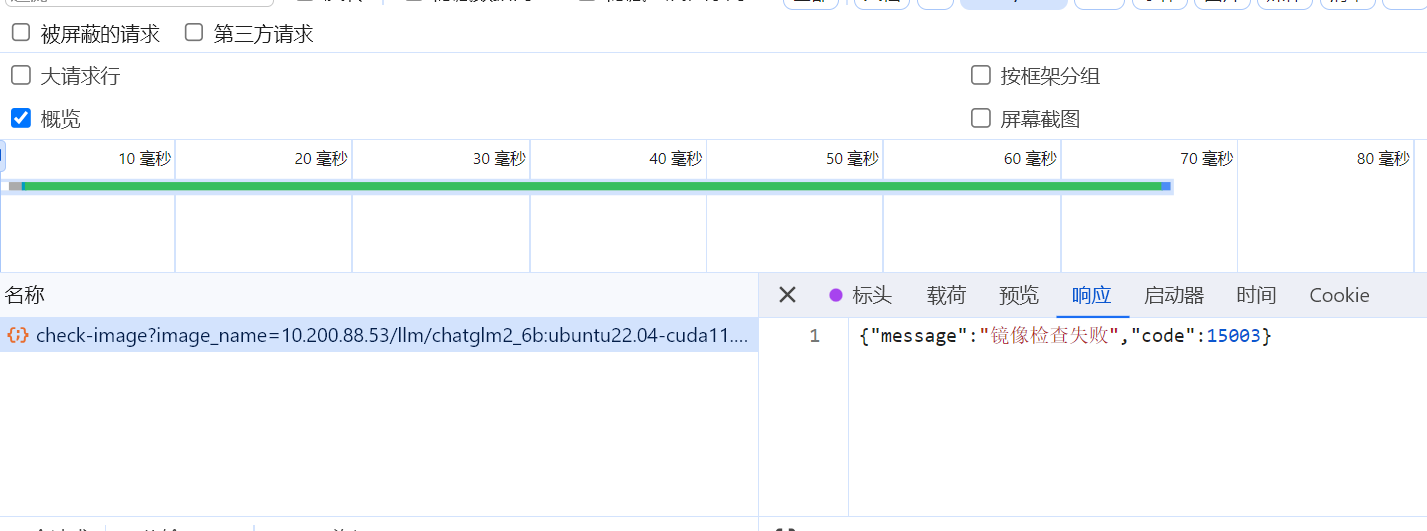
- 当镜像过大时,拉取失败,页面提示非常糟糕,直接提示Bad Request。
- 启动镜像进行容器环境检测的时候,基本上需要花费16秒,太久了,不得不用并行

这次主要修改的内容为其实有两个
- 并发策略的引入
- 全局捕获异常的引入
为了解决这个问题,自己真的是花费了很多的时间,因为感情的事情以及工作的压力,让自己精神也很焦虑,就很糟糕的状态。不过也没办法。哎
昨天晚上搞到了晚上23:40,内心又很焦虑,完了之后,又看到邻居家的姑娘结婚了,就很心疼自己的父母,515呢,又有一个动态量化的需求要实现,而推理啊,动态量化啊什么的,自己其实懂得很少,各种各样的事情,搞的自己异常焦虑。
人,真的不能走弯路,三十年来狼藉,东壁打到西壁。误入歧途和执迷不悔的人生,总是要进来一些希望和光吧。我想要改变。
实践记录
并发策略引入
待解决的问题
这个是优化之前,FastBuild通过启动的容器,基于python Docker SDK进行交互,获取容器中的运行环境的耗时。
get_image_container took 0.9041
启动容器, 镜像名称: 10.200.88.53/sunning-zhejianglab.com/vit:v2, 容器id: cd391ddc3278
get_kernel_version took 3.7441
get_kernel_artifact took 3.7442
get_sshd_version took 4.4891
get_sshd_artifact took 8.4335
get_jupyter_lab_artifact took 9.9615
get_os_release_contents took 4.1719
get_ubuntu_version took 4.1720
get_os_artifact took 10.3813
get_python_artifact took 11.9672
get_package_manager_artifact took 13.0781
get_pip_artifact took 14.1710
get_conda_artifact took 17.4669
get_artifact_result_parallel took 17.5001
get_image_meta took 0.0626
镜像类型: amd64
镜像大小: 32.44G
可以看到,尽管使用了并行,执行,但是耗时真的太久了,前端等不到响应,页面就直接抛出了一个Bad Request.一开始很大的精力就是解决这个问题。
而问题代码为:
def get_image_descriptor(self) -> ImageDescriptor:"""获取镜像描述信息:return:"""descriptor = ImageDescriptor(self.image_name)descriptor.kernel = self.get_kernel_artifact()descriptor.os = self.get_os_artifact()descriptor.package_manager = self.get_package_manager_artifact()descriptor.pip = self.get_pip_artifact()descriptor.conda = self.get_conda_artifact()descriptor.python = self.get_python_artifact()descriptor.image_id = self.image_iddescriptor.sshd = self.get_sshd_artifact()descriptor.jupyter_lab = self.get_jupyter_lab_artifact()return descriptor
首先,可以看到,上述的代码是串行执行的,但实际上,由于这些代码相互并不影响,因此,先进行了如下的重构。
concurrent.futures.ThreadPoolExecutor
为了解决这个问题,就需要首先进行时间的统计,首先要分析出问题,这多亏了如下的博客:
-
python threadpoolexecutor_使用Python的concurrent.futures轻松实现并发编程 其中有装饰器 @timeit的实现,可以方便统计出函数的执行时间,侵入性少。
-
python concurrent.futures 模块线程处理详解 这里包含了一些简单,但是实用的例子,帮助我们理解线程池的概念。
这里根据参数的传递,分为两种情况,一种就是不需要参数的
无参
下面就是掩饰了这个线程池的并发获取这些信息的过程。
- get_all_artifact_funcs返回待执行的所有函数
- get_artifact_result_parallel通过线程池发起8个线程去执行会话,得到探测结果
- get_image_descriptor将所有结果取出。
def get_image_descriptor(self) -> ImageDescriptor:"""获取镜像描述信息:return:"""descriptor = ImageDescriptor(self.image_name)descriptor.image_id = self.image_idresult = self.get_artifact_result_parallel()descriptor.kernel = result["get_kernel_artifact"]descriptor.os = result["get_os_artifact"]descriptor.package_manager = result["get_package_manager_artifact"]descriptor.pip = result["get_pip_artifact"]descriptor.conda = result["get_conda_artifact"]descriptor.python = result["get_python_artifact"]descriptor.sshd = result["get_sshd_artifact"]descriptor.jupyter_lab = result["get_jupyter_lab_artifact"]return descriptordef get_all_artifact_funcs(self) -> List:return [self.get_kernel_artifact, self.get_os_artifact, self.get_package_manager_artifact,self.get_pip_artifact, self.get_conda_artifact, self.get_python_artifact,self.get_sshd_artifact, self.get_jupyter_lab_artifact]@timeitdef get_artifact_result_parallel(self):# 使用线程池执行所有的artifact获取函数with concurrent.futures.ThreadPoolExecutor(max_workers=8) as executor:# 执行所有函数并将结果映射到一个字典中results = {func.__name__: executor.submit(func) for func in self.get_all_artifact_funcs()}# 等待所有任务完成并更新descriptorres = {}for name, future in results.items():res[name] = future.result()return res
经过这样设置之后,发现了如下的结果:
get_image_container took 0.9041
启动容器, 镜像名称: 10.200.88.53/sunning-zhejianglab.com/vit:v2, 容器id: cd391ddc3278
get_kernel_version took 3.7441
get_kernel_artifact took 3.7442
get_sshd_version took 4.4891
get_sshd_artifact took 8.4335
get_jupyter_lab_artifact took 9.9615
get_os_release_contents took 4.1719
get_ubuntu_version took 4.1720
get_os_artifact took 10.3813
get_python_artifact took 11.9672
get_package_manager_artifact took 13.0781
get_pip_artifact took 14.1710
get_conda_artifact took 17.4669
get_artifact_result_parallel took 17.5001
get_image_meta took 0.0626
镜像类型: amd64
镜像大小: 32.44G
可以看到,这个函数要执行17秒,而启动容器,和获取镜像元数据,均不到1s。所以必须继续优化。
继续定位,发现了如下的问题代码。
直观理解,每次和容器通过python docker sdk进行交互,都要花费时间,而这个get_command_result这个断言是多余的,果断拿掉这个之后,代码执行效率提升一倍。
def get_command_result(self, cmd: str) -> str:""":param cmd::return:"""assert self.command_success(cmd)exit_code, output = self.container.exec_run(cmd)return output.decode("utf-8")得到了如下的结果,整体需要花费10秒的时间。
get_image_container took 0.9335
启动容器, 镜像名称: 10.200.88.53/sunning-zhejianglab.com/vit:v2, 容器id: 9e02c9d8894a
__is_ubuntu took 0.4077
contains_service took 1.0056
contains_jupyter_lab_service took 1.0056
get_jupyter_lab_artifact took 1.0057
get_kernel_version took 1.3691
get_kernel_artifact took 1.3692
contains_service took 2.9088
contains_sshd_service took 2.9089
get_os_release_contents took 2.5661
get_ubuntu_version took 2.5670
get_os_artifact took 2.9750
__is_ubuntu took 2.9669
get_sshd_version took 1.0172
get_sshd_artifact took 3.9262
get_conda_version took 2.2805
get_package_manager_artifact took 6.5252
get_python_artifact took 7.1439
get_multiple_pip_version took 7.8002
__is_ubuntu took 0.3780
get_conda_environments took 2.9953
get_pip_artifact took 8.5834
__is_ubuntu took 0.3355
get_conda_artifact took 9.6392
get_artifact_result_parallel took 9.6798
get_image_meta took 0.0621
镜像类型: amd64
镜像大小: 32.44G
有参
其实可以看到上述的多个线程在执行的时候,占用较多时间的为:
- get_conda_artifact took 9.6392
- get_pip_artifact took 8.5834
- get_package_manager_artifact took 6.5252
- get_python_artifact took 7.1439
而__is_ubuntu took 一共执行了4次。所以继续优化
以优化get_conda_artifact 为例
@timeitdef get_conda_artifact(self) -> Artifact:if self.command_not_exist("conda -v"):return CondaArtifact("", [], [])return CondaArtifact(version=self.get_conda_version(), environments=(self.get_conda_environments()),source=self.get_conda_source(is_apt=self.is_ubuntu()))
主要是将get_conda_version,get_conda_environments, get_conda_source继续并行。
注: 下文演示了executor.submit的函数包含参数的形式。
@timeitdef get_conda_artifact(self) -> Artifact:if self.command_not_exist("conda -v"):return CondaArtifact("", [], [])with concurrent.futures.ThreadPoolExecutor(max_workers=3) as executor:version_future = executor.submit(self.get_conda_version)environments_future = executor.submit(self.get_conda_environments)source_future = executor.submit(self.get_conda_source, is_apt=self.is_ubuntu())return CondaArtifact(version=version_future.result(), environments=environments_future.result(),source=source_future.result())
至于其他的如消除操作系统的交互需求的,主要是基于镜像的元数据进行交互,因为镜像元数据获取,不到1s。具体可以参见如下代码:
def __init__(self, image_name, container: Container, image_meta) -> None:super().__init__()meta_str = json.dumps(image_meta).lower()if "ubuntu" in meta_str:self._is_ubuntu = Trueif "centos" in meta_str:self._is_centos = Trueself.image_name = image_nameself.container = containerself.ps_lines = self.get_command_result("ps -ef").splitlines()self.image_id = self.container.image.id如果继续优化,则是将每次执行,先判断是否包含,其实也可以直接执行命令,根据返回的错误码直接判断是否有无,我就是停在了这里
@timeitdef get_sshd_artifact(self) -> Artifact:if self.contains_sshd_service():return SshdArtifact(True, version=self.get_sshd_version())return SshdArtifact(False)当前的执行结果为:
INFO:     Application startup complete.
get_image_meta took 0.0800
get_image_container took 0.9872
启动容器, 镜像名称: 10.200.88.53/sunning-zhejianglab.com/vit:v2, 容器id: 040f66ab3183
__is_ubuntu took 0.0000
__is_ubuntu took 0.0000
__is_ubuntu took 0.0000
contains_service took 0.0000
contains_sshd_service took 0.0025
contains_service took 0.0000
contains_jupyter_lab_service took 0.0091
get_jupyter_lab_artifact took 0.0098
get_kernel_version took 0.4791
get_kernel_artifact took 0.4802
get_os_release_contents took 3.2166
get_ubuntu_version took 3.2197
get_os_artifact took 3.2201
get_sshd_version took 3.4866
get_sshd_artifact took 3.4893
__is_ubuntu took 0.0000
get_pip_artifact took 5.1001
get_conda_version took 2.4581
get_package_manager_artifact took 6.0547
get_python_artifact took 6.9397
get_conda_environments took 3.8802
get_conda_artifact took 7.4389
get_artifact_result_parallel took 7.4907
check_image一个本地镜像的环境,基本上花费的时间为8s左右。
threading.Thread的用法
解决的问题
这个主要是为了解决,当我拉取镜像,超过了5s的时间,我就直接向用户返回超时了,后台继续拉取。因此,我肯定也是要使用后台启动线程的。
但是这个超时的问题,纠结了自己很久,一方面,刚使用了concurrent.futures.ThreadPoolExecutor,而其在获取result的时候也有超时异常,但自己在为了解决镜像拉取时的代码
def pull_image(self, image_name, log_path=None, to_stdout=True):"""仅仅负责拉取镜像:param to_stdout: 是否要将镜像拉取日志输出到标准输出:param log_path: 待写入的日志文件路径:param image_name:基础镜像名称:return:"""last_colon_index = image_name.rfind(":")if last_colon_index == -1:repository, tag = image_name, ""else:repository, tag = image_name[0:last_colon_index], image_name[last_colon_index + 1:]auth_config = self.get_auth_config(image_name)# 当前优化的程序,在check时,一般会在8秒内进行镜像检测,因此拉取镜像,如果5秒仍然无法拉取成功,则提示前端错误,并异步拉取镜像generator = self.api_client.pull(repository, tag, stream=True, auth_config=auth_config)self._log_pull_image_process(generator, log_path, to_stdout=to_stdout)
开始的时候,自己尝试将generator和打印日志,用try包括,使用future.result(timeout=5),但这个地方就是不抛出异常,太折磨死了。之后,我就感觉,可能是generator是异步返回的,日志是流式处理的,因此成功执行了,虽然在这个地方设置了future.result(timeout=5),也是不生效的。
而这个时候,楼主其实已经很累了,因为毕竟自己要赶紧投入时间到动态量化上啊。
一开始,自己尝试了使用装饰器使用signal设置函数超时异常来解决,但是,这个是太强制了,而且它直接将当前的拉取镜像的线程所在的线程给终止了。这就不是自己的本意了。没办法,自己就继续想方法。能不能让拉取的镜像在另外一个线程中进行呢,主线程直接sleep(5)之后,判断如果线程还是活着的,就直接抛异常,让这个拉取镜像的线程继续运行,沿着这个思路,正好发现了threading.Thread,更发现了其有join(timeout)的方法,简直是量身定做。
应用场景
这个其实是主线程执行的动作,启动了镜像拉取线程,下述代码演示了元组参数和具名参数的情形。
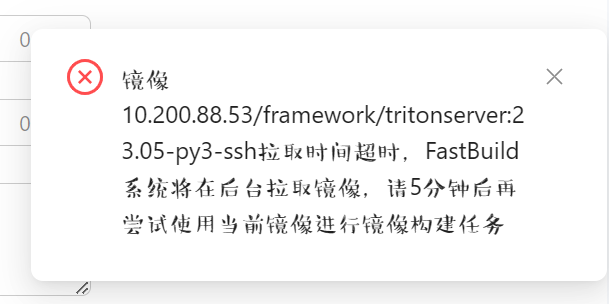
def async_pull_image(image_name, image_utils, log_path=None, to_stdout=True):thread = threading.Thread(target=image_utils.pull_image_to_fastbuild, args=(image_name,),kwargs={"log_path": log_path, "to_stdout": to_stdout})thread.start()thread.join(5)if thread.is_alive():raise FBException(code=15004, message=f"镜像{image_name}拉取时间超时,FastBuild系统将在后台拉取镜像,"f"请5分钟后再尝试使用当前镜像进行镜像构建任务")注,抛出的全局捕获异常,用于直接在会话中返回给前端错误,这个方法很灵活,而且还可以统一全局错误码。
下述代码是使用threading.Thread的另外一个情形了,可以看到需要提供两个位置参数,而位置参数,均放在args元组中即可。
@staticmethoddef post_state(callback_url, state):thread_name = f"回调函数{state['taskId']}线程"headers = DBCallbackService.query_latest_callback().headersthreading.Thread(target=CallBackService.state_upload, args=(callback_url, state, headers),name=thread_name).start()return Response.success(msg=f"{thread_name},请等待回调结束", data=state)全局捕获异常
全局捕获异常可以参见 状态码与异常处理,里面演示了全局捕获异常的实践方式。
要解决的问题
核心要解决的问题,就是前端调用我的程序,如果在15秒以内,不回应,页面就发出Bad Request的响应了,用户体验非常的差。
通过使用异常,可以直接将会话中的底层异常抛出,而在全局异常中返回给用户提示信息,非常的优雅。
实践
# 全局异常处理中间件
@app.exception_handler(FBException)
async def http_exception_handler(request: Request, exc: FBException):print(f"全局异常处理中间件: {exc.message}")if request.url:print(f"request_url: {request.url}")else:print(f"系统发生异常FBException")return JSONResponse(status_code=200,content={"message": f"{exc.message}", "code": exc.code})
主要是解决了超时返回的问题:
def async_pull_image(image_name, image_utils, log_path=None, to_stdout=True):thread = threading.Thread(target=image_utils.pull_image_to_fastbuild, args=(image_name,),kwargs={"log_path": log_path, "to_stdout": to_stdout})thread.start()thread.join(5)if thread.is_alive():raise FBException(code=15004, message=f"镜像{image_name}拉取时间超时,FastBuild系统将在后台拉取镜像,"f"请5分钟后再尝试使用当前镜像进行镜像构建任务")
这样,在平台进行check的时候,自己可以直接将异常提示信息抛出,而后台继续拉取这个镜像。这样就解决了镜像拉取和check两个耗时操作耦合在一起的问题了。
代码实用技巧
zip和列表推导式
下述代码演示了列表推导式,以及使用zip,重组两个数组的演示过程,还是可以看出代码还是非常凝练的。
下述代码的作用,是根据三个命令,获取容器中对应的python运行环境。
def get_multiple_python_version(self):version_info = []with concurrent.futures.ThreadPoolExecutor(max_workers=3) as executor:python_futures = [executor.submit(self.get_python_version, python_cmd)for python_cmd in ["python -V", "python2 -V", "python3 -V"]]return [f"{k}({v.result()})" for k, v in dict(zip(["python", "python2", "python3"], python_futures)).items()if v.result()]
装饰器
统计时间
def timeit(method):"""A decorator that reports the execution time."""@wraps(method)def wrapper(*args, **kwargs):start_time = time.time()result = method(*args, **kwargs)end_time = time.time()print(f"{method.__name__} took {end_time - start_time:.4f}")return resultreturn wrapper
使用的时候非常的方便
@timeitdef get_kernel_artifact(self) -> Artifact:return KernelArtifact(self.get_kernel_version())
即可得到
get_image_container took 0.9041
启动容器, 镜像名称: 10.200.88.53/sunning-zhejianglab.com/vit:v2, 容器id: cd391ddc3278
get_kernel_version took 3.7441
get_kernel_artifact took 3.7442
get_sshd_version took 4.4891
get_sshd_artifact took 8.4335
get_jupyter_lab_artifact took 9.9615
get_os_release_contents took 4.1719
get_ubuntu_version took 4.1720
get_os_artifact took 10.3813
get_python_artifact took 11.9672
get_package_manager_artifact took 13.0781
get_pip_artifact took 14.1710
get_conda_artifact took 17.4669
get_artifact_result_parallel took 17.5001
get_image_meta took 0.0626
镜像类型: amd64
镜像大小: 32.44G
这样的函数统计时间,对于问题定位一目了然。
使用signal设置函数超时异常
这个是为了当时程序拉取镜像,比较大的时候,我想要提前返回,通过全局异常告诉前端,让后端继续执行。但比较遗憾,这个会把当前会话线程直接中断,所以最后我没有使用这个方案。
def timeout(seconds=10, error_message="Function call timed out"):def decorator(func):def _handle_timeout(signum, frame):print("处理函数调用时,超时了。")raise FBException(code=15004, message="镜像拉取时间超时,系统将在后台拉取镜像,请稍后再次尝试")@wraps(func)def wrapper(*args, **kwargs):# 设置信号处理器signal.signal(signal.SIGALRM, _handle_timeout)# 设置超时时间signal.alarm(seconds)try:result = func(*args, **kwargs)finally:# 取消信号signal.alarm(0)return resultreturn wrapperreturn decorator
这里其实也是使用装饰器模式,处理异常时,抛出了一个全局异常,就比较方便。
总结
自己可真的是蔡格尼克效应的实在的表现。简直是有一件事情之后,自己一定要把它做完,才能放下他,不被它占据自己的注意力。
对于当前的自己来说,其实更加紧急的事515需求,因为推理啊,量化啊,这些知识其实自己都不懂的,压力很大。
最近自己又在京东上购买了一本书《心若菩提》和印象笔记的Evermarker,这两天因为这个FastBuild的第二次优化,就很焦虑,不过好在又到了一个新的状态保存点了。接下来,就是全力以赴搞量化了。