一、安装准备
建议使用Ubuntu 20.04 或 Ubuntu 22.04 操作系统
为了在 ESP32-C3 中使用 ESP-IDF,需要安装一些依赖包
sudo apt-get install git wget flex bison gperf python3 python3-pip python3-venv cmake ninja-build ccache libffi-dev libssl-dev dfu-util libusb-1.0-0
提示:若系统上已经安装过上述部分软件包,则会自动跳过该安装包,跳到下一个安装包的安装。
1、要求cmake版本至少是cmake 3.16 或以上,查看版本信息:cmake --version
2、要求python版本至少是python3.6 或以上,查看版本信息: python3 --version
二、从Gitee克隆esp-idf仓库
从Github端clone仓库很容易失败,故转而向Gitee端clone整个esp-idf。
从远程仓库克隆ESP-IDF到本地
mkdir -p ~/esp
cd ~/esp
git clone -b v5.2.2 https://gitee.com/EspressifSystems/esp-idf.git
为了克隆子仓库和安装工具链,需要用到esp-gitee-tools工具,下载该工具到本地。
cd ~/esp/esp-idf
git clone https://gitee.com/EspressifSystems/esp-gitee-tools.git
克隆子模块
cd ~/esp/esp-idf
./esp-gitee-tools/submodule-update.sh

安装工具链(需要下载的工具包比较多,大约需要10分钟左右)
cd ~/esp/esp-idf
./esp-gitee-tools/install.sh

三、激活esp-idf
在 ~/.bashrc 文件中增加 一行命令:alias get_idf='. ~/esp/esp-idf/export.sh'
激活 ~/.bashrc,执行命令:source ~/.bashrc。 在任何terminal窗口均可以执行命令:get_idf,激活esp-idf环境。
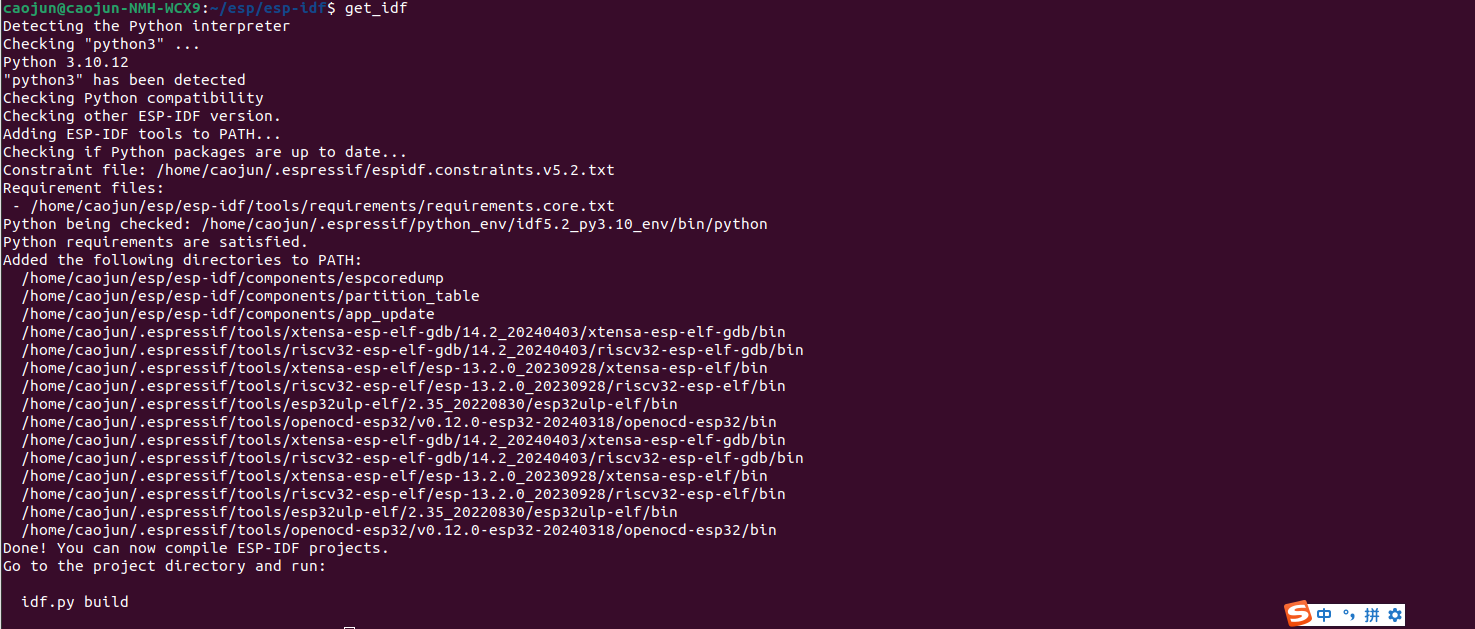
四、验证esp-idf
esp-idf给出了一个blink项目,用于测试目的,将所有测试用例拷贝出来。
cd ~/esp
cp -r  esp-idf/examples/* app-example/
cd app-example/get-started/blink/
-
第一步:激活esp-idf环境,执行命令:
get_idf -
第二步:设置编译目标,执行命令:
idf.py set-target esp32c3(这里我已经从esp官方购买了ESP32-C3-DevKitM-1) -
第三步:设置编译菜单,执行命令:
idf.py menuconfig, 此处为标准测试用例blink和开发板,故不需要做额外的设置,保持默认菜单即可 -
第四步:开始编译,执行命令:
idf.py build -
第五步:开始烧录,将开发板插入PC,修改串口权限:
sudo chmod 664 /dev/ttyUSB0,烧录到开发板,执行命令:idf.py -p /dev/ttyUSB0 flash提示:有的开发板插入后,串口名称是/dev/ttyACM0
-
第六步:观察开发板状态是否和预想的一致,如果一闪一闪就正确。
参考来源
esp-idf 编程指南
ESP32-C3物联网工程开发实战 (乐鑫科技).pdf

