引言
如果使用Processing开发应用,画面中需要设定一些按钮,而且这些按钮是不规则图形样式,甚至是以一张图片形式呈现,如何判定其轮廓,定义悬停事件、点击事件是非常核心的算法需求。本文浅析这一问题的通用解决方案。因为Processing是Java衍生语言,同样适合java语言体系。
第一项
以最简单的检测情景开始------矩形检测。主要包括检测边界,触发悬停事件和点击事件。
矩形的话只需要考虑四个边坐标和鼠标x、y坐标大小关系,见下文:
// 检查鼠标是否悬停在矩形上
boolean isMouseOver(float mx, float my) {return mx >= x && mx <= x + width && my >= y && my <= y + height;
}其中的mx、my分别表示mouseX,mouseY。width、height代表矩形的宽和高。
为了方便定义矩形样式,这里diy一个矩形类:
// 自定义矩形类class Rectangle {// 矩形的左上角坐标 方便绘制float x, y;// 矩形的宽度和高度float width, height;// 构造函数,用于初始化矩形的位置和大小Rectangle(float x, float y, float width, float height) {this.x = x;this.y = y;this.width = width;this.height = height;}// 检查鼠标是否悬停在矩形上boolean isMouseOver(float mx, float my) {return mx >= x && mx <= x + width && my >= y && my <= y + height;}// 绘制矩形的方法void draw (){rect(x,y,width,height);}}完整代码如下:
import processing.core.PApplet;import java.util.ArrayList;public class RectangleExample extends PApplet {// 存储矩形信息的列表ArrayList<Rectangle> rectangles = new ArrayList<>();@Overridepublic void settings() {// 设置窗口大小size(600, 400);}@Overridepublic void setup() {// 创建一个矩形并添加到列表中rectangles.add(new Rectangle(100, 100, 200, 150));}@Overridepublic void draw() {// 设置背景颜色为白色background(255);// 遍历所有矩形for (Rectangle rect : rectangles) {// 检查鼠标是否悬停在矩形上if (rect.isMouseOver(mouseX, mouseY)) {// 鼠标悬停时,设置填充颜色为灰色fill(200);} else {// 鼠标未悬停时,设置填充颜色为黑色fill(0);}// 绘制矩形rect.draw();}}@Overridepublic void mouseClicked() {// 遍历所有矩形for (Rectangle rect : rectangles) {// 检查鼠标是否点击在矩形上if (rect.isMouseOver(mouseX, mouseY)) {// 鼠标点击在矩形上时,打印消息println("点击了矩形!");}}}// 自定义矩形类class Rectangle {// 矩形的左上角坐标float x, y;// 矩形的宽度和高度float width, height;// 构造函数,用于初始化矩形的位置和大小Rectangle(float x, float y, float width, float height) {this.x = x;this.y = y;this.width = width;this.height = height;}// 检查鼠标是否悬停在矩形上boolean isMouseOver(float mx, float my) {return mx >= x && mx <= x + width && my >= y && my <= y + height;}// 绘制矩形的方法void draw (){rect(x,y,width,height);}}public static void main(String[] args) {PApplet.main(RectangleExample.class);}}结果如下:

第二项
不规则多边形检测。主要包括检测轮廓,触发悬停事件和点击事件。
首先定义一个多边形:
// 定义多边形的顶点float[][] polygon = {{100, 100},{200, 50},{300, 200},{250, 300},{150, 250}};然后编写判断鼠标位置与多边形区域是否相遇,也就是是否悬停于多边形之上,类似三维世界中的射线检测方法:
/*** 判断点是否在多边形内,使用射线法。** @param x 点的 x 坐标* @param y 点的 y 坐标* @param polygon 多边形的顶点数组* @return 如果点在多边形内返回 true,否则返回 false*/public boolean isPointInPolygon(float x, float y, float[][] polygon) {boolean inside = false;int j = polygon.length - 1;for (int i = 0; i < polygon.length; i++) {if ((polygon[i][1] > y) != (polygon[j][1] > y) &&x < (polygon[j][0] - polygon[i][0]) * (y - polygon[i][1]) / (polygon[j][1] - polygon[i][1]) + polygon[i][0]) {inside = !inside;}j = i;}return inside;}然后就好办了,悬停事件以及点击事件:
// 判断鼠标是否在多边形内if (isPointInPolygon(mouseX, mouseY, polygon)) {fill(0, 255, 0); // 鼠标在多边形内,设置填充颜色为绿色} else {fill(255, 0, 0); // 鼠标在多边形外,设置填充颜色为红色}} /*** 处理鼠标点击事件*/public void mouseClicked() {if (isPointInPolygon(mouseX, mouseY, polygon)) {println("鼠标在多边形内点击");}}最后的代码:
import processing.core.PApplet;public class MainSketch1 extends PApplet {// 定义多边形的顶点float[][] polygon = {{100, 100},{200, 50},{300, 200},{250, 300},{150, 250}};@Overridepublic void settings() {super.settings();size(600,400);}@Overridepublic void setup() {super.setup();}/*** 绘制循环,用于更新和绘制窗口内容。* 此方法在 setup() 方法之后自动重复调用。*/public void draw() {// 设置背景颜色为白色(RGB 值:255, 255, 255)background(255);// 在窗口的左上角 (0, 0) 位置绘制加载的图像 img// 绘制多边形beginShape();for (float[] point : polygon) {vertex(point[0], point[1]);}endShape(CLOSE);// 判断鼠标是否在多边形内if (isPointInPolygon(mouseX, mouseY, polygon)) {fill(0, 255, 0); // 鼠标在多边形内,设置填充颜色为绿色} else {fill(255, 0, 0); // 鼠标在多边形外,设置填充颜色为红色}}/*** 判断点是否在多边形内,使用射线法。** @param x      点的 x 坐标* @param y      点的 y 坐标* @param polygon 多边形的顶点数组* @return 如果点在多边形内返回 true,否则返回 false*/public boolean isPointInPolygon(float x, float y, float[][] polygon) {boolean inside = false;int j = polygon.length - 1;for (int i = 0; i < polygon.length; i++) {if ((polygon[i][1] > y) != (polygon[j][1] > y) &&x < (polygon[j][0] - polygon[i][0]) * (y - polygon[i][1]) / (polygon[j][1] - polygon[i][1]) + polygon[i][0]) {inside = !inside;}j = i;}return inside;}/*** 处理鼠标点击事件*/public void mouseClicked() {if (isPointInPolygon(mouseX, mouseY, polygon)) {println("鼠标在多边形内");}}/*** 程序的入口点,启动 MainSketch 类的 Processing 应用程序。** @param args 命令行参数*/public static void main(String[] args) {// 调用 Processing 库的 main 方法,传入 MainSketch 类的 Class 对象以启动应用程序PApplet.main(MainSketch1.class);  // 启动入口}
}
如下图:
第三项
接下来,我们导入一张带通道的.PNG图片,轮廓不规则。鼠标悬停,图片变黑白,且有描边效果。

然后编写算法,计算鼠标是否悬停。其实可以采用第二项的方法,把轮廓抽象成多个点构成的多边形,然后检测。下面我用另一种讨巧的方法-----通过alpha通道值判断。见代码:
/*** 判断鼠标是否在图片的不透明区域内 即悬停* @param mouseX 鼠标的 x 坐标* @param mouseY 鼠标的 y 坐标* @param img 图片对象* @param imgX 图片的 x 坐标* @param imgY 图片的 y 坐标* @return 如果鼠标在图片的不透明区域内返回 true,否则返回 false*/public boolean isMouseInImageOpaqueArea(int mouseX, int mouseY, PImage img, int imgX, int imgY) {if (mouseX >= imgX && mouseX < imgX + img.width &&mouseY >= imgY && mouseY < imgY + img.height) {int localX = mouseX - imgX;int localY = mouseY - imgY;int pixel = img.get(localX, localY);return alpha(pixel) > 0;}return false;}而计算轮廓,也就是不透明边界,方便做描边处理,见下:
// 预计算不透明区域的边界private void precomputeBoundaries() {boundaries = new ArrayList<>();for (int y = 0; y < img.height; y++) {for (int x = 0; x < img.width; x++) {int pixel = img.get(x, y);if (alpha(pixel) > 0) {// 检查当前像素是否为边界像素boolean isBoundary = false;// 检查相邻像素的透明度if (x > 0 && alpha(img.get(x - 1, y)) == 0) isBoundary = true;if (x < img.width - 1 && alpha(img.get(x + 1, y)) == 0) isBoundary = true;if (y > 0 && alpha(img.get(x, y - 1)) == 0) isBoundary = true;if (y < img.height - 1 && alpha(img.get(x, y + 1)) == 0) isBoundary = true;if (isBoundary) {boundaries.add(new Point(x, y)); // 存储边界点}}}}}当有了这两个算法支持,接下来的任务就顺利多了,见完整代码:
import processing.core.PApplet;
import processing.core.PImage;import java.util.ArrayList;
import java.util.List;//自定义数据类 ---- 点
class Point {int x;int y;Point(int x, int y) {this.x = x;this.y = y;}
}
public class ImageSketch extends PApplet {PImage img;int imgX, imgY;List<Point> boundaries; // 存储不透明区域的边界点/*** 判断鼠标是否在图片的不透明区域内* @param mouseX 鼠标的 x 坐标* @param mouseY 鼠标的 y 坐标* @param img 图片对象* @param imgX 图片的 x 坐标* @param imgY 图片的 y 坐标* @return 如果鼠标在图片的不透明区域内返回 true,否则返回 false*/public boolean isMouseInImageOpaqueArea(int mouseX, int mouseY, PImage img, int imgX, int imgY) {if (mouseX >= imgX && mouseX < imgX + img.width &&mouseY >= imgY && mouseY < imgY + img.height) {int localX = mouseX - imgX;int localY = mouseY - imgY;int pixel = img.get(localX, localY);return alpha(pixel) > 0;}return false;}@Overridepublic void settings() {size(800, 600);}@Overridepublic void setup() {// 加载 PNG 图片img = loadImage("img.png");img.resize(300,300);imgX = (width - img.width) / 2;imgY = (height - img.height) / 2;precomputeBoundaries(); // 预计算不透明区域的边界}@Overridepublic void draw() {background(255);PImage displayImg = img;boolean isMouseInImgOpaqueArea;isMouseInImgOpaqueArea = isMouseInImageOpaqueArea(mouseX,mouseY,img,imgX,imgY);if (isMouseInImgOpaqueArea) {// 鼠标悬停时将图片转换为灰度图displayImg = img.get();displayImg.filter(GRAY);for (Point p : boundaries) {point(p.x + imgX, p.y + imgY); // 绘制边界点}}stroke(0); // 设置描边颜色为黑色strokeWeight(2); // 设置描边宽度为 2 像素noFill(); // 不填充内部// 绘制图片image(displayImg, imgX, imgY);}// 预计算不透明区域的边界private void precomputeBoundaries() {boundaries = new ArrayList<>();for (int y = 0; y < img.height; y++) {for (int x = 0; x < img.width; x++) {int pixel = img.get(x, y);if (alpha(pixel) > 0) {// 检查当前像素是否为边界像素boolean isBoundary = false;// 检查相邻像素的透明度if (x > 0 && alpha(img.get(x - 1, y)) == 0) isBoundary = true;if (x < img.width - 1 && alpha(img.get(x + 1, y)) == 0) isBoundary = true;if (y > 0 && alpha(img.get(x, y - 1)) == 0) isBoundary = true;if (y < img.height - 1 && alpha(img.get(x, y + 1)) == 0) isBoundary = true;if (isBoundary) {boundaries.add(new Point(x, y)); // 存储边界点}}}}}public static void main(String[] args) {PApplet.main("ImageSketch");}
}
效果如下:
第四项
假如场景更复杂,图片有变化,比如位置、旋转,那么如何解决?
当图片旋转时,鼠标悬停和点击检测会变得更加复杂,因为图片的坐标系统发生了变化。为了实现旋转图片的检测,需要重点考虑以下方面:
- 记录旋转角度:需要一个变量来记录图片的旋转角度。
- 旋转坐标转换:在检测鼠标是否在图片不透明区域内时,需要将鼠标坐标转换到图片的旋转坐标系中。
- 更新绘制逻辑:在绘制图片和边界时需考虑旋转角度。
我们先把事件处理好:
@Overridepublic void mousePressed() {if (isMouseInImageOpaqueArea(mouseX, mouseY, img, imgX, imgY, rotationAngle)) {isDragging = true;// 计算鼠标点击位置相对于图片中心的偏移量float centeredMouseX = mouseX - (imgX + img.width / 2);float centeredMouseY = mouseY - (imgY + img.height / 2);// 将偏移量转换到旋转后的坐标系float rotatedMouseX = centeredMouseX * cos(-rotationAngle) - centeredMouseY * sin(-rotationAngle);float rotatedMouseY = centeredMouseX * sin(-rotationAngle) + centeredMouseY * cos(-rotationAngle);// 记录鼠标点击位置相对于图片的偏移量offsetX = (int) rotatedMouseX;offsetY = (int) rotatedMouseY;}}@Overridepublic void mouseDragged() {if (isDragging) {// 计算鼠标相对于图片中心的当前偏移量float centeredMouseX = mouseX - (imgX + img.width / 2);float centeredMouseY = mouseY - (imgY + img.height / 2);// 将当前偏移量转换到旋转后的坐标系float rotatedMouseX = centeredMouseX * cos(-rotationAngle) - centeredMouseY * sin(-rotationAngle);float rotatedMouseY = centeredMouseX * sin(-rotationAngle) + centeredMouseY * cos(-rotationAngle);// 计算鼠标拖动的偏移量float deltaX = rotatedMouseX - offsetX;float deltaY = rotatedMouseY - offsetY;// 将拖动的偏移量转换回全局坐标系float globalDeltaX = deltaX * cos(rotationAngle) - deltaY * sin(rotationAngle);float globalDeltaY = deltaX * sin(rotationAngle) + deltaY * cos(rotationAngle);// 更新图片的位置imgX += (int) globalDeltaX;imgY += (int) globalDeltaY;}}// 鼠标释放@Overridepublic void mouseReleased() {isDragging = false;}// 键盘事件@Overridepublic void keyPressed() {if (key == 'r') {rotationAngle += PI / 16; // 按 'r' 键旋转图片}}检测悬停与否,重点考虑坐标系的变化:
/** 判断鼠标是否在图片的不透明区域内* @param mouseX 鼠标的 x 坐标* @param mouseY 鼠标的 y 坐标* @param img 图片对象* @param imgX 图片的 x 坐标* @param imgY 图片的 y 坐标* @param angle 图片的旋转角度* @return 如果鼠标在图片的不透明区域内返回 true,否则返回 false*/public boolean isMouseInImageOpaqueArea(int mouseX, int mouseY, PImage img, int imgX, int imgY, float angle) {// 先将鼠标坐标转换到以图片中心为原点的坐标系float centeredMouseX = mouseX - (imgX + img.width / 2);float centeredMouseY = mouseY - (imgY + img.height / 2);// 再进行旋转转换float rotatedMouseX = centeredMouseX * cos(-angle) - centeredMouseY * sin(-angle);float rotatedMouseY = centeredMouseX * sin(-angle) + centeredMouseY * cos(-angle);// 将旋转后的坐标转换回以图片左上角为原点的坐标系rotatedMouseX += img.width / 2;rotatedMouseY += img.height / 2;if (rotatedMouseX >= 0 && rotatedMouseX < img.width &&rotatedMouseY >= 0 && rotatedMouseY < img.height) {int localX = (int) rotatedMouseX;int localY = (int) rotatedMouseY;int pixel = img.get(localX, localY);return alpha(pixel) > 0;}return false;}另外,移动旋转操作,使用translate和rotate函数:
translate(imgX + img.width / 2, imgY + img.height / 2); // 将原点移动到图片中心rotate(rotationAngle); // 旋转图片完整代码参考如下:
import processing.core.PApplet;
import processing.core.PImage;
import java.util.ArrayList;
import java.util.List;public class ImageSketchRotated extends PApplet {PImage img;int imgX, imgY;List<Point> boundaries; // 存储不透明区域的边界点boolean isDragging = false;int offsetX, offsetY;float rotationAngle = 0; // 图片的旋转角度class Point {int x;int y;Point(int x, int y) {this.x = x;this.y = y;}}/*** 判断鼠标是否在图片的不透明区域内* @param mouseX 鼠标的 x 坐标* @param mouseY 鼠标的 y 坐标* @param img 图片对象* @param imgX 图片的 x 坐标* @param imgY 图片的 y 坐标* @param angle 图片的旋转角度* @return 如果鼠标在图片的不透明区域内返回 true,否则返回 false*/public boolean isMouseInImageOpaqueArea(int mouseX, int mouseY, PImage img, int imgX, int imgY, float angle) {// 先将鼠标坐标转换到以图片中心为原点的坐标系float centeredMouseX = mouseX - (imgX + img.width / 2);float centeredMouseY = mouseY - (imgY + img.height / 2);// 再进行旋转转换float rotatedMouseX = centeredMouseX * cos(-angle) - centeredMouseY * sin(-angle);float rotatedMouseY = centeredMouseX * sin(-angle) + centeredMouseY * cos(-angle);// 将旋转后的坐标转换回以图片左上角为原点的坐标系rotatedMouseX += img.width / 2;rotatedMouseY += img.height / 2;if (rotatedMouseX >= 0 && rotatedMouseX < img.width &&rotatedMouseY >= 0 && rotatedMouseY < img.height) {int localX = (int) rotatedMouseX;int localY = (int) rotatedMouseY;int pixel = img.get(localX, localY);return alpha(pixel) > 0;}return false;}@Overridepublic void settings() {size(800, 600);}@Overridepublic void setup() {// 加载 PNG 图片img = loadImage("img.png");img.resize(300, 300);imgX = (width - img.width) / 2;imgY = (height - img.height) / 2;precomputeBoundaries(); // 预计算不透明区域的边界}@Overridepublic void draw() {background(255);pushMatrix(); // 保存当前的变换矩阵translate(imgX + img.width / 2, imgY + img.height / 2); // 将原点移动到图片中心rotate(rotationAngle); // 旋转图片translate(-img.width / 2, -img.height / 2); // 将原点移回图片左上角// 检查鼠标是否悬停在图片上boolean isMouseInImgOpaqueArea = isMouseInImageOpaqueArea(mouseX, mouseY, img, imgX, imgY, rotationAngle);PImage displayImg = img;if (isMouseInImgOpaqueArea) {// 鼠标悬停时将图片转换为灰度图displayImg = img.get();displayImg.filter(GRAY);for (Point p : boundaries) {point(p.x, p.y); // 绘制边界点}}stroke(0); // 设置描边颜色为黑色strokeWeight(2); // 设置描边宽度为 2 像素noFill(); // 不填充内部// 绘制图片image(displayImg, 0, 0);popMatrix(); // 恢复之前的变换矩阵}@Overridepublic void mousePressed() {if (isMouseInImageOpaqueArea(mouseX, mouseY, img, imgX, imgY, rotationAngle)) {isDragging = true;// 计算鼠标点击位置相对于图片中心的偏移量float centeredMouseX = mouseX - (imgX + img.width / 2);float centeredMouseY = mouseY - (imgY + img.height / 2);// 将偏移量转换到旋转后的坐标系float rotatedMouseX = centeredMouseX * cos(-rotationAngle) - centeredMouseY * sin(-rotationAngle);float rotatedMouseY = centeredMouseX * sin(-rotationAngle) + centeredMouseY * cos(-rotationAngle);// 记录鼠标点击位置相对于图片的偏移量offsetX = (int) rotatedMouseX;offsetY = (int) rotatedMouseY;}}@Overridepublic void mouseDragged() {if (isDragging) {// 计算鼠标相对于图片中心的当前偏移量float centeredMouseX = mouseX - (imgX + img.width / 2);float centeredMouseY = mouseY - (imgY + img.height / 2);// 将当前偏移量转换到旋转后的坐标系float rotatedMouseX = centeredMouseX * cos(-rotationAngle) - centeredMouseY * sin(-rotationAngle);float rotatedMouseY = centeredMouseX * sin(-rotationAngle) + centeredMouseY * cos(-rotationAngle);// 计算鼠标拖动的偏移量float deltaX = rotatedMouseX - offsetX;float deltaY = rotatedMouseY - offsetY;// 将拖动的偏移量转换回全局坐标系float globalDeltaX = deltaX * cos(rotationAngle) - deltaY * sin(rotationAngle);float globalDeltaY = deltaX * sin(rotationAngle) + deltaY * cos(rotationAngle);// 更新图片的位置imgX += (int) globalDeltaX;imgY += (int) globalDeltaY;}}@Overridepublic void mouseReleased() {isDragging = false;}// 预计算不透明区域的边界private void precomputeBoundaries() {boundaries = new ArrayList<>();int[] pixels = img.pixels; // 提前加载像素数据for (int y = 0; y < img.height; y++) {for (int x = 0; x < img.width; x++) {int index = y * img.width + x; // 计算像素在数组中的索引int pixel = pixels[index];if (alpha(pixel) > 0) {// 检查当前像素是否为边界像素boolean isBoundary = false;// 检查相邻像素的透明度if (x > 0 && alpha(pixels[index - 1]) == 0) isBoundary = true;if (x < img.width - 1 && alpha(pixels[index + 1]) == 0) isBoundary = true;if (y > 0 && alpha(pixels[index - img.width]) == 0) isBoundary = true;if (y < img.height - 1 && alpha(pixels[index + img.width]) == 0) isBoundary = true;if (isBoundary) {boundaries.add(new Point(x, y)); // 存储边界点}}}}}@Overridepublic void keyPressed() {if (key == 'r') {rotationAngle += PI / 16; // 按 'r' 键旋转图片}}public static void main(String[] args) {PApplet.main("ImageSketchRotated");}
}
效果如下:
接着说
一般的应用,有了这几个通用方法,想必能够应付了。写到这里,笔者突然想到另一种讨巧的解决方法,一种“笨办法”,但或许可以节省性能开销-------使用一张蒙版层来辅助检测边界,计算区域。
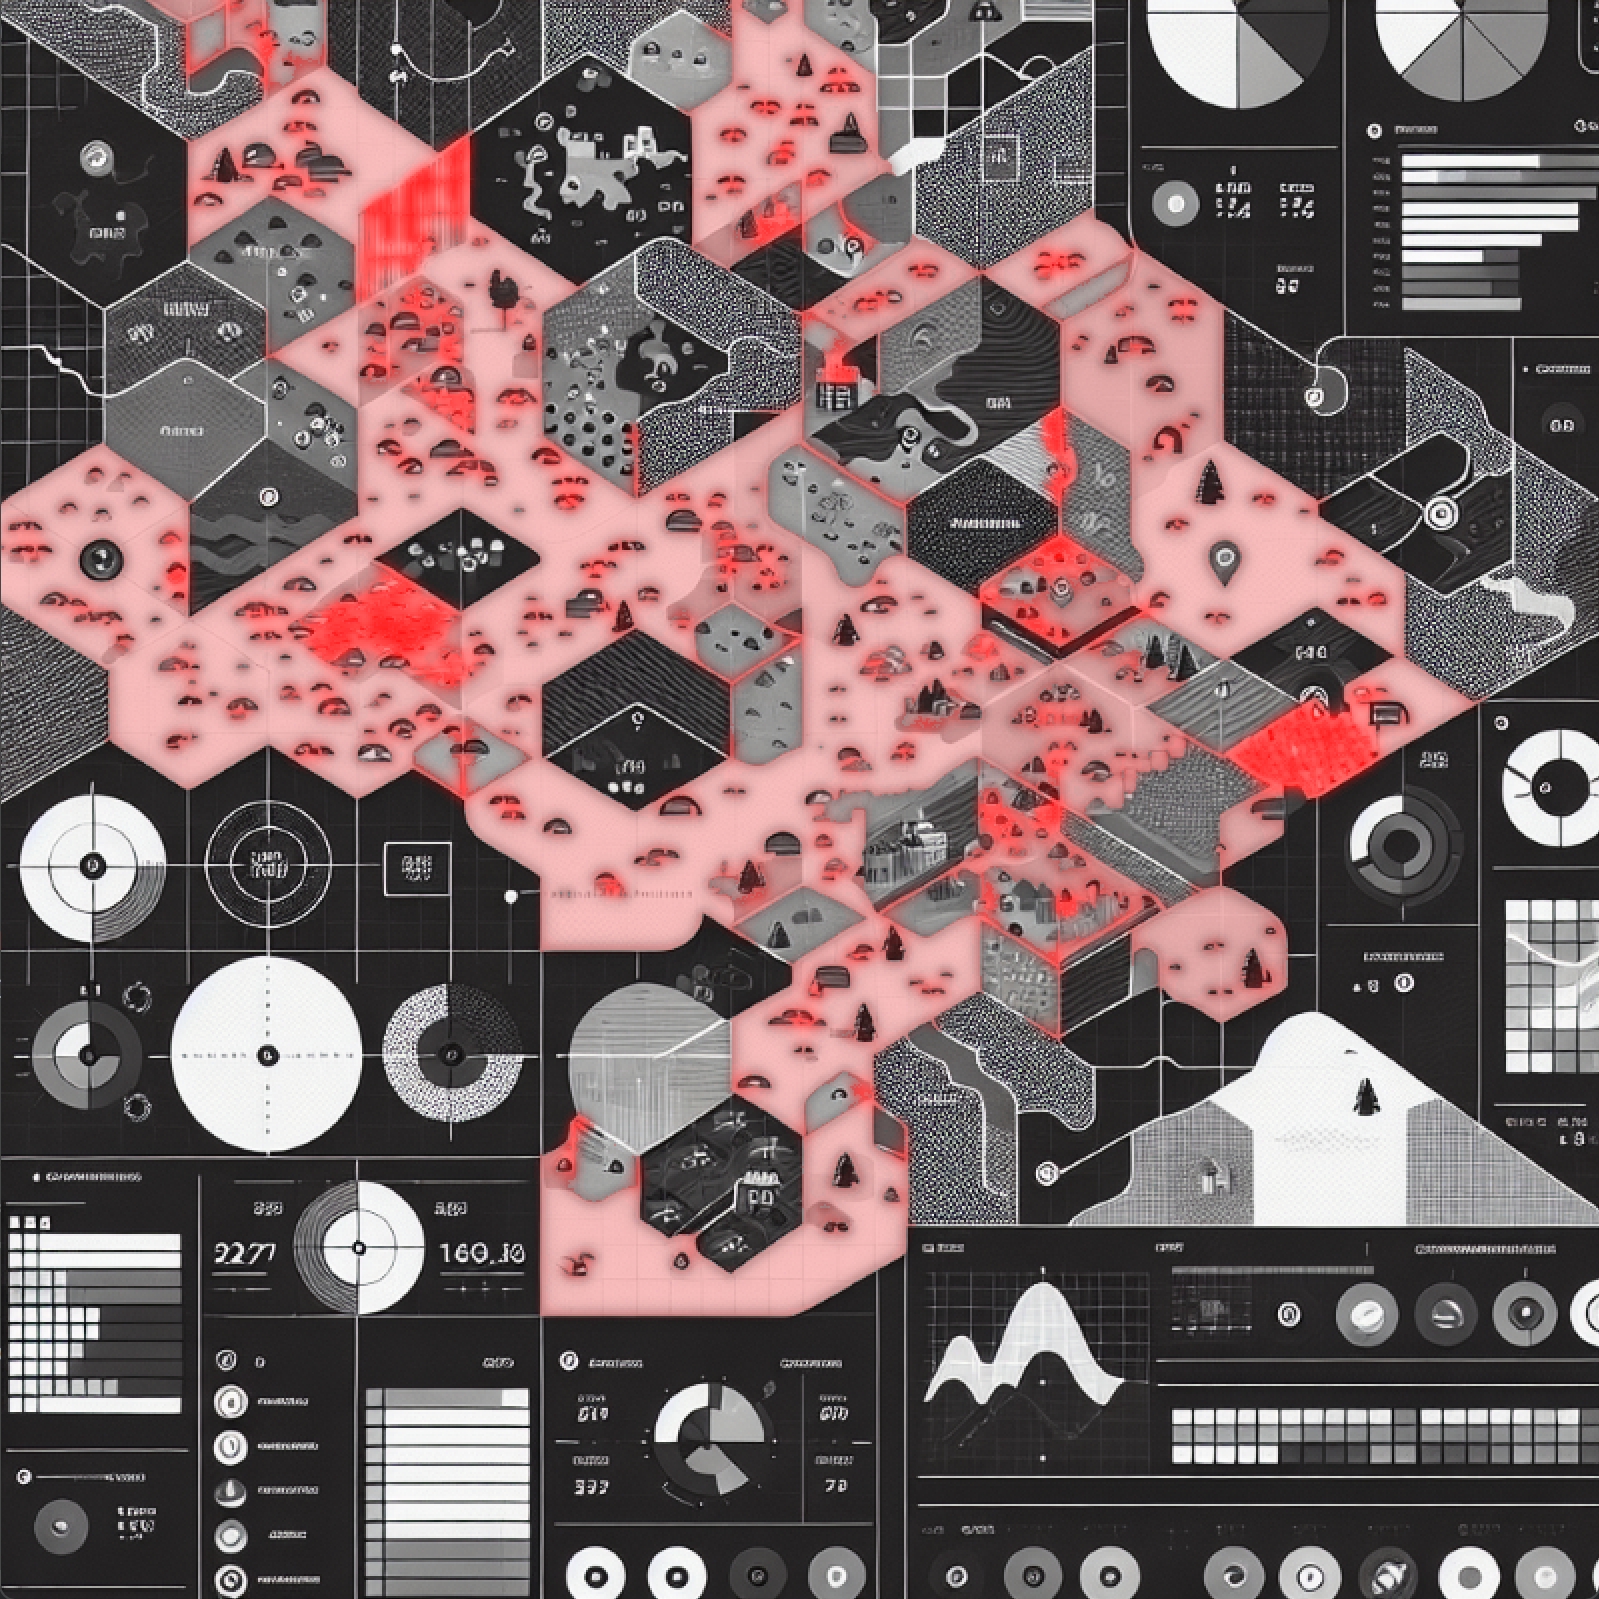
准备好素材,一张原图(地图样板),一张特殊区域图(蒙版)
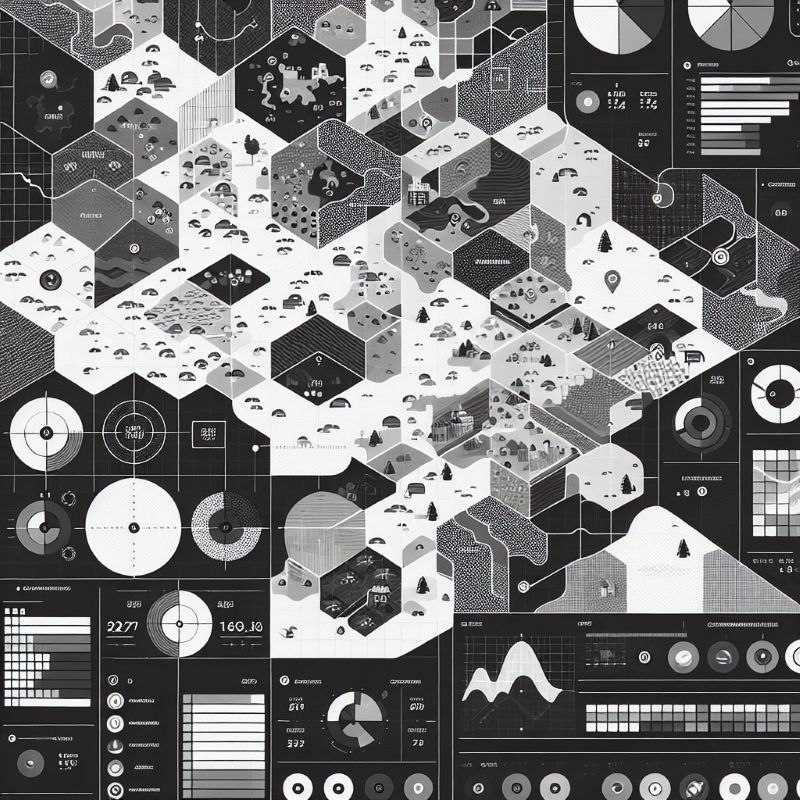
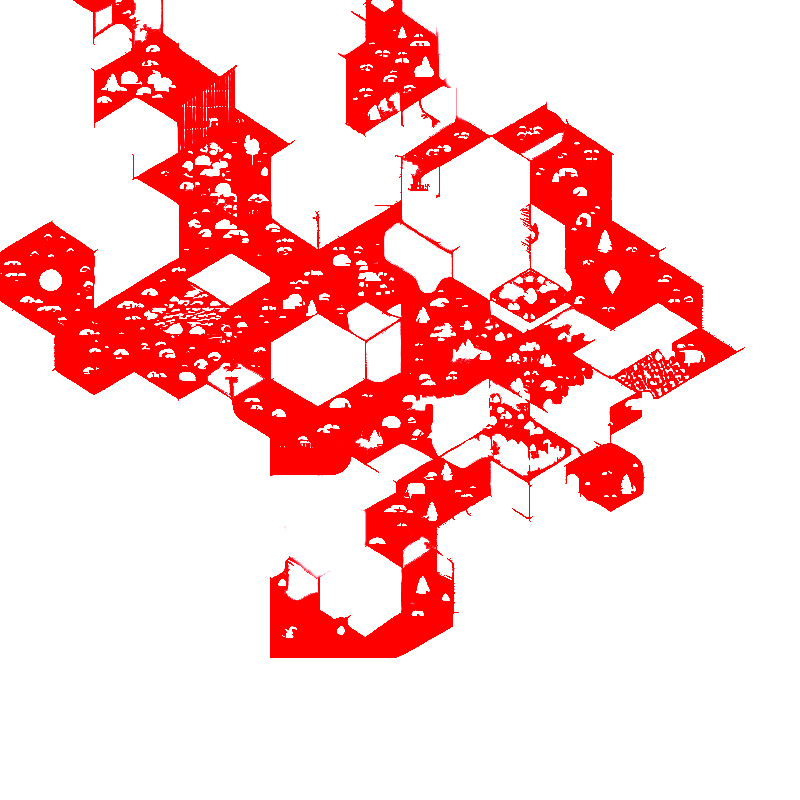
有了蒙版做辅助,就以它切入。去计算蒙版图片的每个像素值。如果是红色(R:255 G:0 B:0,或者放宽范围) ,那么就是我们想要的区域。算法如下:
/*** 检查鼠标是否悬停在特殊区域* @return 如果鼠标悬停在特殊区域返回 true,否则返回 false*/private boolean isMouseOverSpecialArea() {if (mouseX >= 0 && mouseX < width && mouseY >= 0 && mouseY < height) {int pixel = maskImage.get(mouseX, mouseY);// 检查蒙版图对应位置是否为红色return red(pixel) > 200 && green(pixel) < 50 && blue(pixel) < 50;}return false;}鼠标如果悬停特殊区域,那么该区域标红。其他代码照样,如下图:
import processing.core.PApplet;
import processing.core.PImage;public class MapInteraction33 extends PApplet {PImage mapImage;PImage maskImage;public void settings() {size(800, 800);}public void setup() {// 加载地图图片mapImage = loadImage("ditu.png");// 加载蒙版图maskImage = loadImage("mask.jpg");// 确保图片大小一致mapImage.resize(width, height);maskImage.resize(width, height);}public void draw() {background(255);// 绘制地图image(mapImage, 0, 0);// 检查鼠标是否悬停在特殊区域if (isMouseOverSpecialArea()) {// 绘制红色覆盖层,仅覆盖特殊区域fill(255, 0, 0, 100); // 红色半透明noStroke();for (int y = 0; y < height; y++) {for (int x = 0; x < width; x++) {int pixel = maskImage.get(x, y);if (red(pixel) > 200 && green(pixel) < 50 && blue(pixel) < 50) {rect(x, y, 1, 1);}}}}}/*** 检查鼠标是否悬停在特殊区域* @return 如果鼠标悬停在特殊区域返回 true,否则返回 false*/private boolean isMouseOverSpecialArea() {if (mouseX >= 0 && mouseX < width && mouseY >= 0 && mouseY < height) {int pixel = maskImage.get(mouseX, mouseY);// 检查蒙版图对应位置是否为红色return red(pixel) > 200 && green(pixel) < 50 && blue(pixel) < 50;}return false;}public void mousePressed() {if (isMouseOverSpecialArea()) {// 处理点击事件println("Clicked on the special area!");}}public static void main(String[] args) {PApplet.main("MapInteraction33");}
}
绘制特殊区域高亮显示,其实可以随意发挥,这里可以优化一下代码,提前线计算好区域信息,减少性能消耗:
// 提前处理蒙版图,记录红色区域的像素位置specialAreaPoints = new ArrayList<>();for (int y = 0; y < height; y++) {for (int x = 0; x < width; x++) {int pixel = maskImage.get(x, y);if (red(pixel) > 200 && green(pixel) < 50 && blue(pixel) < 50) {specialAreaPoints.add(new Point(x, y));}}}然后再Draw...
fill(255, 0, 0, 100); // 红色半透明noStroke();for (Point point : specialAreaPoints) {rect(point.x, point.y, 1, 1);}完整代码:
import processing.core.PApplet;
import processing.core.PImage;
import java.util.ArrayList;
import java.util.List;public class MapInteraction extends PApplet {PImage mapImage;PImage maskImage;List<Point> specialAreaPoints;  // 存储特殊区域位置class Point {int x;int y;Point(int x, int y) {this.x = x;this.y = y;}}public void settings() {size(800, 800);}public void setup() {// 加载地图图片mapImage = loadImage("ditu.png");// 加载蒙版图maskImage = loadImage("mask.jpg");// 确保图片大小一致mapImage.resize(width, height);maskImage.resize(width, height);// 提前处理蒙版图,记录红色区域的像素位置specialAreaPoints = new ArrayList<>();for (int y = 0; y < height; y++) {for (int x = 0; x < width; x++) {int pixel = maskImage.get(x, y);if (red(pixel) > 200 && green(pixel) < 50 && blue(pixel) < 50) {specialAreaPoints.add(new Point(x, y));}}}}public void draw() {background(255);// 绘制地图image(mapImage, 0, 0);// 检查鼠标是否悬停在特殊区域if (isMouseOverSpecialArea()) {// 绘制红色覆盖层,仅覆盖特殊区域fill(255, 0, 0, 100); // 红色半透明noStroke();for (Point point : specialAreaPoints) {rect(point.x, point.y, 1, 1);}}}/*** 检查鼠标是否悬停在特殊区域* @return 如果鼠标悬停在特殊区域返回 true,否则返回 false*/private boolean isMouseOverSpecialArea() {if (mouseX >= 0 && mouseX < width && mouseY >= 0 && mouseY < height) {int pixel = maskImage.get(mouseX, mouseY);// 检查蒙版图对应位置是否为红色return red(pixel) > 200 && green(pixel) < 50 && blue(pixel) < 50;}return false;}public void mousePressed() {if (isMouseOverSpecialArea()) {// 处理点击事件println("Clicked on the special area!");}}public static void main(String[] args) {PApplet.main("MapInteraction");}
}
效果如下:
如果继续美化,可以加一些辉光效果,辉光算法如下:
/*** 计算特殊区域的边界* @return 边界点列表*/private List<Point> calculateBoundary() {List<Point> boundary = new ArrayList<>();for (int y = 0; y < height; y++) {for (int x = 0; x < width; x++) {int pixel = maskImage.get(x, y);if (red(pixel) > 200 && green(pixel) < 50 && blue(pixel) < 50) {// 检查当前像素是否为边界像素boolean isBoundary = false;if (x > 0 && !isRed(maskImage.get(x - 1, y))) isBoundary = true;if (x < width - 1 && !isRed(maskImage.get(x + 1, y))) isBoundary = true;if (y > 0 && !isRed(maskImage.get(x, y - 1))) isBoundary = true;if (y < height - 1 && !isRed(maskImage.get(x, y + 1))) isBoundary = true;if (isBoundary) {boundary.add(new Point(x, y));}}}}return boundary;} /*** 绘制辉光效果*/private void drawGlowEffect() {// 创建一个与窗口大小相同的临时图像PImage glowImage = createImage(width, height, ARGB);glowImage.loadPixels();// 将特殊区域绘制到临时图像上,增强颜色透明度for (Point p : specialAreaBoundary) {int index = p.y * width + p.x;glowImage.pixels[index] = color(255, 0, 0, 255); // 增大透明度}glowImage.updatePixels();glowImage.filter(BLUR, 2); // 增大模糊半径tint(255,255);image(glowImage, 0, 0);// 对临时图像应用模糊滤镜,增大模糊半径glowImage.filter(BLUR, 4); // 增大模糊半径tint(255,255);image(glowImage, 0, 0);// 设置混合模式为 ADD,多次叠加辉光图像blendMode(ADD);for (int i = 0; i < 10; i++) { // 多次叠加image(glowImage, 0, 0);}// 恢复默认混合模式blendMode(BLEND);}完整代码:
import processing.core.PApplet;
import processing.core.PImage;
import java.util.ArrayList;
import java.util.List;
import processing.opengl.*;public class MapInteractionwithglow extends PApplet {class Point {int x;int y;Point(int x, int y) {this.x = x;this.y = y;}}PImage mapImage;PImage maskImage;List<Point> specialAreaBoundary;ArrayList<MapInteractionwithglow.Point> specialAreaPoints = new ArrayList<>();public void settings() {size(800, 800);}public void setup() {// 加载地图图片mapImage = loadImage("ditu.png");// 加载蒙版图maskImage = loadImage("mask.jpg");// 确保图片大小一致mapImage.resize(width, height);maskImage.resize(width, height);// 提前计算特殊区域的边界specialAreaBoundary = calculateBoundary();// 提前处理蒙版图,记录红色区域的像素位置for (int y = 0; y < height; y++) {for (int x = 0; x < width; x++) {int pixel = maskImage.get(x, y);if (red(pixel) > 200 && green(pixel) < 50 && blue(pixel) < 50) {specialAreaPoints.add(new MapInteractionwithglow.Point(x, y));}}}}public void draw() {background(255);// 绘制地图image(mapImage, 0, 0);// 检查鼠标是否悬停在特殊区域if (isMouseOverSpecialArea()) {fill(255, 0, 0, 60); // 红色半透明noStroke();for (MapInteractionwithglow.Point point : specialAreaPoints) {rect(point.x, point.y, 1, 1);}// 绘制辉光效果drawGlowEffect();}}/*** 绘制辉光效果*/private void drawGlowEffect() {// 创建一个与窗口大小相同的临时图像PImage glowImage = createImage(width, height, ARGB);glowImage.loadPixels();// 将特殊区域绘制到临时图像上,增强颜色透明度for (Point p : specialAreaBoundary) {int index = p.y * width + p.x;glowImage.pixels[index] = color(255, 0, 0, 255); // 增大透明度}glowImage.updatePixels();glowImage.filter(BLUR, 2); // 增大模糊半径tint(255,255);image(glowImage, 0, 0);// 对临时图像应用模糊滤镜,增大模糊半径glowImage.filter(BLUR, 4); // 增大模糊半径tint(255,255);image(glowImage, 0, 0);// 设置混合模式为 ADD,多次叠加辉光图像blendMode(ADD);for (int i = 0; i < 10; i++) { // 多次叠加image(glowImage, 0, 0);}// 恢复默认混合模式blendMode(BLEND);}/*** 计算特殊区域的边界* @return 边界点列表*/private List<Point> calculateBoundary() {List<Point> boundary = new ArrayList<>();for (int y = 0; y < height; y++) {for (int x = 0; x < width; x++) {int pixel = maskImage.get(x, y);if (red(pixel) > 200 && green(pixel) < 50 && blue(pixel) < 50) {// 检查当前像素是否为边界像素boolean isBoundary = false;if (x > 0 && !isRed(maskImage.get(x - 1, y))) isBoundary = true;if (x < width - 1 && !isRed(maskImage.get(x + 1, y))) isBoundary = true;if (y > 0 && !isRed(maskImage.get(x, y - 1))) isBoundary = true;if (y < height - 1 && !isRed(maskImage.get(x, y + 1))) isBoundary = true;if (isBoundary) {boundary.add(new Point(x, y));}}}}return boundary;}/*** 检查像素是否为红色* @param pixel 像素颜色* @return 如果是红色返回 true,否则返回 false*/private boolean isRed(int pixel) {return red(pixel) > 200 && green(pixel) < 50 && blue(pixel) < 50;}/*** 检查鼠标是否悬停在特殊区域* @return 如果鼠标悬停在特殊区域返回 true,否则返回 false*/private boolean isMouseOverSpecialArea() {if (mouseX >= 0 && mouseX < width && mouseY >= 0 && mouseY < height) {int pixel = maskImage.get(mouseX, mouseY);// 检查蒙版图对应位置是否为红色return red(pixel) > 200 && green(pixel) < 50 && blue(pixel) < 50;}return false;}public void mousePressed() {if (isMouseOverSpecialArea()) {// 处理点击事件println("Clicked on the special area!");}}public static void main(String[] args) {PApplet.main("MapInteractionwithglow");}
}
效果:
尾声
从规则四边形(矩形)到不规则多边形,再延伸到png透明通道图片,最后举了地图检测的例子。一般场景下足以应付检测问题了。
想要深入研究,大致可以参考经典游戏《英雄无敌3》中,回到城堡选中建筑物时的交互体验,不过游戏中的解决方案看来是很科学高效的,或许是调用了OpenGL图形接口的相关算法。未来有机会还需继续探究算法。