章节 6:日期选择器与日期处理
目标
- 学习如何使用
DatePicker组件。 - 理解日期格式化和日期计算。
内容
- 日期选择器基础
- 使用
DatePicker组件。 - 处理日期选择事件。
- 使用
- 日期格式化
- 格式化日期为友好的文本。
- 日期计算
- 判断日期是否过期或即将到期。
代码示例
@Entry
@Component
struct DatePickerDemo {@State selectedDate: Date = new Date();@State showDatePicker: boolean = false;formatDate(date: Date): string {return `${date.getFullYear()}-${(date.getMonth() + 1).toString().padStart(2, '0')}-${date.getDate().toString().padStart(2, '0')}`;}build() {Column() {Text('选择日期: ' + this.formatDate(this.selectedDate)).margin({ bottom: 16 })Button('选择日期').onClick(() => { this.showDatePicker = true; })if (this.showDatePicker) {DatePicker({start: new Date('2020-01-01'),end: new Date('2030-12-31'),selected: this.selectedDate,}).onChange((value: DatePickerInfo) => {this.selectedDate = new Date(value.year, value.month - 1, value.day);}).margin({ bottom: 16 })}}}
}
章节 7:任务统计与数据可视化
目标
- 学习如何实现任务统计。
- 理解简单的数据可视化方法。
内容
- 任务统计
- 计算任务总数和完成率。
- 按优先级统计任务数量。
- 数据可视化
- 使用简单的图表展示统计数据。
- 示例:任务统计面板
- 实现任务统计功能。
代码示例
@Entry
@Component
struct TaskStatistics {@State todoList: TodoItem[] = [new TodoItem('任务1', Priority.HIGH),new TodoItem('任务2', Priority.MEDIUM),new TodoItem('任务3', Priority.LOW)];getCompletionPercentage(): number {if (this.todoList.length === 0) return 0;const completedCount = this.todoList.filter(item => item.isCompleted).length;return Math.round((completedCount / this.todoList.length) * 100);}getPriorityStats(): PriorityStatItem[] {const highStat: PriorityStatItem = { priority: Priority.HIGH, count: 0, color: '#FF3B30' };const mediumStat: PriorityStatItem = { priority: Priority.MEDIUM, count: 0, color: '#FF9500' };const lowStat: PriorityStatItem = { priority: Priority.LOW, count: 0, color: '#34C759' };this.todoList.forEach(item => {switch (item.priority) {case Priority.HIGH: highStat.count++; break;case Priority.MEDIUM: mediumStat.count++; break;case Priority.LOW: lowStat.count++; break;}});return [highStat, mediumStat, lowStat];}build() {Column() {Text('任务统计').fontSize(24).fontWeight(FontWeight.Bold).margin({ bottom: 16 })Text(`完成率: ${this.getCompletionPercentage()}%`).margin({ bottom: 16 })ForEach(this.getPriorityStats(), (stat: PriorityStatItem) => {Row() {Circle().fill(stat.color).width(12).height(12).margin({ right: 8 })Text(`${stat.priority}: ${stat.count} 个`)}.margin({ bottom: 8 })})}}
}
章节 8:振动反馈与用户交互
目标
- 学习如何使用
@ohos.vibrator实现振动反馈。 - 理解用户交互的优化方法。
内容
- 振动反馈基础
- 使用
vibrate方法实现短振动。
- 使用
- 用户交互优化
- 在任务操作时提供振动反馈。
- 示例:振动反馈应用
- 实现用户交互时的振动效果。
代码示例
import vibrator from '@ohos.vibrator';@Entry
@Component
struct VibrationDemo {vibrateShort() {try {vibrator.vibrate(10);} catch (error) {console.error('Failed to vibrate:', error);}}build() {Column() {Text('点击按钮体验振动反馈').margin({ bottom: 16 })Button('短振动').onClick(() => this.vibrateShort())}}
}
章节 9:对话框与用户提示
目标
- 学习如何使用
@ohos.promptAction显示对话框。 - 理解如何处理用户输入。
内容
- 对话框基础
- 使用
showDialog方法显示对话框。
- 使用
- 用户输入处理
- 获取用户选择的结果。
- 示例:确认删除对话框
- 实现删除任务时的确认对话框。
代码示例
import promptAction from '@ohos.promptAction';@Entry
@Component
struct DialogDemo {async showConfirmationDialog() {try {const dialogButtons: Array<DialogButton> = [{ text: '取消', color: '#8E8E93' },{ text: '确定', color: '#FF3B30' }];const options: promptAction.ShowDialogOptions = {title: '确认删除',message: '确定要删除此任务吗?',buttons: dialogButtons};const result = await promptAction.showDialog(options);if (result && result.index === 1) {console.log('用户确认删除');}} catch (error) {console.error('对话框显示失败:', error);}}build() {Column() {Text('点击按钮显示对话框').margin({ bottom: 16 })Button('删除任务').onClick(() => this.showConfirmationDialog())}}
}
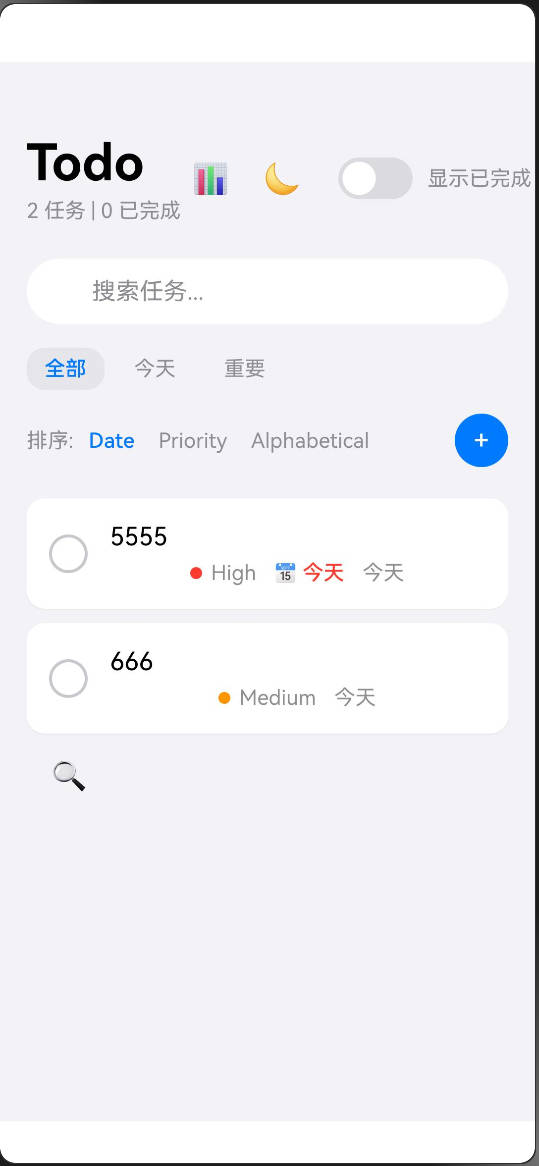
章节 10:完整Todo应用实现
目标
- 综合应用前面章节的知识,实现一个完整的Todo应用。
- 理解如何将各个功能模块整合在一起。
内容
- 功能整合
- 数据存储与加载。
- 响应式布局与主题切换。
- 任务管理与统计。
- 日期选择与振动反馈。
- 完整代码实现
- 从头到尾实现一个功能完整的Todo应用。
总结
通过以上章节的学习,用户将逐步掌握HarmonyOS Next的开发技能,从基础的环境搭建到复杂的任务管理应用实现。每个章节都包含清晰的代码示例和详细解释,帮助用户快速上手并深入理解HarmonyOS Next的开发。