前言
上一篇文章给大家分享了Android蓝牙的基础知识和基础用法,不过上一篇都是一些零散碎片化的程序,这一篇给大家分享Android蓝牙开发实战项目的初步使用
效果演示 :
Android蓝牙搜索,配对,连接,通信
Android蓝牙实战开发步骤
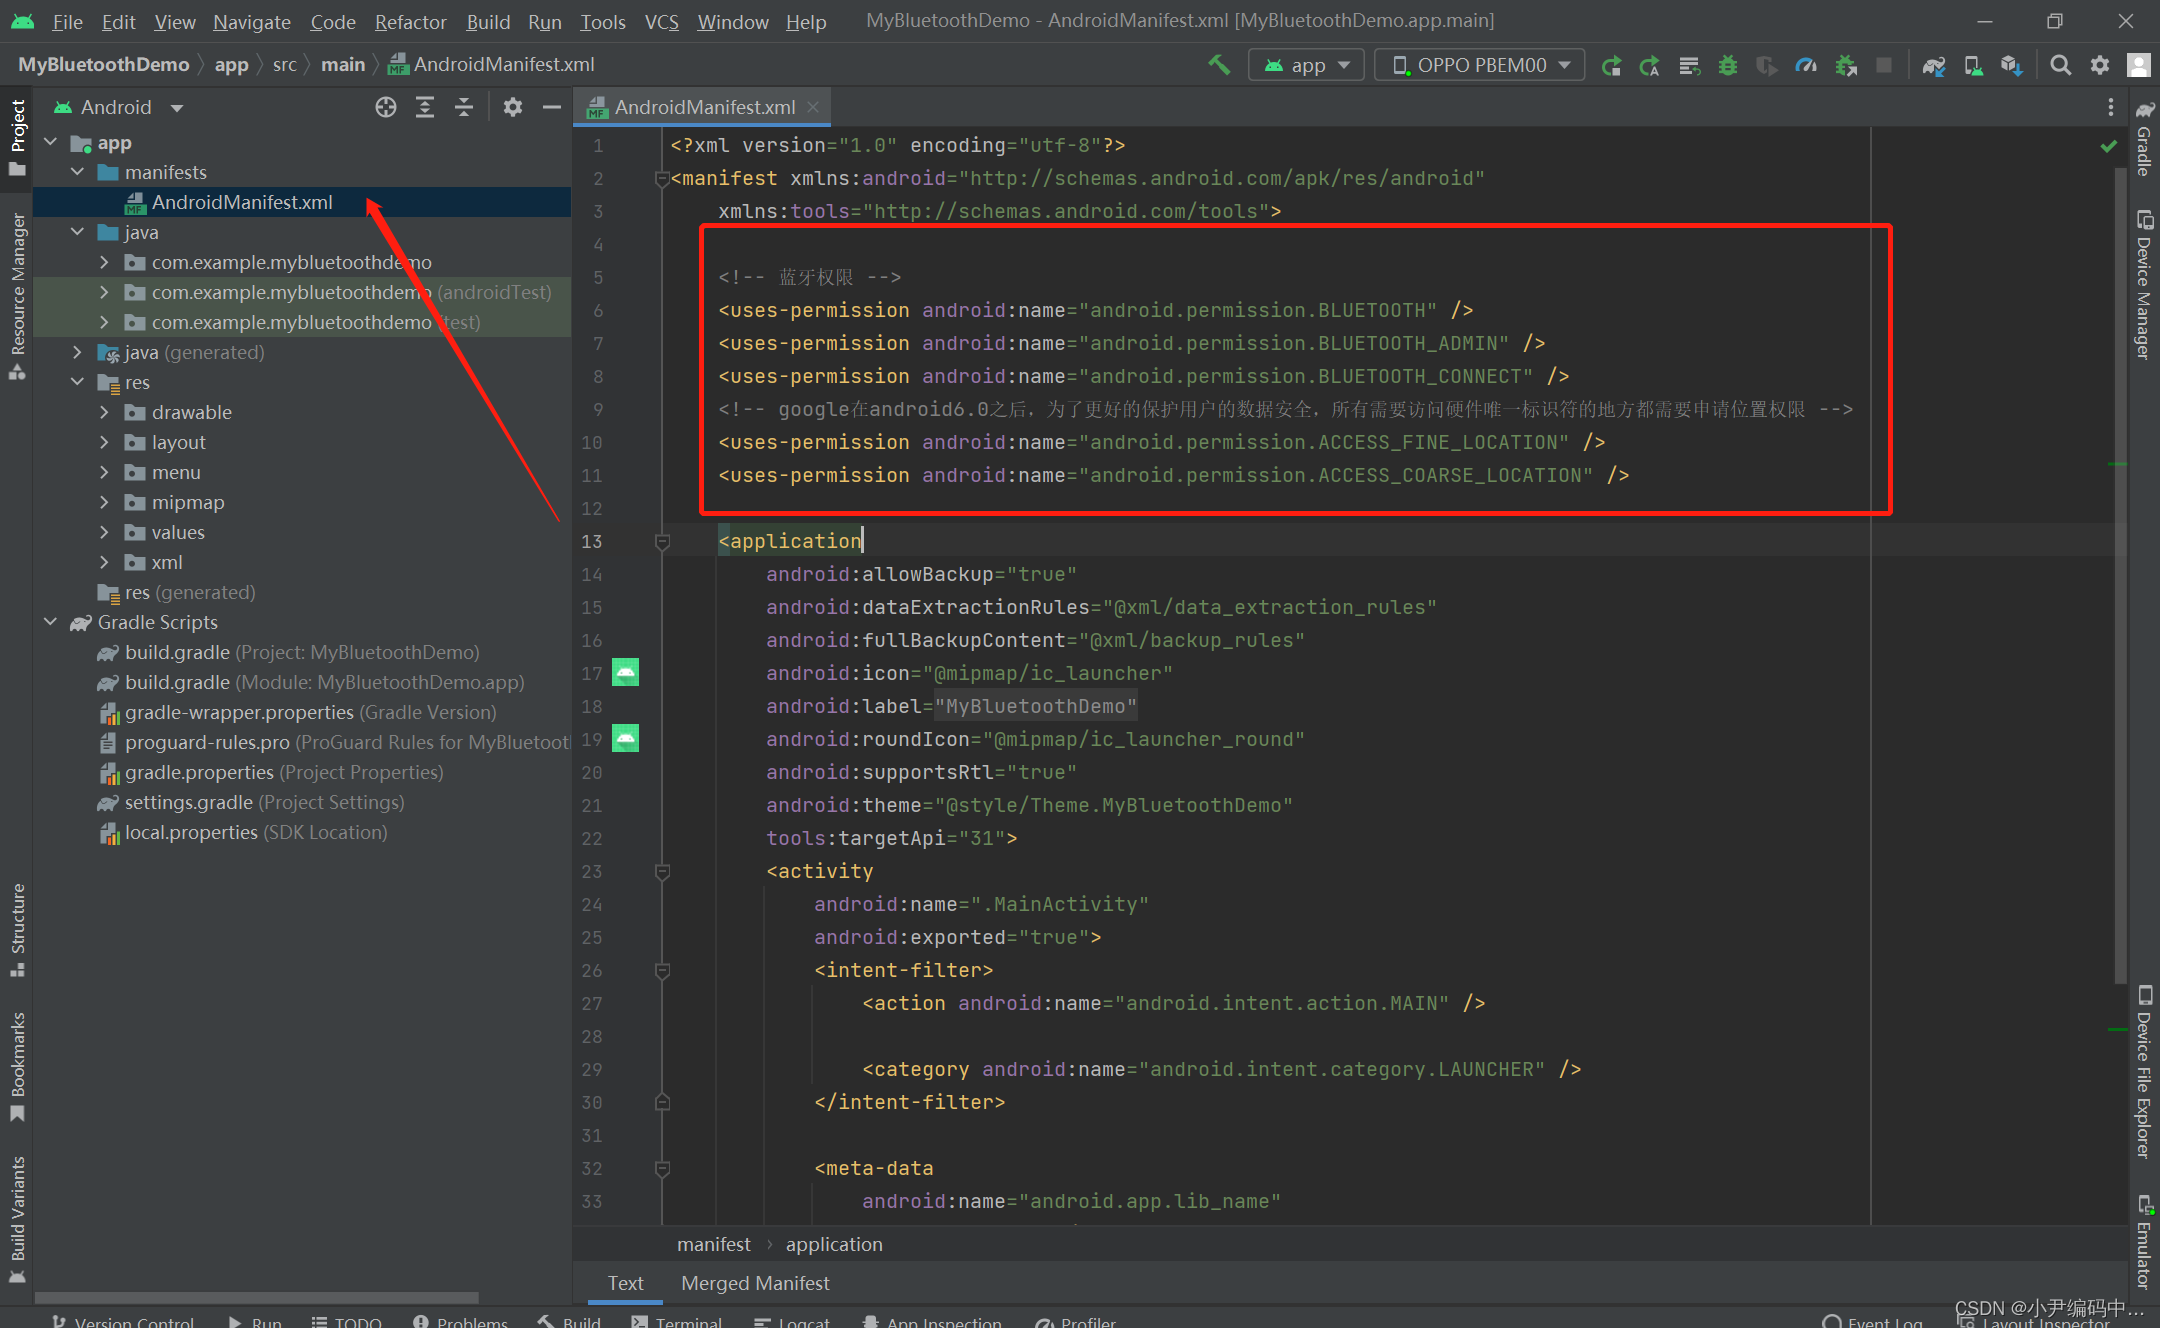
1.新建Android项目添加蓝牙权限
下图所示:MyBluetoothDemo为刚刚创建的Android空项目,我们现在清单文件中把我们需要用到的权限声明一下,其中定位权限还需要做动态申请
2.封装BluetoothAdapter类
BluetoothAdapter类提供了常用的蓝牙API,我这里创建了一个BlueToothController类,小编这里是先将这些API封装到了一个BlueToothController类中,方便后续使用和操作
package com.example.mybluetoothdemo;import android.annotation.SuppressLint;
import android.app.Activity;
import android.bluetooth.BluetoothAdapter;
import android.bluetooth.BluetoothDevice;
import android.bluetooth.BluetoothSocket;
import android.content.Context;
import android.content.Intent;import java.util.ArrayList;
import java.util.List;public class BlueToothController {private BluetoothAdapter mBluetoothAdapter;public BlueToothController(){//初始化蓝牙适配器mBluetoothAdapter = BluetoothAdapter.getDefaultAdapter();}public BluetoothAdapter getBluetoothAdapter() {return mBluetoothAdapter;}/*** 检查设备是否支持蓝牙*/public boolean isBluetoothSupport(){if(mBluetoothAdapter == null){return false;}else {return true;}}/*** 检查该设备蓝牙是否开启*/public boolean isBluetoothEnabled(){if(mBluetoothAdapter.isEnabled()){return true;}else {return false;}}/*** 打开蓝牙*/@SuppressLint("MissingPermission")public void turnOnBlueTooth(Activity activity, int requestCode) {Intent intent = new Intent(BluetoothAdapter.ACTION_REQUEST_ENABLE);activity.startActivityForResult(intent, requestCode);}/*** 打开蓝牙可见性*/@SuppressLint("MissingPermission")public void enableVisibily(Context context){Intent intent = new Intent(BluetoothAdapter.ACTION_REQUEST_DISCOVERABLE);intent.putExtra(BluetoothAdapter.EXTRA_DISCOVERABLE_DURATION,300);context.startActivity(intent);}/*** 停止查找设备*/@SuppressLint("MissingPermission")public void cancelFindDevice(){mBluetoothAdapter.cancelDiscovery();}/*** 判断当前设备是否在查找蓝牙设备*/@SuppressLint("MissingPermission")public boolean isStartDiscovering(){if(mBluetoothAdapter.isDiscovering()){return true;}else {return false;}}/*** 判断当前设备是否未在查找蓝牙设备*/@SuppressLint("MissingPermission")public boolean isCancelDiscovering(){if(!mBluetoothAdapter.isDiscovering()){return true;}else {return false;}}/*** 查找设备*/@SuppressLint("MissingPermission")public void findDevice() {mBluetoothAdapter.startDiscovery();}/*** 获取已绑定设备*/@SuppressLint("MissingPermission")public List<BluetoothDevice> getBondedDeviceList(){return new ArrayList<>(mBluetoothAdapter.getBondedDevices());}/*** 判断蓝牙是否连接*/@SuppressLint("MissingPermission")public boolean isConnectBlue(BluetoothSocket bluetoothSocket){return bluetoothSocket !=null && bluetoothSocket.isConnected();}
}
3. 编写UI页面
activity_main.xml:这是我们MainActivity的UI,放置了一个ListView和一个按钮,ListView用来显示搜索到的蓝牙设备和已配对的蓝牙设备,Button控件用来与连接后的设备发送信息时使用
<?xml version="1.0" encoding="utf-8"?>
<RelativeLayout xmlns:android="http://schemas.android.com/apk/res/android"android:layout_width="match_parent"android:layout_height="match_parent"android:paddingLeft="16.dp"android:paddingRight="16.dp"android:paddingBottom="16.dp"><ListViewandroid:id="@+id/device_list"android:layout_width="match_parent"android:layout_height="match_parent"android:divider="#e90423"android:dividerHeight="1px"></ListView><Buttonandroid:id="@+id/btn_write_1"android:layout_width="wrap_content"android:layout_height="wrap_content"android:layout_alignParentRight="true"android:layout_alignParentBottom="true"android:text="发送消息"/></RelativeLayout>
既然有了ListView,那就一定有ListView的每条子元素UI,新建list_item.xml
list_item.xml: 用来显示ListView列表的子内容
<?xml version="1.0" encoding="utf-8"?>
<LinearLayout xmlns:android="http://schemas.android.com/apk/res/android"android:layout_width="match_parent"android:orientation="horizontal"android:layout_height="wrap_content"><LinearLayoutandroid:layout_width="match_parent"android:layout_height="match_parent"android:orientation="vertical"><TextView android:id="@+id/text1"android:layout_width="match_parent"android:layout_height="wrap_content"android:textStyle="bold"android:textSize="18sp"/><TextView android:id="@+id/text3"android:layout_width="match_parent"android:layout_height="wrap_content"android:textSize="13sp"/></LinearLayout></LinearLayout>
然后,我们再为页面右上角写一个menu列表按钮,新建menu_main.xml
menu_main.xml:
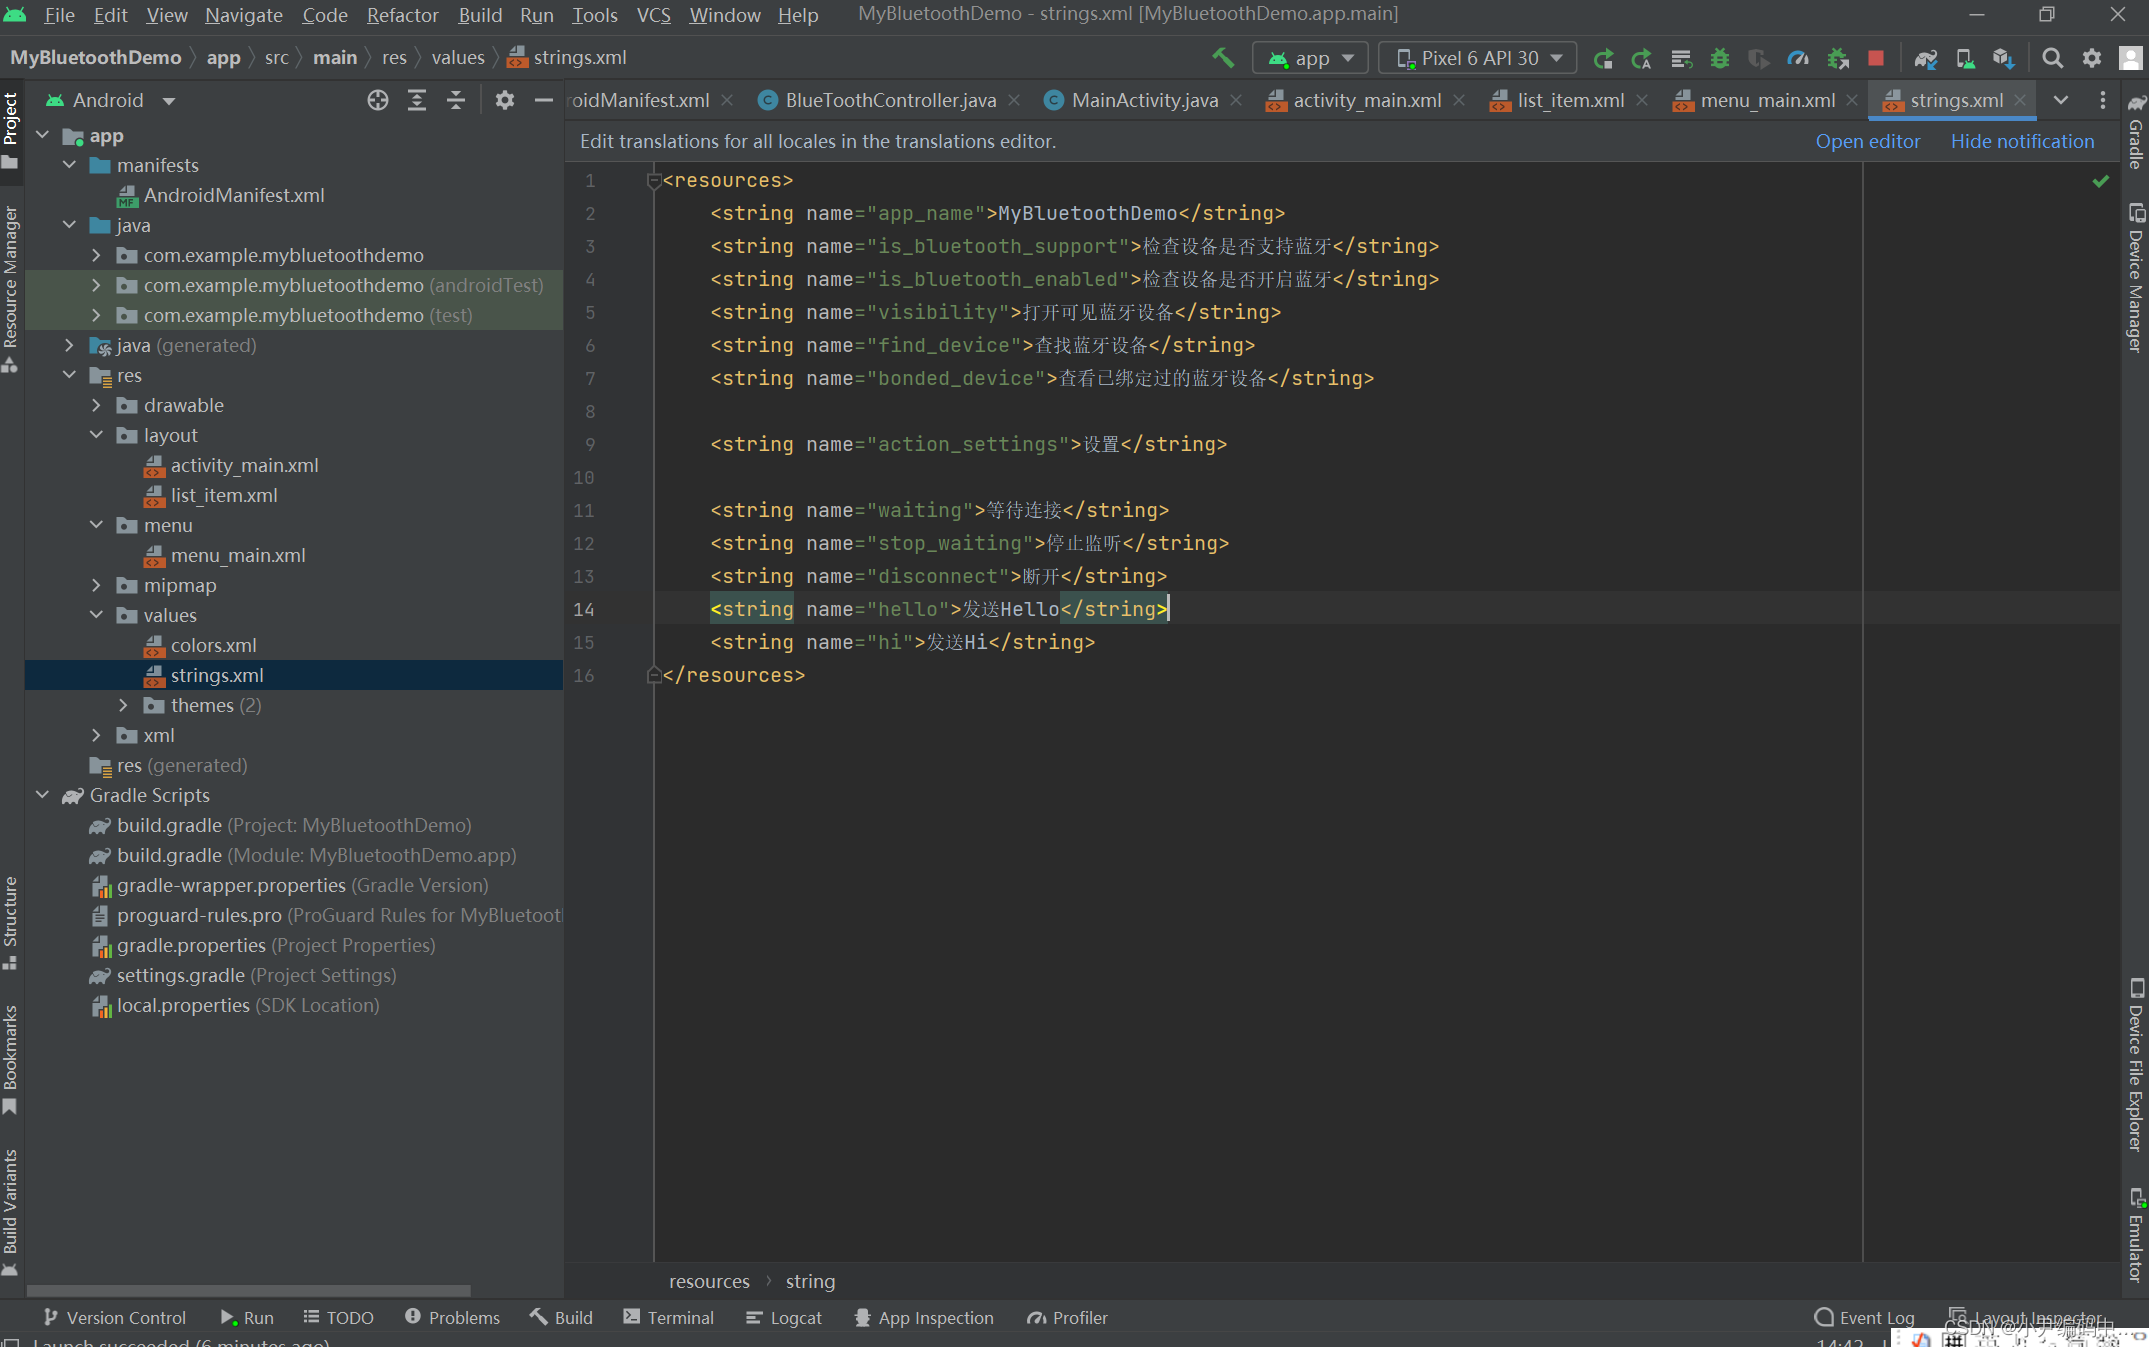
<menu xmlns:android="http://schemas.android.com/apk/res/android"xmlns:tools="http://schemas.android.com/tools"tools:context=".MainActivity" ><itemandroid:id="@+id/is_bluetooth_support"android:title="@string/is_bluetooth_support"android:orderInCategory="1" /><itemandroid:id="@+id/is_bluetooth_enabled"android:title="@string/is_bluetooth_enabled"android:orderInCategory="2" /><itemandroid:id="@+id/bonded_device"android:title="@string/bonded_device"android:orderInCategory="2" /><itemandroid:id="@+id/find_device"android:title="@string/find_device"android:orderInCategory="3" /></menu>最后,再为大家分享一下string.xml字符串配置信息
4. 蓝牙列表适配器
创建DeviceAdapter类,具体如下图所示:
package com.example.mybluetoothdemo;import android.annotation.SuppressLint;
import android.bluetooth.BluetoothDevice;
import android.content.Context;
import android.graphics.Color;
import android.view.LayoutInflater;
import android.view.View;
import android.view.ViewGroup;
import android.widget.BaseAdapter;
import android.widget.TextView;import java.util.List;public class DeviceAdapter extends BaseAdapter{private List<BluetoothDevice> mData;private Context mContext;public DeviceAdapter(List<BluetoothDevice> data, Context context){mData = data;mContext = context.getApplicationContext();}@Overridepublic int getCount() {return mData.size();}@Overridepublic Object getItem(int i) {return mData.get(i);}@Overridepublic long getItemId(int i) {return i;}@SuppressLint("MissingPermission")@Overridepublic View getView(int i, View view, ViewGroup viewGroup) {View itemView = view;//复用view,优化性能if(itemView == null){itemView = LayoutInflater.from(mContext).inflate(R.layout.list_item, viewGroup,false);}TextView text1 = itemView.findViewById(R.id.text1);TextView text2 = itemView.findViewById(R.id.text3);text1.setTextColor(Color.BLACK);text2.setTextColor(Color.BLACK);//获取对应的蓝牙设备BluetoothDevice device = (BluetoothDevice) getItem(i);//显示设备名称if(device.getName()==null){text1.setText("N/A");}else {text1.setText(device.getName());}//显示设备地址text2.setText(device.getAddress());return itemView;}//刷新列表,防止搜索结果重复出现public void refresh(List<BluetoothDevice> data){mData = data;notifyDataSetChanged();}}
5. 蓝牙搜索,配对,连接,通信
小编这里为了让大家方便,便将搜索,配对,连接都写在了MainActivity中了
package com.example.mybluetoothdemo;import androidx.annotation.NonNull;
import androidx.appcompat.app.AppCompatActivity;import android.Manifest;
import android.annotation.SuppressLint;
import android.bluetooth.BluetoothAdapter;
import android.bluetooth.BluetoothDevice;import android.bluetooth.BluetoothGatt;
import android.bluetooth.BluetoothGattCallback;
import android.bluetooth.BluetoothGattCharacteristic;
import android.bluetooth.BluetoothGattDescriptor;
import android.bluetooth.BluetoothGattService;
import android.bluetooth.BluetoothProfile;
import android.content.BroadcastReceiver;
import android.content.Context;
import android.content.Intent;
import android.content.IntentFilter;
import android.content.pm.PackageManager;
import android.os.Build;
import android.os.Bundle;
import android.util.Log;
import android.view.Menu;
import android.view.MenuItem;import android.view.View;
import android.widget.AdapterView;
import android.widget.ListView;
import android.widget.Toast;import java.util.ArrayList;
import java.util.List;
import java.util.UUID;public class MainActivity extends AppCompatActivity {private final String TAG = "yf";private BlueToothController blueToothController = new BlueToothController();private static final int REQUEST_ENABLE_BT = 1;private ListView listView;private DeviceAdapter blueToothDeviceAdapter,bondBlueToothDeviceAdapter;private List<BluetoothDevice> deviceList = new ArrayList<>();private List<BluetoothDevice> bondedDeviceList = new ArrayList<>();private BluetoothDevice device;private BluetoothGatt bluetoothGatt;@Overrideprotected void onCreate(Bundle savedInstanceState) {super.onCreate(savedInstanceState);setContentView(R.layout.activity_main);initUI();//判断是否有访问位置的权限,没有权限,直接申请位置权限isPermission();registerBluetoothReceiver();}@SuppressLint("MissingPermission")private void initUI(){listView = findViewById(R.id.device_list);blueToothDeviceAdapter = new DeviceAdapter(deviceList,this);bondBlueToothDeviceAdapter = new DeviceAdapter(bondedDeviceList,this);findViewById(R.id.btn_write_1).setOnClickListener(view -> {if (null == mWriter){Log.e("cx12345","ble:发送失败:null == writer !!!!");}else {mWriter.setValue(new byte[]{(byte)0x0c,(byte)0x11,(byte)0x09,(byte)0x41,(byte)0x23,(byte)0x00,(byte)0x01,(byte)0x03,(byte)0xFF});mGatt.writeCharacteristic(mWriter);}});}@Overridepublic boolean onCreateOptionsMenu(Menu menu) {getMenuInflater().inflate(R.menu.menu_main,menu);return true;}@SuppressLint("MissingPermission")@Overridepublic boolean onOptionsItemSelected(MenuItem item) {int id = item.getItemId();switch (id){case R.id.is_bluetooth_support:if (blueToothController.isBluetoothSupport()){Toast.makeText(MainActivity.this, "该设备支持蓝牙功能", Toast.LENGTH_SHORT).show();}else {Toast.makeText(MainActivity.this, "该设备不支持蓝牙功能", Toast.LENGTH_SHORT).show();}break;case R.id.is_bluetooth_enabled:if (blueToothController.isBluetoothEnabled()){Toast.makeText(MainActivity.this, "蓝牙已开启", Toast.LENGTH_SHORT).show();}else {blueToothController.turnOnBlueTooth(this,REQUEST_ENABLE_BT);}break;case R.id.bonded_device:setTitle("已配对的设备");bondedDeviceList = blueToothController.getBondedDeviceList();listView.setAdapter(bondBlueToothDeviceAdapter);bondBlueToothDeviceAdapter.refresh(bondedDeviceList);break;case R.id.find_device:setTitle("可用设备");if(blueToothController.isStartDiscovering()){blueToothController.cancelFindDevice();}blueToothController.findDevice();
//                blueToothController.getBluetoothAdapter().startLeScan(leScanCallback);listView.setAdapter(blueToothDeviceAdapter);blueToothDeviceAdapter.refresh(deviceList);listView.setOnItemClickListener(deviceBluetooth);break;default:break;}return super.onOptionsItemSelected(item);}private AdapterView.OnItemClickListener deviceBluetooth = new AdapterView.OnItemClickListener() {@SuppressLint("MissingPermission")public void onItemClick(AdapterView<?> adapterView, View view, int i, long l) {device = deviceList.get(i);if (Build.VERSION.SDK_INT >= Build.VERSION_CODES.KITKAT) {//蓝牙绑定
//                device.createBond();//Gatt协议连接蓝牙bluetoothGatt = device.connectGatt(MainActivity.this,true,mGattCallback);bluetoothGatt.connect();}}};//动态获取位置权限private void isPermission(){if ((checkSelfPermission(Manifest.permission.ACCESS_COARSE_LOCATION) != PackageManager.PERMISSION_GRANTED)|| (checkSelfPermission(Manifest.permission.ACCESS_FINE_LOCATION) != PackageManager.PERMISSION_GRANTED)) {requestPermissions(new String[]{Manifest.permission.ACCESS_COARSE_LOCATION, Manifest.permission.ACCESS_FINE_LOCATION}, 200);}}@SuppressLint("MissingPermission")@Overrideprotected void onDestroy() {super.onDestroy();// 停止设备搜索blueToothController.getBluetoothAdapter().cancelDiscovery();//注销广播unregisterReceiver(receiver);}private void registerBluetoothReceiver(){//filter注册广播接收器IntentFilter filter = new IntentFilter();//蓝牙当前状态filter.addAction(BluetoothAdapter.ACTION_STATE_CHANGED);//开始扫描蓝牙设备广播filter.addAction(BluetoothAdapter.ACTION_DISCOVERY_STARTED);//找到蓝牙设备广播filter.addAction(BluetoothDevice.ACTION_FOUND);//扫描蓝牙设备结束广播filter.addAction(BluetoothAdapter.ACTION_DISCOVERY_FINISHED);//蓝牙设备配对状态改变广播filter.addAction(BluetoothDevice.ACTION_BOND_STATE_CHANGED);//设备扫描模式改变广播filter.addAction(BluetoothAdapter.ACTION_SCAN_MODE_CHANGED);registerReceiver(receiver, filter);}//处理找到蓝牙设备和搜索完成的广播消息BroadcastReceiver receiver = new BroadcastReceiver() {@SuppressLint("MissingPermission")@Overridepublic void onReceive(Context context, Intent intent) {String action = intent.getAction();//开始查找设备if(BluetoothAdapter.ACTION_DISCOVERY_STARTED.equals(action)){//初始化适配器列表deviceList.clear();bondedDeviceList.clear();blueToothDeviceAdapter.refresh(deviceList);bondBlueToothDeviceAdapter.refresh((bondedDeviceList));}//找到蓝牙设备else if(BluetoothDevice.ACTION_FOUND.equals(action)){//搜到蓝牙设备BluetoothDevice device = intent.getParcelableExtra(BluetoothDevice.EXTRA_DEVICE);//把搜索到的设备添加到已找到列表中,显示它的信息deviceList.add(device);blueToothDeviceAdapter.refresh(deviceList);}//查找设备结束else if(BluetoothAdapter.ACTION_DISCOVERY_FINISHED.equals(action)){//搜索完毕Toast.makeText(MainActivity.this, "选择要配对的蓝牙设备", Toast.LENGTH_SHORT).show();blueToothDeviceAdapter.refresh(deviceList);}//配对状态else if(BluetoothDevice.ACTION_BOND_STATE_CHANGED.equals(action)){BluetoothDevice device = intent.getParcelableExtra(BluetoothDevice.EXTRA_DEVICE);if(device == null){Toast.makeText(MainActivity.this, "无设备", Toast.LENGTH_SHORT).show();return;}int state = intent.getIntExtra(BluetoothDevice.EXTRA_BOND_STATE,0);if(state == BluetoothDevice.BOND_BONDED){Toast.makeText(MainActivity.this, "已配对", Toast.LENGTH_SHORT).show();}else if(state == BluetoothDevice.BOND_BONDING){Toast.makeText(MainActivity.this, "正在配对", Toast.LENGTH_SHORT).show();}else if(state == BluetoothDevice.BOND_NONE){Toast.makeText(MainActivity.this, "未配对", Toast.LENGTH_SHORT).show();}}}};private BluetoothGatt mGatt;private BluetoothGattCharacteristic mWriter;/*** @param gatt     返回连接建立的gatt对象* @param status   返回的是此次gatt操作的结果,成功了返回0* @param newState 每次client连接或断开连接状态变化,*                 STATE_CONNECTED 0,*                 STATE_CONNECTING 1,*                 STATE_DISCONNECTED 2,*                 STATE_DISCONNECTING 3*/private BluetoothGattCallback mGattCallback = new BluetoothGattCallback() {@SuppressLint("MissingPermission")@Overridepublic void onConnectionStateChange(BluetoothGatt gatt, int status, int newState) {//连接成功if(newState == BluetoothProfile.STATE_CONNECTED){//进行服务发现gatt.discoverServices();Log.d(TAG,"连接成功");}else if(newState == BluetoothProfile.STATE_DISCONNECTED){//连接断开,处理断开逻辑Log.d(TAG,"连接断开");}}@SuppressLint("MissingPermission")@Overridepublic void onServicesDiscovered(BluetoothGatt gatt, int status) {Log.d(TAG,"onServicesDiscovered : " + status + " ==>> " + gatt.toString());//发现服务成功,处理服务和特征值if(status == BluetoothGatt.GATT_SUCCESS){//发送消息mGatt = gatt;BluetoothGattService service = gatt.getService(UUID.fromString("0000180a-0000-1000-8000-00805F9B34FB"));mWriter = service.getCharacteristic(UUID.fromString("00002ad9-0000-1000-8000-00805F9B34FB"));//打开消息通知mGatt.setCharacteristicNotification(mWriter,true);BluetoothGattDescriptor descriptor = mWriter.getDescriptor(UUID.fromString("00002902-0000-1000-8000-00805f9b34fb"));descriptor.setValue(BluetoothGattDescriptor.ENABLE_NOTIFICATION_VALUE);mGatt.writeDescriptor(descriptor);}else {Log.d(TAG,"发现服务失败");}}@Overridepublic void onCharacteristicRead(BluetoothGatt gatt, BluetoothGattCharacteristic characteristic, int status) {Log.e(TAG,"onCharacteristicRead " + status);//读取特征成功,处理特征值if(status == BluetoothGatt.GATT_SUCCESS){}}@Overridepublic void onCharacteristicWrite(BluetoothGatt gatt, BluetoothGattCharacteristic characteristic, int status) {Log.e(TAG,"onCharacteristicWrite " + status);//写入特征成功if(status == BluetoothGatt.GATT_SUCCESS){Log.d(TAG,"发送成功");}else {Log.d(TAG,"发送失败");}}@Overridepublic void onCharacteristicChanged(BluetoothGatt gatt, BluetoothGattCharacteristic characteristic) {//接收到数据byte[] data = characteristic.getValue();//处理接收到的数据Log.d(TAG,"Received data: " + bytesToHexFun2(data));}@Overridepublic void onDescriptorRead(BluetoothGatt gatt, BluetoothGattDescriptor descriptor, int status) {super.onDescriptorRead(gatt, descriptor, status);}@Overridepublic void onDescriptorWrite(BluetoothGatt gatt, BluetoothGattDescriptor descriptor, int status) {super.onDescriptorWrite(gatt, descriptor, status);}@Overridepublic void onReliableWriteCompleted(BluetoothGatt gatt, int status) {super.onReliableWriteCompleted(gatt, status);}@Overridepublic void onReadRemoteRssi(BluetoothGatt gatt, int rssi, int status) {super.onReadRemoteRssi(gatt, rssi, status);}@Overridepublic void onMtuChanged(BluetoothGatt gatt, int mtu, int status) {super.onMtuChanged(gatt, mtu, status);}@Overridepublic void onServiceChanged(@NonNull BluetoothGatt gatt) {super.onServiceChanged(gatt);}@Overridepublic void onPhyUpdate(BluetoothGatt gatt, int txPhy, int rxPhy, int status) {super.onPhyUpdate(gatt, txPhy, rxPhy, status);}@Overridepublic void onPhyRead(BluetoothGatt gatt, int txPhy, int rxPhy, int status) {super.onPhyRead(gatt, txPhy, rxPhy, status);}};private char[] HEX_CHAR = {'0', '1', '2', '3', '4', '5','6', '7', '8', '9', 'a', 'b', 'c', 'd', 'e', 'f'};private  String bytesToHexFun2(byte[] bytes) {char[] buf = new char[bytes.length * 2];int index = 0;for(byte b : bytes) { // 利用位运算进行转换,可以看作方法一的变种buf[index++] = HEX_CHAR[b >>> 4 & 0xf];buf[index++] = HEX_CHAR[b & 0xf];}return new String(buf);}}
到此为止,我们的程序就到这里了,蓝牙搜索,配对,连接,通信便已经成功实现了,大家可以把代码copy一下拿去运行,具体效果演示图在文章最上方,大家还想了解更多关于Android蓝牙开发的可以继续看我下一篇给大家的分享