一.Spring概念:
1.Spring就是包含了众多工具方法的IoC容器.
2.IoC容器:控制反转,指的是对象的生命周期,将对象的生命周期(什么时候创建,销毁)交给Spring进行管理.
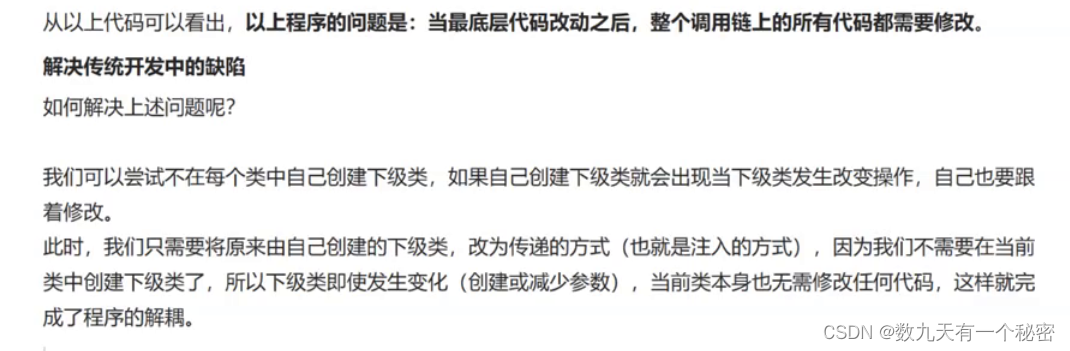
在传统开发中,如果A类依赖B类,会在A类中创建B类的实例,如果B类增加一个属性,那么使用B类的构造方法需要修改代码,如果使用IoC的观念,类的实例的创建全部在app类的方法中(由Spring完成),这样B类发生改变,A类不需要修改代码.
3.为什么要使用IoC容器:为了解耦合.
4.IoC容器的两个基本功能是将对象存入容器和从容器中取出容器.
5.DI:依赖注入,在程序运行期间,动态的将某个对象传入到当前类中的行为.
6(重要).IoC和DI的区别:IoC是一种思想,DI是一种具体的实现技术.
二.Spring创建:
1.步骤:

<dependencies><dependency><groupId>org.springframework</groupId><artifactId>spring-context</artifactId><version>5.2.3.RELEASE</version></dependency><dependency><groupId>org.springframework</groupId><artifactId>spring-beans</artifactId><version>5.2.3.RELEASE</version></dependency>
</dependencies>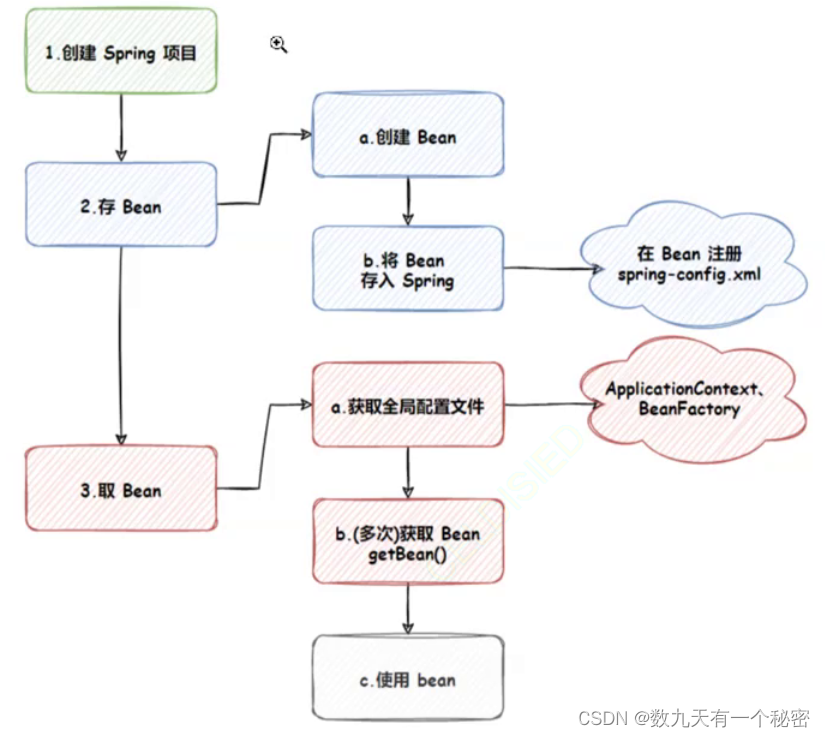
2.Spring对象的存储:
a.创建Bean对象,随便写一个类.
b.将Bean对象存到Spring当中(使用xml):resourses目录下创建Spring配置文件(命名无要求,这里我用spring-config.xml),然后将Bean配置进去,使用下面第二段代码.
<?xml version="1.0" encoding="UTF-8"?>
<beans xmlns="http://www.springframework.org/schema/beans"xmlns:xsi="http://www.w3.org/2001/XMLSchema-instance"xmlns:content="http://www.springframework.org/schema/context"xsi:schemaLocation="http://www.springframework.org/schema/beans http://www.springframework.org/schema/beans/spring-beans.xsd http://www.springframework.org/schema/context https://www.springframework.org/schema/context/spring-context.xsd"><bean id="user" class="User"></bean>
</beans>
3.从Spring中读取到Bean对象:
a.先得到Spring的上下文.
ApplicationContext context = new ClassPathXmlApplicationContext("spring-config.xml");b.得到Bean对象(三种方法,推荐第三种).
//User user = (User)context.getBean("user"); // 这里需要和xml文件中的bean标签的id名称对应,如果是空指针,强转会出错//User user = context.getBean(User.class); // 这种方法不推荐,如果同一个类注入多次就会发生问题User user = context.getBean("user", User.class); // 推荐使用这种方法,不用强制,不会出错注意起名规范(xml中bean标签id不重复,class用域名(如果没有可省略)+类名),名字对应.
c.使用Bean(可选).
System.out.println(user.hello());d.使用BeanFactory方式.
BeanFactory context = new XmlBeanFactory(new ClassPathResource("spring-config.xml")); // 古老写法ApplicationContext和BeanFactory区别:
1)相同点
a)都可以得到Spring上下文对象.
b)都是来着Spring的顶级接口.
2)不同的
a) ApplicationContext是BeanFactory的子类,前者功能更多(国际化支持,资源方法,事件传播).
b)性能区别: ApplicationContext是饿汉模式,BeanFactory是懒汉模式,前者快,后者慢.
三.Spring更简单地读取和存储对象
1.依靠注解,先配置扫描路径
<?xml version="1.0" encoding="UTF-8"?>
<beans xmlns="http://www.springframework.org/schema/beans"xmlns:xsi="http://www.w3.org/2001/XMLSchema-instance"xmlns:content="http://www.springframework.org/schema/context"xsi:schemaLocation="http://www.springframework.org/schema/beans http://www.springframework.org/schema/beans/spring-beans.xsd http://www.springframework.org/schema/context https://www.springframework.org/schema/context/spring-context.xsd"><content:component-scan base-package="com"></content:component-scan>
</beans>
2.注解
a.使用类注解
注意:默认使用类名的首字母改小写作为id.


关于这个通配符(**),首先一定是两个(*),然后,ApplicationContext的对象不能使用,BeanFactory对象可以使用,但是效率很低,因为要扫描所有的路径,建议创建合适的目录。
Demo1 demo1 = context.getBean("demo1", Demo1.class);b.使用方法注解
1)需要重新写一个类,通过编写多个不同的方法,返回多个同一个类的不同对象.

2)@Bean注解可以给一个对象起多个(包括一个)名字,起了名字之后就不能使用默认的名字了.
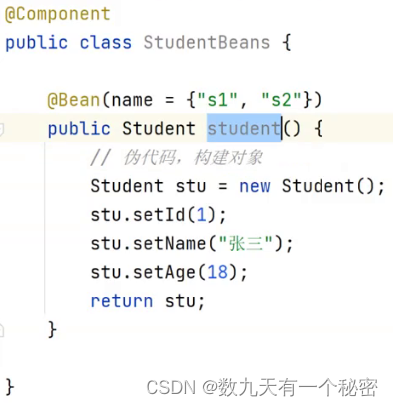
3)ApplicationContext的对象可以使用,BeanFactory对象不能使用.
4)代码
public class Student {public void hello() {System.out.println("hello");}
}
@Controller
public class StudentBeans {@Bean(name = {"s1", "s2"})public Student student() {Student student = new Student();return student;}}public class App {public static void main(String[] args) {ApplicationContext context = new ClassPathXmlApplicationContext("spring-config.xml");Student student = context.getBean("s2", Student.class);System.out.println(student);}
}
3.更加简单的获取Bean对象的方法(常用)
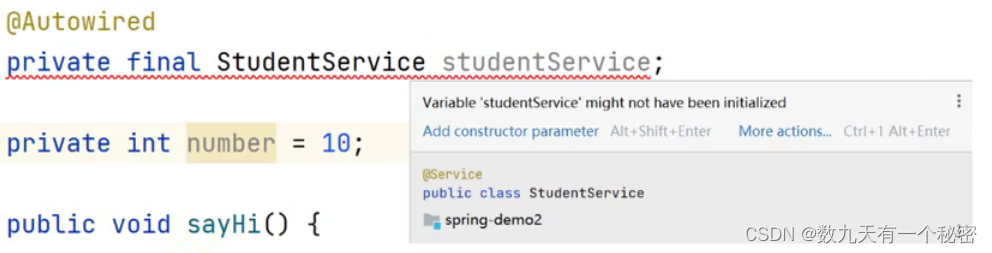
a.属性注入(不建议使用,但是目前最常用)

注意:不能在main方法中使用.
代码实现:
@Service
public class Student {public void hello() {System.out.println("hello");}
}
@Controller
public class StudentBeans {@Autowiredprivate Student student;public void print1() {student.hello();}public void hi() {System.out.println("hi");}
}
public class App {public static void main(String[] args) {ApplicationContext context = new ClassPathXmlApplicationContext("spring-config.xml");StudentBeans sc = context.getBean("studentBeans", StudentBeans.class);sc.print1();}
}缺点:

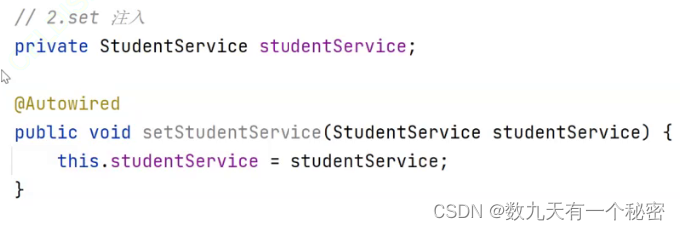
b.set注入(很危险,不推荐使用)
代码实现:
@Service
public class Student {public void hello() {System.out.println("hello");}
}
@Controller
public class StudentBeans {private Student student;@Autowiredpublic void setStudent(Student student) {this.student = student;}public void print1() {student.hello();}public void hi() {System.out.println("hi");}
}public class App {public static void main(String[] args) {ApplicationContext context = new ClassPathXmlApplicationContext("spring-config.xml");StudentBeans sc = context.getBean("studentBeans", StudentBeans.class);sc.print1();}
}优点:相较于属性注入,更符合单一设计原则.
缺点:

c.构造方法注入(推荐使用)
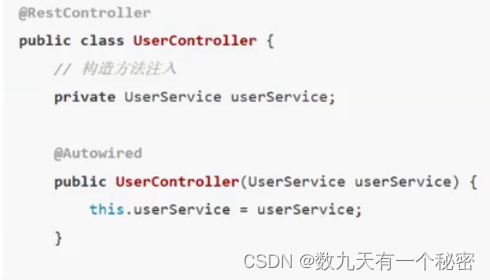
注意:

代码:
@Service
public class Student {public void hello() {System.out.println("hello");}
}
@Controller
public class StudentBeans {private Student student;//@Autowiredpublic StudentBeans(Student student) {this.student = student;}public void print1() {student.hello();}public void hi() {System.out.println("hi");}
}
public class App {public static void main(String[] args) {ApplicationContext context = new ClassPathXmlApplicationContext("spring-config.xml");StudentBeans sc = context.getBean("studentBeans", StudentBeans.class);sc.print1();}
}优点:
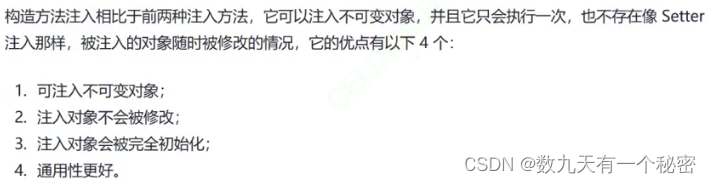

缺点:没有属性注入简单.
d.

如果使用@Bean注解,可以注入一个类的多个对象,那么@Resource和@Autowired需要根据对象名(@Bean注解的方法名) 来获取指定对象.
1)@Resource需要设置参数(@Resource(name = "?")).
2)@Autowired有两种方法
a)对象名和@Bean注解的方法名相同,但是不推荐使用,如果@Bean注解的方法是别人写的,这样会沿用别人的名字,可能会发生命名不规范.
b)同时使用@Qualifier("??").
代码
public class Student {private String hello;public Student(String hello) {this.hello = hello;}public void hello() {System.out.println(hello);}
}
@Component
public class StudentBeans {@Beanpublic Student student1() {Student student = new Student("1");return student;}@Beanpublic Student student2() {Student student = new Student("2");return student;}}
@Controller
public class Test {
//    @Autowired
//    private Student student1;
//    public void print1() {
//        student1.hello();
//    }//    @Autowired
//    @Qualifier("student2")
//    private Student student;
//        public void print1() {
//        student.hello();
//    }@Resource(name = "student2")private Student student;public void print1() {student.hello();}
}
public class App {public static void main(String[] args) {ApplicationContext context = new ClassPathXmlApplicationContext("spring-config.xml");Test test1 = context.getBean("test", Test.class);test1.print1();}
}
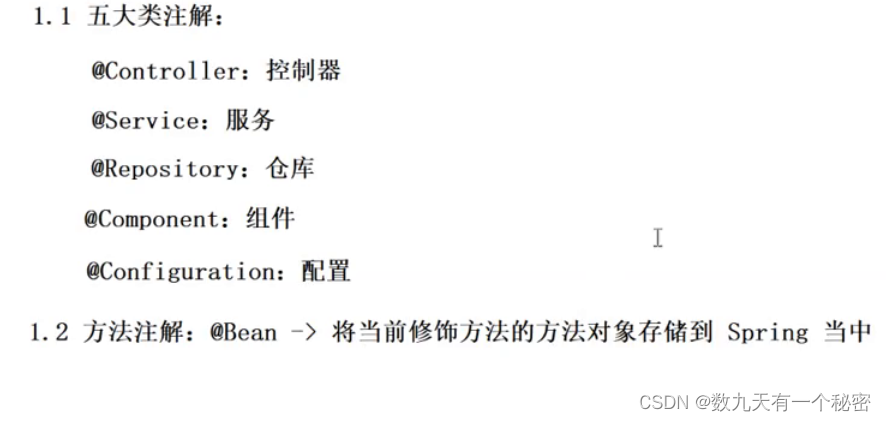
四.五大类注解(重点)
1.作用
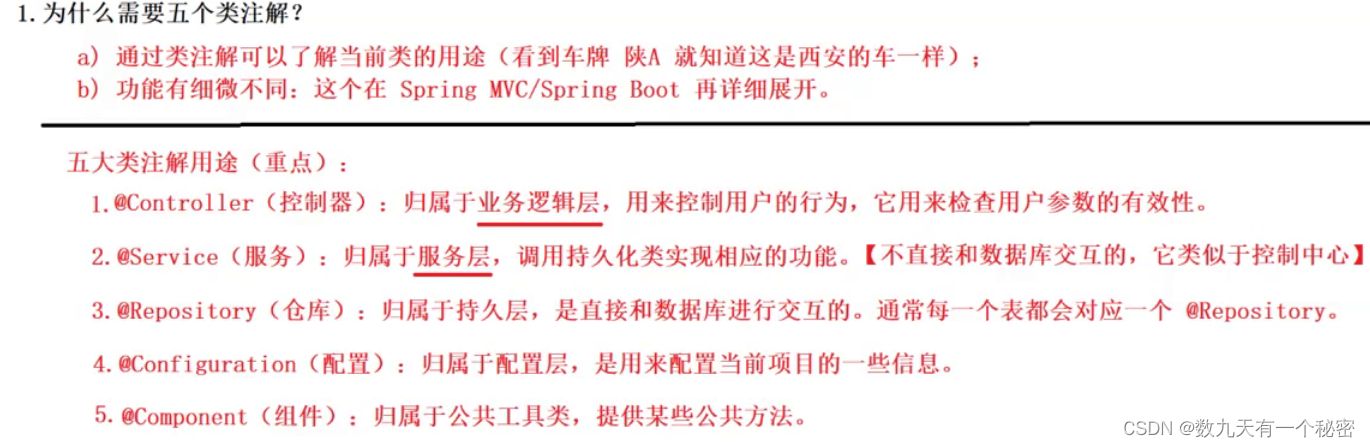

2.区别:@Component是其它四个类注解的父类.