1.环境准备
1、导入sql脚本:
create database if not exists springboot default charset utf8mb4;use springboot;create table if not exists `user`
(`id`       bigint(20) primary key auto_increment comment '主键id',`username` varchar(255)   not null comment '用户名',`sex`      char(1)        not null comment '性别',`phone`    varchar(22)    not null comment '手机号',`city`     varchar(255)   not null comment '所在城市',`position` varchar(255)   not null comment '职位',`salary`   decimal(18, 2) not null comment '工资:长度18位,保留2位小数'
) engine InnoDB comment '用户表';INSERT INTO `user` (`username`, `sex`, `phone`, `city`, `position`, `salary`) VALUES
('张三', '男', '13912345678', '北京', '软件工程师', 10000.00),
('李四', '女', '13723456789', '上海', '数据分析师', 12000.00),
('王五', '男', '15034567890', '广州', '产品经理', 15000.00),
('赵六', '女', '15145678901', '深圳', '前端工程师', 11000.00),
('刘七', '男', '15856789012', '成都', '测试工程师', 9000.00),
('陈八', '女', '13967890123', '重庆', 'UI设计师', 8000.00),
('朱九', '男', '13778901234', '武汉', '运维工程师', 10000.00),
('杨十', '女', '15089012345', '南京', '数据工程师', 13000.00),
('孙十一', '男', '15190123456', '杭州', '后端工程师', 12000.00),
('周十二', '女', '15801234567', '天津', '产品设计师', 11000.00);

2、创建springboot工程 (springboot版本为2.7.13)
3、引入依赖:
<dependencies><dependency><groupId>org.springframework.boot</groupId><artifactId>spring-boot-starter-web</artifactId></dependency><dependency><groupId>org.springframework.boot</groupId><artifactId>spring-boot-test</artifactId></dependency><dependency><groupId>org.projectlombok</groupId><artifactId>lombok</artifactId></dependency><dependency><groupId>mysql</groupId><artifactId>mysql-connector-java</artifactId><version>8.0.13</version></dependency><dependency><groupId>com.baomidou</groupId><artifactId>mybatis-plus-boot-starter</artifactId><version>3.5.2</version></dependency>
</dependencies>
4、修改yml配置:
server:port: 8001# 数据库配置
spring:datasource:driver-class-name: com.mysql.cj.jdbc.Driverurl: jdbc:mysql://localhost:3306/springboot?useUnicode=true&characterEncoding=utf-8&allowMultiQueries=true&useSSL=false&serverTimezone=GMT%2b8&allowPublicKeyRetrieval=trueusername: rootpassword: 123456# mybatisplus配置
mybatis-plus:mmapper-locations: classpath:mapper/*.xml #mapper文件存放路径type-aliases-package: cn.z3inc.exceldemo.entity # 类型别名(实体类所在包)configuration:log-impl: org.apache.ibatis.logging.stdout.StdOutImpl  #配置标准sql输出
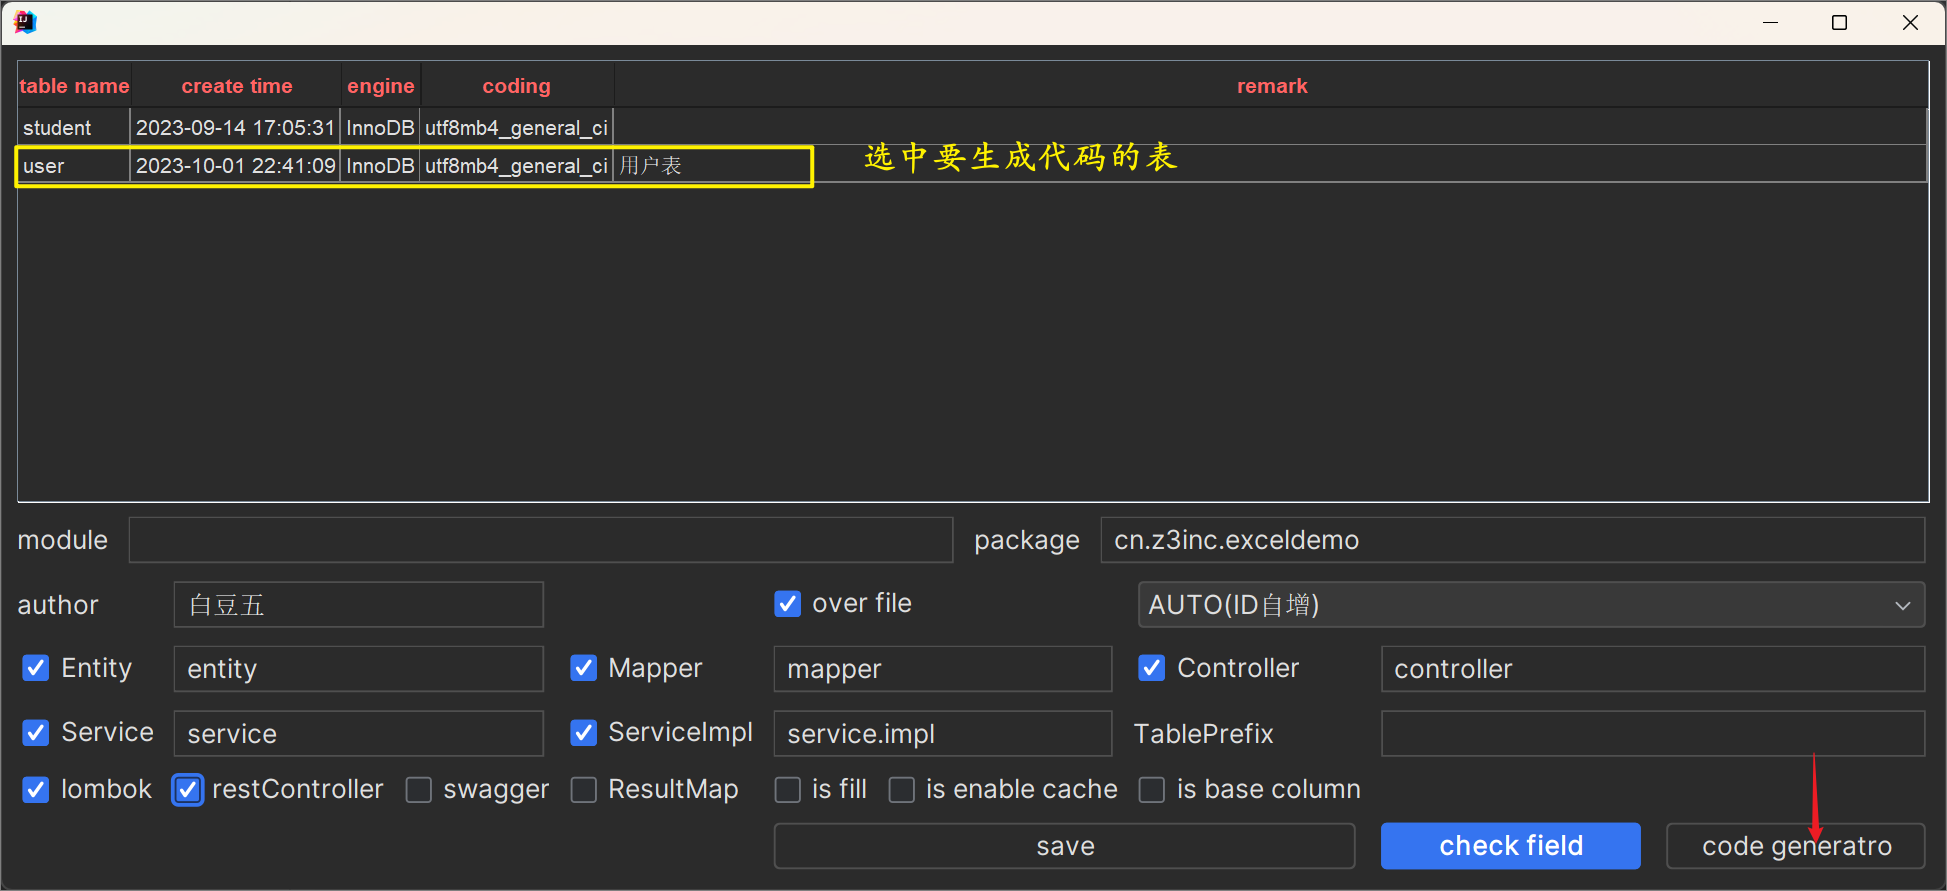
5、使用 MyBatisPlus 插件生成基础代码:

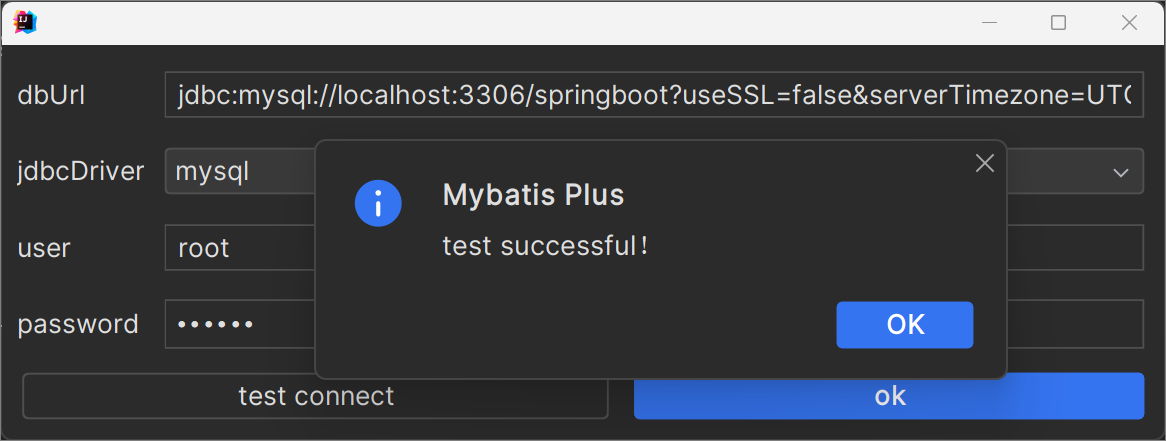
① 配置数据库:

② 使用代码生成器生成代码:


2. POI
Excel报表的两种方式:
在企业级应用开发中,Excel报表是一种常见的报表需求,Excel报表开发一般分为两种形式:
-
把Excel中的数据导入到系统中;(上传)
-
通过Java代码生成Excel报表。(下载)
Excel版本:
目前世面上的Excel分为两个大版本:Excel2003 和 Excel2007及以上版本;
Excel2003是一个特有的二进制格式,其核心结构是复合文档类型的结构,存储数据量较小;Excel2007 的核心结构是 XML 类型的结构,采用的是基于 XML 的压缩方式,使其占用的空间更小,操作效率更高。
| Excel 2003 | Excel 2007 | |
|---|---|---|
| 后缀 | xls | xlsx |
| 结构 | 二进制格式,其核心结构是复合文档类型的结构 | XML类型结构 |
| 单sheet数据量(sheet,工作表) | 表格共有65536行,256列 | 表格共有1048576行,16384列 |
| 特点 | 存储容量有限 | 基于xml压缩,占用空间小,操作效率高 |
Apache POI:
Apache POI(全称:Poor Obfuscation Implementation),是Apache软件基金会的一个开源项目,它提供了一组API,可以让Java程序读写 Microsoft Office 格式的文件,包括 word、excel、ppt等。
Apache POI是目前最流行的操作Microsoft Office的API组件,借助POI可以为工作提高效率,如 数据报表生成,数据批量上传,数据备份等工作。
官网地址:https://poi.apache.org/
POI针对Excel的API如下:
- Workbook:工作薄,Excel的文档对象,针对不同的Excel类型分为:HSSFWorkbook(2003)和XSSFWorkbook(2007);
- Sheet:Excel的工作单(表);
- Row:Excel的行;
- Cell:Excel的格子,单元格。
Java中常用的excel报表工具有:POI、easyexcel、easypoi等。
POI快速入门:
引入POI依赖:
<!--excel  POI依赖-->
<dependency><groupId>org.apache.poi</groupId><artifactId>poi</artifactId><version>4.0.1</version>
</dependency>
<dependency><groupId>org.apache.poi</groupId><artifactId>poi-ooxml</artifactId><version>4.0.1</version>
</dependency>
<dependency><groupId>org.apache.poi</groupId><artifactId>poi-ooxml-schemas</artifactId><version>4.0.1</version>
</dependency>
示例1:批量写操作(大数据量时会出现内存异常问题)
写入excel文件步骤:
- 创建工作簿:workbook
- 创建工作表:sheet
- 创建行:row
- 创建列(单元格):cell
- 具体数据写入
package cn.z3inc.exceldemo.controller;import cn.z3inc.exceldemo.entity.User;
import cn.z3inc.exceldemo.service.IUserService;
import lombok.RequiredArgsConstructor;
import org.apache.poi.ss.usermodel.Cell;
import org.apache.poi.ss.usermodel.Row;
import org.apache.poi.ss.usermodel.Sheet;
import org.apache.poi.xssf.usermodel.XSSFWorkbook;
import org.springframework.web.bind.annotation.CrossOrigin;
import org.springframework.web.bind.annotation.RequestMapping;
import org.springframework.web.bind.annotation.RestController;import javax.servlet.ServletOutputStream;
import javax.servlet.http.HttpServletResponse;
import java.io.FileOutputStream;
import java.io.IOException;
import java.util.List;/*** <p>* 用户表 前端控制器* </p>** @author 白豆五* @since 2023-10-01*/
@CrossOrigin
@RestController
@RequiredArgsConstructor
@RequestMapping("/user")
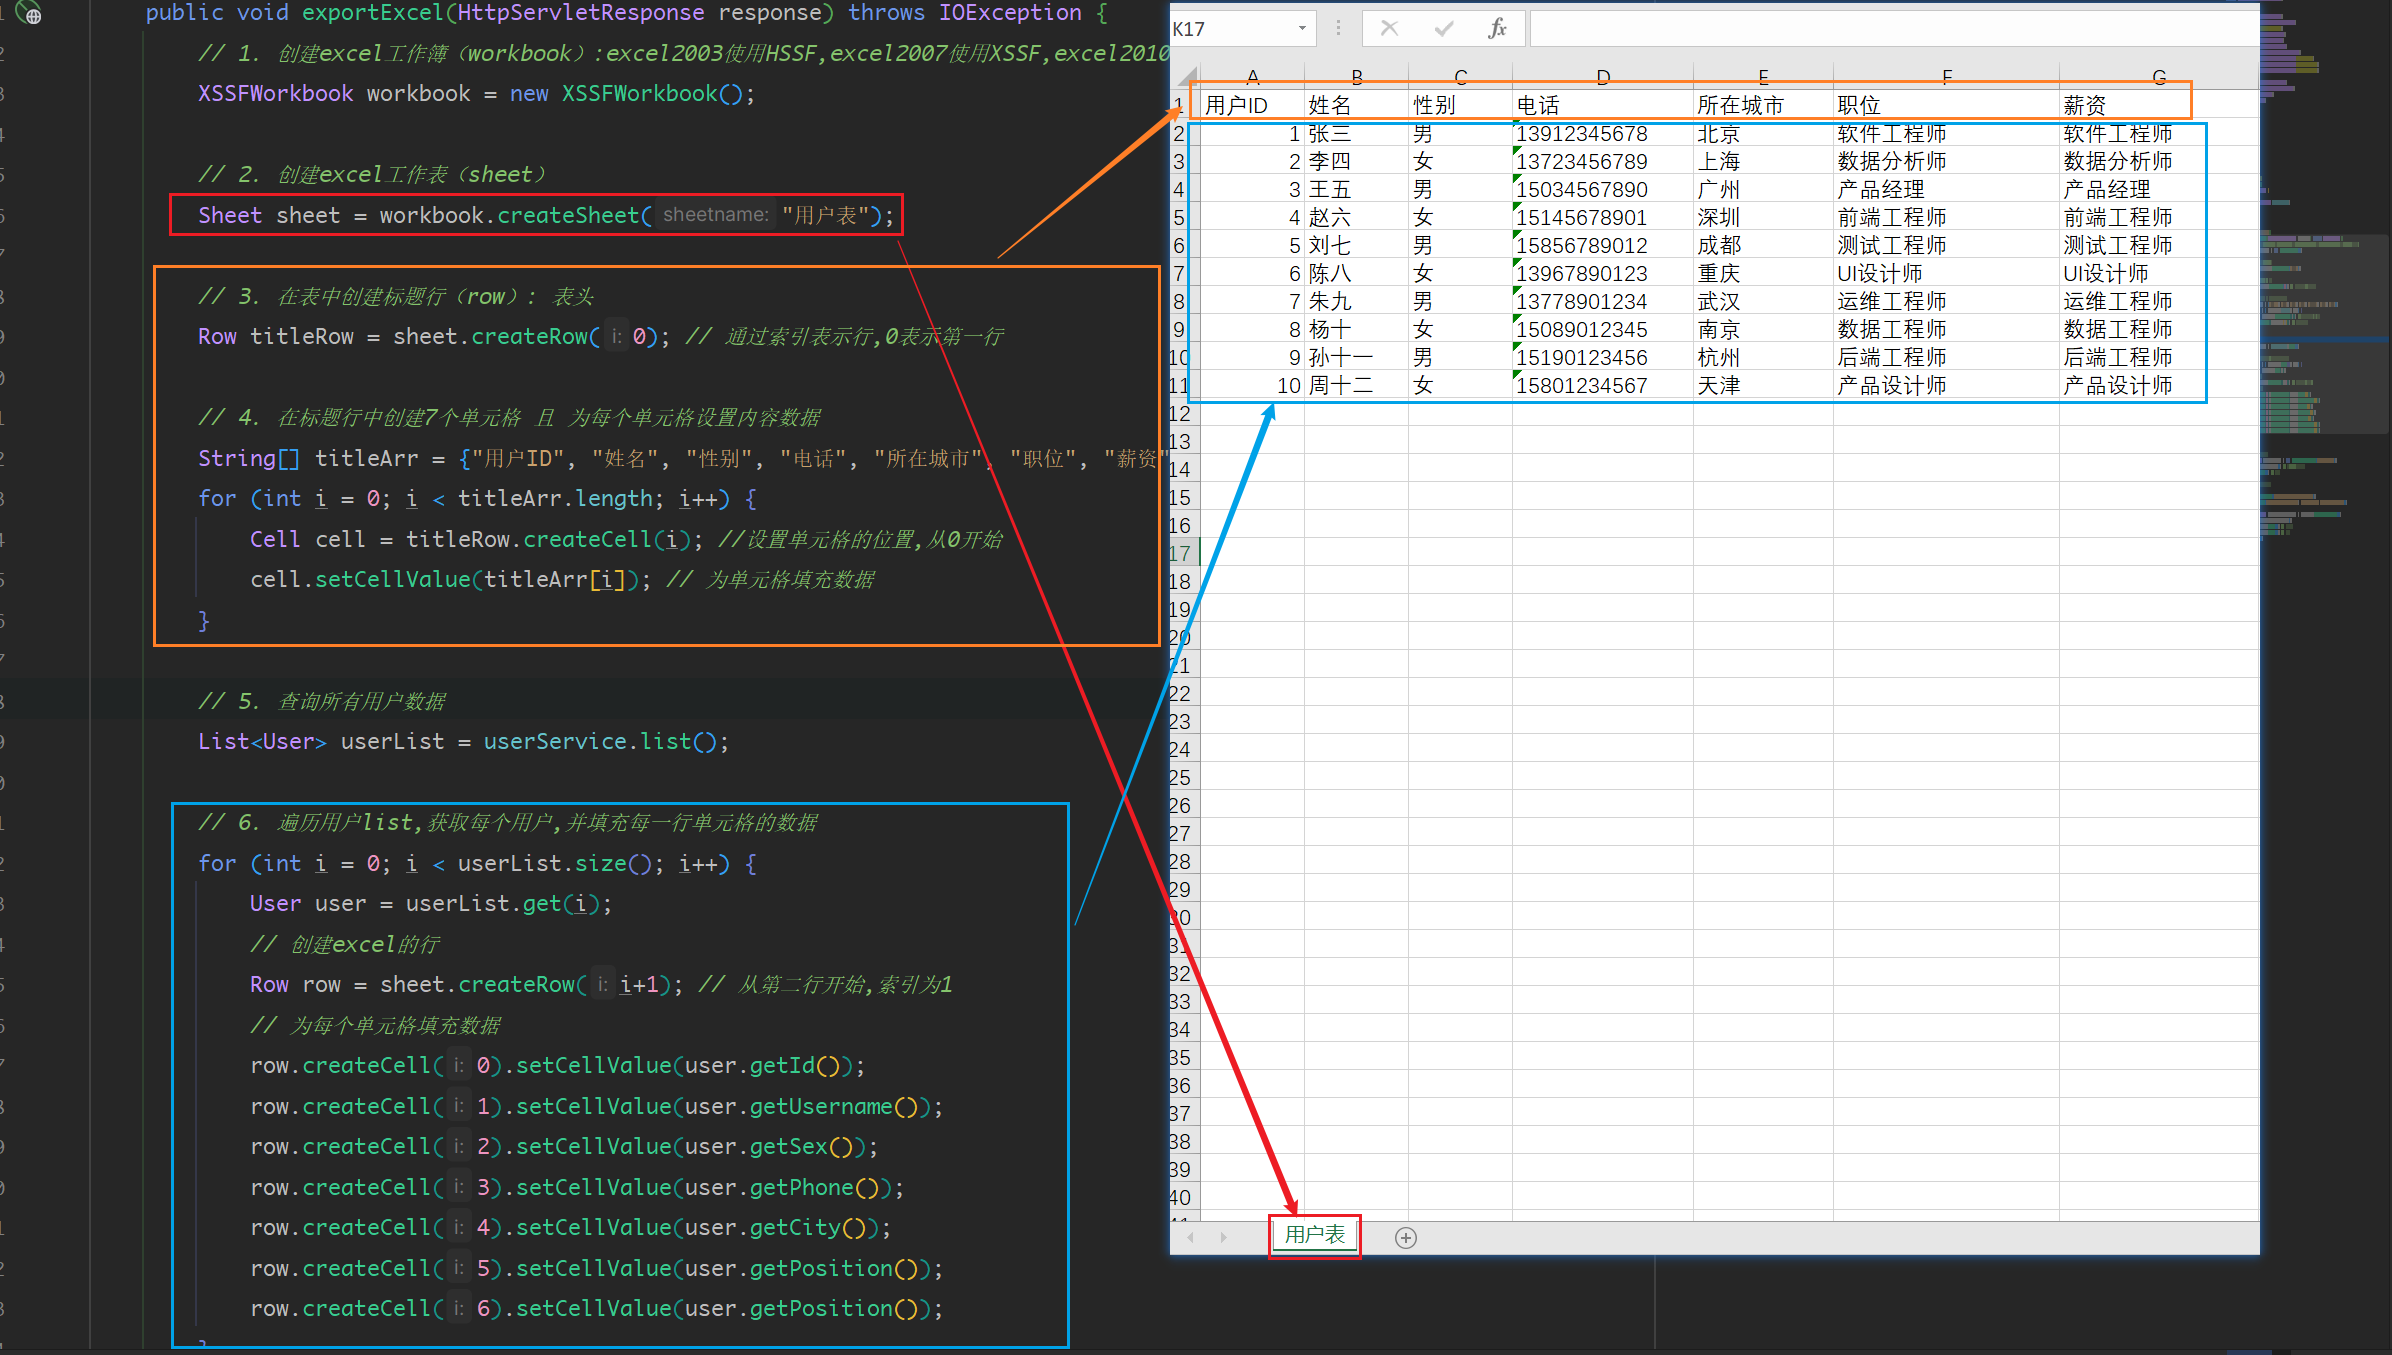
public class UserController {private final IUserService userService;/*** 导出excel*/@RequestMapping("/export")public void exportExcel(HttpServletResponse response) throws IOException {// 1. 创建excel工作簿(workbook):excel2003使用HSSF,excel2007使用XSSF,excel2010使用SXSSF(大数据量)XSSFWorkbook workbook = new XSSFWorkbook();// 2. 创建excel工作表(sheet)Sheet sheet = workbook.createSheet("用户表");// 3. 在表中创建标题行(row): 表头Row titleRow = sheet.createRow(0); // 通过索引表示行,0表示第一行// 4. 在标题行中创建7个单元格 且 为每个单元格设置内容数据String[] titleArr = {"用户ID", "姓名", "性别", "电话", "所在城市", "职位", "薪资"};for (int i = 0; i < titleArr.length; i++) {Cell cell = titleRow.createCell(i); //设置单元格的位置,从0开始cell.setCellValue(titleArr[i]); // 为单元格填充数据}// 5. 查询所有用户数据List<User> userList = userService.list();// 6. 遍历用户list,获取每个用户,并填充每一行单元格的数据for (int i = 0; i < userList.size(); i++) {User user = userList.get(i);// 创建excel的行Row row = sheet.createRow(i+1); // 从第二行开始,索引为1// 为每个单元格填充数据row.createCell(0).setCellValue(user.getId());row.createCell(1).setCellValue(user.getUsername());row.createCell(2).setCellValue(user.getSex());row.createCell(3).setCellValue(user.getPhone());row.createCell(4).setCellValue(user.getCity());row.createCell(5).setCellValue(user.getPosition());row.createCell(6).setCellValue(user.getSalary().doubleValue());}// 7. 输出文件// 7.1 把excel文件写到磁盘上FileOutputStream outputStream = new FileOutputStream("d:/1.xlsx");workbook.write(outputStream); // 把excel写到输出流中outputStream.close(); // 关闭流// 7.2 把excel文件输出到浏览器上// 设置响应头信息response.setContentType("application/vnd.ms-excel");response.setHeader("Content-Disposition", "attachment; filename=1.xlsx");ServletOutputStream servletOutputStream = response.getOutputStream();workbook.write(servletOutputStream);servletOutputStream.flush(); // 刷新缓冲区servletOutputStream.close(); // 关闭流workbook.close();}
}
示例2:大数量写操作
/*** 大数据量批量导出excel:SXSSF(同样兼容XSSF)* 官方提供了SXSSF来解决大文件写入问题,它可以写入非常大量的数据,比如上百万条数据,并且写入速度更快,占用内存更少* SXSSF在写入数据时会将数据分批写入硬盘(会产生临时文件),而不是一次性将所有数据写入硬盘。* SXSSF通过滑动窗口限制内存读取的行数(默认100行,超过100行就会写入磁盘),而XSSF将文档中所有行加载到内存中。那些不在滑动窗口中的数据是不能访问的,因为它们已经被写到磁盘上了。这样可以节省大量内存空间 。*/
@RequestMapping("/export2")
public void exportExcel2(HttpServletResponse response) throws IOException {long star = System.currentTimeMillis();// 1. 创建excel工作簿(workbook):SXSSFWorkbookSXSSFWorkbook workbook = new SXSSFWorkbook();//默认窗口大小为100// 2. 创建excel工作表(sheet)Sheet sheet = workbook.createSheet("用户表");// 3. 在表中创建标题行(row): 表头Row titleRow = sheet.createRow(0); // 通过索引表示行,0表示第一行// 4. 在标题行中创建7个单元格 且 为每个单元格设置内容数据String[] titleArr = {"用户ID", "姓名", "性别", "电话", "所在城市", "职位", "薪资"};for (int i = 0; i < titleArr.length; i++) {Cell cell = titleRow.createCell(i); //设置单元格的位置,从0开始cell.setCellValue(titleArr[i]); // 为单元格填充数据}// 5. 查询所有用户数据List<User> userList = userService.list();// 6. 遍历用户list,获取每个用户,并填充每一行单元格的数据for (int i = 0; i < 65536; i++) {User user;if (i > userList.size() - 1) {user = userList.get(userList.size() - 1);} else {user = userList.get(i);}// 创建excel的行Row row = sheet.createRow(i + 1); // 从第二行开始,索引为1// 为每个单元格填充数据row.createCell(0).setCellValue(user.getId());row.createCell(1).setCellValue(user.getUsername());row.createCell(2).setCellValue(user.getSex());row.createCell(3).setCellValue(user.getPhone());row.createCell(4).setCellValue(user.getCity());row.createCell(5).setCellValue(user.getPosition());row.createCell(6).setCellValue(user.getPosition());}// 7. 输出文件// 7.1 把excel文件写到磁盘上FileOutputStream outputStream = new FileOutputStream("d:/2.xlsx");workbook.write(outputStream); // 把excel写到输出流中outputStream.close(); // 关闭流workbook.close();long end = System.currentTimeMillis();log.info("大数据量批量数据写入用时: {} ms", end - star);
}
经测试XSSF大概十秒左右输出excel文件,而SXSSF一秒左右输出excel文件。
示例:读取excel文件
读取excel文件步骤:(通过文件流读取)
- 获取工作簿
- 获取工作表(sheet)
- 获取行(row)
- 获取单元格(cell)
- 读取数据
// 读取excel文件
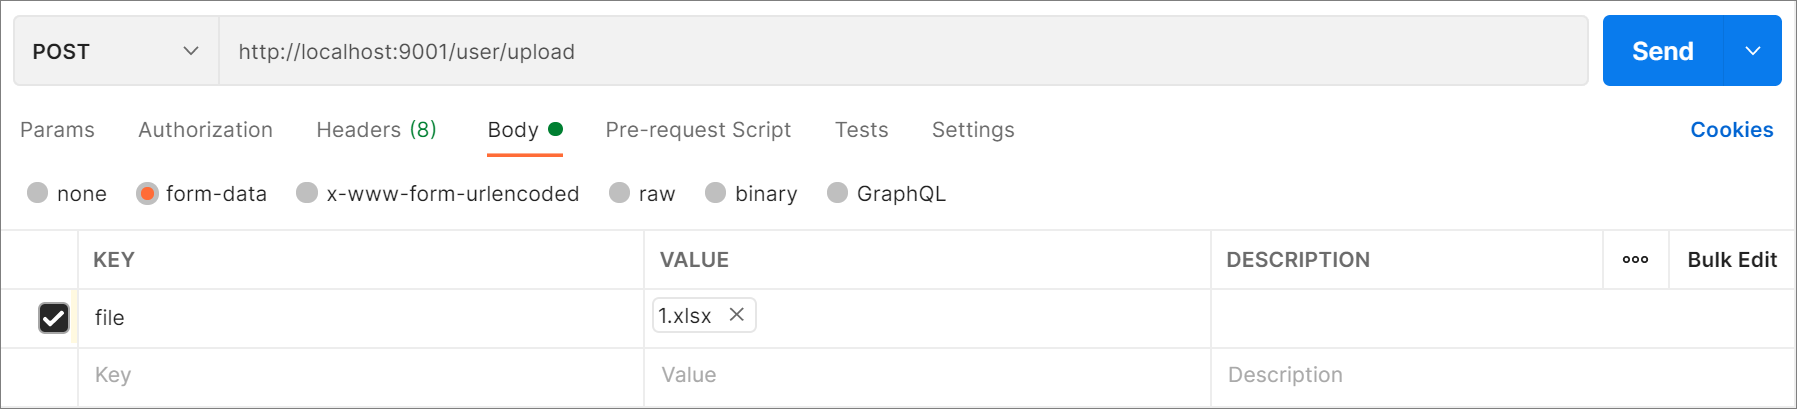
@RequestMapping("/upload")
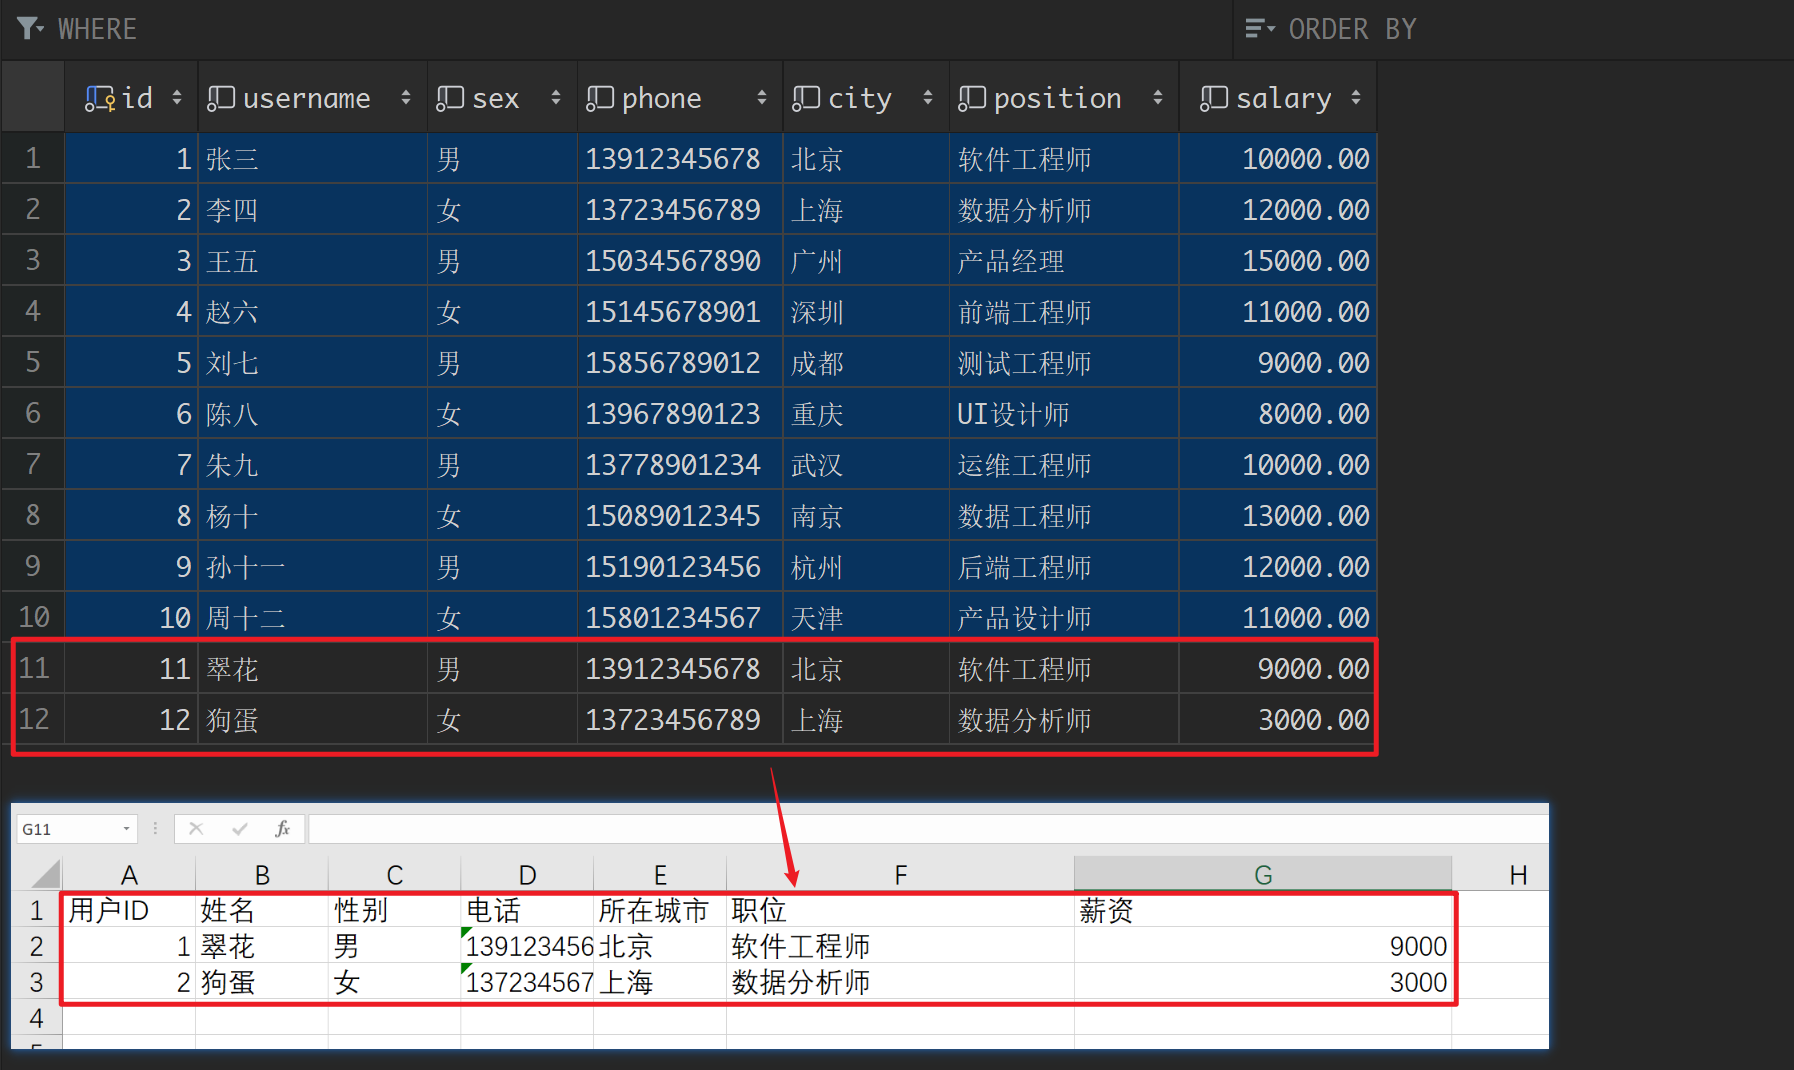
public void readExcel(MultipartFile file) {InputStream is = null;XSSFWorkbook workbook = null;try {// 1. 创建excel工作簿(workbook)is = file.getInputStream();workbook = new XSSFWorkbook(is);// 2. 获取要解析的工作表(sheet)Sheet sheet = workbook.getSheetAt(0); // 获取第一个sheet// 3. 获取表格中的每一行,排除表头,从第二行开始User user;List<User> list = new ArrayList<>();for (int i = 1; i <= sheet.getLastRowNum(); i++) {Row row = sheet.getRow(i); // 获取第i行// 4. 获取每一行的每一列,并为user对象的属性赋值,添加到list集合中user = new User();user.setUsername(row.getCell(1).getStringCellValue());user.setSex(row.getCell(2).getStringCellValue());user.setPhone(row.getCell(3).getStringCellValue());user.setCity(row.getCell(4).getStringCellValue());user.setPosition(row.getCell(5).getStringCellValue());user.setSalary(new BigDecimal(row.getCell(6).getNumericCellValue()));list.add(user);}// 5. 批量保存userService.saveBatch(list);} catch (IOException e) {e.printStackTrace();throw new RuntimeException("批量导入失败");} finally {try {if (is != null) {is.close();}if (workbook != null) {workbook.close();}} catch (IOException e) {e.printStackTrace();throw new RuntimeException("批量导入失败");}}
}

3. EasyExcel
EasyExcel是一个基于Java的、快速、简洁、解决大文件内存溢出的Excel处理工具。他能让你在不用考虑性能、内存的等因素的情况下,快速完成Excel的读、写等功能。
官网地址:https://easyexcel.opensource.alibaba.com/
文档地址:https://easyexcel.opensource.alibaba.com/docs/current/
示例代码:https://github.com/alibaba/easyexcel/tree/master/easyexcel-test/src/test/java/com/alibaba/easyexcel/test/demo
pom依赖:
<!-- https://mvnrepository.com/artifact/com.alibaba/easyexcel -->
<dependency><groupId>com.alibaba</groupId><artifactId>easyexcel</artifactId><version>3.2.1</version>
</dependency>
最后,EasyExcel的官方文档非常全面,我就不一一赘述了。