文章目录
- 1. 写在前面
- 2. 抓包分析
- 3. 接口分析
- 4. 滑动验证码弹出分析
- 5. 滑动验证分析
- 6. 轨迹生成算法实现
- 7. 生成W参数值算法
1. 写在前面
验证码是机器人防护(即爬虫)常用重要手段之一!在爬虫这个领域内专精某一项(验证码识别、JS或者APP逆向)都是可以成为大牛存在的
传统的验证码我们都知道是静态图片的形式,它们包含一些阿拉伯数字跟字母加一些干扰(现在而言的话难度系数极低)。目前高级且复杂的验证码那是五花八门,有成熟方案的厂商也是非常之多

如上图所示,是使用ChatGPT时弹出的验证码!很有创意~
本次主要讲一下滑块验证码,因为目前这类验证码在大部分网站中还是比较常见的,如下所示:
极验、易盾、数美…
分析目标:
aHR0cHM6Ly93d3cuZ2VldGVzdC5jb20vZGVtby9zbGlkZS1mbG9hdC5odG1s
滑动验证码的轨迹加密,是逆向的最终目的!所有厂商验证码都是以下步骤
2. 抓包分析
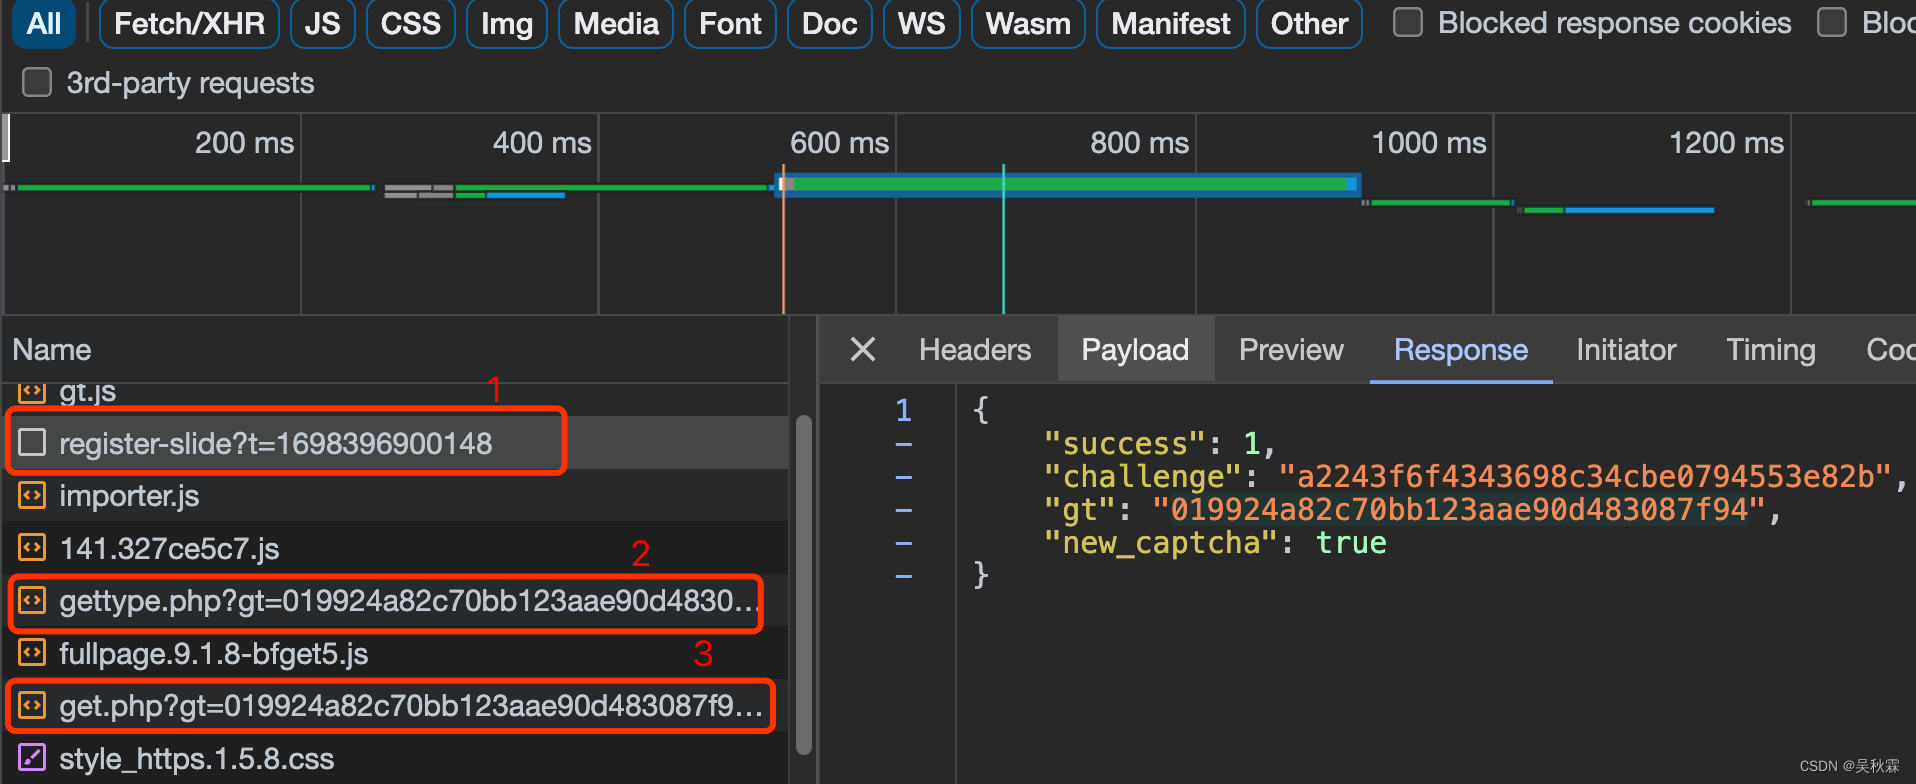
首先我们打开网站抓包分析,分析各个请求。现在我们来分析下面三个可疑的接口
3. 接口分析
第一个URL(register-slide?t=1698396900148)带着时间戳,请求滑动验证码并返回一些重要数据,内容如下所示:
// 响应
{"success": 1,"challenge": "a2243f6f4343698c34cbe0794553e82b","gt": "019924a82c70bb123aae90d483087f94","new_captcha": true
}
这里有两个重要值challenge和gt,这两个值都是加密的,具体作用我们不知,接着向下分析
第二个URL(gettype.php)猜测是获取滑动验证类型的,因为极验有很多种验证码类型。内容如下所示:
// 响应
geetest_1698396906979({"status": "success","data": {"type": "fullpage","static_servers": ["static.geetest.com/", "dn-staticdown.qbox.me/"],"voice": "/static/js/voice.1.2.3.js","click": "/static/js/click.3.0.9.js","beeline": "/static/js/beeline.1.0.1.js","fullpage": "/static/js/fullpage.9.1.8-bfget5.js","slide": "/static/js/slide.7.9.0.js","geetest": "/static/js/geetest.6.0.9.js","aspect_radio": {"slide": 103,"click": 128,"voice": 128,"beeline": 50}}
})
即返回很多验证码用到的JS,其中fullpage.9.1.8.js就是滑动验证码JS,还有与之相关的JS文件
另外第二个URL请求的参数有gt参数,正是第一个URL响应返回的

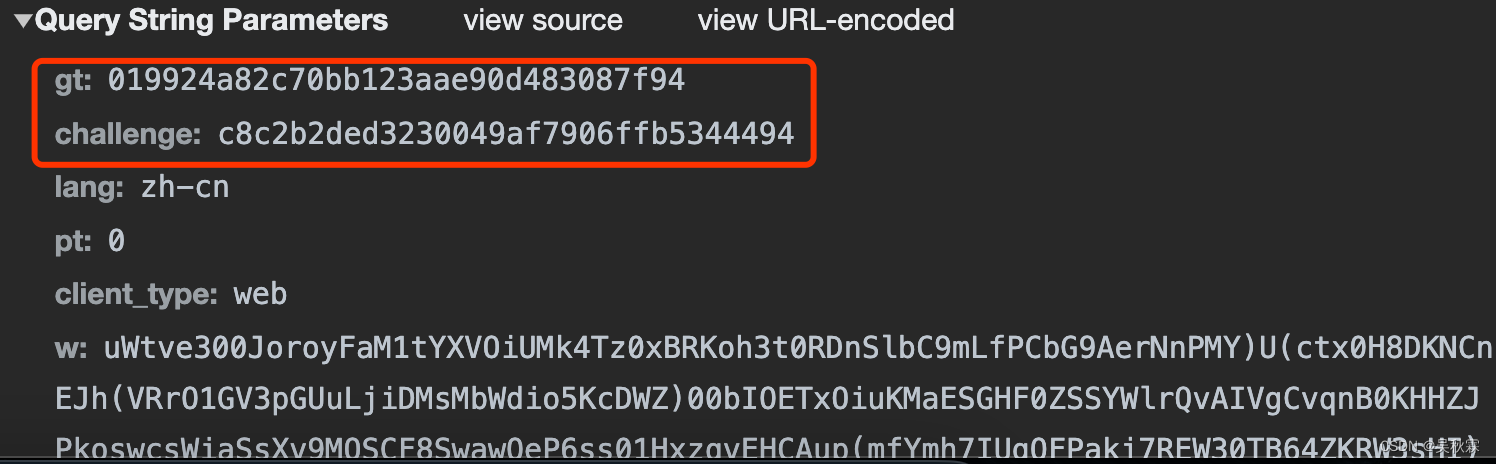
第三个URL(get.php)请求参数包括gt、w和challenge。内容如下所示:
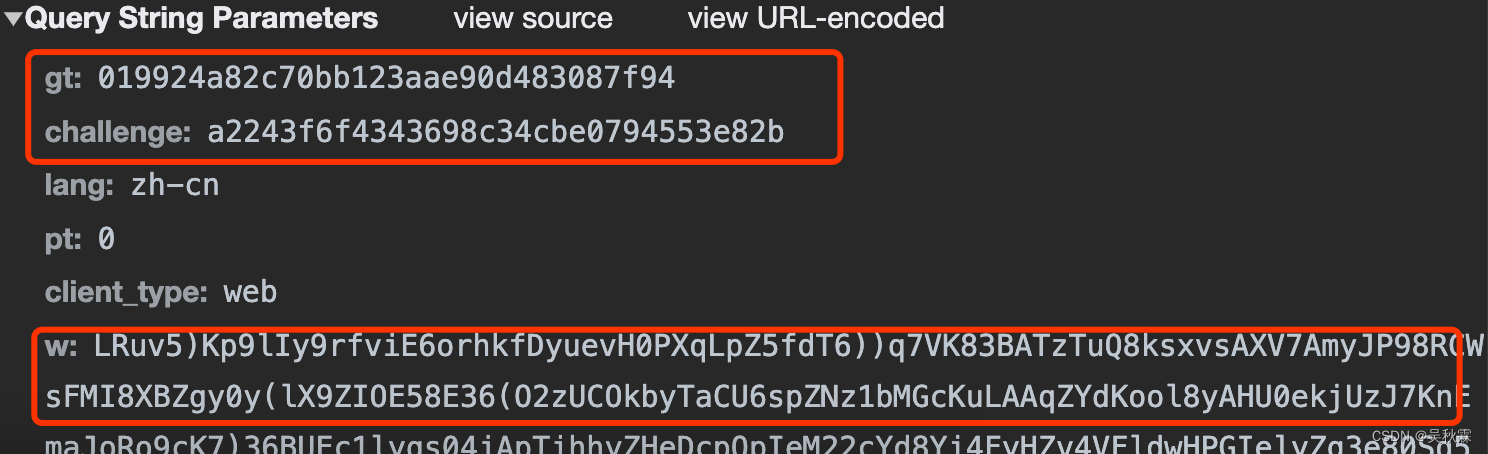
其中gt、challenge均可以通过第一个URL获取拿到。这里说一下w参数,加密的一大串字符串猜测有可能是轨迹、环境检测、参数最终计算生成的
//响应
geetest_1698396904448({"status": "success","data": {"theme": "wind","theme_version": "1.5.8","static_servers": ["static.geetest.com", "dn-staticdown.qbox.me"],"api_server": "api.geetest.com","logo": true,"feedback": "https://www.geetest.com/contact#report","c": [12, 58, 98, 36, 43, 95, 62, 15, 12],"s": "2c506476","i18n_labels": {"copyright": "\u7531\u6781\u9a8c\u63d0\u4f9b\u6280\u672f\u652f\u6301","error": "\u7f51\u7edc\u4e0d\u7ed9\u529b","error_content": "\u8bf7\u70b9\u51fb\u6b64\u5904\u91cd\u8bd5","error_title": "\u7f51\u7edc\u8d85\u65f6","fullpage": "\u667a\u80fd\u68c0\u6d4b\u4e2d","goto_cancel": "\u53d6\u6d88","goto_confirm": "\u524d\u5f80","goto_homepage": "\u662f\u5426\u524d\u5f80\u9a8c\u8bc1\u670d\u52a1Geetest\u5b98\u7f51","loading_content": "\u667a\u80fd\u9a8c\u8bc1\u68c0\u6d4b\u4e2d","next": "\u6b63\u5728\u52a0\u8f7d\u9a8c\u8bc1","next_ready": "\u8bf7\u5b8c\u6210\u9a8c\u8bc1","read_reversed": false,"ready": "\u70b9\u51fb\u6309\u94ae\u8fdb\u884c\u9a8c\u8bc1","refresh_page": "\u9875\u9762\u51fa\u73b0\u9519\u8bef\u5566\uff01\u8981\u7ee7\u7eed\u64cd\u4f5c\uff0c\u8bf7\u5237\u65b0\u6b64\u9875\u9762","reset": "\u8bf7\u70b9\u51fb\u91cd\u8bd5","success": "\u9a8c\u8bc1\u6210\u529f","success_title": "\u901a\u8fc7\u9a8c\u8bc1"}}
})上响应面重要的可能就是s和c的值
4. 滑动验证码弹出分析
接下来请空之前的请求信息,打开滑块验证码,点击验证码按钮,弹出如下:
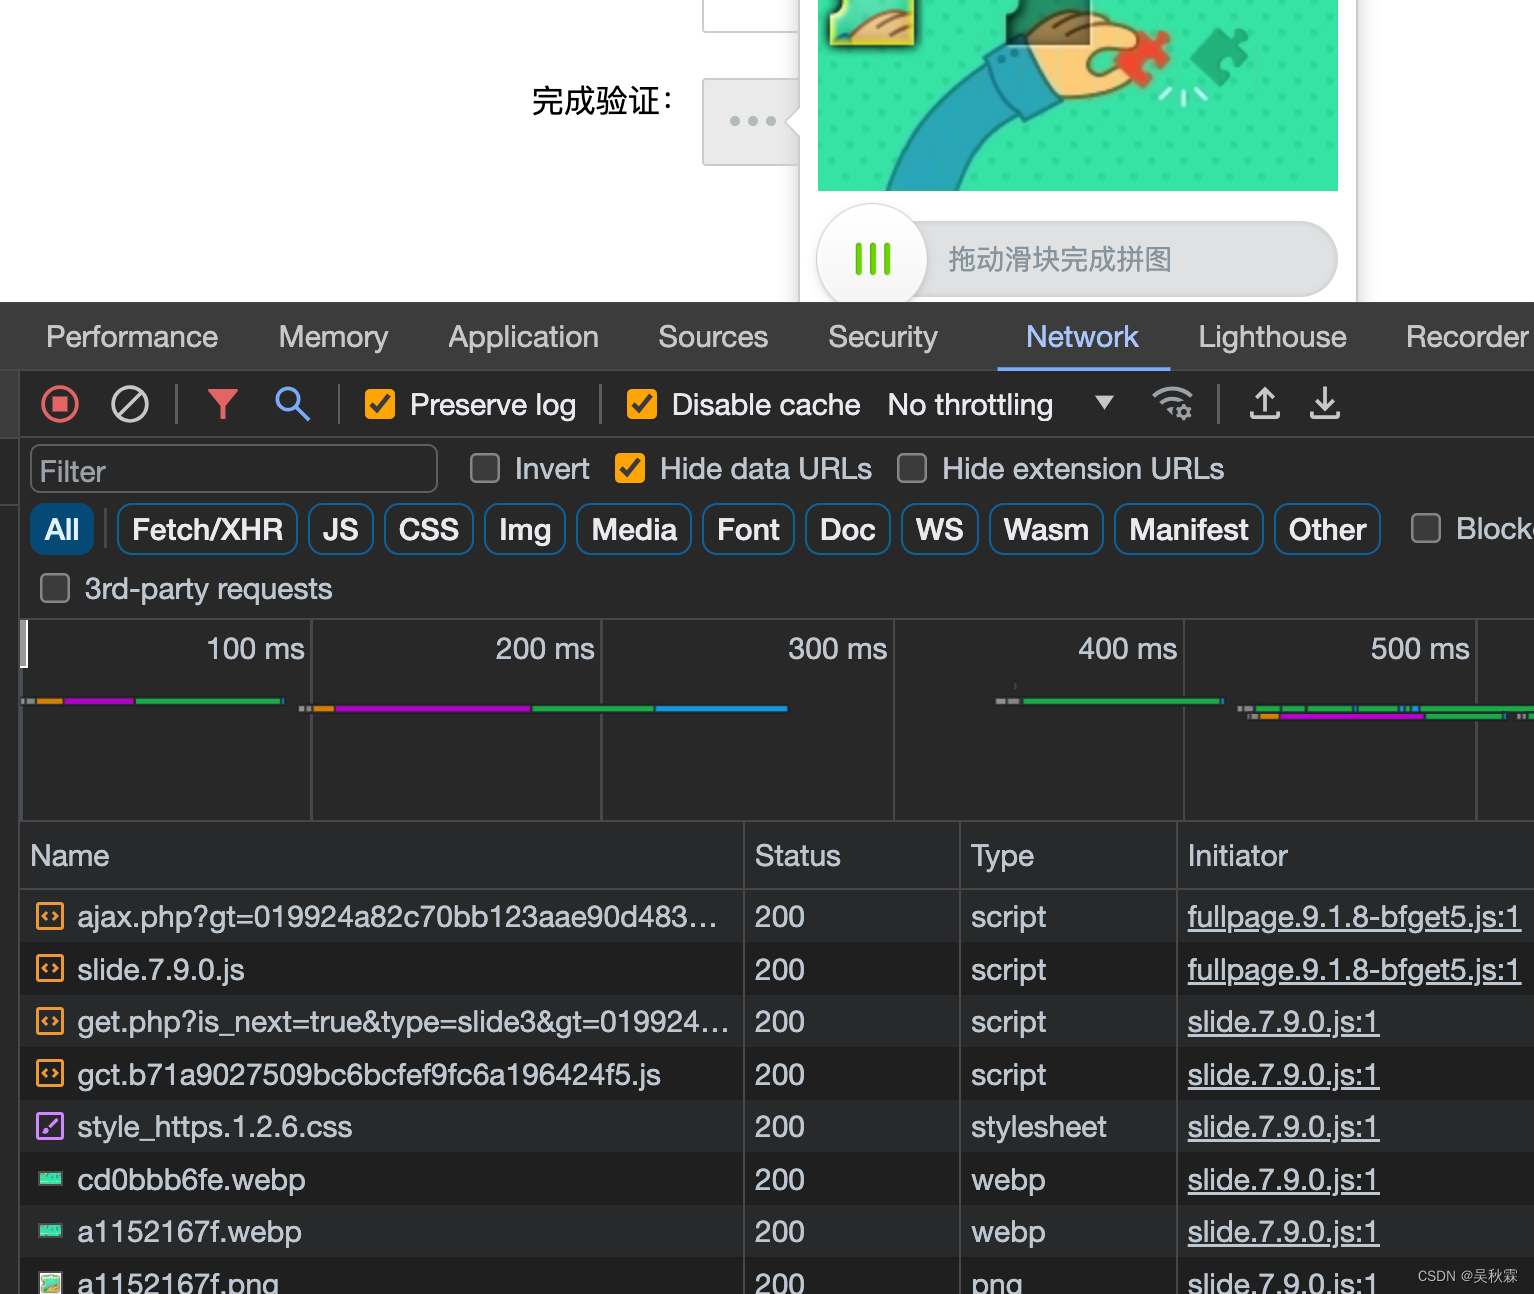
我们按照上图继续简单分析一下请求的URL接口,第一个URL(ajax.php),它的请求信息如下所示:
跟上面的基本一样gt、challenge、w。这里都按照前面的接口拿需要的参数值即可,唯一不同此时w值会变化,因为我们点击滑动验证码弹出一个验证码来,推测w值有轨迹信息以及一些检验
//响应
geetest_1698400310968({"status": "success", "data": {"result": "slide"}})
点击弹出滑动验证码进行了验证,成功后给出成功的结果!
第二个URL(get.php),它的请求信息跟上面一样带着gt、challenge,不过没有w。这里我们直接看返回的响应:
//响应
geetest_1698400310948({"gt": "019924a82c70bb123aae90d483087f94","challenge": "c8c2b2ded3230049af7906ffb5344494gz","id": "ac8c2b2ded3230049af7906ffb5344494","bg": "pictures/gt/cd0bbb6fe/bg/a1152167f.jpg","fullbg": "pictures/gt/cd0bbb6fe/cd0bbb6fe.jpg","link": "","ypos": 39,"xpos": 0,"height": 160,"slice": "pictures/gt/cd0bbb6fe/slice/a1152167f.png","api_server": "https://api.geetest.com","static_servers": ["static.geetest.com/", "dn-staticdown.qbox.me/"],"mobile": true,"theme": "ant","theme_version": "1.2.6","template": "","logo": true,"clean": false,"type": "multilink","fullpage": false,"feedback": "https://www.geetest.com/contact#report","show_delay": 250,"hide_delay": 800,"benchmark": false,"version": "6.0.9","product": "embed","https": true,"width": "100%","show_voice": true,"c": [12, 58, 98, 36, 43, 95, 62, 15, 12],"s": "62542a52","so": 0,"i18n_labels": {"cancel": "\u53d6\u6d88","close": "\u5173\u95ed\u9a8c\u8bc1","error": "\u8bf7\u91cd\u8bd5","fail": "\u8bf7\u6b63\u786e\u62fc\u5408\u56fe\u50cf","feedback": "\u5e2e\u52a9\u53cd\u9988","forbidden": "\u602a\u7269\u5403\u4e86\u62fc\u56fe\uff0c\u8bf7\u91cd\u8bd5","loading": "\u52a0\u8f7d\u4e2d...","logo": "\u7531\u6781\u9a8c\u63d0\u4f9b\u6280\u672f\u652f\u6301","read_reversed": false,"refresh": "\u5237\u65b0\u9a8c\u8bc1","slide": "\u62d6\u52a8\u6ed1\u5757\u5b8c\u6210\u62fc\u56fe","success": "sec \u79d2\u7684\u901f\u5ea6\u8d85\u8fc7 score% \u7684\u7528\u6237","tip": "\u8bf7\u5b8c\u6210\u4e0b\u65b9\u9a8c\u8bc1","voice": "\u89c6\u89c9\u969c\u788d"},"gct_path": "/static/js/gct.b71a9027509bc6bcfef9fc6a196424f5.js"
})
返回的滑块验证码的图片等一些数据
5. 滑动验证分析
接上面我们开始滑动滑块验证,拖动滑块到缺口处现实验证成功即可,该动作也就是我们之后要模拟的轨迹

携带的参数还是以前生成的gt、challenge,以及新的w值,每一次的w都是变化的,由此可以推测出w值确实包含着滑动的轨迹。如下图所示:

接口返回的则是成功验证后的信息,如下所示:
//响应
geetest_1698401308875({"success": 1,"message": "success","validate": "57aa8ef66d49966e169d10b8eef6886e","score": "1"
})
6. 轨迹生成算法实现
import math
import random
import matplotlib.pyplot as plt
import numpy as np
import matplotlib as mplclass GTrace:def __init__(self):self.__pos_x = []self.__pos_y = []self.__pos_z = []def __set_pt_time(self):"""设置各节点的时间分析不同时间间隔中X坐标数量的占比统计结果: 1. 80%~90%的X坐标在15~20毫秒之间2. 10%~15%在20~200及以上,其中 [-a, 0, x, ...] 这里x只有一个,取值在110~200之间坐标集最后3~5个坐标取值再50~400之间,最后一个坐标数值最大滑动总时间的取值规则: 图片宽度260,去掉滑块的宽度剩下200;如果距离小于100,则耗时1300~1900之间如果距离大于100,则耗时1700~2100之间"""__end_pt_time = []__move_pt_time = []self.__pos_z = []total_move_time = self.__need_time * random.uniform(0.8, 0.9)start_point_time = 0__start_pt_time = [0, 0, int(start_point_time)]sum_move_time = 0_tmp_total_move_time = total_move_timewhile True:delta_time = random.uniform(15, 20)if _tmp_total_move_time < delta_time:breaksum_move_time += delta_time_tmp_total_move_time -= delta_time__move_pt_time.append(int(start_point_time+sum_move_time))last_pt_time = __move_pt_time[-1]__move_pt_time.append(last_pt_time+_tmp_total_move_time)sum_end_time = start_point_time + total_move_timeother_point_time = self.__need_time - sum_end_timeend_first_ptime = other_point_time / 2while True:delta_time = random.uniform(110, 200)if end_first_ptime - delta_time <= 0:breakend_first_ptime -= delta_timesum_end_time += delta_time__end_pt_time.append(int(sum_end_time))__end_pt_time.append(int(sum_end_time + (other_point_time/2 + end_first_ptime)))# self.__pos_z.extend(__start_pt_time)self.__pos_z.extend(__move_pt_time)self.__pos_z.extend(__end_pt_time)def __set_distance(self, _dist):"""设置要生成的轨迹长度"""self.__distance = _distif _dist < 100:self.__need_time = int(random.uniform(500, 1500))else:self.__need_time = int(random.uniform(1000, 2000))def __get_pos_z(self):return self.__pos_zdef __get_pos_y(self):_pos_y = []point_count = len(self.__pos_z)x = np.linspace(-10, 15, point_count - len(_pos_y))arct_y = np.arctan(x)for _, val in enumerate(arct_y):_pos_y.append(val)return _pos_ydef __get_pos_x(self, _distance):"""绘制标准的数学函数图像: 以 tanh 开始 以 arctan 结尾根据此模型用等比时间差生成X坐标"""# first_val = random.uniform(-40, -18)# _distance += first_val# _pos_x = [random.uniform(-40, -18), 0]_pos_x = []self.__set_distance(_distance)self.__set_pt_time()point_count = len(self.__pos_z)x = np.linspace(-1, 19, point_count-len(_pos_x))ss = np.arctan(x)th = np.tanh(x)for idx in range(0, len(th)):if th[idx] < ss[idx]:th[idx] = ss[idx]th += 1th *= (_distance / 2.5)i = 0start_idx = int(point_count/10)end_idx = int(point_count/50)delta_pt = abs(np.random.normal(scale=1.1, size=point_count-start_idx-end_idx))for idx in range(start_idx, point_count):if idx*1.3 > len(delta_pt):breakth[idx] += delta_pt[i]i+=1_pos_x.extend(th)return _pos_x[-1], _pos_xdef get_mouse_pos_path(self, distance):"""获取滑动滑块鼠标的滑动轨迹坐标集合"""result = []_distance, x = self.__get_pos_x(distance)y = self.__get_pos_y()z = self.__get_pos_z()for idx in range(len(x)):result.append([int(x[idx]), int(y[idx]), int(z[idx])])return int(_distance), resultif __name__ == "__main__":_color = ["blue", "green", "red", "cyan", "magenta"]trace = GTrace()distance , res = trace.get_mouse_pos_path(100)print(res)
7. 生成W参数值算法
w参数值生成需要关键参数如下:
c、s、gt、challenge、轨迹、滑动时间、滑动距离
代码比较多也比较复杂,这里直接展示最终的参数生成代码,只需传入对应的参数即可,如下图所示:
function generate_w(params){/*** 生成w, params需要传入distance, passtime, track, c, s, gt, challenge*/var u = new U()["encrypt"](rt_)  // 这里的rt是一个随机值,但是需要和下面保持一致o = {"lang": "zh-cn","userresponse": H(params['distance'], params['challenge']),  // 把滑动距离和challenge传入H函数,得到userresponse"passtime": params['passtime'],  // 滑动时间,要和轨迹里的滑动时间一致"imgload": 155,  // 加载时间,可以是随机值"aa": sign_aaa(params['track'], params['c'], params['s']),  // 传入轨迹、c、s,生成aa"ep": sign_ep(),  // 一些版本号和时间等信息"h9s9": "1816378497",  // 固定值"rp": md5Hash(params['gt'] + params['challenge'].slice(0, 32) + params['passtime'])  // 传入gt、challenge、passtime,md5生成rp}var l = V['encrypt'](gt['stringify'](o), rt_)var h = m["$_FCp"](l)return h + u
}
好了,到这里又到了跟大家说再见的时候了。创作不易,帮忙点个赞再走吧。你的支持是我创作的动力,希望能带给大家更多优质的文章