上一篇博客【「图像 merge」无中生有制造数据 】写的是图片直接融合,此方法生成的图片相对而言比较生硬,虽然目标图片已经透明化处理过了,但是生成的图片依旧很假
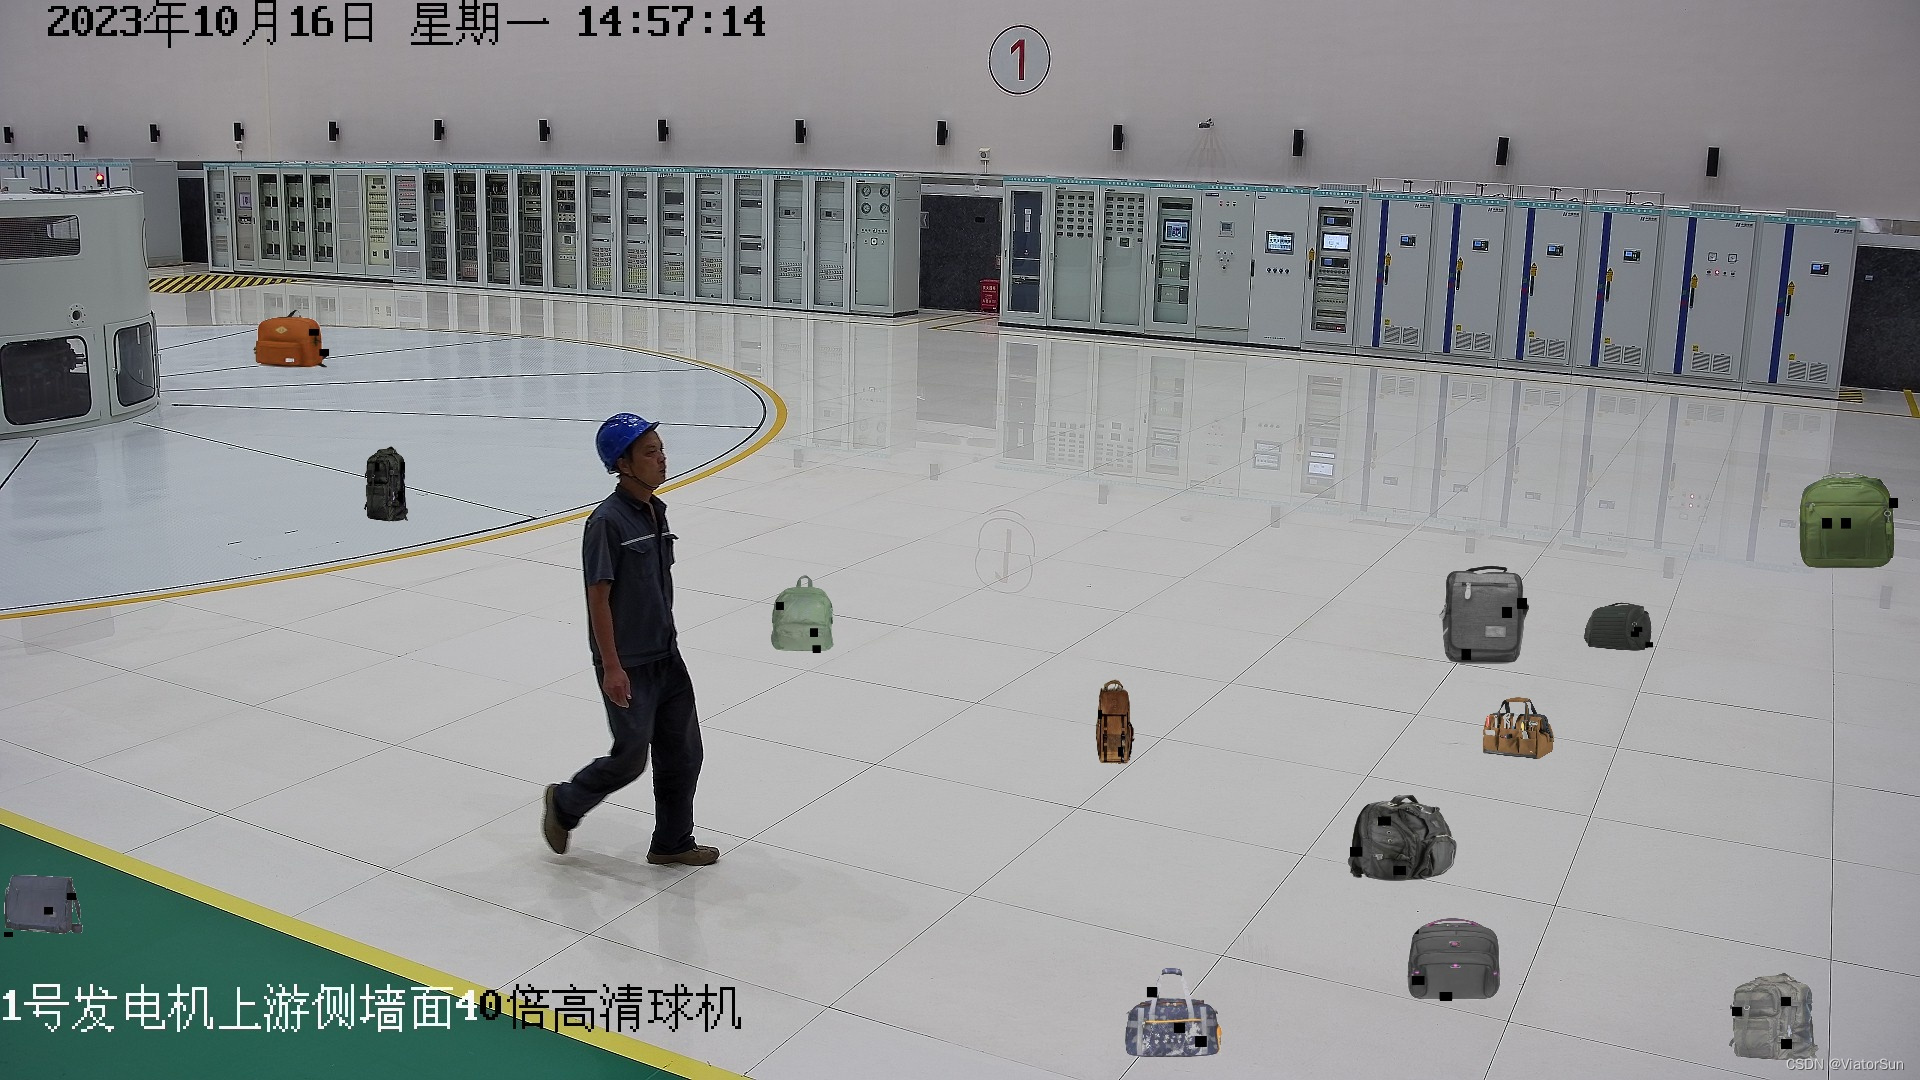
除了上述上述的图片叠加融合之外,还有一种更加自然的融合方法,就是 cv2.seamlessClone ,生成的效果图如下图所示
但是 cv2.seamlessClone 并不是万能的,需要根据实际情况测试,页根据目标模版的制作效果有很大关系
注意!
此方法融合图片时,目标区域不能按照目标的边缘进行透明化抠图,需要包含一部分的边缘信息,不然融合效果会很差


此算法的 目标图透明化处理/抠图处理与 【「图像 merge」无中生有制造数据 】一致,相关代码已附在博客中,自行移步查看
#  !/usr/bin/env  python
#  -*- coding:utf-8 -*-
# @Time   :  2023.10
# @Author :  绿色羽毛
# @Email  :  lvseyumao@foxmail.com
# @Blog   :  https://blog.csdn.net/ViatorSun
# @Note   :import os
import cv2
import random
from random import sample
import numpy as np
import argparsedef read_label_txt(label_dir):labels = []with open(label_dir) as fp:for f in fp.readlines():labels.append(f.strip().split(' '))return labelsdef rescale_yolo_labels(labels, img_shape):height, width, nchannel = img_shaperescale_boxes = []for box in list(labels):x_c = float(box[1]) * widthy_c = float(box[2]) * heightw = float(box[3]) * widthh = float(box[4]) * heightx_left = x_c - w * .5y_left = y_c - h * .5x_right = x_c + w * .5y_right = y_c + h * .5rescale_boxes.append([box[0], int(x_left), int(y_left), int(x_right), int(y_right)])return rescale_boxesdef xyxy2xywh(image, bboxes):height, width, _ = image.shapeboxes = []for box in bboxes:if len(box) < 4:continuecls = int(box[0])x_min = box[1]y_min = box[2]x_max = box[3]y_max = box[4]w = x_max - x_minh = y_max - y_minx_c = (x_min + x_max) / 2.0y_c = (y_min + y_max) / 2.0x_c = x_c / widthy_c = y_c / heightw = float(w) / widthh = float(h) / heightboxes.append([cls, x_c, y_c, w, h])return boxesdef cast_color(img, value):img_t = cv2.cvtColor(img,cv2.COLOR_BGR2HSV)h,s,v = cv2.split(img_t)# 增加图像对比度v2 = np.clip(cv2.add(2*v,value),0,255)img2 = np.uint8(cv2.merge((h,s,v2)))img_cast = cv2.cvtColor(img2,cv2.COLOR_HSV2BGR)             # 改变图像对比度return img_castdef brightness(img, value):img_t = cv2.cvtColor(img,cv2.COLOR_BGR2HSV)h,s,v = cv2.split(img_t)# 增加图像亮度v1 = np.clip(cv2.add(1*v,value),0,255)img1 = np.uint8(cv2.merge((h,s,v1)))img_brightness = cv2.cvtColor(img1,cv2.COLOR_HSV2BGR)       # 改变图像亮度亮度return img_brightnessdef random_add_patches_on_objects(image, template_lst, rescale_boxes, mask_lst, paste_number):img = image.copy()new_bboxes = []cl = 0random.shuffle(rescale_boxes)for rescale_bbox in rescale_boxes[:int(len(rescale_boxes) * 0.2)]:      # 待ps图像 目标框中num_p = random.randint(0, 50) % len(template_lst)           # 随机挑选 原图和maskp_img = template_lst[num_p]mask = mask_lst[num_p]bbox_h, bbox_w, bbox_c = p_img.shapeobj_xmin = rescale_bbox[1]obj_ymin = rescale_bbox[2]obj_xmax = rescale_bbox[3]obj_ymax = rescale_bbox[4]obj_w = obj_xmax - obj_xmin + 1         # 目标框尺寸obj_h = obj_ymax - obj_ymin + 1new_bbox_w = bbox_wnew_bbox_h = bbox_hwhile not (bbox_w < obj_w and bbox_h < obj_h):                  # 如果目标框小于 mask尺寸,对mask进行缩放以确保可以放进 bbox中new_bbox_w = int(bbox_w * random.uniform(0.5, 0.8))new_bbox_h = int(bbox_h * random.uniform(0.5, 0.8))bbox_w, bbox_h = new_bbox_w, new_bbox_hsuccess_num = 0while success_num < paste_number:center_search_space = [obj_xmin, obj_ymin, obj_xmax - new_bbox_w - 1, obj_ymax - new_bbox_h - 1] # 选取生成随机点区域if center_search_space[0] >= center_search_space[2] or center_search_space[1] >= center_search_space[3]:print('============== center_search_space error!!!! ================')success_num += 1continuenew_bbox_x_min = random.randint(center_search_space[0], center_search_space[2])  # 随机生成点坐标new_bbox_y_min = random.randint(center_search_space[1], center_search_space[3])new_bbox_x_left, new_bbox_y_top, new_bbox_x_right, new_bbox_y_bottom = new_bbox_x_min, new_bbox_y_min, new_bbox_x_min + new_bbox_w - 1, new_bbox_y_min + new_bbox_h - 1new_bbox = [cl, int(new_bbox_x_left), int(new_bbox_y_top), int(new_bbox_x_right), int(new_bbox_y_bottom)]success_num += 1new_bboxes.append(new_bbox)mask = cv2.resize(mask, (new_bbox_w, new_bbox_h)) p_img = cv2.resize(p_img, (new_bbox_w, new_bbox_h))center = (int(new_bbox_w / 2), int(new_bbox_h / 2))img[new_bbox_y_top:new_bbox_y_bottom, new_bbox_x_left:new_bbox_x_right] = cv2.seamlessClone(p_img,image[new_bbox_y_top:new_bbox_y_bottom, new_bbox_x_left:new_bbox_x_right],mask, center, cv2.MONOCHROME_TRANSFER) # NORMAL_CLONE 、MIXED_CLONE 和 MONOCHROME_TRANSFERreturn img, new_bboxesif __name__ == "__main__":# 用来装载参数的容器parser = argparse.ArgumentParser(description='PS')# 给这个解析对象添加命令行参数parser.add_argument('-i', '--images', default= '/media/yinzhe/DataYZ/DataSet/DataSet/bag_model',type=str, help='path of images')parser.add_argument('-t', '--templates', default= '/media/yinzhe/DataYZ/DataSet/DataSet/bag_mask',type=str, help='path of templates')parser.add_argument('-s', '--saveImage',default= '/media/yinzhe/DataYZ/DataSet/DataSet/bag_save3', type=str, help='path of ')parser.add_argument('-n', '--num', default=5, type=str, help='number of img')args = parser.parse_args()  # 获取所有参数templates_path = args.templatesimages_path = args.imagessave_path = args.saveImagenum = int(args.num)template_paths = []if not os.path.exists(save_path):os.makedirs(save_path)for t_path in os.listdir(templates_path):template_paths.append(t_path)# template_paths = random.shuffle(template_paths) #打乱顺序for image_path in os.listdir(images_path) :if "txt" in image_path:continueimage = cv2.imread(os.path.join(images_path, image_path))pre_name = image_path.split('.')[0]labels = read_label_txt(os.path.join(images_path, pre_name + ".txt"))if image is None or len(labels) == 0:print("empty image !!! or empty label !!!")continue# yolo txt转化为x1y1x2y2rescale_labels = rescale_yolo_labels(labels, image.shape)  # 转换坐标表示template_path = sample(template_paths, num)template_lst = []mask_lst = []for i in range(num):template = cv2.imread(os.path.join(templates_path, template_path[i]), cv2.IMREAD_UNCHANGED)print(template.shape[2])if (template.shape[2] != 4):        # RGB alphabreakalpha = template[:, :, 3]p_img = cv2.cvtColor(template, cv2.COLOR_BGRA2BGR)if (p_img is None):print("empty p image !!!", template_path[i])continuemask = np.where(alpha>0, 255, 0)  #满足大于0的值保留,不满足的设为0mask = mask.astype(np.uint8)mask_lst.append(mask)template_lst.append(p_img)for i in range(num):img, bboxes = random_add_patches_on_objects(image, template_lst, rescale_labels, mask_lst, 1)boxes = xyxy2xywh(img, bboxes)img_name = pre_name + '_' + str(i) + '.jpg'print('handle img:', img_name)cv2.imwrite(os.path.join(save_path, img_name), img)with open(os.path.join(save_path, img_name[:-4] + ".txt"), 'a') as f:for box in boxes:mess = str(3) + " " + str(box[1]) + " " + str(box[2]) + " " + str(box[3] * 0.6) + " " + str(box[4]* 0.6) + "\n"f.write(mess)

