文章目录
- 前言
- 三种安装方式
- 应当具备的知识
- 源码安装Nav2
- 找到Nav2的仓库
- 下载源码
- 下依赖
- 构建源码
- 构建源码中遇到的问题
- 找不到Config.cmake
- fatal error: Eigen/Core: No such file or directory
- oom C++: fatal error: Killed signal terminated program cc1plus
- error: RPC failed; curl 56 GnuTLS recv error (-9): A TLS packet with unexpected length was
- 网络问题
- *OMPL* 74aa6292323230db31f6f4c5e734a758b314eff2
- OMPL_VERSIONED_INSTALL
- ld 链接错误
- 运行实例
- 依赖关系图
前言
Nav2项目官网
https://navigation.ros.org/index.html
在学完《ROS2机器人编程实战》后,我认为现有的知识太过于零散,需要做一个项目来将这些知识串成一个系统。
https://github.com/homalozoa/ros2_for_beginners_code
这是这本书中代码的仓库。
书中在第五章的拓展知识板块以Nav2项目为例,讲解了如何分析一个开源项目。
作者和我的想法算是比较一致的,在这我简单概括一下。
对于代码量比较小的项目,可以采取直接阅读源代码的方式来学习,因为这样足够快,也足够你掌握代码的精髓了。等你阅读完毕,再运行几个例子,你脑中就有了对应的图像,这个项目的每个部分是如何组合到一块完成这个项目的。然后你再去把这个图像画出来,用代码来验证。这么重复几遍,你就可以掌握项目了。这也就是作者所说的,从源码到例子。
但是对于代码量特别大的项目,直接阅读代码去理解项目,会迷失在代码的海洋中。你会一直找函数的定义,实现,但是你不知道这些函数能干嘛,为什么要放到这里。所以比较好的学习方式你首先去运行大量的例子,然后再编写大量的例子,等你对项目的各个接口都十分熟悉了,你再去对点阅读源码。即你用到某个部分,你就去看透他。然后一直重复到你觉得把需要看的都看完了,你其实就对这个项目心中有数了。
这样说还是太抽象了,举个例子吧。以一个问题开头,即应该怎么去学操作系统?这里指的学操作系统是指看懂操作系统的源码。按照我们上面的分析,应该从例子到接口,从接口到代码。哈哈,其实学操作系统应该先找一个代码量比较小的操作系统,假如找个现代操作系统,某个接口里面的代码你可能都看不完。就从进程来说吧,在日常的代码中,我们需要创建一个进程,需要通过fork。然后你就可以去找fork的声明,然后跳过中间一些你现在不需要了解的函数,找到他的实现,然后再把实现中设计到的函数内容再度标记为接口。好吧,就是一个dfs的过程。
回到正题,本文的目标是安装Nav2。不给环境的安装是刷流氓的。
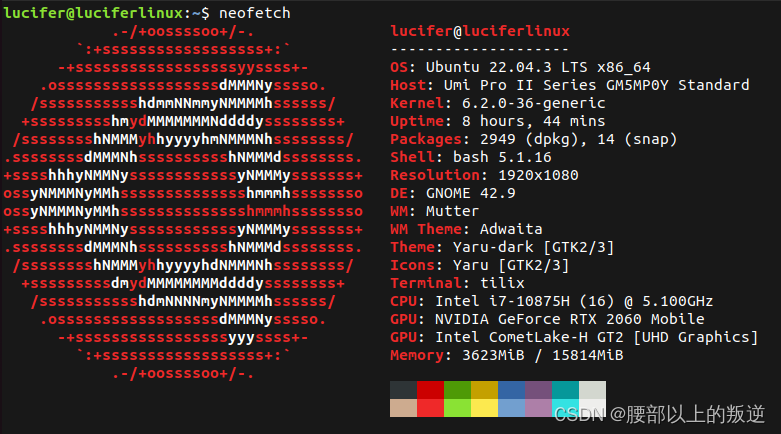
ROS2版本 iron
安装方式是从源码构建,也就是下载了一个ros2.repos,然后用vcs import, colcon build的
gcc和g++是系统默认的
lucifer@luciferlinux:~$ gcc --version
gcc (Ubuntu 11.4.0-1ubuntu1~22.04) 11.4.0
Copyright (C) 2021 Free Software Foundation, Inc.
This is free software; see the source for copying conditions.  There is NO
warranty; not even for MERCHANTABILITY or FITNESS FOR A PARTICULAR PURPOSE.lucifer@luciferlinux:~$ g++ --version
g++ (Ubuntu 11.4.0-1ubuntu1~22.04) 11.4.0
Copyright (C) 2021 Free Software Foundation, Inc.
This is free software; see the source for copying conditions.  There is NO
warranty; not even for MERCHANTABILITY or FITNESS FOR A PARTICULAR PURPOSE.
三种安装方式
安装Nav2有三种方式
1.二进制安装
2.源码
3.docker
可看官方文章
https://navigation.ros.org/development_guides/build_docs/index.html#build-instructions
二进制安装没有代码看,docker最方便,但是还是想先体验一下源码安装的感觉,所以我选择的是源码安装。
应当具备的知识
cmake 需要会看CMakeLists.txt, 不然只通过报错信息去搜,很难解决问题。
知道 build install log src里面放的都是内容
build 构建过程中的产物
install 需要下载的内容 可以通过source install/local_setup.sh使得他们在当前终端生效
log colcon build 会生成的日志内容,最重要的是lastest,这个目录存放的是最新的日志
sudo make install 会默认安装头文件到 /usr/local/include/
可查看输出的信息
sudo make uninstall 会卸载这些内容,但是不会删除文件夹
colcon 和 vcs 的使用
其实也简单
colcon build --help
vcs --help
vcs import --help
vcs validate --help
如果有什么不会的命令
man 即可
源码安装Nav2
我们首先得想明白
从源码构建我们需要做什么?我们最终需要得到什么样的结果?
对于第一个问题,
首先我们需要下载我们要安装项目的源码,然后去下载Nav2所有的依赖,同时将他们下载到本地,供构建Nav2的工具识别,最后再构建这个项目,并安装到本地。那么Nav2用的是什么构建工具呢?从上层来说是colcon, 但是本质上还是cmake。
cmake识别外部的依赖靠的是find_package。关于find_package我们需要知道他的两种模式,module和config。module下我们会去找Find<PackageName>.cmake,config下我们会去找<lowercasePackageName>-config.cmake和<PackageName>Config.cmake。
所以如果构建工具报错,说找不到 某某Config.cmake,就是说这个包我们还没下载到本地,现在需要做的就是找源码然后构建,然后下载到本地。关于find_package更多的信息参考该网站 https://cmake.org/cmake/help/v3.22/command/find_package.html。
find_package(<PackageName> [version] [EXACT] [QUIET] [MODULE][REQUIRED] [[COMPONENTS] [components...]][OPTIONAL_COMPONENTS components...][NO_POLICY_SCOPE])
那么我们要怎么去构建这个依赖呢?
递归。说得更加形式化一点吧。
1.找到源码
2.下载源码
3.构建源码
3.1 分析构建体系 是用的cmake 还是 Conf 用的是catkin 还是 colcon
3.2 按照对应构建体系的方式构建源码
4.报错找不到包,跳转到step 1
5.下载构建内容到本地
5.1查找当前构建体系的下载方法; Cmake 直接构建是 sudo make install; colcon 只需要source install/local_setup.sh
5.2下载构建内容
6.通过colcon build --packages-select 测试依赖是否下载成功
我们最终需要得到的结果是:
1.在本地有Nav2的代码
2.install结果
3.需要能运行他给的例子。
接下来我会按照上述流程来阐述我的安装过程。
找到Nav2的仓库
Nav2的仓库
https://github.com/ros-planning/navigation2.git
下载源码
按照ros2项目的习惯,按照如下方式下载。
这里的分支请自行找到是适配自己ROS2版本的分支
mkdir -p ~/nav2_ws/src
cd ~/nav2_ws/src
git clone https://github.com/ros-planning/navigation2.git -b iron
最终我们会在src下面得到navigation2库
下依赖
如果想避开网络问题,还请参考 https://zhuanlan.zhihu.com/p/526382730
下述为他的核心步骤
# 安装依赖
# 这里我们使用rosdepc进行依赖的安装,rosdepc指令找不到可以先运行下面的一键安装命令,选择一键配置rosdep即可。
wget http://fishros.com/install -O fishros && . fishros
# 接着在fishbot_ws下运行下面这个命令进行依赖的安装。
rosdepc install -r --from-paths src --ignore-src --rosdistro $ROS_DISTRO -y
这些都是直接可以安装的依赖,但是总有一些包管理器下不了的,你就需要去查看underlay.repos然后进行下载了
cd ~/nav2_ws
cat src/navigation2/tools/underlay.repos
这里面存放了所有需要下载的依赖
不过,请注意,大部分的依赖是被注释掉的,但是他们实际上是被需要的。
我最开始没有注意到这一点
直接通过 vcs import src < underlay.repos
结果就下载了一个ROS2-rolling版本的geometry2
而我构建完ros2-iron后,其实就已经有了这个库,只是版本不同而已,所以我注释掉了这个库。
我的repos信息如下
repositories:# BehaviorTree/BehaviorTree.CPP:# type: git# url: https://github.com/BehaviorTree/BehaviorTree.CPP.git# version: master# ros/angles:# type: git# url: https://github.com/ros/angles.git# version: ros2# ros-simulation/gazebo_ros_pkgs:# type: git# url: https://github.com/ros-simulation/gazebo_ros_pkgs.git# version: ros2# ros-perception/vision_opencv:# type: git# url: https://github.com/ros-perception/vision_opencv.git# version: ros2# ros/bond_core:# type: git# url: https://github.com/ros/bond_core.git# version: ros2# ros/diagnostics:# type: git# url: https://github.com/ros/diagnostics.git# version: ros2-devel # ros/geographic_info:# type: git# url: https://github.com/ros-geographic-info/geographic_info.git# version: ros2 # ompl/ompl:# type: git# url: https://github.com/ompl/ompl.git# version: mainrobot_localization/robot_localization:type: giturl: https://github.com/cra-ros-pkg/robot_localization.gitversion: ros2# ros-simulation/gazebo_ros_pkgs:# type: git# url: https://github.com/ros-simulation/gazebo_ros_pkgs.git# version: ros2# ros2/geometry2:# type: git# url: https://github.com/ros2/geometry2.git# version: rolling
虽然我提到了用vcs下载这些库,但是实际上因为我最开始没有注意到这些注释,所以我都是手动一个一个从git上下,然后构建了一堆库的。
在此我提供一个搜索ROS相关依赖的网站,https://index.ros.org/
当你输入包名后,他会去搜索这个包相关的包和对应的ROS版本还有仓库地址。如果你嫌这个网站响应慢,你也可以直接用搜索引擎搜,找到对应仓库的对应分支。
当然,最好还是直接用vcs 直接一口气下完,省心。
这些库基本上都是cmake构建的,你可以重新创建一个文件夹,nav2depend_ws,然后把他们放到这里面。由于我是单独的拉的库,并且我之前就下载了version_opencv, diagnostics。
所以我只将 gazebo_ros_pkgs, ompl, robot_localization用这种方法进行构建。(至于为什么是这三个,是因为前面的我一遍就下过了,就这三个折腾了半天)
`
mkdir -p ~/nav2depend_ws/src
cd ~/nav2depend_ws/src
vcs import underly.repos
cd ~/nav2depend_ws
colcon build
source install/local_setup.sh
构建源码
colcon build
# 如果输出38个包finished 就说明编译下载完了 提示信息如下
Starting >>> nav2_common
Starting >>> nav_2d_msgs
Starting >>> header
Finished <<< header [1.18s]
Finished <<< nav2_common [2.73s]
Starting >>> nav2_msgs
Starting >>> nav2_voxel_grid
Finished <<< nav2_voxel_grid [1.37s]
Finished <<< nav_2d_msgs [4.37s]
Starting >>> dwb_msgs
Finished <<< dwb_msgs [3.27s]
Finished <<< nav2_msgs [7.37s]
Starting >>> nav2_util
Starting >>> nav2_simple_commander
Finished <<< nav2_util [2.55s]
Starting >>> nav2_behavior_tree
Starting >>> nav_2d_utils
Starting >>> nav2_lifecycle_manager
Starting >>> nav2_map_server
Starting >>> nav2_amcl
Starting >>> nav2_velocity_smoother
Finished <<< nav2_simple_commander [6.50s]
Finished <<< nav2_velocity_smoother [2.25s]
Finished <<< nav2_lifecycle_manager [4.25s]
Finished <<< nav2_amcl [3.53s]
Starting >>> nav2_rviz_plugins
Finished <<< nav2_map_server [4.71s]
Finished <<< nav_2d_utils [5.85s]
Starting >>> nav2_costmap_2d
Finished <<< nav2_rviz_plugins [2.38s]
Finished <<< nav2_behavior_tree [8.21s]
Finished <<< nav2_costmap_2d [2.24s]
Starting >>> nav2_core
Starting >>> costmap_queue
Starting >>> nav2_collision_monitor
Finished <<< nav2_core [2.05s]
Starting >>> dwb_core
Starting >>> nav2_controller
Starting >>> nav2_regulated_pure_pursuit_controller
Starting >>> nav2_behaviors
Starting >>> nav2_bt_navigator
Starting >>> nav2_constrained_smoother
Starting >>> nav2_mppi_controller
Starting >>> nav2_navfn_planner
Starting >>> nav2_planner
Starting >>> nav2_smac_planner
Starting >>> nav2_smoother
Starting >>> nav2_theta_star_planner
Starting >>> nav2_waypoint_follower
Finished <<< costmap_queue [9.31s]
Finished <<< nav2_collision_monitor [9.06s]
Finished <<< nav2_controller [9.94s]
Finished <<< nav2_smac_planner [6.30s]
Finished <<< nav2_regulated_pure_pursuit_controller [9.88s]
Finished <<< nav2_constrained_smoother [8.64s]
Finished <<< nav2_theta_star_planner [6.15s]
Starting >>> nav2_rotation_shim_controller
Finished <<< nav2_navfn_planner [8.77s]
Finished <<< nav2_behaviors [10.9s]
Finished <<< nav2_bt_navigator [10.6s]
Finished <<< dwb_core [12.7s]
Finished <<< nav2_planner [9.12s]
Finished <<< nav2_smoother [8.34s]
Starting >>> dwb_critics
Starting >>> dwb_plugins
Finished <<< nav2_mppi_controller [11.4s]
Finished <<< nav2_waypoint_follower [8.79s]
Finished <<< nav2_rotation_shim_controller [4.22s]
Finished <<< dwb_plugins [2.22s]
Finished <<< dwb_critics [2.90s]
Starting >>> nav2_dwb_controller
Finished <<< nav2_dwb_controller [1.13s]
Starting >>> navigation2
Finished <<< navigation2 [1.33s]
Starting >>> nav2_bringup
Finished <<< nav2_bringup [1.36s]
Starting >>> nav2_system_tests
Finished <<< nav2_system_tests [1.62s]                        Summary: 39 packages finished [48.5s]
可能你会说,你这39个包啊,对啊,39个,如果是38个一下子全部编译成功了,我还写这篇文章干嘛。😃
构建源码中遇到的问题
找不到Config.cmake
按照之前的思路,下包,然后构建就是了,没什么好说的。
你可以通过二进制的方式下
https://blog.csdn.net/scarecrow_sun/article/details/127869660
也可以源码
我都是选择的源码
fatal error: Eigen/Core: No such file or directory
忘记是哪个包了(可能是杀千刀的ompl),他引用了EIgen/Core, 但是由于这个库他会默认放到eigen3/Eigen,所以你需要一个链接,具体可参考。
https://blog.csdn.net/qq_43872529/article/details/100937091
sudo ln -s /usr/include/eigen3/Eigen /usr/include/Eigen
oom C++: fatal error: Killed signal terminated program cc1plus
具体的输出可能是
fatal: cpp什么什么,然后意外中止,你可以去观察他那个构建的时候出现的秒数,如果没有实时显示了,说明内存不够用,要爆了。
出现这个问题了你有三种解决办法,1.加内存条,2.增加swap的大小,3.再跑几次。
第一种方法不太通用。
第二种方式可参考 https://blog.csdn.net/weixin_44796670/article/details/121234446
第三种方式之所以能成功,是因为colcon会自动保留之前的进度,而之前oom可能只是因为前后的程序吃了太多了,所以再跑几次有概率成功。
error: RPC failed; curl 56 GnuTLS recv error (-9): A TLS packet with unexpected length was
这个错误是发生在我下载robot_localization的时候,其实看输出就知道是缓冲区不够,导致信息被截断了。
但是当我修改了缓存区大小后,还是会出现这个错误。
最后是看到了这篇博客,说使用ssh协议,而不是使用https协议。
最终解决了这个问题。
(不过github使用ssh可能得配置会了)
https://blog.csdn.net/zkp_987/article/details/119883273
网络问题
主要体现在使用vcs, wget
vcs底层使用的还是git,所以需要你自己去配置git的代理
wget你配置终端的代理
OMPL 74aa6292323230db31f6f4c5e734a758b314eff2
给他留点面子吧,没有他,我最一个下午就搞定了。
OMPL_VERSIONED_INSTALL
这个变量指明了最后安装的时候是否带上OMPL的版本
在main分支下,他默认是ON的!!!!!!
If you are building OMPL from source, there are several options that you can use to configure how OMPL is compiled. The options can be set via the command line like so: cmake -D<option>=ON ../... If you previously ran cmake in your build directory, it is safest to remove the CMakeCache.txt before re-running cmake with different options. Below is a list of all options.
| Option | Default value | Description |
|---|---|---|
| OMPL_BUILD_DEMOS | ON | Compile the OMPL demo programs. (The binaries are never installed.) |
| OMPL_BUILD_PYBINDINGS | ON | Whether to compile the Python bindings (requires Py++). |
| OMPL_BUILD_PYTESTS | ON | Whether the Python tests should be added to the test target. |
| OMPL_BUILD_TESTS | ON | Wether to compile the C++ unit tests |
| OMPL_REGISTRATION | ON | Whether the registration page is shown. (Disabling it might be useful for build bots.) |
| OMPL_VERSIONED_INSTALL | ON | Install header files in include/ompl-X.Y/ompl, where X and Y are the major and minor version numbers. |
以上内容在ompl/doc/markdown/buildOptions.md中
假如我们不对他做任何修改,默认参数编译的话,那么我们将会在/usr/local/include下得到
ompl-1.6/ompl/base/State.h
但是Nav2中引用他是用的
ompl/base/State.h
所以他会报错,说头文件找不到。
要解决这个问题
就是在cmake的时候加上参数
# 使用cmake
cmake -DOMPL_VERSIONED_INSTALL=OFF
# 使用colcon
colcon build --cmake-args -DOMPL_VERSIONED_INSTALL=OFF --packages-select ompl
ld 链接错误
某某.so 找不到对应的代码的实现
报这个错的原因是我最开始并没有发现上述问题,而是粗暴的把ompl-1.6/ompl 复制到了/usr/local/include 下面
现在想来,也没错,只是这样就没法知道为啥会报链接错误了。
为什么会报链接错误需要去看他的另外一个markdown文件。
ompl/doc/markdown/buildSystem.md
在这里面他提到
- CMake: For ease of use with CMake, we have included a CMake module for finding in `CONFIG`` mode. If you use CMake in your own project, you can simply use the following commands in your CMakeLists.txt to find and link to the OMPL target.
find_package(ompl CONFIG)
target_link_libraries(your_library PUBLIC ompl::ompl)
To support the previous CMake module behavior, the following variables are defined. These are for backwards compatability, but not recommended anymore.
OMPL_FOUND-TRUEOMPL_INCLUDE_DIRS- The OMPL include directoryOMPL_LIBRARIES- The OMPL libraryOMPLAPP_LIBRARIES- The OMPL.app libraries (if installed)OMPL_VERSION- The OMPL version in the form<major>.<minor>.<patchlevel>OMPL_MAJOR_VERSION- Major versionOMPL_MINOR_VERSION- Minor versionOMPL_PATCH_VERSION- Patch version
也就是说,在当前版本中,我们需要通过target_link_libraries(your_library ompl::ompl)的方式来链接动态库,而头文件他默认是给我们下到了编译器可以搜索到的路径,所以就不用额外include了,虽然他这里说,对以前的使用方法进行了保留,但是经过我实际的测试,发现输出是空,根本没有这个变量。
我的测试方法如下
ros2 pkg create header --build-type ament_cmake
cd src/header/src
vim header.cpp
header.cpp
#include "cstdio"
#include "rclcpp/rclcpp.hpp"
#include "ompl/base/ScopedState.h"int test() {int i = 1;i -= 1;return i;
}int main() {return test();
}
CMakeLists.txt
cmake_minimum_required(VERSION 3.8)
project(header)if(CMAKE_COMPILER_IS_GNUCXX OR CMAKE_CXX_COMPILER_ID MATCHES "Clang")add_compile_options(-Wall -Wextra -Wpedantic)
endif()# find dependencies
find_package(ament_cmake REQUIRED)
find_package(ompl CONFIG)
find_package(rclcpp REQUIRED)if(NOT CMAKE_CXX_STANDARD)set(CMAKE_CXX_STANDARD 17)
endif()set(library_name_header header_test)include_directories(include${OMPL_INCLUDE_DIRS}
)message(STATUS "OMPL_INCLUDE_DIRS: ${OMPL_INCLUDE_DIRS}.")
message(STATUS "OMPL_LIBRARIES: ${OMPL_LIBRARIES}.")
message(STATUS "OMPL_INCLUDE_DIRS: ${OMPL_INCLUDE_DIRS}.")
message(STATUS "OMPL_FOUND: ${OMPL_FOUND}.")add_library(${library_name_header}src/header.cpp# main.cpp
)ament_target_dependencies(${library_name_header}rclcpp
)#target_link_libraries(${library_name_header} ${OMPL_LIBRARIES})
target_link_libraries(${library_name_header} public ompl::ompl)if(BUILD_TESTING)find_package(ament_lint_auto REQUIRED)set(ament_cmake_copyright_FOUND TRUE)set(ament_cmake_cpplint_FOUND TRUE)ament_lint_auto_find_test_dependencies()
endif()ament_export_dependencies(include ${OMPL_INCLUDE_DIRS})
ament_package()
colcon build --packages-select header
cat log/latest/header/stdout_stderr.log
-- Found ament_cmake: 2.0.3 (/home/lucifer/ros2_iron/install/ament_cmake/share/ament_cmake/cmake)
-- Found rclcpp: 21.0.3 (/home/lucifer/ros2_iron/install/rclcpp/share/rclcpp/cmake)
-- Found rosidl_generator_c: 4.0.1 (/home/lucifer/ros2_iron/install/rosidl_generator_c/share/rosidl_generator_c/cmake)
-- Found rosidl_generator_cpp: 4.0.1 (/home/lucifer/ros2_iron/install/rosidl_generator_cpp/share/rosidl_generator_cpp/cmake)
-- Using all available rosidl_typesupport_c: rosidl_typesupport_introspection_c;rosidl_typesupport_fastrtps_c
-- Using all available rosidl_typesupport_cpp: rosidl_typesupport_introspection_cpp;rosidl_typesupport_fastrtps_cpp
-- Found rmw_implementation_cmake: 7.1.0 (/home/lucifer/ros2_iron/install/rmw_implementation_cmake/share/rmw_implementation_cmake/cmake)
-- Found rmw_fastrtps_cpp: 7.1.1 (/home/lucifer/ros2_iron/install/rmw_fastrtps_cpp/share/rmw_fastrtps_cpp/cmake)
-- Using RMW implementation 'rmw_fastrtps_cpp' as default
-- OMPL_INCLUDE_DIRS: .
-- OMPL_LIBRARIES: .
-- OMPL_INCLUDE_DIRS: .
-- OMPL_FOUND: .
-- Found ament_lint_auto: 0.14.2 (/home/lucifer/ros2_iron/install/ament_lint_auto/share/ament_lint_auto/cmake)
-- Added test 'cppcheck' to perform static code analysis on C / C++ code
-- Configured cppcheck include dirs: /home/lucifer/nav2/src/header/include
-- Configured cppcheck exclude dirs and/or files:
-- Added test 'lint_cmake' to check CMake code style
-- Added test 'uncrustify' to check C / C++ code style
-- Configured uncrustify additional arguments:
-- Added test 'xmllint' to check XML markup files
-- Configuring done
-- Generating done
-- Build files have been written to: /home/lucifer/nav2/build/header
[ 50%] [32mBuilding CXX object CMakeFiles/header_test.dir/src/header.cpp.o[0m
[01m[K/home/lucifer/nav2/src/header/src/header.cpp:3:10:[m[K [01;31m[Kfatal error: [m[Kompl/base/ScopeState.h: No such file or directory3 | #include [01;31m[K"ompl/base/ScopeState.h"[m[K|          [01;31m[K^~~~~~~~~~~~~~~~~~~~~~~~[m[K
compilation terminated.
gmake[2]: *** [CMakeFiles/header_test.dir/build.make:76: CMakeFiles/header_test.dir/src/header.cpp.o] Error 1
gmake[1]: *** [CMakeFiles/Makefile2:137: CMakeFiles/header_test.dir/all] Error 2
gmake: *** [Makefile:146: all] Error 2
然后我们就会发现上面的几个变量根本就没有值,所以只能按照他的方式来。
我也尝试了回退ompl的版本来解决这个问题,但是我发现回退版本后我会编译失败,所以我还是停留在了当前版本。
ompl影响的是nav2_smac_planner包
因此需要将他的CMakeLists.txt修改为
cmake_minimum_required(VERSION 3.5)
project(nav2_smac_planner)set(CMAKE_BUILD_TYPE Release) #Debug, Releasefind_package(ament_cmake REQUIRED)
find_package(nav2_common REQUIRED)
find_package(rclcpp REQUIRED)
find_package(rclcpp_action REQUIRED)
find_package(rclcpp_lifecycle REQUIRED)
find_package(std_msgs REQUIRED)
find_package(visualization_msgs REQUIRED)
find_package(nav2_util REQUIRED)
find_package(nav2_core REQUIRED)
find_package(nav2_msgs REQUIRED)
find_package(nav_msgs REQUIRED)
find_package(geometry_msgs REQUIRED)
find_package(builtin_interfaces REQUIRED)
find_package(tf2_ros REQUIRED)
find_package(nav2_costmap_2d REQUIRED)
find_package(pluginlib REQUIRED)
find_package(eigen3_cmake_module REQUIRED)
find_package(Eigen3 REQUIRED)
find_package(angles REQUIRED)
find_package(ompl REQUIRED)
find_package(OpenMP REQUIRED)if(NOT CMAKE_CXX_STANDARD)set(CMAKE_CXX_STANDARD 17)
endif()set(CMAKE_CXX_FLAGS "${CMAKE_CXX_FLAGS} ${OpenMP_CXX_FLAGS}")if(MSVC)add_compile_definitions(_USE_MATH_DEFINES)
else()add_compile_options(-O3 -Wextra -Wdeprecated -fPIC)
endif()include_directories(include${OMPL_INCLUDE_DIRS}${OpenMP_INCLUDE_DIRS}
)find_package(OpenMP)
if(OPENMP_FOUND)set(CMAKE_C_FLAGS "${CMAKE_C_FLAGS} ${OpenMP_C_FLAGS}")set(CMAKE_CXX_FLAGS "${CMAKE_CXX_FLAGS} ${OpenMP_CXX_FLAGS}")set(CMAKE_EXE_LINKER_FLAGS "${CMAKE_EXE_LINKER_FLAGS} ${OpenMP_EXE_LINKER_FLAGS}")
endif()set(library_name nav2_smac_planner)set(dependenciesrclcpprclcpp_actionrclcpp_lifecyclestd_msgsvisualization_msgsnav2_utilnav2_msgsnav_msgsgeometry_msgsbuiltin_interfacestf2_rosnav2_costmap_2dnav2_corepluginlibangleseigen3_cmake_module
)# Hybrid plugin
add_library(${library_name} SHAREDsrc/smac_planner_hybrid.cppsrc/a_star.cppsrc/collision_checker.cppsrc/smoother.cppsrc/analytic_expansion.cppsrc/node_hybrid.cppsrc/node_lattice.cppsrc/costmap_downsampler.cppsrc/node_2d.cppsrc/node_basic.cpp
)# target_link_libraries(${library_name} ${OMPL_LIBRARIES} ${OpenMP_LIBRARIES}  OpenMP::OpenMP_CXX)
target_link_libraries(${library_name} ${OMPL_LIBRARIES} ${OpenMP_LIBRARIES}  OpenMP::OpenMP_CXX)
target_link_libraries(${library_name} ompl::ompl)
target_include_directories(${library_name} PUBLIC ${Eigen3_INCLUDE_DIRS})ament_target_dependencies(${library_name}${dependencies}
)# 2D plugin
add_library(${library_name}_2d SHAREDsrc/smac_planner_2d.cppsrc/a_star.cppsrc/smoother.cppsrc/collision_checker.cppsrc/analytic_expansion.cppsrc/node_hybrid.cppsrc/node_lattice.cppsrc/costmap_downsampler.cppsrc/node_2d.cppsrc/node_basic.cpp
)# target_link_libraries(${library_name}_2d ${OMPL_LIBRARIES})
target_link_libraries(${library_name}_2d ompl::ompl)
target_include_directories(${library_name}_2d PUBLIC ${Eigen3_INCLUDE_DIRS})ament_target_dependencies(${library_name}_2d${dependencies}
)# Lattice plugin
add_library(${library_name}_lattice SHAREDsrc/smac_planner_lattice.cppsrc/a_star.cppsrc/smoother.cppsrc/collision_checker.cppsrc/analytic_expansion.cppsrc/node_hybrid.cppsrc/node_lattice.cppsrc/costmap_downsampler.cppsrc/node_2d.cppsrc/node_basic.cpp
)# target_link_libraries(${library_name}_lattice ${OMPL_LIBRARIES})
target_link_libraries(${library_name}_lattice ompl::ompl)
target_include_directories(${library_name}_lattice PUBLIC ${Eigen3_INCLUDE_DIRS})ament_target_dependencies(${library_name}_lattice${dependencies}
)pluginlib_export_plugin_description_file(nav2_core smac_plugin_hybrid.xml)
pluginlib_export_plugin_description_file(nav2_core smac_plugin_2d.xml)
pluginlib_export_plugin_description_file(nav2_core smac_plugin_lattice.xml)install(TARGETS ${library_name} ${library_name}_2d ${library_name}_latticeARCHIVE DESTINATION libLIBRARY DESTINATION libRUNTIME DESTINATION lib/${PROJECT_NAME}
)install(DIRECTORY include/DESTINATION include/
)install(DIRECTORY lattice_primitives/sample_primitives DESTINATION share/${PROJECT_NAME})if(BUILD_TESTING)find_package(ament_lint_auto REQUIRED)set(AMENT_LINT_AUTO_FILE_EXCLUDE include/nav2_smac_planner/thirdparty/robin_hood.h)ament_lint_auto_find_test_dependencies()find_package(ament_cmake_gtest REQUIRED)add_subdirectory(test)
endif()ament_export_include_directories(include ${OMPL_INCLUDE_DIRS})
ament_export_libraries(${library_name} ${library_name}_2d ${library_name}_lattice)
ament_export_dependencies(${dependencies})
ament_package()
colcon build --packages-select nav2_smac_planner
应该就能运行成功了
运行实例
https://navigation.ros.org/getting_started/index.html#running-the-example
官网给的是
source /opt/ros/<ros2-distro>/setup.bash
export TURTLEBOT3_MODEL=waffle
export GAZEBO_MODEL_PATH=$GAZEBO_MODEL_PATH:/opt/ros/<ros2-distro>/share/turtlebot3_gazebo/models
ros2 launch nav2_bringup tb3_simulation_launch.py headless:=False
注意将上述<ros2-distro>修改为自己的版本
可通过env | grep ROS 查看
但是通过上面的方法,我发现我的 rviz2 可以正常开启
但是Gazebo会黑屏,后来我尝试直接输入gazebo,结果正常开启了。
所以我根据下面这篇博文判断我的问题是gazebo找不到模型,可能就是因为他没有访问/opt/ros/iron/share/turtlebot3_gazebo/models的权限,结果给我去到外网的数据库找model了,然后就卡死了
https://blog.csdn.net/qq_42451251/article/details/105187392
于是我按照博客中的操作办法
在~/.gazebo下新建了models文件夹,然后把/opt下面的models给复制过去了
打开gazebo发现有了这些model,
然后我运行了下述命令
export TURTLEBOT3_MODEL=waffle
env | grep TURTLEBOT3_MODEL
ros2 launch nav2_bringup tb3_simulation_launch.py headless:=False
# 不加headless好像就不会出gazebo了
ros2 launch nav2_bringup tb3_simulation_launch.py
最终结果
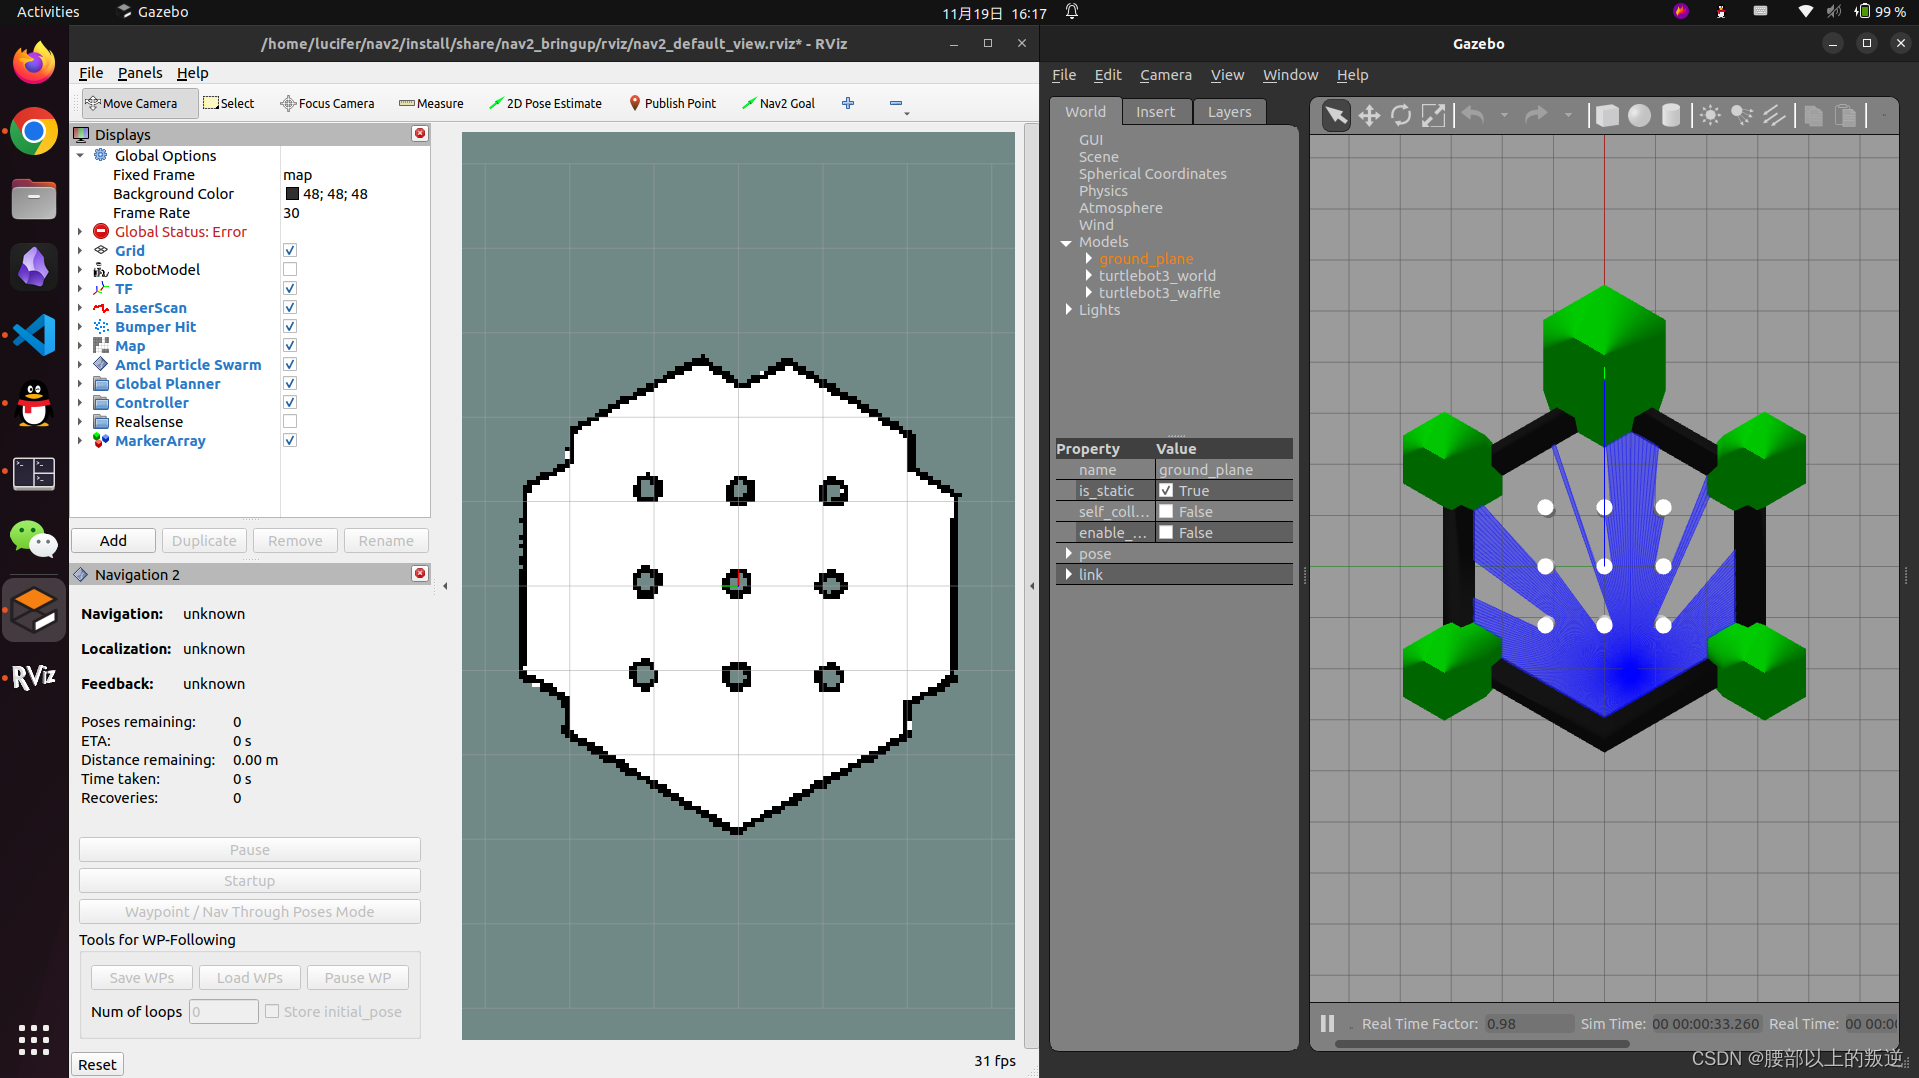
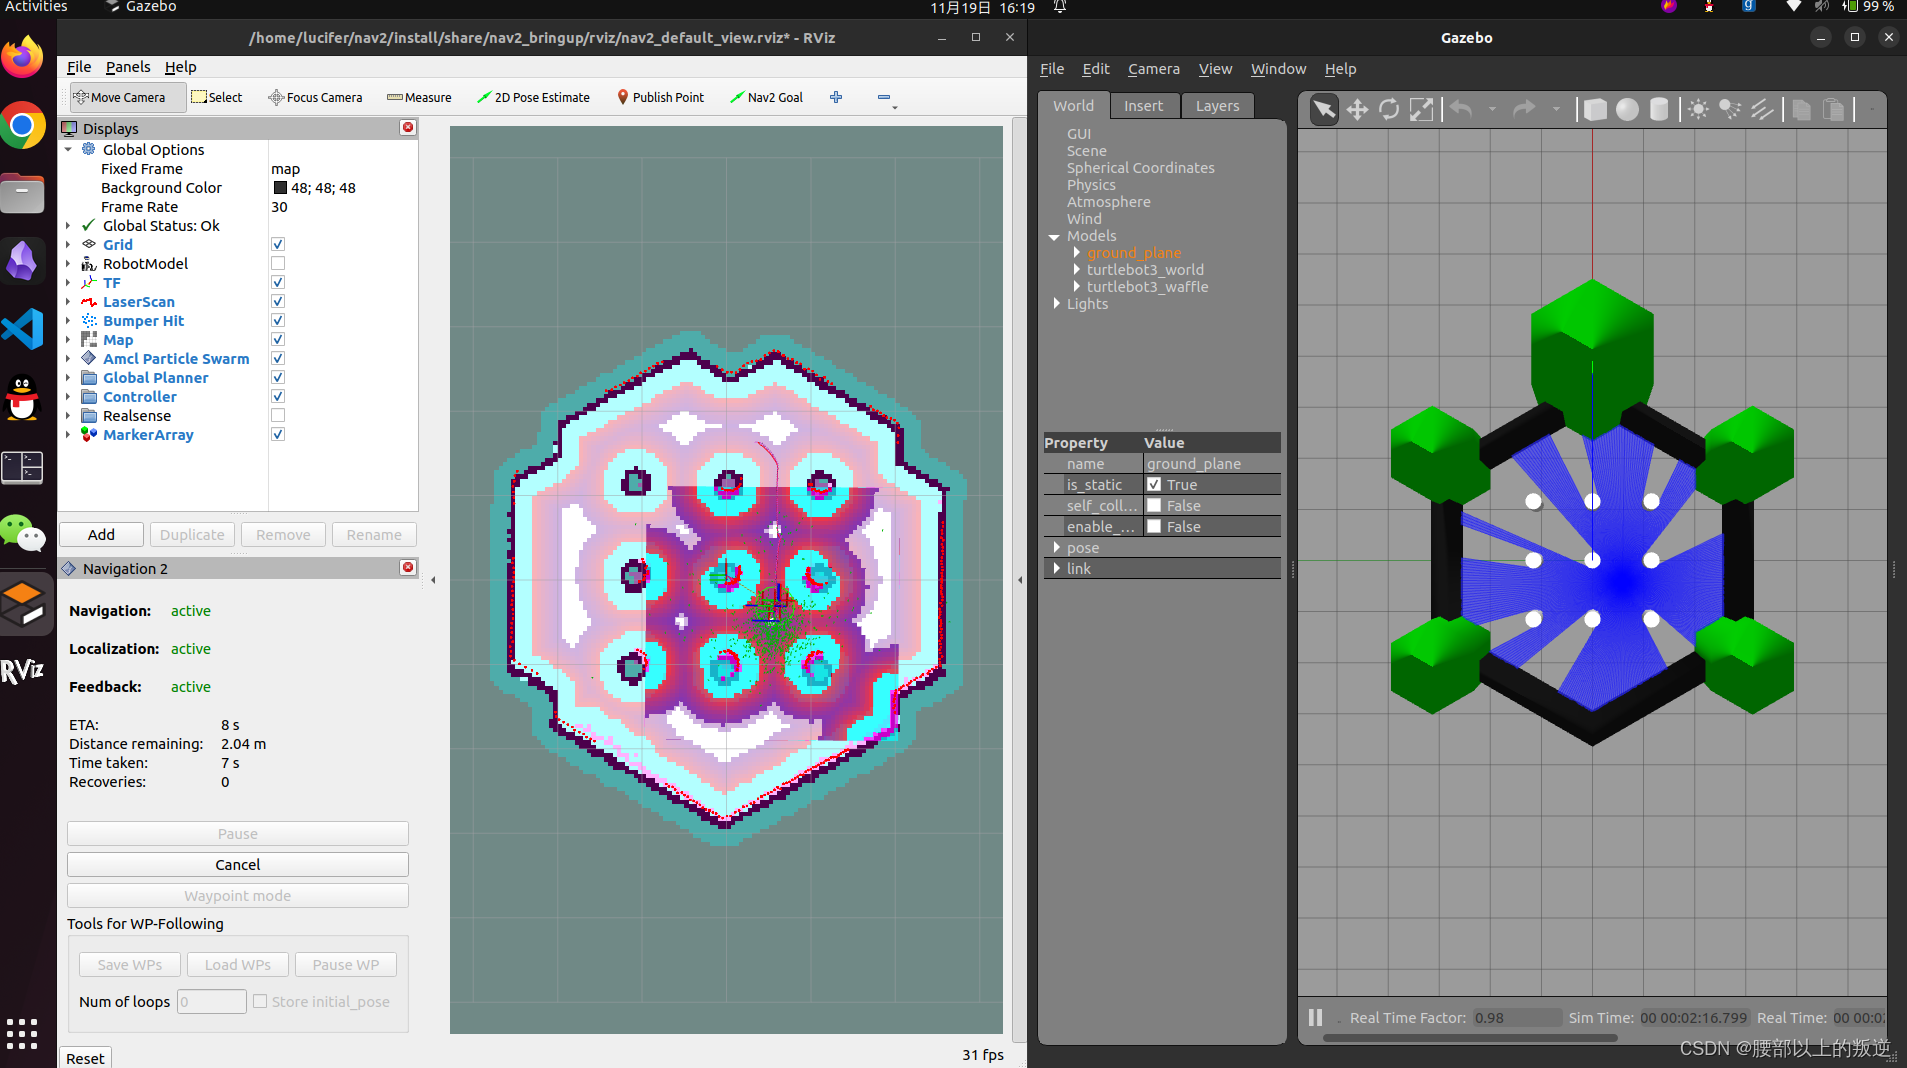
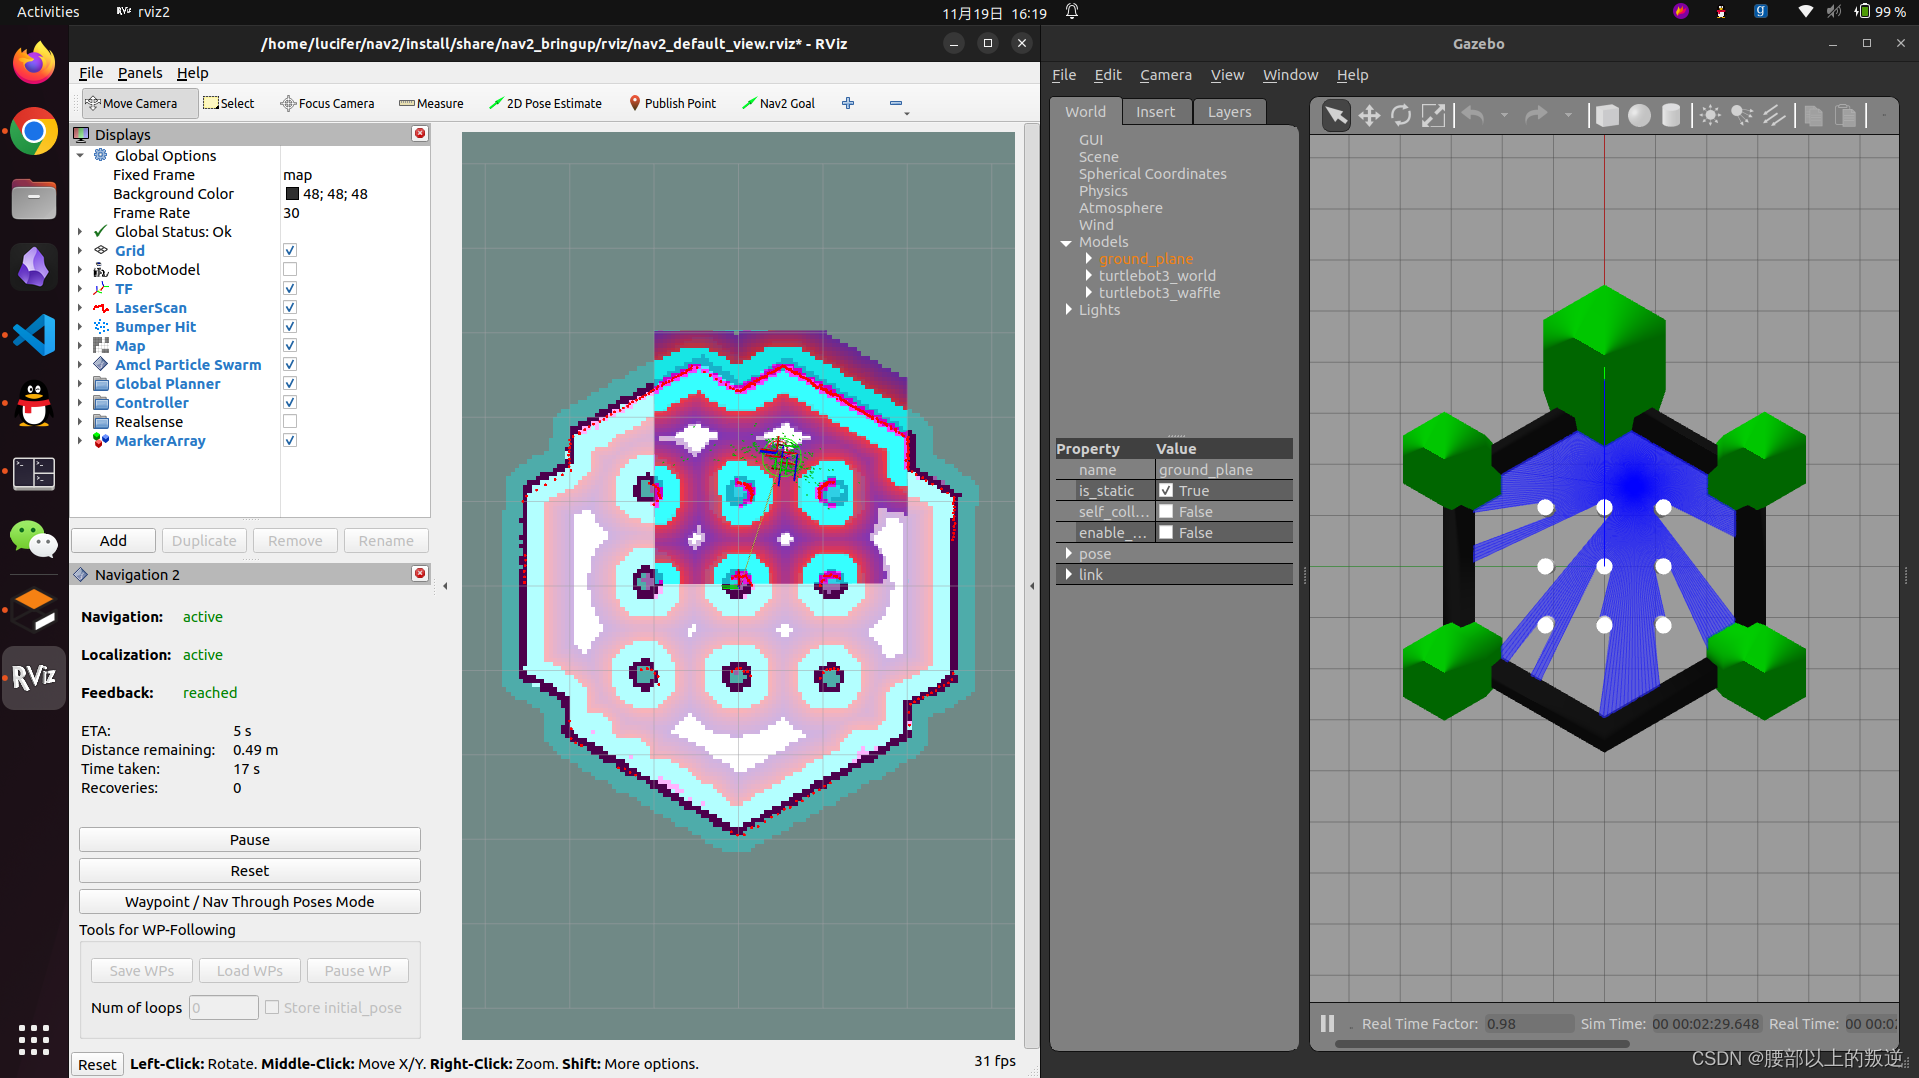
成功!
依赖关系图
接下来你可以运行
colcon graph --dot | dot -Tpng -o graph.png
来查看这些包之前的依赖关系。
