练习九-利用状态机实现比较复杂的接口设计
- 1,任务目的:
- 2,RTL代码
- 3,RTL原理框图
- 4,测试代码
- 5,波形输出
1,任务目的:
(1)学习运用状态机控制的逻辑开关,并设计出一个比较复杂的接口逻辑;
(2)在复杂设计中使用任务(task)结构,以提高程序的可读性;
(3)加深对可综合风格模块的认识。
下面例子是一个并行数据转换为串行位流的变换器,利用双向总线输出。该案例来自于EPROM读写器,电路工作的步骤是:
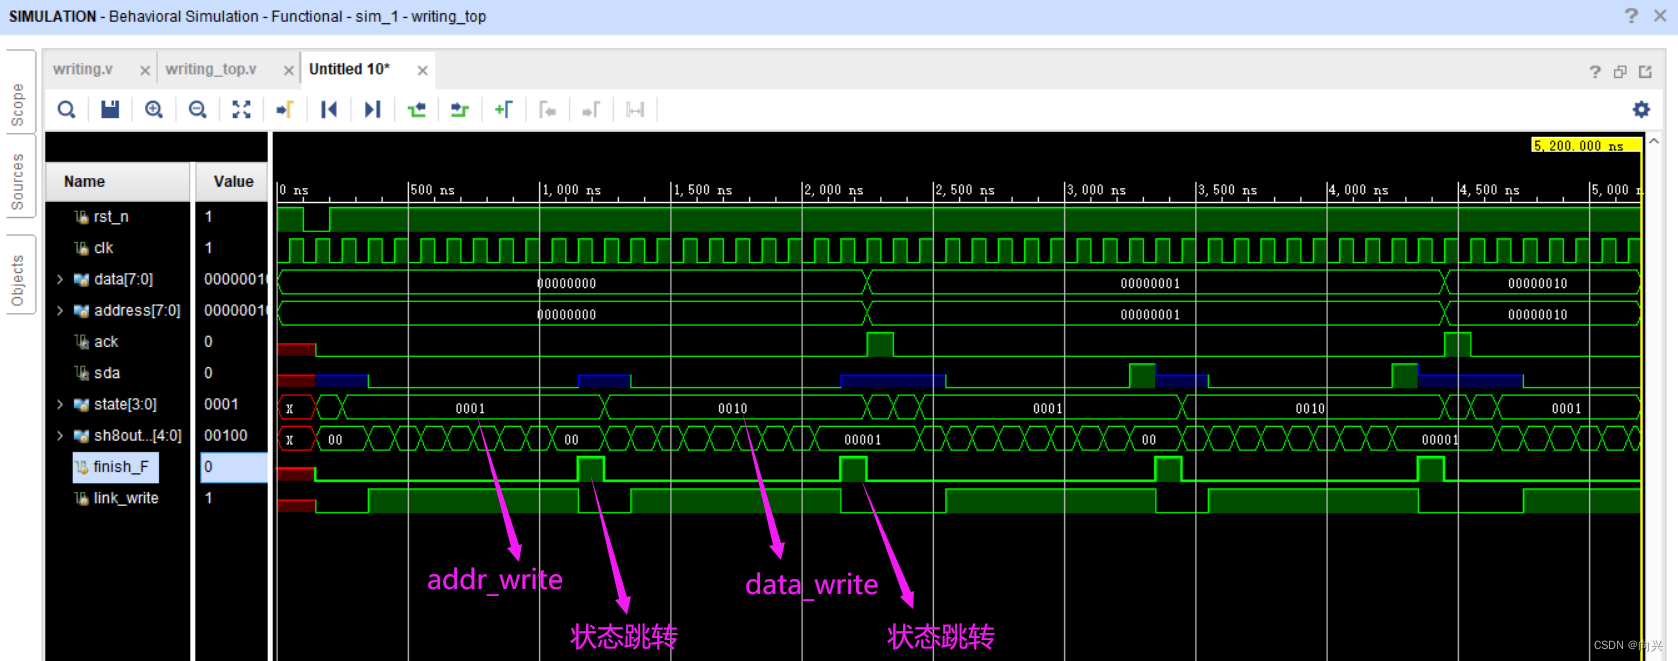
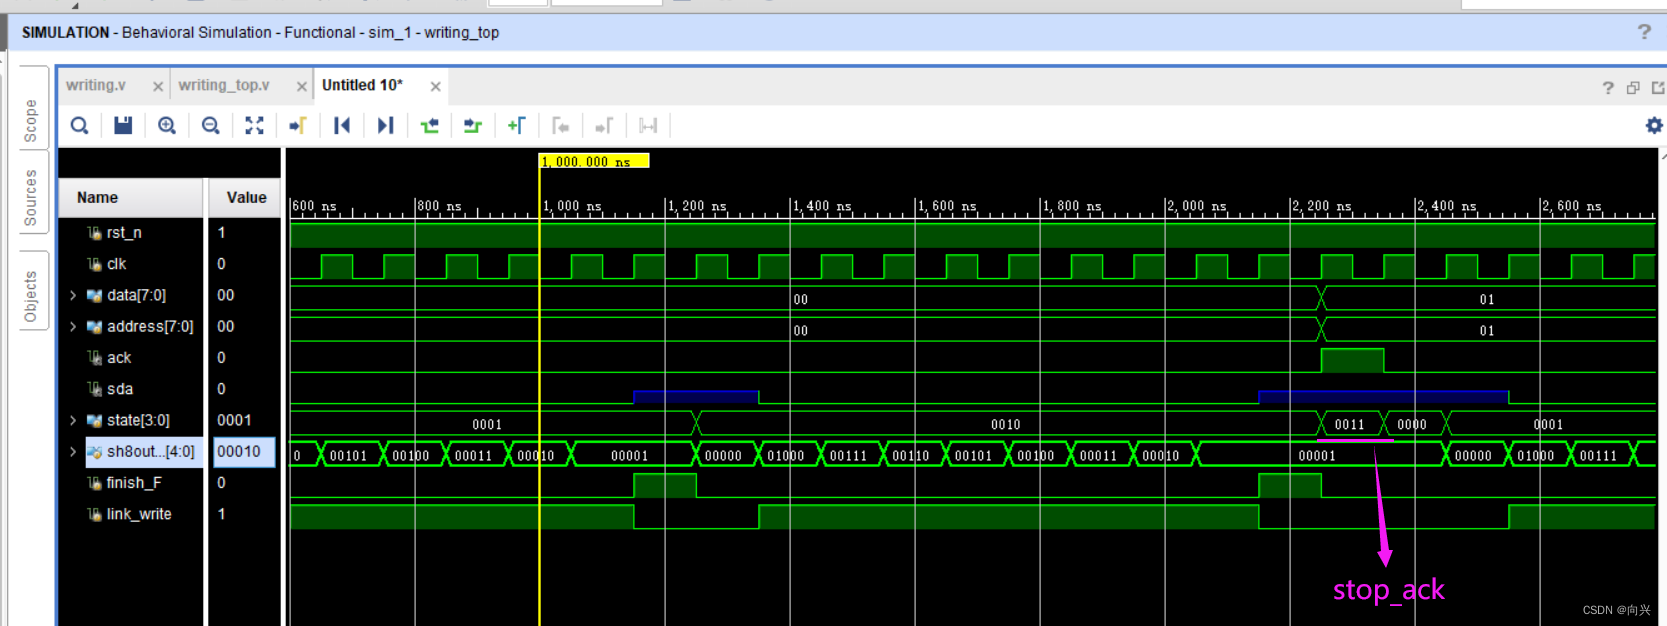
(1)把并行地址存入寄存器; (2)把并行数据存入寄存器; (3)连接串行单总线; (4)地址的串行输出; (5)数据的串行输出; (6)挂起串行单总线; (7)给信号源应答; (8)让信号源给出下一个操作对象; (9)结束写操作。
2,RTL代码
`timescale 1ns / 1ps
//
// Company:
// Engineer:
//
// Create Date: 2023/11/22 10:52:02
// Design Name:
// Module Name: writing
// Project Name:
// Target Devices:
// Tool Versions:
// Description:
//
// Dependencies:
//
// Revision:
// Revision 0.01 - File Created
// Additional Comments:
//
//module writing(
rst_n, clk, address, data, sda, ack);input			rst_n, clk;
input	[7:0]	data, address;inout			sda;			// 	串行数据的输出或者输入接口
output			ack;			//	模块给出的应答信号
reg				link_write;		// link_write决定何时输出reg		[3:0]	state;			//	主状态机的状态字
reg		[4:0]	sh8out_state;	// 从状态机的状态字
reg		[7:0]	sh8out_buf;		// 输入数据缓冲
reg				finish_F;		//	用以判断是否处理完一个操作对象
reg				ack;parameter	idle 		= 0;
parameter	addr_write	= 1;
parameter	data_write	= 2;
parameter	stop_ack	= 3;parameter	bit0		= 1;
parameter	bit1		= 2;
parameter	bit2		= 3;
parameter	bit3		= 4;
parameter	bit4		= 5;
parameter	bit5		= 6;
parameter	bit6		= 7;
parameter	bit7		= 8;assign		sda = link_write ? sh8out_buf[7] : 1'bz;always@(posedge clk)	beginif(!rst_n)	begin	// 复位link_write		<= 0;		// 挂起串行总线sh8out_state	<= idle;sh8out_buf		<= 0;state			<= idle;finish_F		<= 0;		// 结束标志清零ack				<= 0;endelse	case(state)idle:	beginlink_write		<= 0;	// 断开串行单总线sh8out_state	<= idle;sh8out_buf		<= address;	// 并行地址存入寄存器state			<= addr_write;	// 进入下一个状态finish_F		<= 0;				ack				<= 0;endaddr_write:		// 地址的输入if(finish_F == 0)	shift8_out	;	// 地址的串行输出//	?	任务else	beginsh8out_state	<= idle;sh8out_buf		<= data;	// 并行数据存入寄存器state			<= data_write;finish_F		<= 0;enddata_write:		// 数据的写入if(finish_F	== 0)shift8_out	;	//	数据的串行输出// 任务else	beginlink_write	<= 0;state		<= stop_ack;finish_F	<= 0;ack			<= 1;	// 向信号源发出应答endstop_ack:	begin // 向信号源发出应答结果ack		<= 0;state	<= idle;endendcase
endtask	shift8_out;	// 地址和数据的串行输出
begincase(sh8out_state)idle:	beginlink_write		<= 1;	// 连接串行单总线,立即输出地址或数据的最高位(MSB)sh8out_state	<= bit7;endbit7:	beginlink_write		<= 1;	// 连接串行单总线sh8out_state	<= bit6;sh8out_buf		<= sh8out_buf << 1;	// 输出地址或数据的次高位(bit6)endbit6:	beginsh8out_state	<= bit5;sh8out_buf		<= sh8out_buf << 1;endbit5:	beginsh8out_state	<= bit4;sh8out_buf		<= sh8out_buf << 1;endbit4:	beginsh8out_state	<= bit3;sh8out_buf		<= sh8out_buf << 1;endbit3:	beginsh8out_state	<= bit2;sh8out_buf		<= sh8out_buf << 1;endbit2:	beginsh8out_state	<= bit1;sh8out_buf		<= sh8out_buf << 1;endbit1:	beginsh8out_state	<= bit0;sh8out_buf		<= sh8out_buf << 1;	// 输出地址或数据的最低位(LSB)endbit0:	beginlink_write		<= 0;	// 挂起串行单总线finish_F		<= 1;	// 建立结束标志endendcase
end
endtaskendmodule
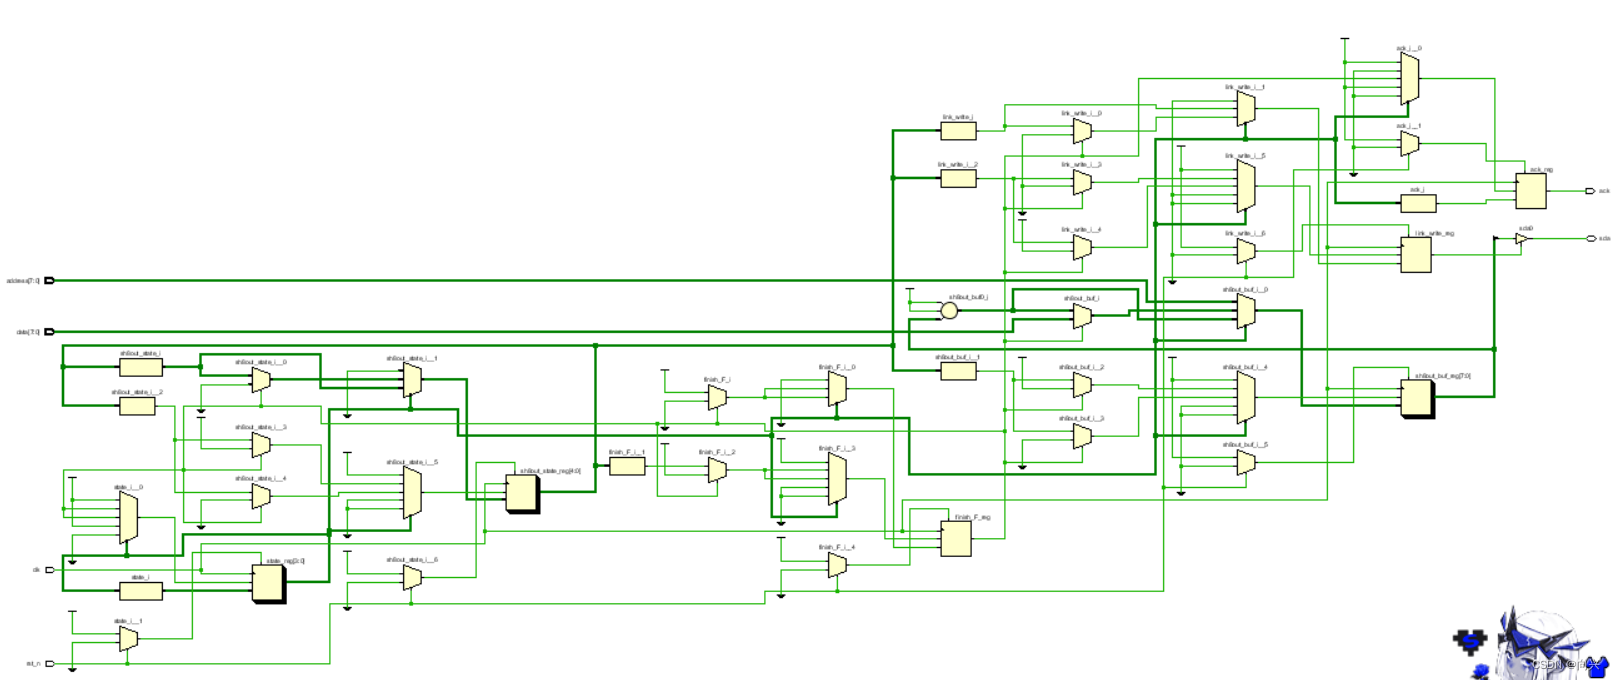
3,RTL原理框图
4,测试代码
`timescale 1ns / 1ps
//
// Company:
// Engineer:
//
// Create Date: 2023/11/22 10:53:46
// Design Name:
// Module Name: writing_top
// Project Name:
// Target Devices:
// Tool Versions:
// Description:
//
// Dependencies:
//
// Revision:
// Revision 0.01 - File Created
// Additional Comments:
//
//// 测试代码
`define	clk_cycle	50
module	writing_top;
reg		rst_n,	clk;
reg		[7:0]	data, address;
wire	ack,	sda;always #`clk_cycle	clk = ~clk;initial	beginclk 	= 0;rst_n	= 1;data	= 0;address	= 0;#(2   * `clk_cycle)		rst_n = 0;#(2   * `clk_cycle)		rst_n = 1;#(100 * `clk_cycle)		$stop;
endalways@(posedge ack)	begin// 接收到应答信号后,给出下一个处理对象data 	= data + 1;address	= address + 1;
endwriting u_writing(
.rst_n			(rst_n		),
.clk			(clk		),
.data			(data		),
.address		(address	),
.ack			(ack		),
.sda			(sda		)
);endmodule
5,波形输出
