开发环境:
- Windows 11 家庭中文版
- Microsoft Visual Studio Community 2019
- VTK-9.3.0.rc0
- vtk-example
- 参考代码
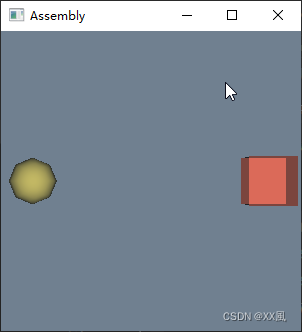
demo解决问题:创建了一个球体和立方体的三维可视化,将它们组合成一个装配体,应用变换,调整不透明度,并使用 VTK 显示场景。
关键流程:
-
组装: 使用
vtkAssembly将球体和立方体组合成一个装配体,使它们被视为一个单独的实体。 -
变换 对整个装配体应用变换 (
vtkTransform),将其平移到三维空间中的新位置。 -
获取actor集合
assembly->GetActors(collection);, 改变actor不透明度
关键代码:
// Combine the sphere and cube into an assembly./*创建 vtkProp3D 的层次结构(可转换道具)vtkAssembly 是一个将 vtkProp3Ds、其子类和其他程序集组合成树状层次结构的对象。vtkProp3Ds 和程序集可以通过只转换层次结构中的根程序集来一起转换。vtkAssembly 对象可以用来代替 vtkProp3D,因为它是 vtkProp3D 的子类。区别在于,vtkAssembly 会维护一个构成装配体的 vtkProp3D 实例(其 "部件")列表。然后,任何转换(即缩放、旋转、平移)父装配体的操作都会转换其所有部件。请注意,这个过程是递归的:您可以创建由任意深度的装配体和/或 vtkProp3D 组成的组。*/vtkNew<vtkAssembly> assembly;assembly->AddPart(sphereActor);assembly->AddPart(cubeActor);// Apply a transform to the whole assembly.vtkNew<vtkTransform> transform;transform->PostMultiply(); // This is the key line.transform->Translate(5.0, 0, 0);assembly->SetUserTransform(transform);// Extract each actor from the assembly and change its opacity.vtkNew<vtkPropCollection> collection;//遍历assemblyassembly->GetActors(collection);collection->InitTraversal();for (vtkIdType i = 0; i < collection->GetNumberOfItems(); i++){dynamic_cast<vtkActor*>(collection->GetNextProp())->GetProperty()->SetOpacity(0.5);}
prj name: Assembly
#include <vtkActor.h>
#include <vtkAssembly.h>
#include <vtkCubeSource.h>
#include <vtkNamedColors.h>
#include <vtkNew.h>
#include <vtkPolyDataMapper.h>
#include <vtkProperty.h>
#include <vtkRenderWindow.h>
#include <vtkRenderWindowInteractor.h>
#include <vtkRenderer.h>
#include <vtkSphereSource.h>
#include <vtkTransform.h>int main(int, char*[])
{vtkNew<vtkNamedColors> namedColors;// Create a sphere.vtkNew<vtkSphereSource> sphereSource;sphereSource->Update();vtkNew<vtkPolyDataMapper> sphereMapper;sphereMapper->SetInputConnection(sphereSource->GetOutputPort());vtkNew<vtkActor> sphereActor;sphereActor->SetMapper(sphereMapper);sphereActor->GetProperty()->SetColor(namedColors->GetColor3d("Banana").GetData());// Create a cube.vtkNew<vtkCubeSource> cubeSource;cubeSource->SetCenter(5.0, 0.0, 0.0);cubeSource->Update();vtkNew<vtkPolyDataMapper> cubeMapper;cubeMapper->SetInputConnection(cubeSource->GetOutputPort());vtkNew<vtkActor> cubeActor;cubeActor->SetMapper(cubeMapper);cubeActor->GetProperty()->SetColor(namedColors->GetColor3d("Tomato").GetData());// Combine the sphere and cube into an assembly./*创建 vtkProp3D 的层次结构(可转换道具)vtkAssembly 是一个将 vtkProp3Ds、其子类和其他程序集组合成树状层次结构的对象。vtkProp3Ds 和程序集可以通过只转换层次结构中的根程序集来一起转换。vtkAssembly 对象可以用来代替 vtkProp3D,因为它是 vtkProp3D 的子类。区别在于,vtkAssembly 会维护一个构成装配体的 vtkProp3D 实例(其 "部件")列表。然后,任何转换(即缩放、旋转、平移)父装配体的操作都会转换其所有部件。请注意,这个过程是递归的:您可以创建由任意深度的装配体和/或 vtkProp3D 组成的组。*/vtkNew<vtkAssembly> assembly;assembly->AddPart(sphereActor);assembly->AddPart(cubeActor);// Apply a transform to the whole assembly.vtkNew<vtkTransform> transform;transform->PostMultiply(); // This is the key line.transform->Translate(5.0, 0, 0);assembly->SetUserTransform(transform);// Extract each actor from the assembly and change its opacity.vtkNew<vtkPropCollection> collection;//遍历assemblyassembly->GetActors(collection);collection->InitTraversal();for (vtkIdType i = 0; i < collection->GetNumberOfItems(); i++){dynamic_cast<vtkActor*>(collection->GetNextProp())->GetProperty()->SetOpacity(0.5);}// VisualizationvtkNew<vtkRenderer> renderer;vtkNew<vtkRenderWindow> renderWindow;renderWindow->AddRenderer(renderer);vtkNew<vtkRenderWindowInteractor> renderWindowInteractor;renderWindowInteractor->SetRenderWindow(renderWindow);renderer->AddActor(assembly);renderer->SetBackground(namedColors->GetColor3d("SlateGray").GetData());renderer->ResetCamera();renderWindow->SetWindowName("Assembly");renderWindow->Render();renderWindowInteractor->Start();return EXIT_SUCCESS;
}