1. 定义组件
- 函数式定义(简单组件),使用function定义
import React from 'react';
import ReactDOM from 'react-dom/client';function App() {return (<button onClick={handleClick}>click</button> // 直接把方法handleClick赋值给onClick)function handleClick() {alert('click')}
}
export default App; // 其他组件引用时需要export出去const root = ReactDOM.createRoot(document.getElementById('root'));
root.render(<App />);
- 类式定义(复杂组件),使用class定义
import React from 'react';
import ReactDOM from 'react-dom/client';class App extends React.Component {render() {return (<button onClick={this.handleClick}>click</button>  // this代表在App的实例对象上赋值handleClick)}handleClick() {alert('click')}
}
export default App; // 其他组件引用时需要export出去const root = ReactDOM.createRoot(document.getElementById('root'));
root.render(<App />);
2. state,设置组件初始值
- 原始定义,需要在constructor中定义state和绑定方法handleClick的this
class Weather extends React.Component {// 创建构造器,类似ruby的initializeconstructor(props) {// 构造器是否接收props,是否传递给super,取决于是否希望在构造器中通过this访问props// 如果是 super(),则 console.log(this.props)为undefined, console.log(props)就是传进来的props// 如果是 super(props),则 console.log(this.props)为Weather的实例super(props) // 调用父类React.Component的构造器this.state = { isHot: true, wind: 'big' }this.handleClick = this.handleClick.bind(this) // 给handleClick绑定this}render() {const isHot = this.state.isHotreturn (<h1 onClick={this.handleClick}>Today is very {isHot ? 'hot' : 'cold'}, wind: {this.state.wind}</h1>)}handleClick() {this.setState({ isHot: !this.state.isHot, wind: this.state.wind !== 'big' ? 'big' : 'small' })}
}
- 简化后在类中直接给state和handleClick赋值,就直接把属性和方法绑定到Weather的实例上了
class Weather extends React.Component {// 初始化state = { isHot: true, wind: 'big' }// 渲染render() {const isHot = this.state.isHotreturn (<h1 onClick={this.handleClick}>Today is very {isHot ? 'hot' : 'cold'}, wind: {this.state.wind}</h1>)}// 自定义方法handleClick = () => {this.setState({ isHot: !this.state.isHot, wind: this.state.wind !== 'big' ? 'big' : 'small' })}
}
3. props,从组件外部给组件定义中传值
- 函数式组件使用props
- 函数式组件使用props
```typescript
import React from 'react';
import ReactDOM from 'react-dom/client';
import PropTypes from 'prop-types';function Person(props){const { name, age, sex } = propsreturn (<ul><li>name: {name}</li><li>age: {age}</li><li>sex: {sex}</li></ul>)
}
// 限制属性
Person.propTypes = {name: PropTypes.string.isRequired,age: PropTypes.number,sex: PropTypes.string,speak: PropTypes.func
}
// 设置属性默认值
Person.defaultProps = {age: 18,sex: 'female'
}function speak() {console.log('speak')
}const root = ReactDOM.createRoot(document.getElementById('root'));
const p = { name: 'Tom' }
root.render(<React.StrictMode>{/* <Person name={p.name} age={p.age} sex={p.sex} speak={speak} /> */}<Person {...p} speak={speak} /></React.StrictMode>
);
- 类式组件使用props
import React from 'react';
import ReactDOM from 'react-dom/client';
import PropTypes from 'prop-types';class Person extends React.Component {render() {const { name, age, sex } = this.propsreturn (<ul><li>name: {name}</li><li>age: {age}</li><li>sex: {sex}</li></ul>)}state = { isHot: true } // 这是给组件实例对象赋值// 限制属性 前面加 static 是给组件类赋值static propTypes = {name: PropTypes.string.isRequired,age: PropTypes.number,sex: PropTypes.string,speak: PropTypes.func}// 设置属性默认值static defaultProps = {age: 18,sex: 'female'}
}function speak() {console.log('speak')
}const root = ReactDOM.createRoot(document.getElementById('root'));
const p = { name: 'Tom' }
root.render(<React.StrictMode>{/* <Person name={p.name} age={p.age} sex={p.sex} speak={speak} /> */}<Person {...p} speak={speak} /></React.StrictMode>
);
4. refs,获取其他html元素的dom,相当于$(‘#xx’)
- 字符串形式ref
class Demo extends React.Component {render() {return (<><input ref="input1" type="text" /><button onClick={this.tipLeftInput}>Click me</button><input ref="input2" onBlur={this.tiprightInput} type="text" /></>)}tipLeftInput = () => {alert(this.refs.input1.value);}tiprightInput = () => {alert(this.refs.input2.value);}
}
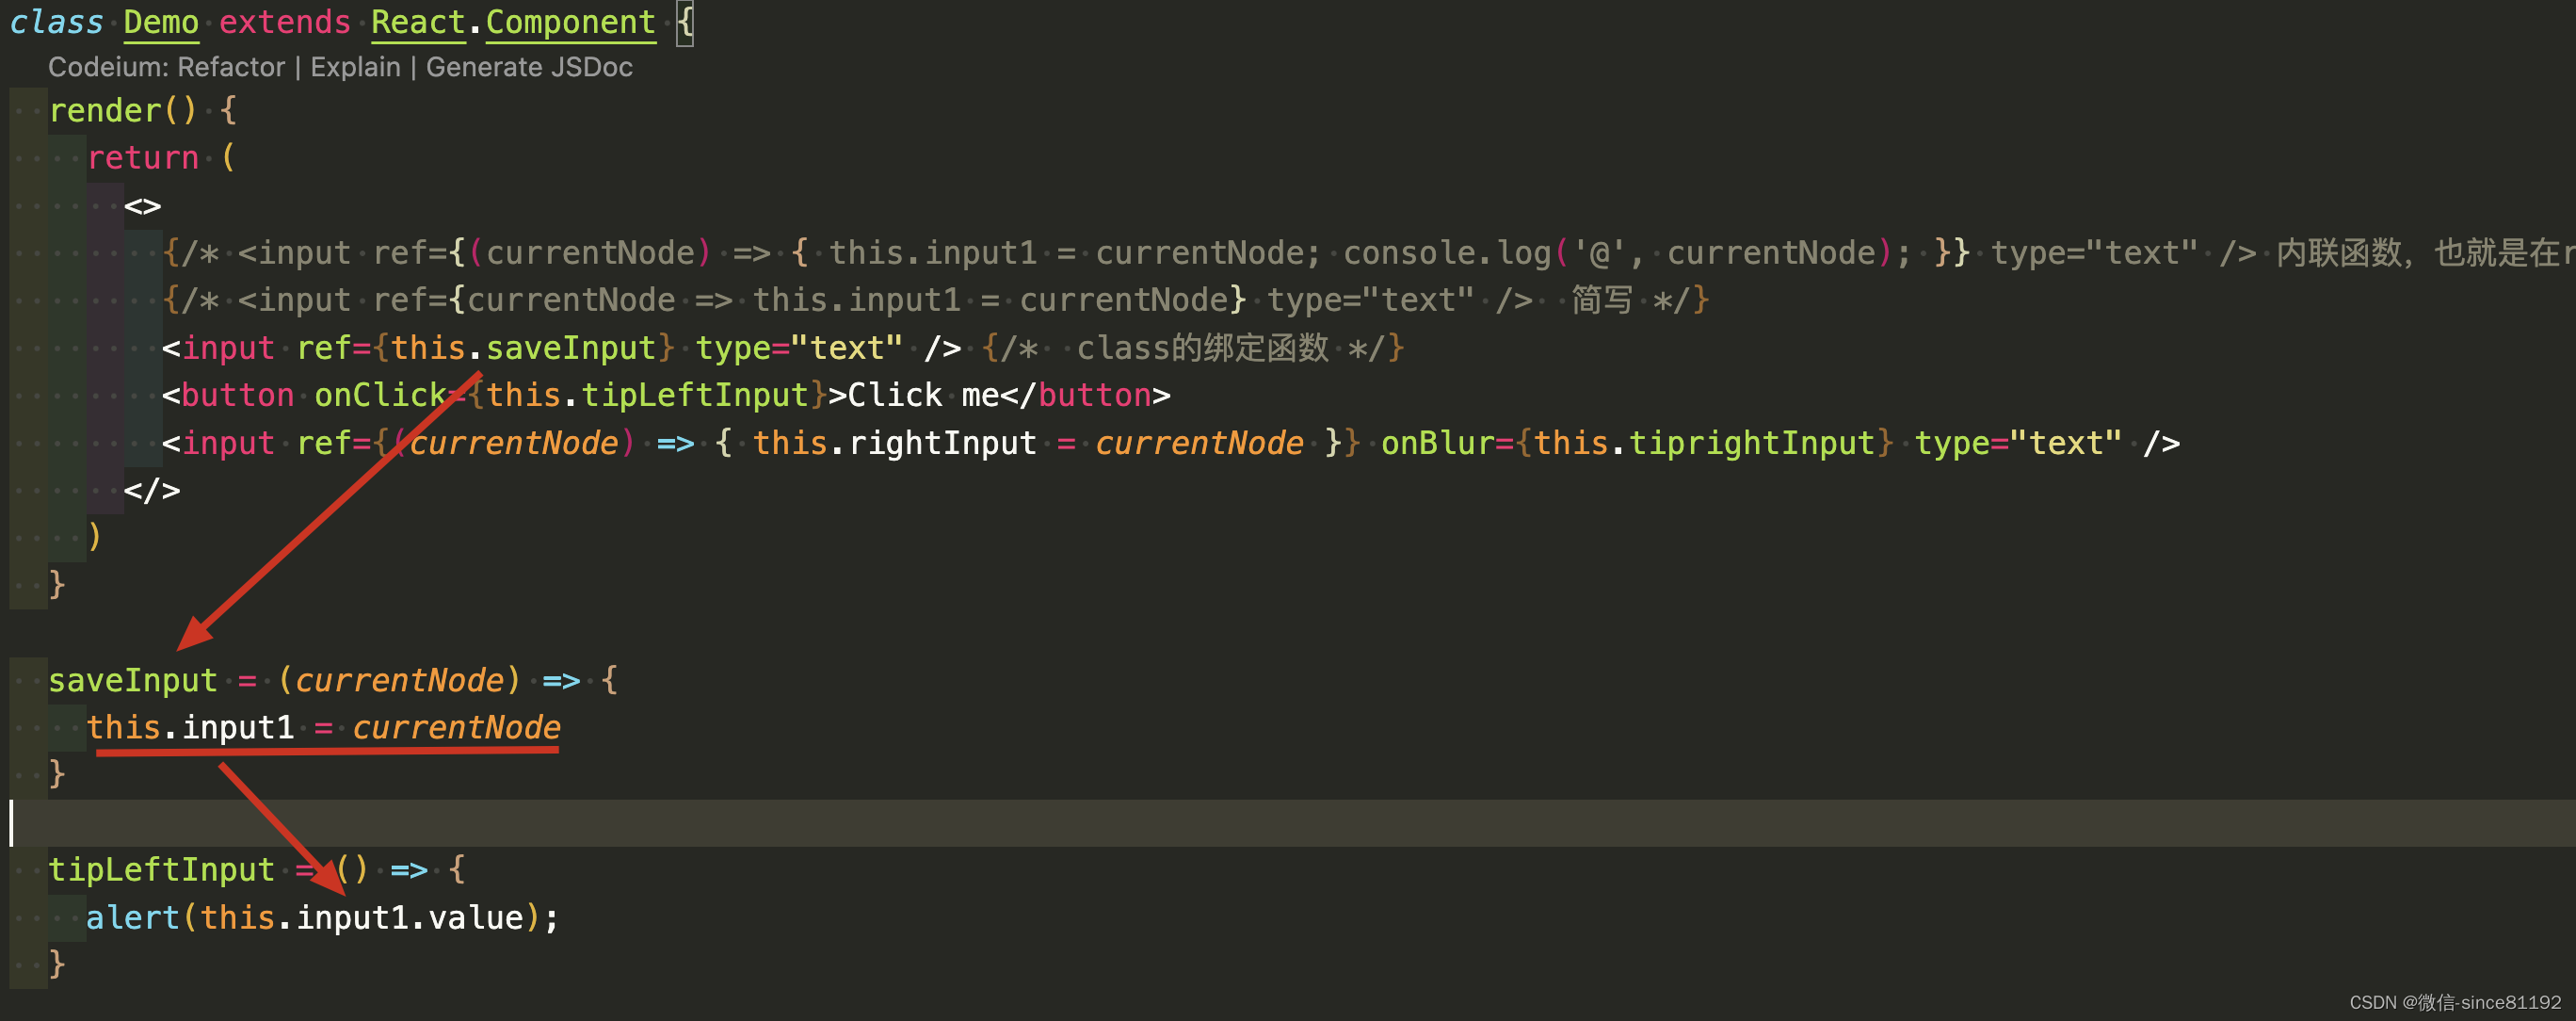
- 回调形式ref
class Demo extends React.Component {render() {return (<><input ref={(currentNode) => { this.input1 = currentNode }} type="text" />{/* <input ref={currentNode => this.input1 = currentNode} type="text" />  简写 */}<button onClick={this.tipLeftInput}>Click me</button><input ref={(currentNode) => { this.rightInput = currentNode }} onBlur={this.tiprightInput} type="text" /></>)}tipLeftInput = () => {alert(this.input1.value);}tiprightInput = () => {alert(this.rightInput.value);}
}
- ref回调函,如果是内联函数方式定义的,在更新过程中(更改state重新渲染render)会被执行两次,第一次传入参数null,第二次传入参数为DOM, 可以将ref回调函数定义为class的绑定函数避免上述问题。
- createRef api创建ref , 较麻烦
class Demo extends React.Component {render() {return (<><input ref={this.myRef1} type="text" /><button onClick={this.tipLeftInput}>Click me</button><input ref={this.myRef2} onBlur={this.tiprightInput} type="text" /></>)}myRef1 = React.createRef()myRef2 = React.createRef()tipLeftInput = () => {console.log(this.myRef1.current.value);}tiprightInput = () => {console.log(this.myRef2.current.value);}
}
5. 事件处理
- button要获取input的值,使用ref
class Demo extends React.Component {render() {return (<><input ref={this.myRef1} type="text" /><button onClick={this.tipLeftInput}>Click me</button></>)}myRef1 = React.createRef()tipLeftInput = () => {console.log(this.myRef1.current.value);}
}
- input获取本身DOM的值,使用e.target获取dom
class Demo extends React.Component {render() {return (<><input onBlur={this.tiprightInput} type="text" /></>)}tiprightInput = (e) => {console.log(e.target.value);}
}
6. 非受控组件和受控组件
- 非受控组件,使用ref取值,不建议使用
class Login extends React.Component {render() {return (<form onSubmit={this.submit}><input type="text" name="username" ref={ref => this.username = ref} /><input type="text" name="password" ref={ref => this.password = ref} /><input type="submit" name="" /></form>)}submit = (e) => {e.preventDefault();alert(`username: ${this.username.value}, password: ${this.password.value}`)}
}
- 受控组件,使用state取值,建议使用
class Login extends React.Component {state = {username: '',password: ''}render() {return (<form onSubmit={this.submit}><input type="text" name="username" onChange={this.saveUsername} /><input type="text" name="password" onChange={this.savePassword} /><input type="submit" name="" /></form>)}saveUsername = (e) => {this.setState({ username: e.target.value })}savePassword = (e) => {this.setState({ password: e.target.value })}submit = (e) => {e.preventDefault();alert(`username: ${this.state.username}, password: ${this.state.password}`)}
}
7.高阶函数
-上面的代码重构,onChange 调用的是saveFormdate方法return的返回值,是个函数
必须把一个函数交给onChange
class Login extends React.Component {state = {username: '',password: ''}render() {return (<form onSubmit={this.submit}><input type="text" name="username" onChange={this.saveFormdate('username')} /><input type="text" name="password" onChange={this.saveFormdate('password')} /><input type="submit" name="" /></form>)}saveFormdate = (params) => {return (e) => {this.setState({ [params]: e.target.value })}}submit = (e) => {e.preventDefault();alert(`username: ${this.state.username}, password: ${this.state.password}`)}
}
8. 生命周期,回调函数或者叫钩子函数
class Life extends React.Component {// 构造器constructor(props) {console.log('constructor')super(props)this.state = { num: 0 }}// 组件挂载前调用componentWillMount() {console.log('componentWillMount')}// 询问是否更新组件调用shouldComponentUpdate() {console.log('shouldComponentUpdate')return true // 默认返回true}// 组件更新前调用componentWillUpdate() {console.log('componentWillUpdate')}// 组件挂载,初始化渲染、状态更新后调用render() {console.log('render')return (<><h1 style={{ opacity: this.state.opacity }}>当前数字: {this.state.num}</h1><button onClick={this.add}>数字+1</button><button onClick={this.unmount}>卸载组件</button></>)}// 组件更新后调用componentDidUpdate() {console.log('componentDidUpdate')}// 组件挂载后调用,调用一次componentDidMount() {console.log('componentDidMount')}// 组件卸载前调用componentWillUnmount() {console.log('componentWillUnmount')}// 数字+1调用add = () => {const { num } = this.statethis.setState({ num: num + 1 })}// 卸载组件调用unmount = () => {root.unmount();}
}