目录
一、流式布局标签发展历程
二、类型及使用
2.1 Chip.Action(默认值)
2.2 Chip.Entry
2.3 Chip.Filter
2.4 Chip.Choice
三、常用事件
3.1 OnClickListener
3.2 OnCheckedChangeListener
3.3 OnCloseIconClickListener
四、ChipGroup
4.1 ChipGroup + Chip.Choice(简单使用)
4.1.1 单选
4.1.2 多选
4.2 属性
4.3 setOnCheckedStateChangeListener
一、流式布局标签发展历程
-
第一阶段:实现这种界面的时候,基本都是自定义一个控件,然后在Java代码中动态的 添加 一个个的TextView,还需要计算布局宽度/高度,进行换行等等处理,蛮复杂的;
-
第二阶段:使用 RecyclerView,我们实现这种界面就比较方便了;
-
第三阶段:谷歌为我们提供了 Chip、ChipGroup、ChipDrawable,有了这三者,我们实现这种界面就更加方便了。
二、类型及使用
Chip 的所有类型都是可点击的,根据选中效果有四种类型
-
Action(默认值):有个点击效果,可用于展示。除非存在其他xml属性,否则按此键将不执行任何操作
-
Entry:默认情况下包含选中
标记/取消标记和关闭图标。 -
Filter:标记/取消标记。
-
Choice:选中后背景颜色变化。
2.1 Chip.Action(默认值)
-
使用
style="@style/Widget.MaterialComponents.Chip.Action" -
不设置style,
使用默认style。
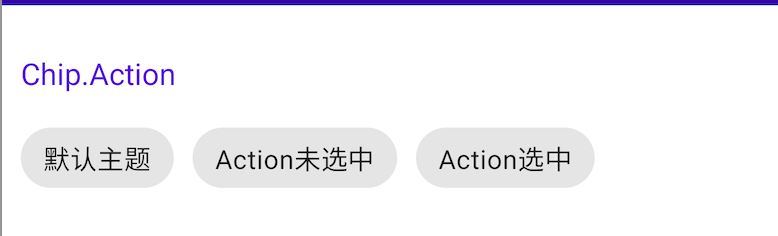
<TextViewandroid:layout_width="wrap_content"android:layout_height="wrap_content"android:layout_marginTop="15dp"android:text="Chip.Action"android:textColor="@color/purple_500"android:textSize="16sp" /><LinearLayoutandroid:layout_width="wrap_content"android:layout_height="wrap_content"android:orientation="horizontal"android:paddingTop="10dp"android:paddingBottom="10dp"><com.google.android.material.chip.Chipandroid:id="@+id/chip0"android:layout_width="wrap_content"android:layout_height="wrap_content"android:text="默认主题" /><com.google.android.material.chip.Chipstyle="@style/Widget.MaterialComponents.Chip.Action"android:layout_width="wrap_content"android:layout_height="wrap_content"android:layout_marginStart="10dp"android:text="Action未选中" /><com.google.android.material.chip.Chipstyle="@style/Widget.MaterialComponents.Chip.Action"android:layout_width="wrap_content"android:layout_height="wrap_content"android:layout_marginStart="10dp"android:checked="true"android:text="Action选中" /></LinearLayout>
2.2 Chip.Entry
使用 style="@style/Widget.MaterialComponents.Chip.Entry"
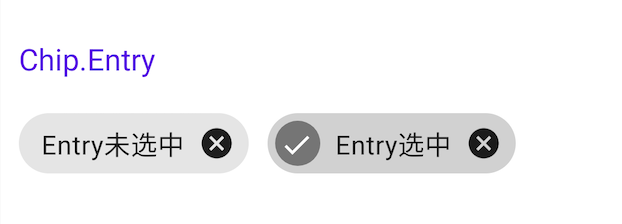
<TextViewandroid:layout_width="wrap_content"android:layout_height="wrap_content"android:layout_marginTop="15dp"android:text="Chip.Entry"android:textColor="@color/purple_500"android:textSize="16sp" /><LinearLayoutandroid:layout_width="wrap_content"android:layout_height="wrap_content"android:orientation="horizontal"android:paddingTop="10dp"android:paddingBottom="10dp"><com.google.android.material.chip.Chipandroid:id="@+id/chip2"style="@style/Widget.MaterialComponents.Chip.Entry"android:layout_width="wrap_content"android:layout_height="wrap_content"android:text="Entry未选中" /><com.google.android.material.chip.Chipstyle="@style/Widget.MaterialComponents.Chip.Entry"android:layout_width="wrap_content"android:layout_height="wrap_content"android:layout_marginStart="10dp"android:checked="true"android:text="Entry选中" /></LinearLayout>2.3 Chip.Filter
使用 style="@style/Widget.MaterialComponents.Chip.Filter"

<TextViewandroid:layout_width="wrap_content"android:layout_height="wrap_content"android:layout_marginTop="15dp"android:text="Chip.Filter"android:textColor="@color/purple_500"android:textSize="16sp" /><LinearLayoutandroid:layout_width="wrap_content"android:layout_height="wrap_content"android:orientation="horizontal"android:paddingTop="10dp"android:paddingBottom="10dp"><com.google.android.material.chip.Chipstyle="@style/Widget.MaterialComponents.Chip.Filter"android:layout_width="wrap_content"android:layout_height="wrap_content"android:text="Filter未选中" /><com.google.android.material.chip.Chipstyle="@style/Widget.MaterialComponents.Chip.Filter"android:layout_width="wrap_content"android:layout_height="wrap_content"android:checked="true"android:text="Filter选中" /></LinearLayout>
2.4 Chip.Choice
使用 style="@style/Widget.MaterialComponents.Chip.Choice"

<TextViewandroid:layout_width="wrap_content"android:layout_height="wrap_content"android:layout_marginTop="15dp"android:text="Chip.Choice"android:textColor="@color/purple_500"android:textSize="16sp" /><LinearLayoutandroid:layout_width="wrap_content"android:layout_height="wrap_content"android:orientation="horizontal"android:paddingTop="10dp"android:paddingBottom="10dp"><com.google.android.material.chip.Chipstyle="@style/Widget.MaterialComponents.Chip.Choice"android:layout_width="wrap_content"android:layout_height="wrap_content"android:text="Choice未选中" /><com.google.android.material.chip.Chipstyle="@style/Widget.MaterialComponents.Chip.Choice"android:layout_width="wrap_content"android:layout_height="wrap_content"android:layout_marginStart="10dp"android:checked="true"android:text="Choice选中" /></LinearLayout>
三、常用事件
3.1 OnClickListener
3.2 OnCheckedChangeListener
3.3 OnCloseIconClickListener
binding.chip0.setOnClickListener { Toast.makeText(this, "OnClickListener", Toast.LENGTH_SHORT).show() }binding.chip1.setOnCheckedChangeListener { button, b -> Toast.makeText(this, "OnCloseIconClickListener"+b, Toast.LENGTH_SHORT).show() }binding.chip2.setOnCloseIconClickListener { Toast.makeText(this, "OnCloseIconClickListener", Toast.LENGTH_SHORT).show() }
看名字基本也能看出是干什么的,就不过多描述了
四、ChipGroup
使用 ChipGroup 可以方便的实现 流式布局效果。其特点如下:
-
默认情况下, ChipGroup 中的 chip 会横向排列,当超过一行时会执行自动换行操作。
-
如果我们不想让 Chip 换行,那么为 ChipGroup 设置 app:singleLine=true,如果 Chip 会超过一行,则在外层包裹 HorizontalScrollView
-
当然,只有当其中包裹的 Chip 是 checkable=true 时,才具有选中效果。
4.1 ChipGroup + Chip.Choice(简单使用)
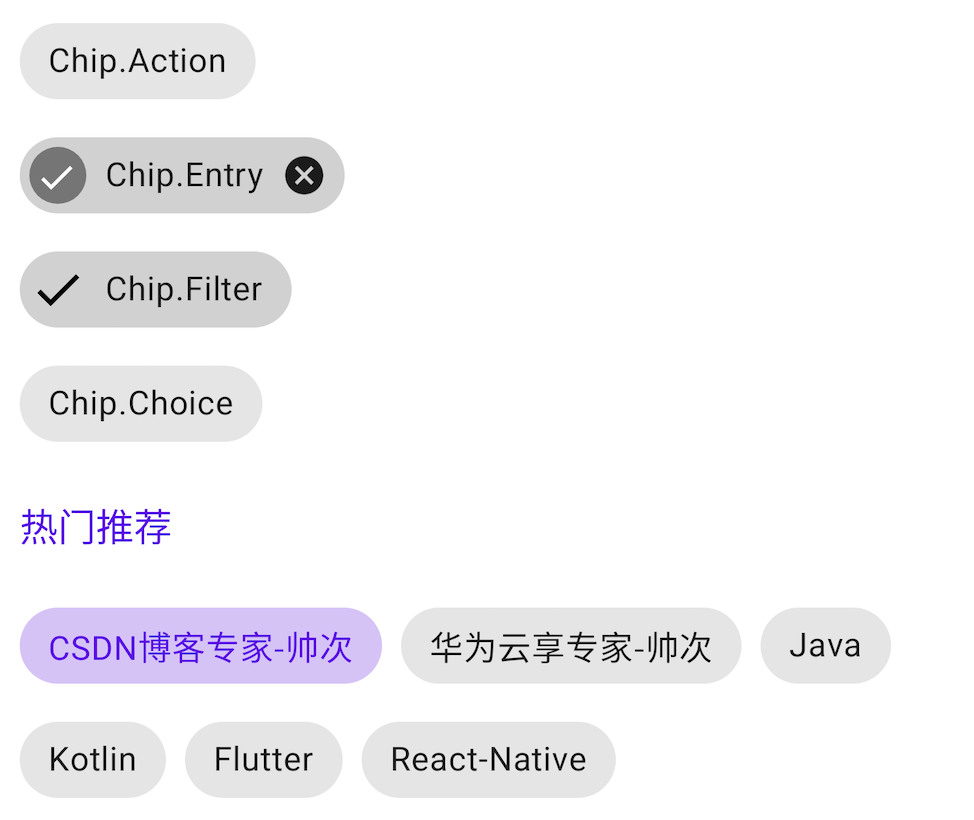
使用 ChipGroup + Chip.Choice ,通过 ChipGroup 的 singleSelection=true/false 属性可以实现单选或多选实现单选。这个跟 RadioGroup 的使用有点类似。
4.1.1 单选


<com.google.android.material.chip.ChipGroupandroid:layout_width="match_parent"android:layout_height="wrap_content"android:layout_marginTop="15dp"app:selectionRequired="true"app:singleSelection="true"><com.google.android.material.chip.Chipstyle="@style/Widget.MaterialComponents.Chip.Choice"android:layout_width="wrap_content"android:layout_height="wrap_content"android:text="CSDN博客专家-帅次" /><com.google.android.material.chip.Chipstyle="@style/Widget.MaterialComponents.Chip.Choice"android:layout_width="wrap_content"android:layout_height="wrap_content"android:text="华为云享专家-帅次" /><com.google.android.material.chip.Chipstyle="@style/Widget.MaterialComponents.Chip.Choice"android:layout_width="wrap_content"android:layout_height="wrap_content"android:text="Java" /><com.google.android.material.chip.Chipstyle="@style/Widget.MaterialComponents.Chip.Choice"android:layout_width="wrap_content"android:layout_height="wrap_content"android:text="Kotlin" /><com.google.android.material.chip.Chipstyle="@style/Widget.MaterialComponents.Chip.Choice"android:layout_width="wrap_content"android:layout_height="wrap_content"android:text="Flutter" /><com.google.android.material.chip.Chipstyle="@style/Widget.MaterialComponents.Chip.Choice"android:layout_width="wrap_content"android:layout_height="wrap_content"android:text="React-Native" /></com.google.android.material.chip.ChipGroup>
4.1.2 多选

上面代码不变,将 app:singleSelection="true" 改为 false 即可。
<TextViewandroid:layout_width="wrap_content"android:layout_height="wrap_content"android:layout_marginTop="15dp"android:text="热门推荐(多选)"android:textColor="@color/purple_500"android:textSize="16sp" /><com.google.android.material.chip.ChipGroupandroid:layout_width="match_parent"android:layout_height="wrap_content"android:layout_marginTop="15dp"app:selectionRequired="true"app:singleSelection="false">............</com.google.android.material.chip.ChipGroup>
4.2 属性
-
app:checkedChip: 初始选中的chip
-
app:chipSpacing: Chip间距
-
app:chipSpacingHorizontal: Chip水平间距
-
app:chipSpacingVertical: Chip垂直间距
-
app:singleLine: 是否开启单行模式,默认false
-
app:singleSelection: 是否开启单选模式,默认false
如果设置了 chipSpacing ,也设置了 chipSpacingHorizontal / chipSpacingVertical 则 chipSpacing 的值会被覆盖。如下:

<com.google.android.material.chip.ChipGroupandroid:layout_width="match_parent"android:layout_height="wrap_content"android:layout_marginTop="15dp"app:selectionRequired="true"app:checkedChip="@id/chip_csdn"app:chipSpacingHorizontal="30dp"app:chipSpacing="10dp"app:chipSpacingVertical="15dp"app:singleSelection="false"><com.google.android.material.chip.Chipandroid:id="@+id/chip_csdn"style="@style/Widget.MaterialComponents.Chip.Choice"android:layout_width="wrap_content"android:layout_height="wrap_content"android:text="CSDN博客专家-帅次" />......</com.google.android.material.chip.ChipGroup>
4.3 setOnCheckedStateChangeListener
选中监听,替换 setOnCheckedChangeListener(已过时)。此回调返回的是 id 数组。
public interface OnCheckedStateChangeListener {/*** Called when the checked chips are changed. When the selection is cleared, {@code checkedIds}* will be an empty list.** @param ChipGroup* @param checkedIds 返回的是选中 ID 数组*/void onCheckedChanged(@NonNull ChipGroup group, @NonNull List<Integer> checkedIds);} 源码提到此回调仅在 单选模式 下可用。但是我设置为多选还是可以的,如下:
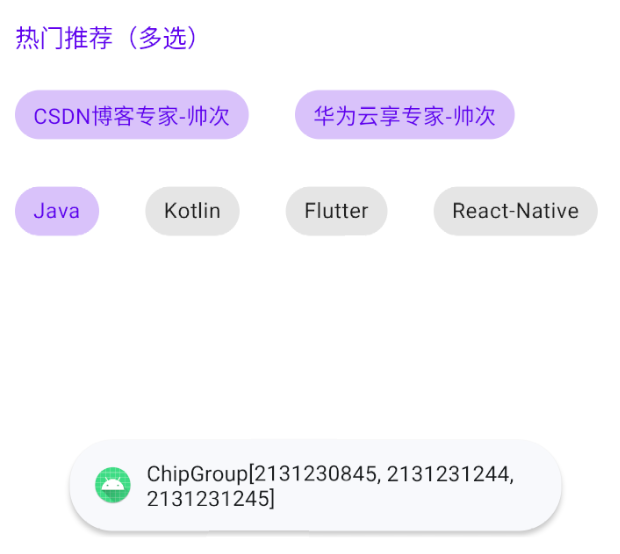
binding.chipGroup.setOnCheckedStateChangeListener { group, checkedIds ->Toast.makeText(this, "ChipGroup"+checkedIds, Toast.LENGTH_SHORT).show()}