基础
 概念 | webpack 中文文档 | webpack 中文文档 | webpack 中文网
深入理解Webpack及Babel的使用 - 掘金
Introduction to React Native for Web // React Native for Web
Webpack 是一个现代的 JavaScript 应用程序的静态模块打包工具,它将应用程序所依赖的各种资源(js、css、图片等)视为模块,通过 loader 转换这些模块,最后打包成符合生产环境部署的静态资源。
Webpack 的运行机制基于一条简单的原则:一切文件皆模块。因此,Webpack 在构建应用程序时,会先从入口模块开始递归解析模块依赖,然后通过 loader 处理各种类型的模块,最后打包成一个或多个浏览器可识别的静态资源。
Webpack 的基本配置包括 entry、output、module 和 plugins 四个部分。其中,entry 指定了入口模块,output 指定了输出目录和输出文件名,module 则用于配置 loader 和其他的一些规则,plugins 则是用于扩展 Webpack 功能的插件。
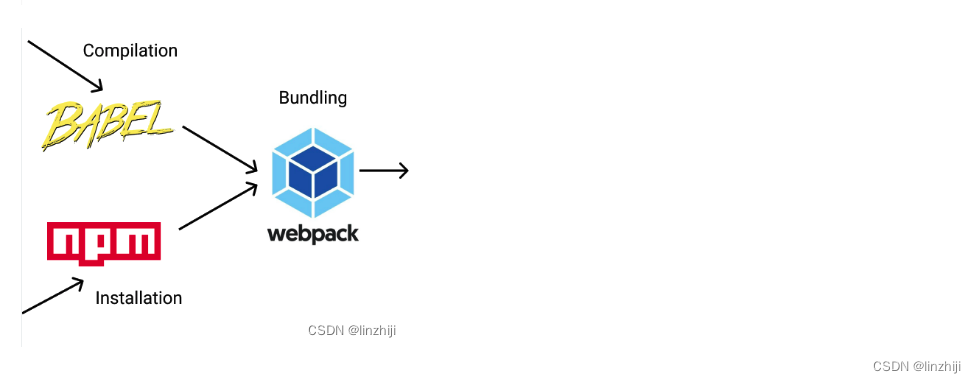
在使用 Webpack 进行项目开发时,我们通常需要使用 Babel 将 ES6+ 代码转换成浏览器兼容的 ES5 代码。Babel 的作用是将 JavaScript 新特性转换成浏览器支持的语法,例如箭头函数、解构赋值等。而 Loader 则是 Webpack 中用于处理各种类型文件的工具,例如将 css 转换成 JavaScript 对象、将图片转换成 data URL 等。
Babel是一个JavaScript编译器,可以将最新版本的JavaScript转换为向后兼容的代码,以便在旧版浏览器或其他环境中运行。Babel的作用是让我们使用最新的JavaScript语法特性,而不必担心浏览器是否支持这些特性。
过程
yarn add react-dom react-native-web
yarn add react-native-reanimated
yarn add -D babel-plugin-react-native-web
yarn add -D babel-loader url-loader webpack webpack-cli webpack-dev-server
yarn add -D babel-plugin-react-native-web
#每次打包发布时自动清理掉 dist 目录中的旧文件,
yarn add -D clean-webpack-plugin#html-webpack-plugin的主要作用就是在webpack构建后生成html文件,同时把构建好入口js文件引入到生成的html文件中。
yarn add -D html-webpack-plugin
webpack.config.js
const path = require('path');
const {CleanWebpackPlugin} = require('clean-webpack-plugin');const webpack = require('webpack');
const HtmlWebpackPlugin = require('html-webpack-plugin');const appDirectory = path.resolve(__dirname);
// const {presets} = require(`${appDirectory}/babel.config.js`);const compileNodeModules = [// Add every react-native package that needs compiling// 'react-native-gesture-handler',
].map((moduleName) => path.resolve(appDirectory, `node_modules/${moduleName}`));const baseProjectSource = [path.resolve(appDirectory, 'web/index.web.js'), // Entry to your applicationpath.resolve(appDirectory, 'web/App.web.js'), // Change this to your main App filepath.resolve(appDirectory, './src'),
];const babelLoaderConfiguration = {test: /\.(js|jsx|ts|tsx)$/,// Add every directory that needs to be compiled by Babel during the build.include: baseProjectSource,use: {loader: 'babel-loader',options: {cacheDirectory: true,// The 'react-native' preset is recommended to match React Native's packagerpresets: ['module:metro-react-native-babel-preset'],// Re-write paths to import only the modules needed by the appplugins: ['react-native-web', 'react-native-reanimated/plugin'],},},
};const imageLoaderConfiguration = {test: /\.(gif|jpe?g|png)$/,use: {loader: 'url-loader',options: {name: '[name].[ext]',},},
};module.exports = {entry: {app: path.join(appDirectory, 'web/index.web.js'),},output: {path: path.resolve(appDirectory, 'dist'),publicPath: '/',filename: 'upup.bundle.js',},resolve: {// If you're working on a multi-platform React Native app, web-specific// module implementations should be written in files using the extension// `.web.js`.extensions: ['.web.tsx', '.web.ts', '.tsx', '.ts', '.web.js', '.js'],alias: {'react-native$': 'react-native-web',},},module: {rules: [babelLoaderConfiguration,imageLoaderConfiguration,],},devServer: {port: 8080,historyApiFallback: true,open: !process.env.CI,}, plugins: [new CleanWebpackPlugin({cleanOnceBeforeBuildPatterns: ['**/*']}),// `process.env.NODE_ENV === 'production'` must be `true` for production// builds to eliminate development checks and reduce build size. You may// wish to include additional optimizations.new webpack.DefinePlugin({'process.env.NODE_ENV': JSON.stringify(process.env.NODE_ENV || 'development'),__DEV__: process.env.NODE_ENV === 'production' || true}),new HtmlWebpackPlugin({template: path.join(appDirectory, 'web/index.html'),}),new webpack.HotModuleReplacementPlugin(),new webpack.DefinePlugin({// See: https://github.com/necolas/react-native-web/issues/349__DEV__: JSON.stringify(true),}),],
};
index.html
<!DOCTYPE html>
<html><head><meta charset="UTF-8" /><meta name="viewport" content="width=device-width, initial-scale=1.0" /><meta http-equiv="X-UA-Compatible" content="ie=edge" /><title>RN Web</title><style>#app-root {display: flex;flex: 1 1 100%;height: 100vh;}</style></head><body><div id="app-root"></div></body>
</html>
index.web.js
import {AppRegistry} from 'react-native';
import appInfo from '../app.json';
import App from './App.web';AppRegistry.registerComponent(appInfo.name, () => App);
AppRegistry.runApplication(appInfo.name, {initialProps: {},rootTag: document.getElementById('app-root'),
});
App.web.js
import React from 'react';
import FaqTestnet from '../src/screen/FaqTestnet';
import AboutTestnet from '../src/screen/AboutTestnet';
import 'react-native-gesture-handler';
import {NavigationContainer} from '@react-navigation/native';
import {createStackNavigator,CardStyleInterpolators,
} from '@react-navigation/stack';
import Color from "../src/app/Color";
import DarkTheme from '../src/app/DarkTheme';const Stack = createStackNavigator();const config = {screens: {FaqTestnet: 'faqtestnet',AboutTestnet: 'abouttestnet',},
};const linking = {prefixes: ['http://tokshow.io',  'http://localhost:8080', 'http://127.0.0.1:5500/'],config,
};function App() {return (<NavigationContainer linking={linking} fallback={<Text>Loading...</Text>} theme={DarkTheme}><Stack.NavigatorinitialRouteName="AboutTestnet"screenOptions={{animationEnabled: false,headerShown: false,unmountOnBlur: false,cardStyleInterpolator: CardStyleInterpolators.forHorizontalIOS,}}><Stack.Screenname="FaqTestnet"component={FaqTestnet}options={{title: 'Testnet FAQ',}}/><Stack.Screenname="AboutTestnet"component={AboutTestnet}options={{title: 'About the Incentivized Testnet',}}/></Stack.Navigator></NavigationContainer>);
}export default App;
package.json
"scripts": {"web:release": "export NODE_ENV=production && rm -rf dist/ && webpack --config ./webpack.config.js","web": "export NODE_ENV=development && webpack-dev-server --config ./webpack.config.js",参考
How to Make Your React Native Apps Work on the Web

