目录
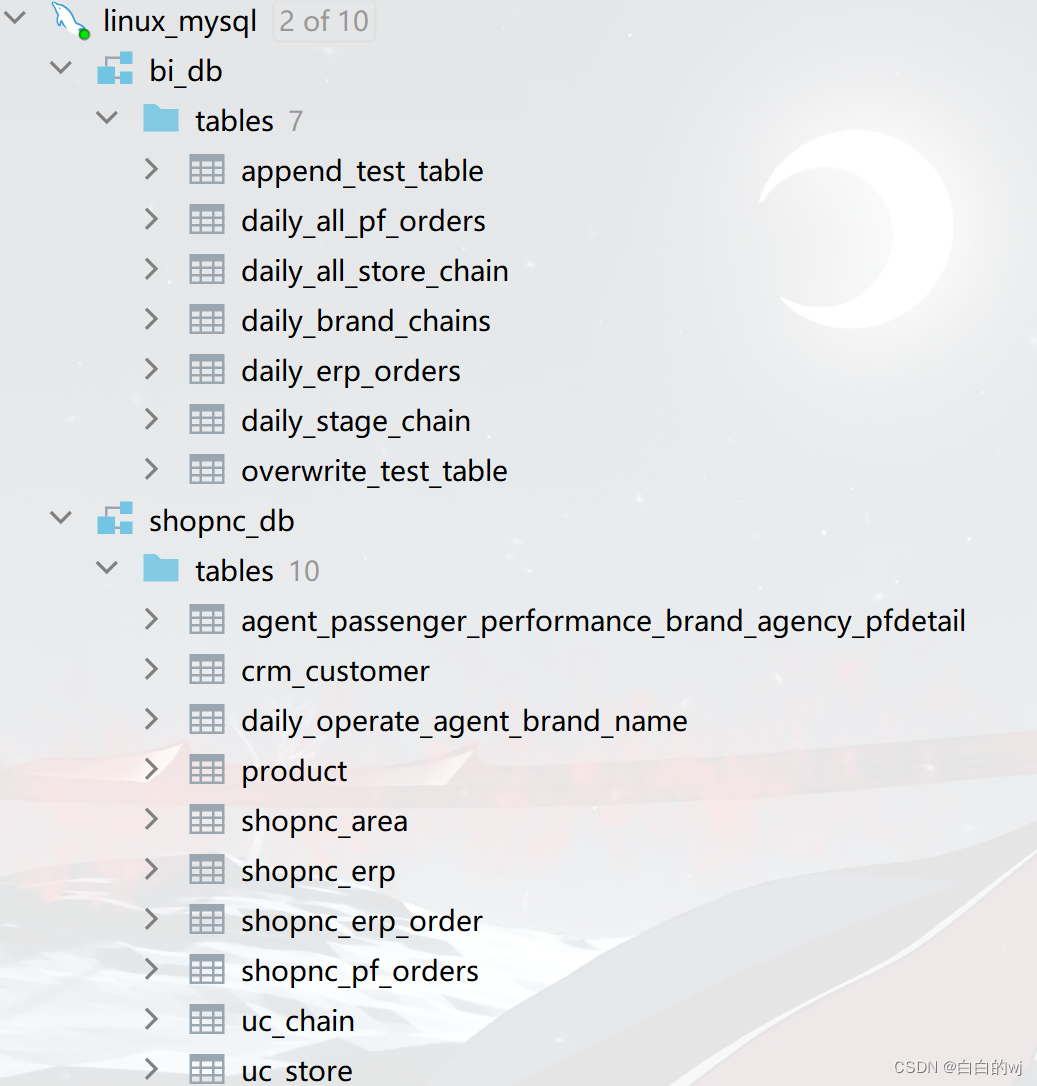
虚拟机中已有的两个库: bi_db和shopnc_db
1.在pycharm中,使用pymysql,连接数据库进行增删改查操作
1.1 查询
1.2 修改
1.3 删除
1.4 增加
2.使用pandas,操作pycharm对数据库进行操作
2.1 对mysql进行覆盖写入
2.2 对mysql进行追加写入
3.在linux中,进行自动化定时调度脚本
3.1 在linux_mysql中进行建库建表操作,编写插入数据等sql语句.
3.2 将插入数据等操作的sql语句,复制到python文件中,使用python来进行数据库的操作
连接库的语句
中间的sql
输出数据的语句
3.3 创建shell脚本文件,去调用python文件
3.4 使用linux命令,定时执行shell脚本文件 crontab -e
4. 五个python脚本中的细节
daily_all pf orders.py :没有问题
daily_all store_chain.py:
daily_brand_chains.py:
daily_erp_orders.py:
daily stage_chain.py:
虚拟机中已有的两个库: bi_db和shopnc_db
product表:

1.在pycharm中,使用pymysql,连接数据库进行增删改查操作
1.1 查询
import pymysql# 建立与数据库的连接
conn1 = pymysql.connect(host='192.168.88.100',port=3306,user='root',password='123456',db='shopnc_db'
)
conn2 = pymysql.connect(host='192.168.88.100',port=3306,user='root',password='123456',db='bi_db'
)
# 2.创建游标对象
c1 = conn1.cursor()
# 3.编写sql语句
sql = "select * from shopnc_db.product"
# 4.执行sql语句
c1.execute(sql)
# 5.获取结果集
result = c1.fetchall() #获取所有结果集
print(result)
# 6.关闭连接
conn1.close() # 关闭连接

1.2 修改
import pymysql# 建立与数据库的连接
conn1 = pymysql.connect(host='192.168.88.100',port=3306,user='root',password='123456',db='shopnc_db'
)
conn2 = pymysql.connect(host='192.168.88.100',port=3306,user='root',password='123456',db='bi_db'
)
# 2.创建游标对象
c1 = conn1.cursor()
# 3.编写sql语句
sql = "update product set price = 20 where pname = 'bwj'"
# 修改全部的价格都变为10000
# 4.执行sql语句
result = c1.execute(sql)
conn1.commit()  # 提交事务
# 5.获取结果集
if result != 0:print("修改成功")
else:print("修改失败")
# 6.关闭连接
conn1.close()  # 关闭连接
1.3 删除
import pymysql# 建立与数据库的连接
conn1 = pymysql.connect(host='192.168.88.100',port=3306,user='root',password='123456',db='shopnc_db'
)# 2.创建游标对象
c1 = conn1.cursor()
# 3.编写sql语句
sql = "delete from product where pname = 'hwj' "
# 4.执行sql语句
result = c1.execute(sql)
conn1.commit()  # 提交事务
# 5.获取结果集
if result != 0:print("删除成功")
else:print("删除失败")
# 6.关闭连接
conn1.close()  # 关闭连接
1.4 增加
import pymysql# 建立与数据库的连接
conn1 = pymysql.connect(host='192.168.88.100',port=3306,user='root',password='123456',db='shopnc_db'
)
conn2 = pymysql.connect(host='192.168.88.100',port=3306,user='root',password='123456',db='bi_db'
)
# 2.创建游标对象
c1 = conn1.cursor()
# 3.编写sql语句
sql = "insert into product value (0,'hwj',9900,'c001')"
# 4.执行sql语句
result = c1.execute(sql)
conn1.commit()  # 提交事务
# 5.获取结果集
if result != 0:print("插入成功")
else:print("插入失败")
# 6.关闭连接
conn1.close()  # 关闭连接

2.使用pandas,操作pycharm对数据库进行操作
2.1 对mysql进行覆盖写入
将查询到的表的数据,写入到另一个表中
import pandas as pd
from sqlalchemy import create_engine# 创建与mysql数据库的连接
shopnc_engine = create_engine('mysql+pymysql://root:123456@192.168.88.100:3306/shopnc_db')
bi_engine = create_engine('mysql+pymysql://root:123456@192.168.88.100:3306/bi_db')
# mysql://用户名:密码@ip地址:端口号/数据库#  获取所有表中数据
df = pd.read_sql("select * from product",con=shopnc_engine)
print('读取数据成功')#  将上面获取到的内容,写入另一个库中,写入的模式是覆盖
#  假如没有这个表,pandas会帮你自动新建,但类型不一定一样
df.to_sql('overwrite_test_table',con=bi_engine,if_exists = 'replace',index = False)
print('覆盖写入数据成功')
2.2 对mysql进行追加写入
将查询到的表的数据,写入到另一个表中
import pandas as pd
from sqlalchemy import create_engine# 创建与mysql数据库的连接
shopnc_engine = create_engine('mysql+pymysql://root:123456@192.168.88.100:3306/shopnc_db')
bi_engine = create_engine('mysql+pymysql://root:123456@192.168.88.100:3306/bi_db')
# mysql://用户名:密码@ip地址:端口号/数据库#  获取所有表中数据
df = pd.read_sql("select * from product",con=shopnc_engine)
print('读取数据成功')# 写入模式是追加
#  假如没有这个表,pandas会帮你自动新建,但类型不一定一样
df.to_sql('append_test_table',con=bi_engine,if_exists = 'append',index = False)
print('追加写入数据成功')

3.在linux中,进行自动化定时调度脚本
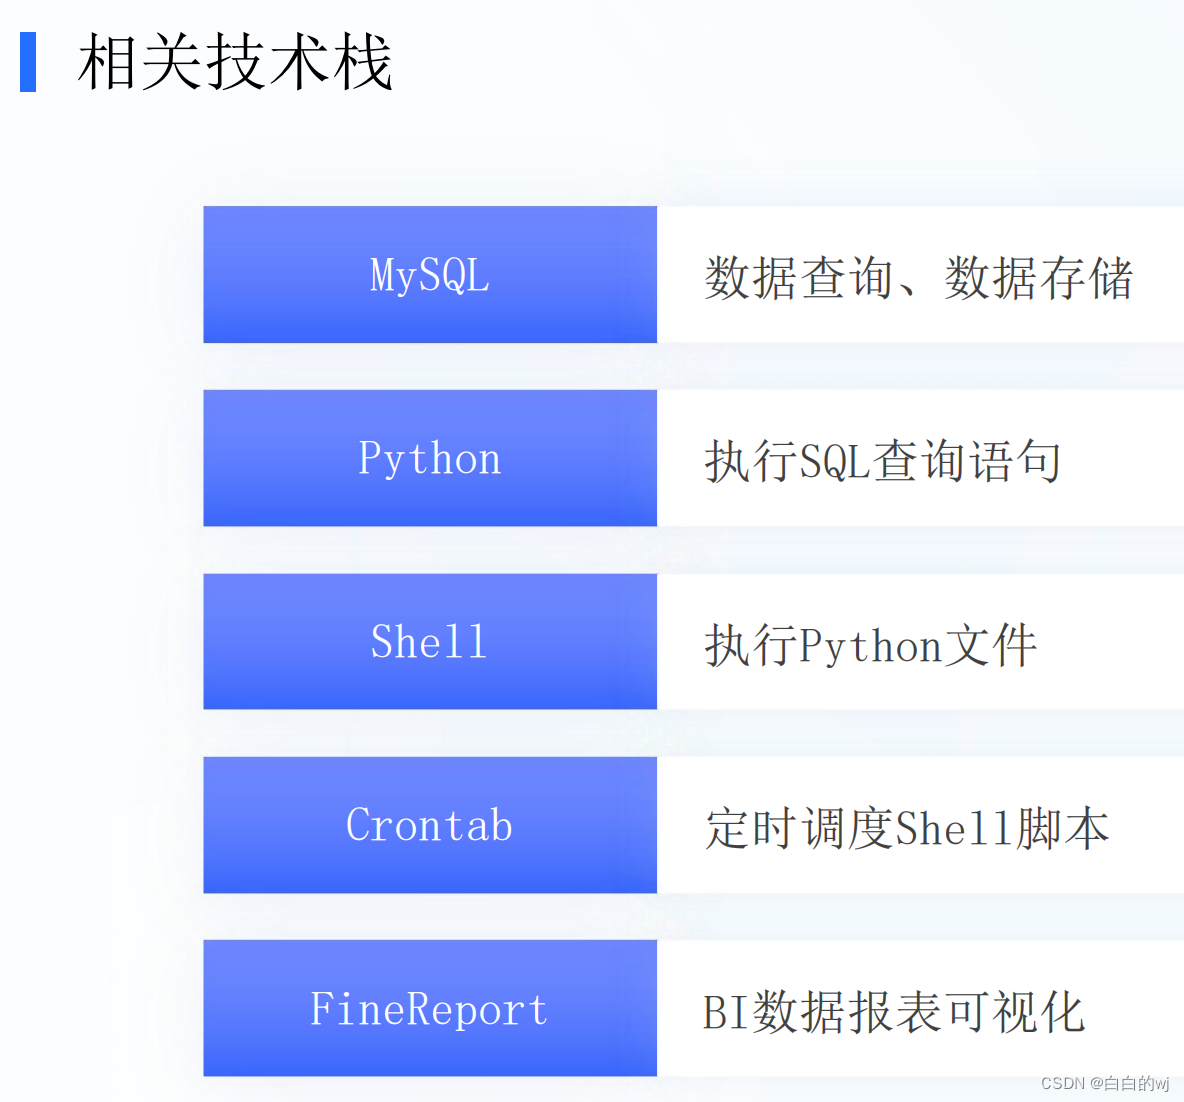
3.1 在linux_mysql中进行建库建表操作,编写插入数据等sql语句.
两个库,shopnc_db作为数据源, 在数据源中查询到的结果放到bi_db库中
3.2 将插入数据等操作的sql语句,复制到python文件中,使用python来进行数据库的操作
连接库的语句
# -*- coding: UTF-8 -*-from sqlalchemy import create_engine
import pandas as pd
# 忽略警告
import warnings
warnings.filterwarnings('ignore')# 创建mysql数据库链接
# 生产库shopnc_db链接
shopnc_engine = create_engine('mysql+pymysql://root:123456@192.168.88.100:3306/shopnc_db')
# BI库bi_db链接
bi_engine = create_engine('mysql+pymysql://root:123456@192.168.88.100:3306/bi_db')
中间的sql
# sql语句
daily_all_store_chain_sql = """
selectarea.province,  -- 省份名称chains.chain_num,  -- 门店数量store.store_num,  -- 店铺数量curdate() collect_time  -- 统计时间
from (selectarea_id,area_name as provincefrom shopnc_db.shopnc_areawhere area_id < 32
) area
left join (selectareaid_1,count(distinct chain_id) as chain_numfrom shopnc_db.uc_chainwhere is_auth = 1and chain_name not like '%%test%%'and chain_name not like '%%测试%%'and add_time < unix_timestamp(curdate())group by areaid_1
) chains on chains.areaid_1 = area.area_id
left join (selectareaid_1,count(distinct store_id) as store_numfrom shopnc_db.uc_storewhere is_auth = 1and store_name not like '%%test%%'and store_name not like '%%测试%%'and add_time < unix_timestamp(curdate())group by areaid_1
) store on store.areaid_1 = area.area_id
"""
输出数据的语句
# 读取mysql数据库中的数据
daily_all_store_chain_data = pd.read_sql(daily_all_store_chain_sql, con=shopnc_engine)
# 将读取的数据保存到mysql数据库中
# name: 表名
# con: 数据库链接
# if_exists: 数据保存方式 replace->覆盖保存 append:追加保存
# index: 是否保留索引序号列, True保留, False保留
daily_all_store_chain_data.to_sql(name="daily_all_store_chain", con=bi_engine, if_exists="append", index=False)
3.3 创建shell脚本文件,去调用python文件

前面是python的软件路径 ,中间是要调用执行文件 , 右边是日志记录
3.4 使用linux命令,定时执行shell脚本文件 crontab -e
[root@node1 finereport_file]# crontab -e
linux里的Crontab,定时任务命令
时间格式 : * * * * *
分 时 日 月 周
命令 第1列表示分钟1~59 每分钟用*或者 */1表示
第2列表示小时1~23(0表示0点)
第3列表示日期1~31
第4列表示月份1~12
第5列标识号星期0~6(0表示星期天)
第6列要运行的命令
4. 五个python脚本中的细节
脚本运行失败的主要原因都是SQL语句的细节,先在本地pycharm进行运行,确认无误了,再将.py文件拖入虚拟机的linux中,再在linux里使用脚本调用,最后确认结果
表中id主键字段设置了auto_increment后,null和0都代表自动使用自增
daily_all pf orders.py :没有问题
daily_all store_chain.py:
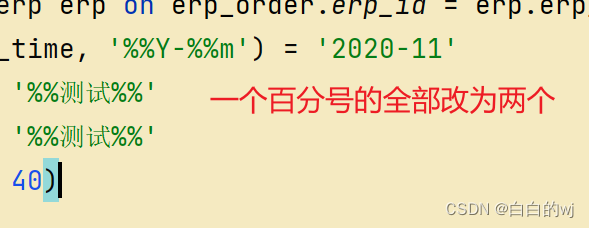
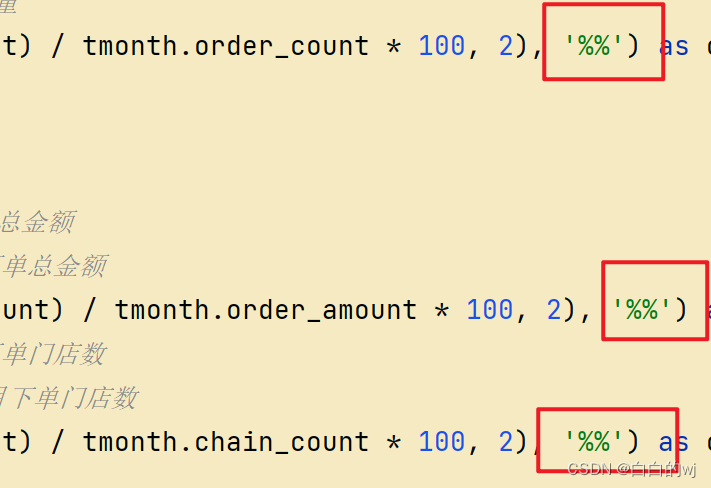
语句中只有一个%的,都需要变为两个;因为%在python里是占位符,%% 在有%拼接的的字符串里,如果要打印百分号,用两个百分号表示%%

daily_brand_chains.py:

daily_erp_orders.py:

daily stage_chain.py:
同上,百分号,字段名字的问题


