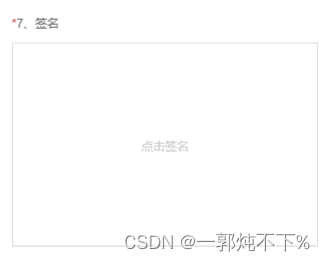
新开发的业务涉及到签字功能,由于是动态的表单,无法确定它会出现在哪里,不得已封装模块。
其中涉及到一个难点就是this的指向性问题,
第二个是微信小程序写法,
我这个写法里用了u-view的写法,可以自己修改组件
首先是封装的内容
1、props接收父级传过来的参数,这些数据是因为我是动态多级表单、可按需传值
2、imageUpload是我上传后台的地址。可自己修改,或者自己封装参数
3、this.canvasadd()是定义画布,一定要放在mounted(),放在其他位置会出现this指向性报错,或者返回位置不一致问题。
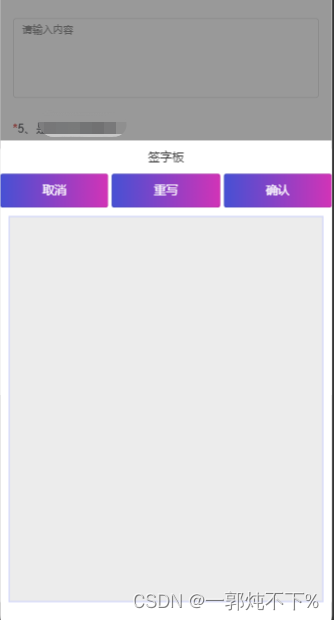
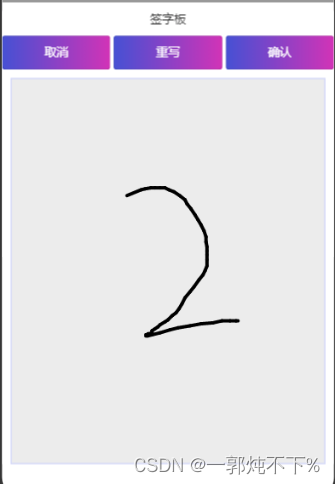
<template><!-- 签名组件 --><view class="container"><view class="fatherWrite" @click="showWrite"><div class="sonWrite"><text v-if="write">点击签名</text></div><image :src="value" v-model="image" style="border:1px solid #ccc;width: 100%;" /></view><uni-popup ref="popup" background-color="#fff" ><h1 style="text-align: center;margin: 20rpx;">签字板</h1><uni-row class="demo-uni-row" :gutter='10' style="padding: 20rpx;" ><uni-col :span="8"><u-button text="取消"   color="linear-gradient(to right, rgb(66, 83, 216), rgb(213, 51, 186))"@tap="handleCancel"></u-button></uni-col><uni-col :span="8"><u-button text="重写" color="linear-gradient(to right, rgb(66, 83, 216), rgb(213, 51, 186))"@tap="handleReset"></u-button></uni-col><uni-col :span="8"><u-button text="确认" color="linear-gradient(to right, rgb(66, 83, 216), rgb(213, 51, 186))"@tap="handleConfirm"></u-button></uni-col></uni-row><view class="sign-box"><canvas class="mycanvas" canvas-id="mycanvas" @touchstart="touchstart" @touchmove="touchmove"@touchend="touchend"></canvas></view></uni-popup></view>
</template>
<script>var x = 20;var y = 20;var tempPoint = []; //用来存放当前画纸上的轨迹点var id = 0;var type = '';let that;let canvasw;let canvash;import {imageUpload} from '@/api/system/applet.js' //export default {name: 'Handwriting',props: {image: String, //判断当前是否有照片writeIndex: Number, //下标writeChildrenIndex: Number, //子级下标},data() {return {ctx: '', //绘图图像points: [], //路径点集合,width: 0,height: 0,write: true,value: this.image,};},mounted() {this.canvasadd()},methods: {canvasadd() {this.ctx = uni.createCanvasContext('mycanvas', this); //创建绘图对象//设置画笔样式this.ctx.lineWidth = 4;this.ctx.lineCap = 'round';this.ctx.lineJoin = 'round';that = this;uni.getSystemInfo({success: function(res) {that.width = res.windowWidth;that.height = res.windowHeight;}});},//签名填写showWrite() {this.canvasadd()if (this.image == null || this.image == '') {that.$refs.popup.open('bottom')} else {uni.showModal({content: "是否重写签名",cancelText: '取消',confirmText: '确定',success: function(res) {if (res.confirm) {that.$refs.popup.open('bottom')} else {that.$refs.popup.close()}}})}},//触摸开始,获取到起点touchstart: function(e) {let startX = e.changedTouches[0].x;let startY = e.changedTouches[0].y;let startPoint = {X: startX,Y: startY};/* **************************************************#由于uni对canvas的实现有所不同,这里需要把起点存起来* **************************************************/this.points.push(startPoint);//每次触摸开始,开启新的路径this.ctx.beginPath();},//触摸移动,获取到路径点touchmove: function(e) {let moveX = e.changedTouches[0].x;let moveY = e.changedTouches[0].y;let movePoint = {X: moveX,Y: moveY};this.points.push(movePoint); //存点let len = this.points.length;if (len >= 2) {this.draw(); //绘制路径}tempPoint.push(movePoint);},// 触摸结束,将未绘制的点清空防止对后续路径产生干扰touchend: function() {this.points = [];},/* ***********************************************	#   绘制笔迹#   1.为保证笔迹实时显示,必须在移动的同时绘制笔迹#   2.为保证笔迹连续,每次从路径集合中区两个点作为起点(moveTo)和终点(lineTo)#   3.将上一次的终点作为下一次绘制的起点(即清除第一个点)************************************************ */draw: function() {let point1 = this.points[0];let point2 = this.points[1];this.points.shift();this.ctx.lineWidth = 4;this.ctx.lineCap = 'round';this.ctx.lineJoin = 'round';this.ctx.moveTo(point1.X, point1.Y);this.ctx.lineTo(point2.X, point2.Y);this.ctx.stroke();this.ctx.draw(true);},//取消绘制handleCancel() {this.handleReset()that.$refs.popup.close()	},//清空画布handleReset: function() {this.ctx.clearRect(0, 0, that.width, that.height);this.ctx.draw(true);tempPoint = [];},//将签名笔迹上传到服务器,并将返回来的地址存到本地handleConfirm: function() {if (tempPoint.length == 0) {that.$modal.msgError('请先签名')return;} else {setTimeout(() => {uni.canvasToTempFilePath({canvasId: 'mycanvas',destWidth: that.width,destHeight: that.height,fileType: 'png',quality: 1, //图片质量success: function(res) {let tempPath = res.tempFilePath;//图片上传拿urllet data = {filePath: tempPath,formData: {isSystem: 'true'}}  imageUpload(data).then(response => {//向上一个页面传参that.value = response.data.urlthat.handleReset()if (that.value) {that.write = false}that.$emit("writeValue", {value: that.value,index: that.writeIndex,childrenIndex: that.writeChildrenIndex}) //返回父级数组下标that.$refs.popup.close()})}}, this);}, 500)}}}};
</script><style lang="scss" scoped>.sign-box {width: 100%;height: 100%;margin: auto;}.demo-uni-row {margin: 20rpx 20rpx;padding: 20rpx;}.mycanvas {margin: 20rpx;width: auto;height: 60vh;border: 1px solid #c6ceff;background-color: #ececec;}.canvsborder {position: fixed;}.fatherWrite {position: relative;.sonWrite {position: absolute;color: #ccc;top: 50%;left: 50%;transform: translate(-50%, -50%);}}
</style>
页面引用
<template>
<view>
//这里简单放置,具体使用,按照规范填写
//普通写法
<uni-forms-item :label="index+1+'、'+item.label" required :rules=item.rules :name="['dynamicLists',index,'images']" ><writeName :image="item.images" :value="item.images" :writeIndex="index"@writeValue="writeValue"></writeName>
</uni-forms-item>
//多级动态提交
uni-forms-item :label="index+1+'.'+ide+1+'、'+ite.itemName" required:rules="[{required: true,errorMessage: '请填写'}]":name="['dynamicLists',index,'children',ide,'images']"><writeName  :image="dynamicFormData.dynamicLists[index].children[ide].images":value="dynamicFormData.dynamicLists[index].children[ide].images":writeIndex="index" :writeChildrenIndex="ide"@writeValue="writeValueChildren"></writeName>
</uni-forms-item>
</view>
</template>
import writeName from '@/pages/public/Handwriting/Handwriting.vue'
export default {components: {writeName},methods:{writeValueChildren(val) {this.dynamicFormData.dynamicLists[val.index].children[val.childrenIndex].images = val.value},writeValue(val) {this.dynamicFormData.dynamicLists[val.index].images = val.value},}
}

以上是我的写法,不足之处还望指出
