数据使用
文章目录
- 数据使用
- 一、数据的获取
- 1、图片爬虫工具
- 2、视频爬虫工具
- 3、复杂的爬虫工具(flickr)
- 4、按照用户的ID来爬取图片
- 5、对一些特定的网站进行爬(摄影网站)(图虫、500px,花瓣网等等)
- 6、爬虫合集
- 二、数据整理
- 1、数据检查与归一化
- 2、数据去重
- 三、数据标注
- 1、labelme
- 2、其他的一些标注工具
- 四、数据增强方法
- 1、基本数据增强方法
- 2、自动数据增强方法
- 3、从零生成新的数据
- 五、pytorch数据增强实战(针对图像分类任务)
- 1、pytorch数据增强接口
- 2、pytorch数据增强实践(目标检测)
- 3、数据增强开源库imgaug介绍
- 4、imaug开源库具体的几个例子:
一、数据的获取
1、图片爬虫工具
https://github.com/sczhengyabin/Image-Downloader
2、视频爬虫工具
https://github.com/iawia002/annie
3、复杂的爬虫工具(flickr)
https://github.com/chenusc11/flickr-crawler
![[外链图片转存失败,源站可能有防盗链机制,建议将图片保存下来直接上传(img-ecWEH3Hf-1652447813334)(/home/wl/.config/Typora/typora-user-images/image-20220502105451429.png)]](https://img-blog.csdnimg.cn/4ded3966df8d4258a04d1a8827e6b38b.png)
![[外链图片转存失败,源站可能有防盗链机制,建议将图片保存下来直接上传(img-jFhiJwhJ-1652447768978)(/home/wl/.config/Typora/typora-user-images/image-20220502105603659.png)]](https://img-blog.csdnimg.cn/ee99fa8b22ec4e2f84b84ea25ab30d3e.png)
4、按照用户的ID来爬取图片
https://github.com/hellock/icrawler
5、对一些特定的网站进行爬(摄影网站)(图虫、500px,花瓣网等等)
https://github.com/chenusc11/darrenfantasy/image_crawler
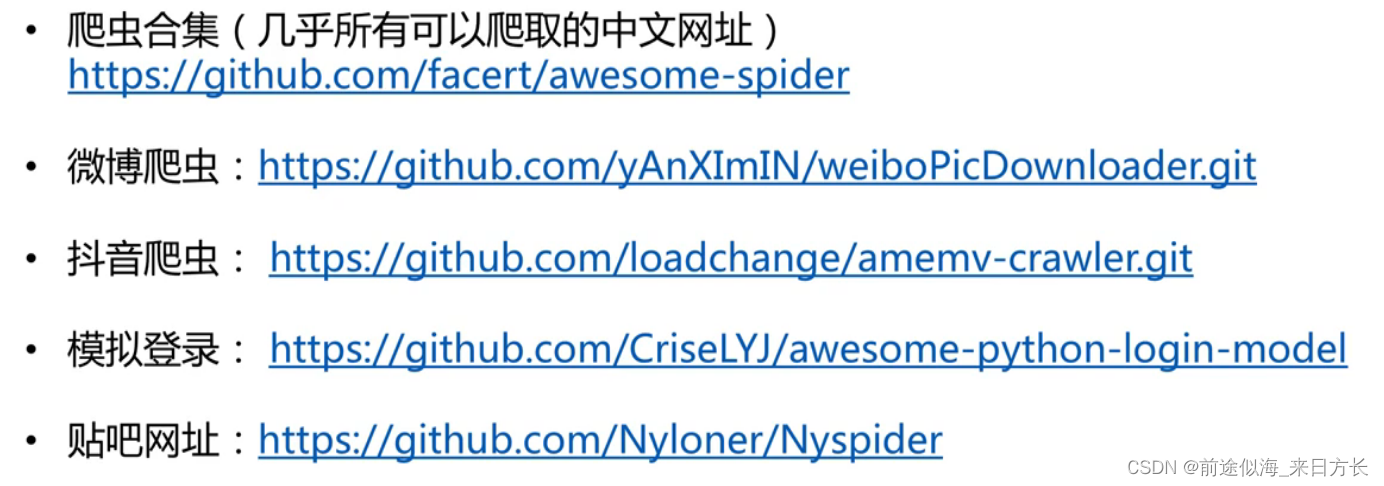
6、爬虫合集
https://github.com/facert/awesome-spider
二、数据整理
1、数据检查与归一化
-
去除坏图与尺寸异常
-
格式归一化
- 类型归一化(jpg,png)
- 命名归一化
下面这个代码是去除坏图以及命名归一化
from pathlib import Path
import datetime
import cv2
import osdef listfiles(rootDir, ifrename=True):list_dirs = os.walk(rootDir)num = 0# os.walk 会迭代遍历文件夹下面的每一个文件夹和文件的名字,然后进行重命名,一直遍历到最低层for root, dirs, files in list_dirs:files.sort()for d in dirs:print(os.path.join(root, d))for f in files:fileid = f.split('.')[0]filepath = os.path.join(root, f)try:src = cv2.imread(filepath, 1)print("src=", filepath, src.shape)# 去除原来的图片os.remove(filepath)if ifrename:# 前面补0到5位数字cv2.imwrite(os.path.join(root ,str(num).zfill(5) + ".jpg"), src)num = num + 1else:cv2.imwrite(os.path.join(root, fileid + ".jpg"), src)except:os.remove(filepath)continueif __name__ == "__main__":listfiles("/home/wl/linshi/linshi2")#这个文件夹下面有多个文件夹也是可以的# 下面这个是控制小数位数的输出的,可以看着用#a = 3.1415926#print(round(a, 4))#print("%.2f" % a)#print("{:.3f}".format(a))
2、数据去重
- 相同的图像(内容完全一样,只不过分辨率不同)
- 相似的图像(连续视频帧,扰动污染有水印等等)
下面的代码是去除相同的图片(基于MD5,直接在该文件夹下删除相同的图片,或者其他文件也行)(单文件夹和多文件夹都有)
import os
import hashlib
import sysdef get_md5(file):file = open(file, 'rb')md5 = hashlib.md5(file.read())file.close()md5_values = md5.hexdigest()return md5_valuesdef remove_by_md5_singledir(file_dir):file_list = os.listdir(file_dir)md5_list = []print("去重前图像的数量:" + str(len(file_list)))for filepath in file_list:filemd5 = get_md5(os.path.join(file_dir, filepath))if filemd5 not in md5_list:md5_list.append(filemd5)else:os.remove(os.path.join(file_dir, filepath))print("去重后图像数量:" + str(len(os.listdir(file_dir))))def remove_by_md5_multidir(file_list):md5_list = []print("去重前图像数量:" + str(len(file_list)))for filepath in file_list:filemd5 = get_md5(filepath)file_id = filepath.split('/')[-1]file_dir = filepath[0:len(filepath) - len(file_id)]if filemd5 not in md5_list:md5_list.append(filemd5)else:os.remove(filepath)print("去重后图像的数量:" + str(len(md5_list)))if __name__ == "__main__":file_dir = sys.argv[1]remove_by_md5_singledir(file_dir)file_dir1 = sys.argv[1]file_list1 = os.listdir(file_dir1)file_list1 = [os.path.join(file_dir1, x) for x in file_list1]file_dir2 = sys.argv[2]file_list2 = os.listdir(file_dir2)file_list2 = [os.path.join(file_dir2, x) for x in file_list2]remove_by_md5_multidir(file_list1 + file_list2)
下面的代码是去除相同或者相似的图片(基于图片内容进行判断)(单文件夹的模式)
import numpy as np
import cv2
import osdef compare_image(image1, image2, mode='same'):# 比较是否完全相同,这个非常严格,要求每个像素都相同if mode == 'same':assert (image1.shape == image2.shape)diff = (image1 == image2).astype(np.int)if cv2.countNonZero(diff) == image1.shape[0]* image1.shape[1]:return 1.0# 比较是否相似,基于绝对差阈值elif mode == 'abs':assert (image1.shape == image2.shape)diff = np.sum(np.abs(image1.astype(np.float) - image2.astype(np.float)))return diff / (image1.shape[0] * image1.shape[1])return 0def remove_by_pixel_singledir(file_dir, mode, th=5.0):file_list = os.listdir(file_dir)print('去重前图像的数量:' + str(len((file_list))))for i in range(0, len(file_list)):if i < len(file_list) - 1:imagei = cv2.imread(os.path.join(file_dir, file_list[i]), 0)imagei = cv2.resize(imagei, (128, 128), interpolation=cv2.INTER_NEAREST)print('testing image' + os.path.join(file_dir, file_list[i]))for j in range(i+1 ,len(file_list)):imagej = cv2.imread(os.path.join(file_dir, file_list[j]), 0)imagej = cv2.resize(imagej, (128, 128), interpolation=cv2.INTER_NEAREST)similarity = compare_image(imagei, imagej, mode = mode)print("simi=" + str(similarity))if similarity >= 1.0 and mode == 'same':os.remove(os.path.join(file_dir, file_list[j]))print('删除' + os.path.join(file_dir, file_list[j]))file_list.pop(j)elif similarity < th and mode == 'abs':os.remove(os.path.join(file_dir, file_list[j]))print('删除' + os.path.join(file_dir, file_list[j]))file_list.pop(j)else:breakprint("去重后的图像数量:" + str(len(os.listdir(file_dir))))if __name__ == "__main__":mode = "same"file_dir = "/home/wl/linshi"remove_by_pixel_singledir(file_dir, mode)
后续的改进方案:
基于图片的相似度的计算改进:
更多的相似度准则:MSE距离,leveshtein距离,DNN特征相似度
更多的遍历方案等(文件物理大小,图像尺寸,文件名字)进行预先排序,搜索一定的深度或最近邻。
3、训练、验证、测试集数据集划分
下面的两个代码分别是随机打乱和均匀划分样本的代码
import random
import sysdef shuffle(file_in, file_out):fin = open(file_in, 'r')fout = open(file_out, 'w')lines = fin.readlines()random.shuffle(lines)for line in lines:fout.write(line)def splittrain_val(fileall, valratio=0.1):fileids = fileall.split('.')fileid = fileids[len(fileids)-2]f = open(fileall)ftrain = open(fileid + "_train.txt", 'w')fval = open(fileid + "_val.txt", 'w')count = 0if valratio == 0 or valratio >=1:valratio = 0.1interval = (int)(1.0/valratio)while 1:line = f.readline()if line:count = count + 1if count % interval == 0:fval.write(line)else:ftrain.write(line)else:breakif __name__ == "__main__":splittrain_val("/home/wl/linshi/test_files.txt", 0.5)
三、数据标注
1、labelme
在线版本(比较早了):http://labelme.csail.mit.edu/Release3.0
离线版本:https://github.com/wkentaro/labelme
2、其他的一些标注工具
其他的一些标注工具:
[外链图片转存失败,源站可能有防盗链机制,建议将图片保存下来直接上传(img-eBj9iVmV-1652447768980)(/home/wl/.config/Typora/typora-user-images/image-20220503104114737.png)]
3、智能标注工具
-
百度的paddle中的EIseg
-
基于RNN的半监督交互式工具
https://github.com/fidler-lab/polyrnn-pp-pytorch
-
基于GCN的半监督交互式工具
四、数据增强方法
1、基本数据增强方法
为什么做数据增强的方法:增加模型泛化能力方法
- 显式正则化(模型集成,参数正则化等)
- 隐式正则化(数据增强,随机梯度下降等)
数据增强方法有哪些
- 单样本增强:几何操作类和颜色操作类
- 多样本增强:离散样本点连续化来进行插值拟合
单样本的几何变换:翻转(方向敏感的任务不能用)、旋转(角度敏感的任务不可用)、缩放、仿射等操作(256×256裁剪224×224,相当于数量级增加了32倍)
单样本的颜色操作类:噪声、模糊、颜色扰动、对比度扰动、擦除等
多样本的数据增强——samplepairing:随机抽取两张图片分别经过基础数据增强操作(如随机翻转等)处理后,直接叠加合成一个新的样本,标签为原样本标签中的一种。
多样本的数据增强——Mixup:对图像和标签都进行线性插值
综合变换的库:https://github.com/aleju/imgaug
2、自动数据增强方法
Autoaugment(主要是图像分类任务上来做实验)
学习已有的数据增强操作的组合,不同的任务,需要不同的数据增强操作
- 准备16个常用的数据操作
- 从16个中选择5个操作,随机产生使用该操作的概率和相应的幅度,将其成为一个sub-policy,一共产生5个sub-polices
- 对训练过程中每一个batch的图片,随机采用5个sub-policy操作方法中的一种。
- 通过模型在验证集上的泛化能力来反馈,使用的优化方法是增强学习方法。
- 经过80~100个epoch后网络开始学习到有效的sub-policies.
- 之后串接这5个sub-policies,然后再进行最后的训练。
3、从零生成新的数据
一般是用生成对抗网络来实现的,这里略
五、pytorch数据增强实战(针对图像分类任务)
1、pytorch数据增强接口
- 最常见的数据增强任务:每一次训练,通过裁剪获得同样大小的图片来输入网络
(1)首先是数据预处理
norm_mean = [0.485, 0.456, 0.406]norm_std = [0.229, 0.224, 0.225]train_transform = transforms.Compose([# (256)区别:一个256的话是短边resize到256,长边缩小到相应比例,不一定是256# (256, 256)的话则是长边和短边都缩小到256transforms.Resize((256)),# 然后从中心截取(256,256)的矩形transforms.CenterCrop(256),# 随机再从里面裁剪出来224的transforms.RandomCrop(224),transforms.RandomHorizontalFlip(p=0.5),transforms.ToTensor(),transforms.Normalize(norm_mean, norm_std),])
(2)数据增强的接口
见pyTorch中文文档:
pytorch官网地址:https://pytorch.org/
开源翻译的中文的地址:http://pytorch.apachecn.org/
github的地址:https://github.com/apachecn/pytorch-doc-zh
下面是一些案例(面向语义分割的数据增强):
import torchvision.transforms.functional as TF
import randomdef my_seg_transforms(image, mask):if random.random > 0.5:angle = random.randint(-30, 30)image = TF.rotate(image, angle)mask = TF.rotate(mask, angle)return image, mask
2、pytorch数据增强实践(目标检测)
# -*- coding=utf-8 -*-# 包括:
#     1. 裁剪(需改变bbox)
#     2. 平移(需改变bbox)
#     3. 改变亮度
#     4. 加噪声
#     5. 旋转角度(需要改变bbox)
#     6. 镜像(需要改变bbox)
#     7. cutout
# 注意:
#     random.seed(),相同的seed,产生的随机数是一样的!!
import sysros_path = '/opt/ros/kinetic/lib/python2.7/dist-packages'if ros_path in sys.path:sys.path.remove(ros_path)import cv2
import time
import random
import os
import math
import numpy as np
from skimage.util import random_noise
from skimage import exposure# 显示带标签显示的图片
def show_pic(img, bboxes=None, labels=None):'''输入:img:图像arraybboxes:图像的所有boudning box list, 格式为[[x_min, y_min, x_max, y_max]....]names:每个box对应的名称'''#     cv2.imwrite('./1.jpg', img)#     img = cv2.imread('./1.jpg')img = img / 255for i in range(len(bboxes)):bbox = bboxes[i]x_min = bbox[0]y_min = bbox[1]x_max = bbox[2]y_max = bbox[3]cv2.rectangle(img, (int(x_min), int(y_min)), (int(x_max), int(y_max)), (0, 255, 0), 3)cv2.putText(img, labels[i], (int(x_min), int(y_min)), cv2.FONT_HERSHEY_SIMPLEX, 0.8, (0, 0, 255), 2)cv2.namedWindow('pic', 0)  # 1表示原图cv2.moveWindow('pic', 0, 0)cv2.resizeWindow('pic', 1200, 800)  # 可视化的图片大小cv2.imshow('pic', img)if cv2.waitKey(1) == ord('q'):cv2.destroyAllWindows()sys.exit()#     cv2.destroyAllWindows()
#     os.remove('./1.jpg')# 图像均为cv2读取
class DataAugmentForObjectDetection():def __init__(self, rotation_rate=0.5, max_rotation_angle=30,crop_rate=0.5, shift_rate=0.5, change_light_rate=0.5,add_noise_rate=0.5, flip_rate=0.5,cutout_rate=0.5, cut_out_length=50, cut_out_holes=1, cut_out_threshold=0.5):self.rotation_rate = rotation_rateself.max_rotation_angle = max_rotation_angleself.crop_rate = crop_rateself.shift_rate = shift_rateself.change_light_rate = change_light_rateself.add_noise_rate = add_noise_rateself.flip_rate = flip_rateself.cutout_rate = cutout_rateself.cut_out_length = cut_out_lengthself.cut_out_holes = cut_out_holesself.cut_out_threshold = cut_out_threshold# 加噪声def _addNoise(self, img):'''输入:img:图像array输出:加噪声后的图像array,由于输出的像素是在[0,1]之间,所以得乘以255'''# random.seed(int(time.time()))# return random_noise(img, mode='gaussian', seed=int(time.time()), clip=True)*255return random_noise(img, mode='gaussian', clip=True) * 255# 调整亮度def _changeLight(self, img):# random.seed(int(time.time()))flag = random.uniform(0.5, 1.5)  # flag>1为调暗,小于1为调亮return exposure.adjust_gamma(img, flag)# cutoutdef _cutout(self, img, bboxes, length=100, n_holes=1, threshold=0.5):'''原版本:https://github.com/uoguelph-mlrg/Cutout/blob/master/util/cutout.pyRandomly mask out one or more patches from an image.Args:img : a 3D numpy array,(h,w,c)bboxes : 框的坐标n_holes (int): Number of patches to cut out of each image.length (int): The length (in pixels) of each square patch.'''def cal_iou(boxA, boxB):'''boxA, boxB为两个框,返回iouboxB为bouding box'''# determine the (x, y)-coordinates of the intersection rectanglexA = max(boxA[0], boxB[0])yA = max(boxA[1], boxB[1])xB = min(boxA[2], boxB[2])yB = min(boxA[3], boxB[3])if xB <= xA or yB <= yA:return 0.0# compute the area of intersection rectangleinterArea = (xB - xA + 1) * (yB - yA + 1)# compute the area of both the prediction and ground-truth# rectanglesboxAArea = (boxA[2] - boxA[0] + 1) * (boxA[3] - boxA[1] + 1)boxBArea = (boxB[2] - boxB[0] + 1) * (boxB[3] - boxB[1] + 1)# compute the intersection over union by taking the intersection# area and dividing it by the sum of prediction + ground-truth# areas - the interesection area# iou = interArea / float(boxAArea + boxBArea - interArea)iou = interArea / float(boxBArea)# return the intersection over union valuereturn iou# 得到h和wif img.ndim == 3:h, w, c = img.shapeelse:_, h, w, c = img.shapemask = np.ones((h, w, c), np.float32)for n in range(n_holes):chongdie = True  # 看切割的区域是否与box重叠太多while chongdie:y = np.random.randint(h)x = np.random.randint(w)y1 = np.clip(y - length // 2, 0,h)  # numpy.clip(a, a_min, a_max, out=None), clip这个函数将将数组中的元素限制在a_min, a_max之间,大于a_max的就使得它等于 a_max,小于a_min,的就使得它等于a_miny2 = np.clip(y + length // 2, 0, h)x1 = np.clip(x - length // 2, 0, w)x2 = np.clip(x + length // 2, 0, w)chongdie = Falsefor box in bboxes:if cal_iou([x1, y1, x2, y2], box) > threshold:chongdie = Truebreakmask[y1: y2, x1: x2, :] = 0.# mask = np.expand_dims(mask, axis=0)img = img * maskreturn img# 旋转def _rotate_img_bbox(self, img, bboxes, angle=5, scale=1.):'''参考:https://blog.csdn.net/u014540717/article/details/53301195crop_rate输入:img:图像array,(h,w,c)bboxes:该图像包含的所有boundingboxs,一个list,每个元素为[x_min, y_min, x_max, y_max],要确保是数值angle:旋转角度scale:默认1输出:rot_img:旋转后的图像arrayrot_bboxes:旋转后的boundingbox坐标list'''# ---------------------- 旋转图像 ----------------------w = img.shape[1]h = img.shape[0]# 角度变弧度rangle = np.deg2rad(angle)  # angle in radians# now calculate new image width and heightnw = (abs(np.sin(rangle) * h) + abs(np.cos(rangle) * w)) * scalenh = (abs(np.cos(rangle) * h) + abs(np.sin(rangle) * w)) * scale# ask OpenCV for the rotation matrixrot_mat = cv2.getRotationMatrix2D((nw * 0.5, nh * 0.5), angle, scale)# calculate the move from the old center to the new center combined# with the rotationrot_move = np.dot(rot_mat, np.array([(nw - w) * 0.5, (nh - h) * 0.5, 0]))# the move only affects the translation, so update the translation# part of the transformrot_mat[0, 2] += rot_move[0]rot_mat[1, 2] += rot_move[1]# 仿射变换rot_img = cv2.warpAffine(img, rot_mat, (int(math.ceil(nw)), int(math.ceil(nh))), flags=cv2.INTER_LANCZOS4)# ---------------------- 矫正bbox坐标 ----------------------# rot_mat是最终的旋转矩阵# 获取原始bbox的四个中点,然后将这四个点转换到旋转后的坐标系下rot_bboxes = list()for bbox in bboxes:xmin = bbox[0]ymin = bbox[1]xmax = bbox[2]ymax = bbox[3]point1 = np.dot(rot_mat, np.array([(xmin + xmax) / 2, ymin, 1]))point2 = np.dot(rot_mat, np.array([xmax, (ymin + ymax) / 2, 1]))point3 = np.dot(rot_mat, np.array([(xmin + xmax) / 2, ymax, 1]))point4 = np.dot(rot_mat, np.array([xmin, (ymin + ymax) / 2, 1]))# 合并np.arrayconcat = np.vstack((point1, point2, point3, point4))# 改变array类型concat = concat.astype(np.int32)# 得到旋转后的坐标rx, ry, rw, rh = cv2.boundingRect(concat)rx_min = rxry_min = ryrx_max = rx + rwry_max = ry + rh# 加入list中rot_bboxes.append([rx_min, ry_min, rx_max, ry_max])return rot_img, rot_bboxes# 裁剪def _crop_img_bboxes(self, img, bboxes):'''裁剪后的图片要包含所有的框输入:img:图像arraybboxes:该图像包含的所有boundingboxs,一个list,每个元素为[x_min, y_min, x_max, y_max],要确保是数值输出:crop_img:裁剪后的图像arraycrop_bboxes:裁剪后的bounding box的坐标list'''# ---------------------- 裁剪图像 ----------------------w = img.shape[1]h = img.shape[0]x_min = w  # 裁剪后的包含所有目标框的最小的框x_max = 0y_min = hy_max = 0for bbox in bboxes:x_min = min(x_min, bbox[0])y_min = min(y_min, bbox[1])x_max = max(x_max, bbox[2])y_max = max(y_max, bbox[3])d_to_left = x_min  # 包含所有目标框的最小框到左边的距离d_to_right = w - x_max  # 包含所有目标框的最小框到右边的距离d_to_top = y_min  # 包含所有目标框的最小框到顶端的距离d_to_bottom = h - y_max  # 包含所有目标框的最小框到底部的距离# 随机扩展这个最小框crop_x_min = int(x_min - random.uniform(0, d_to_left))crop_y_min = int(y_min - random.uniform(0, d_to_top))crop_x_max = int(x_max + random.uniform(0, d_to_right))crop_y_max = int(y_max + random.uniform(0, d_to_bottom))# 随机扩展这个最小框 , 防止别裁的太小# crop_x_min = int(x_min - random.uniform(d_to_left//2, d_to_left))# crop_y_min = int(y_min - random.uniform(d_to_top//2, d_to_top))# crop_x_max = int(x_max + random.uniform(d_to_right//2, d_to_right))# crop_y_max = int(y_max + random.uniform(d_to_bottom//2, d_to_bottom))# 确保不要越界crop_x_min = max(0, crop_x_min)crop_y_min = max(0, crop_y_min)crop_x_max = min(w, crop_x_max)crop_y_max = min(h, crop_y_max)crop_img = img[crop_y_min:crop_y_max, crop_x_min:crop_x_max]# ---------------------- 裁剪boundingbox ----------------------# 裁剪后的boundingbox坐标计算crop_bboxes = list()for bbox in bboxes:crop_bboxes.append([bbox[0] - crop_x_min, bbox[1] - crop_y_min, bbox[2] - crop_x_min, bbox[3] - crop_y_min])return crop_img, crop_bboxes# 平移def _shift_pic_bboxes(self, img, bboxes):'''参考:https://blog.csdn.net/sty945/article/details/79387054平移后的图片要包含所有的框输入:img:图像arraybboxes:该图像包含的所有boundingboxs,一个list,每个元素为[x_min, y_min, x_max, y_max],要确保是数值输出:shift_img:平移后的图像arrayshift_bboxes:平移后的bounding box的坐标list'''# ---------------------- 平移图像 ----------------------w = img.shape[1]h = img.shape[0]x_min = w  # 裁剪后的包含所有目标框的最小的框x_max = 0y_min = hy_max = 0for bbox in bboxes:x_min = min(x_min, bbox[0])y_min = min(y_min, bbox[1])x_max = max(x_max, bbox[2])y_max = max(y_max, bbox[3])d_to_left = x_min  # 包含所有目标框的最大左移动距离d_to_right = w - x_max  # 包含所有目标框的最大右移动距离d_to_top = y_min  # 包含所有目标框的最大上移动距离d_to_bottom = h - y_max  # 包含所有目标框的最大下移动距离x = random.uniform(-(d_to_left - 1) / 3, (d_to_right - 1) / 3)y = random.uniform(-(d_to_top - 1) / 3, (d_to_bottom - 1) / 3)M = np.float32([[1, 0, x], [0, 1, y]])# x为向左或右移动的像素值,正为向右负为向左; y为向上或者向下移动的像素值,正为向下负为向上try:shift_img = cv2.warpAffine(img, M, (img.shape[1], img.shape[0]))except Exception as e:print("error")# ---------------------- 平移boundingbox ----------------------shift_bboxes = list()for bbox in bboxes:shift_bboxes.append([bbox[0] + x, bbox[1] + y, bbox[2] + x, bbox[3] + y])return shift_img, shift_bboxes# 镜像def _filp_pic_bboxes(self, img, bboxes):'''参考:https://blog.csdn.net/jningwei/article/details/78753607平移后的图片要包含所有的框输入:img:图像arraybboxes:该图像包含的所有boundingboxs,一个list,每个元素为[x_min, y_min, x_max, y_max],要确保是数值输出:flip_img:平移后的图像arrayflip_bboxes:平移后的bounding box的坐标list'''# ---------------------- 翻转图像 ----------------------import copyflip_img = copy.deepcopy(img)#         if random.random() < 0.5:    #0.5的概率水平翻转,0.5的概率垂直翻转horizon = True#         else:#             horizon = Falseh, w, _ = img.shapeif horizon:  # 水平翻转flip_img = cv2.flip(flip_img, 1)  # 1是水平,-1是水平垂直else:flip_img = cv2.flip(flip_img, 0)# ---------------------- 调整boundingbox ----------------------flip_bboxes = list()for box in bboxes:x_min = box[0]y_min = box[1]x_max = box[2]y_max = box[3]if horizon:flip_bboxes.append([w - x_max, y_min, w - x_min, y_max])else:flip_bboxes.append([x_min, h - y_max, x_max, h - y_min])return flip_img, flip_bboxesdef dataAugment(self, img, bboxes):'''图像增强输入:img:图像arraybboxes:该图像的所有框坐标输出:img:增强后的图像bboxes:增强后图片对应的box'''change_num = 0  # 改变的次数print('------')while change_num < 1:  # 默认至少有一种数据增强生效if random.random() < self.crop_rate:  # 裁剪print('裁剪')change_num += 1img, bboxes = self._crop_img_bboxes(img, bboxes)if random.random() > self.rotation_rate:  # 旋转print('旋转')change_num += 1angle = random.uniform(-self.max_rotation_angle, self.max_rotation_angle)#                 angle = random.sample([90, 180, 270],1)[0]scale = random.uniform(0.7, 0.8)img, bboxes = self._rotate_img_bbox(img, bboxes, angle, scale)if random.random() < self.shift_rate:  # 平移print('平移')change_num += 1img, bboxes = self._shift_pic_bboxes(img, bboxes)if random.random() > self.change_light_rate:  # 改变亮度print('亮度')change_num += 1img = self._changeLight(img)if random.random() < self.add_noise_rate:  # 加噪声print('加噪声')change_num += 1img = self._addNoise(img)#             if random.random() < self.cutout_rate:  #cutout#                 print('cutout')#                 change_num += 1#                 img = self._cutout(img, bboxes, length=self.cut_out_length, n_holes=self.cut_out_holes, threshold=self.cut_out_threshold)#             if random.random() < self.flip_rate:    #翻转#                 print('翻转')#                 change_num += 1#                 img, bboxes = self._filp_pic_bboxes(img, bboxes)print('\n')# print('------')return img, bboxes# -*- coding=utf-8 -*-
import xml.etree.ElementTree as ET
import xml.dom.minidom as DOC# 从xml文件中提取bounding box信息, 格式为[[x_min, y_min, x_max, y_max, name]]
def parse_xml(xml_path):'''输入:xml_path: xml的文件路径输出:从xml文件中提取bounding box信息, 格式为[[x_min, y_min, x_max, y_max, name]]'''tree = ET.parse(xml_path)root = tree.getroot()objs = root.findall('object')coords = list()for ix, obj in enumerate(objs):name = obj.find('name').textbox = obj.find('bndbox')x_min = int(float(box[0].text))y_min = int(float(box[1].text))x_max = int(float(box[2].text))y_max = int(float(box[3].text))coords.append([x_min, y_min, x_max, y_max, name])return coordsimport os
from lxml.etree import Element, SubElement, tostring
from xml.dom.minidom import parseString
from PIL import Image# 保存xml文件函数的核心实现,输入为图片名称image_name,分类category(一个列表,元素与bbox对应),bbox(一个列表,与分类对应),保存路径save_dir ,通道数channel
def save_xml(image_name, category, bbox, file_dir='/home/xbw/wurenting/dataset_3/',save_dir='/home/xxx/voc_dataset/Annotations/', channel=3):file_path = file_dirimg = Image.open(file_path + image_name)width = img.size[0]height = img.size[1]node_root = Element('annotation')node_folder = SubElement(node_root, 'folder')node_folder.text = 'VOC2007'node_filename = SubElement(node_root, 'filename')node_filename.text = image_namenode_size = SubElement(node_root, 'size')node_width = SubElement(node_size, 'width')node_width.text = '%s' % widthnode_height = SubElement(node_size, 'height')node_height.text = '%s' % heightnode_depth = SubElement(node_size, 'depth')node_depth.text = '%s' % channelfor i in range(len(bbox)):left, top, right, bottom = bbox[i][0], bbox[i][1], bbox[i][2], bbox[i][3]node_object = SubElement(node_root, 'object')node_name = SubElement(node_object, 'name')node_name.text = category[i]node_difficult = SubElement(node_object, 'difficult')node_difficult.text = '0'node_bndbox = SubElement(node_object, 'bndbox')node_xmin = SubElement(node_bndbox, 'xmin')node_xmin.text = '%s' % leftnode_ymin = SubElement(node_bndbox, 'ymin')node_ymin.text = '%s' % topnode_xmax = SubElement(node_bndbox, 'xmax')node_xmax.text = '%s' % rightnode_ymax = SubElement(node_bndbox, 'ymax')node_ymax.text = '%s' % bottomxml = tostring(node_root, pretty_print=True)dom = parseString(xml)save_xml = os.path.join(save_dir, image_name.replace('jpg', 'xml'))with open(save_xml, 'wb') as f:f.write(xml)returnimport shutilneed_aug_num = 1dataAug = DataAugmentForObjectDetection()source_pic_root_path = '/home/wl/import/last_data/VOCdevkit/VOC2007/JPEGImages/'
source_xml_root_path = '/home/wl/import/last_data/VOCdevkit/VOC2007/Annotations/'
img_save_path = '/home/wl/import/last_data/VOCdevkit/VOC2007/aug_img/'
save_dir = '/home/wl/import/last_data/VOCdevkit/VOC2007/aug_label/'for parent, _, files in os.walk(source_pic_root_path):for file in files:cnt = 0while cnt < need_aug_num:pic_path = os.path.join(parent, file)xml_path = os.path.join(source_xml_root_path, file[:-4]+'.xml')coords = parse_xml(xml_path)        #解析得到box信息,格式为[[x_min,y_min,x_max,y_max,name]]coordss = [coord[:4] for coord in coords]labels = [coord[4] for coord in coords]img = cv2.imread(pic_path)show_pic(img, coordss,labels)    # 原图auged_img, auged_bboxes = dataAug.dataAugment(img, coordss)cnt += 1cv2.imwrite(img_save_path+file[:-4]+'_1.jpg',auged_img)save_xml(file[:-4]+'_1.jpg',labels,auged_bboxes,file_dir = img_save_path,save_dir=save_dir)show_pic(auged_img, auged_bboxes,labels)  # 强化后的图
cv2.destroyAllWindows()#测试label是否正确
import shutil# need_aug_num = 1
#
# dataAug = DataAugmentForObjectDetection()
#
# source_pic_root_path = '/home/xbw/darknet_boat/darknet/scripts/VOCdevkit/VOC2007/add_990/990_add/'
# source_xml_root_path = '/home/xbw/darknet_boat/darknet/scripts/VOCdevkit/VOC2007/add_990/990_xml/'
#
# for parent, _, files in os.walk(source_pic_root_path):
#     for file in files:
#         cnt = 0
#         while cnt < need_aug_num:
#             pic_path = os.path.join(parent, file)
#             xml_path = os.path.join(source_xml_root_path, file[:-4]+'.xml')
#             coords = parse_xml(xml_path)        #解析得到box信息,格式为[[x_min,y_min,x_max,y_max,name]]
#             coordss = [coord[:4] for coord in coords]
#             labels = [coord[4] for coord in coords]
#             img = cv2.imread(pic_path)
#             show_pic(img, coordss,labels)    # 原图
#             cnt += 1
# cv2.destroyAllWindows()
3、数据增强开源库imgaug介绍
安装
pip install imgaug
项目地址:https://github.com/aleju/imgaug
里面有相应的数据增强的操作
-
支持各类数据增强操作
- affine transformmations , perspective transformations, contrast changes, gaussian noise, dropout of regions, hue/saturation changes, cropping/paddimng, blurring,…
-
支持的各项视觉任务
- Image(uint8),Heatmaps(float32),Segmentation Maps(int),Mask(bool),Keypoints/Landmarks(int/float coordinates),Bounding Boxes(int/float coordinates),Polygons(int/float coordinates),Line Strings(int/float coordinates)
如何使用
1、组合一系列增强函数(下面是一个标准用法的例子)
augmenters.Sequential
import imgaug.augmenters as iaa
aug_seq = iaa.Sequential([# 仿射变换iaa.Affine(translate_px{"x":-40}), # 高斯噪声的变换iaa.AdditiveGaussianNoise(scale=0.1*255),random_order=True
])
# 下面是标准的使用方法
for batch_idx in range(100):images = load_batch(batch_idx)# 这里记住输入的图像必须是[N,C,H,W]格式的张量,或者图像数组images_aug = aug_seq(images = images)train_on_images(images_aug)# 此外还有一些其他的例子
# jpeg压缩
aug = iaa.JpegCompression(compression=(70,99))
# 图像翻转
aug = iaa.Fliplr(0.5)
4、imaug开源库具体的几个例子:
(1)、简单的数据增强的例子
#coding:utf8
import numpy as np
import imgaug as ia
import imgaug.augmenters as iaaia.seed(1)## 创建矩阵(16, 64, 64, 3).
images = np.array([ia.quokka(size=(64, 64)) for _ in range(16)],dtype=np.uint8
)seq = iaa.Sequential([iaa.Fliplr(0.5), ## 以0.5的概率进行水平翻转horizontal flipsiaa.Crop(percent=(0, 0.1)), ## 随机裁剪random crops## 对50%的图片进行高斯模糊,标准差参数取值0~0.5.iaa.Sometimes(0.5,iaa.GaussianBlur(sigma=(0, 0.5))),## 对50%的通道添加高斯噪声iaa.AdditiveGaussianNoise(loc=0, scale=(0.0, 0.05*255), per_channel=0.5),
], random_order=True) ## 以上所有操作,使用随机顺序images_aug = seq(images=images) ## 应用操作增强
grid_image = ia.draw_grid(images_aug,4)import imageio
imageio.imwrite("example.jpg", grid_image)
(2)、关键点的数据增强
#coding:utf8
import imgaug as ia
import imgaug.augmenters as iaa
from imgaug.augmentables import Keypoint, KeypointsOnImage
ia.seed(1)## 创建图片和关键点
image = ia.quokka(size=(256, 256))
kps = KeypointsOnImage([Keypoint(x=65, y=100),Keypoint(x=75, y=200),Keypoint(x=100, y=100),Keypoint(x=200, y=80)
], shape=image.shape)seq = iaa.Sequential([iaa.Multiply((1.2, 1.5)), ## 改变亮度iaa.Affine(rotate=10,scale=(0.5, 0.7))
])## 对关键点和图片进行增强
image_aug, kps_aug = seq(image=image, keypoints=kps)for i in range(len(kps.keypoints)):before = kps.keypoints[i]after = kps_aug.keypoints[i]print("Keypoint %d: (%.8f, %.8f) -> (%.8f, %.8f)" % (i, before.x, before.y, after.x, after.y)
)image_before = kps.draw_on_image(image, size=7)
image_after = kps_aug.draw_on_image(image_aug, size=7)import imageio
imageio.imwrite("before_keypoint.jpg", image_before)
imageio.imwrite("after_keypoint.jpg", image_after)
(3)、目标检测任务
#coding:utf8
import imgaug as ia
import imgaug.augmenters as iaa
from imgaug.augmentables.bbs import BoundingBox, BoundingBoxesOnImage
import cv2ia.seed(1)image = ia.quokka(size=(256, 256))bbs = BoundingBoxesOnImage([BoundingBox(x1=65, y1=100, x2=200, y2=150),BoundingBox(x1=150, y1=80, x2=200, y2=130)
], shape=image.shape)seq = iaa.Sequential([iaa.Multiply((1.2, 1.5)),iaa.Affine(translate_px={"x": 40, "y": 60},scale=(0.5, 0.7)) ## 对x和y方向分别平移40/60px,尺度缩放为原来的0-70%
])# 对目标框和图片进行增强
image_aug, bbs_aug = seq(image=image, bounding_boxes=bbs)for i in range(len(bbs.bounding_boxes)):before = bbs.bounding_boxes[i]after = bbs_aug.bounding_boxes[i]print("BB %d: (%.4f, %.4f, %.4f, %.4f) -> (%.4f, %.4f, %.4f, %.4f)" % (i,before.x1, before.y1, before.x2, before.y2,after.x1, after.y1, after.x2, after.y2))# 绘制增强前后框
image_before = bbs.draw_on_image(image, size=2)
image_after = bbs_aug.draw_on_image(image_aug, size=2, color=[0, 0, 255])import imageio
imageio.imwrite("before_boundingbox00.jpg", image_before)
imageio.imwrite("after_boundingbox00.jpg", image_after)
此外需要注意的是,有的框会超出边界,我们需要得到有效框
#coding:utf8
import imgaug as ia
import imgaug.augmenters as iaa
from imgaug.augmentables.bbs import BoundingBox, BoundingBoxesOnImageia.seed(1)image = ia.quokka(size=(256, 256))
bbs = BoundingBoxesOnImage([BoundingBox(x1=25, x2=75, y1=25, y2=75),BoundingBox(x1=100, x2=150, y1=25, y2=75),BoundingBox(x1=175, x2=225, y1=25, y2=75)
], shape=image.shape)seq = iaa.Affine(translate_px={"x": 120})
image_aug, bbs_aug = seq(image=image, bounding_boxes=bbs)## 边界填充,1个白色像素,(BY-1)个黑色像素
def pad(image, by):image_border1 = ia.pad(image, top=1, right=1, bottom=1, left=1,mode="constant", cval=255)image_border2 = ia.pad(image_border1, top=by-1, right=by-1,bottom=by-1, left=by-1,mode="constant", cval=0)return image_border2## 边框绘制函数
GREEN = [0, 255, 0]
ORANGE = [255, 140, 0]
RED = [255, 0, 0]
def draw_bbs(image, bbs, border):image_border = pad(image, border)for bb in bbs.bounding_boxes:if bb.is_fully_within_image(image.shape):color = GREENelif bb.is_partly_within_image(image.shape):color = ORANGEelse:color = REDimage_border = bb.shift(left=border, top=border)\.draw_on_image(image_border, size=2, color=color)return image_borderimage_before = draw_bbs(image, bbs, 100)
image_after1 = draw_bbs(image_aug, bbs_aug, 100)
image_after2 = draw_bbs(image_aug, bbs_aug.remove_out_of_image(), 100)
image_after3 = draw_bbs(image_aug, bbs_aug.remove_out_of_image().clip_out_of_image(), 100)import imageio
imageio.imwrite("normal_boundingbox.jpg", image_before)
imageio.imwrite("after1_boundingbox.jpg", image_after1)
imageio.imwrite("after2_boundingbox.jpg", image_after2)
imageio.imwrite("after3_boundingbox.jpg", image_after3)
(4)、分割数据增强
#coding:utf8
import imageio
import numpy as np
import imgaug as ia
import imgaug.augmenters as iaa
from imgaug.augmentables.segmaps import SegmentationMapsOnImageia.seed(1)image = ia.quokka(size=(128, 128), extract="square")segmap = np.zeros((128, 128, 1), dtype=np.int32)
segmap[28:71, 35:85, 0] = 1
segmap[10:25, 30:45, 0] = 2
segmap[10:25, 70:85, 0] = 3
segmap[10:110, 5:10, 0] = 4
segmap[118:123, 10:110, 0] = 5
segmap = SegmentationMapsOnImage(segmap, shape=image.shape)# 数据增强操作
seq = iaa.Sequential([iaa.Dropout([0.05, 0.2]),      # 随机丢掉 5% or 20%的像素iaa.Sharpen((0.0, 1.0)),       # 锐化操作sharpeniaa.Affine(rotate=(-45, 45)),  # 旋转-45到45度iaa.ElasticTransformation(alpha=50, sigma=5)  # 应用ElasticTransformation操作
], random_order=True)# 对分割掩膜和图片进行增强
images_aug = []
segmaps_aug = []
for _ in range(5):images_aug_i, segmaps_aug_i = seq(image=image, segmentation_maps=segmap)images_aug.append(images_aug_i)segmaps_aug.append(segmaps_aug_i)cells = []
for image_aug, segmap_aug in zip(images_aug, segmaps_aug):cells.append(image)                                         # column 1cells.append(segmap.draw_on_image(image)[0])                # column 2cells.append(image_aug)                                     # column 3cells.append(segmap_aug.draw_on_image(image_aug)[0])        # column 4cells.append(segmap_aug.draw(size=image_aug.shape[:2])[0])  # column 5grid_image = ia.draw_grid(cells, cols=5)
imageio.imwrite("example_segmaps.jpg", grid_image)
(5)、bbox计算iou的例子
import numpy as np
import imgaug as ia
from imgaug.augmentables.bbs import BoundingBoxia.seed(1)# Define image with two bounding boxes.
image = ia.quokka(size=(256, 256))
bb1 = BoundingBox(x1=50, x2=100, y1=25, y2=75)
bb2 = BoundingBox(x1=75, x2=125, y1=50, y2=100)# Compute intersection, union and IoU value
# Intersection and union are both bounding boxes. They are here
# decreased/increased in size purely for better visualization.
bb_inters = bb1.intersection(bb2).extend(all_sides=-1)
bb_union = bb1.union(bb2).extend(all_sides=2)
iou = bb1.iou(bb2)# Draw bounding boxes, intersection, union and IoU value on image.
image_bbs = np.copy(image)
image_bbs = bb1.draw_on_image(image_bbs, size=2, color=[0, 255, 0])
image_bbs = bb2.draw_on_image(image_bbs, size=2, color=[0, 255, 0])
image_bbs = bb_inters.draw_on_image(image_bbs, size=2, color=[255, 0, 0])
image_bbs = bb_union.draw_on_image(image_bbs, size=2, color=[0, 0, 255])
image_bbs = ia.draw_text(image_bbs, text="IoU=%.2f" % (iou,),x=bb_union.x2+10, y=bb_union.y1+bb_union.height//2,color=[255, 255, 255], size=13
)

