一、基础UI组件结构
每个UI组件需要定义为@Component struct对象,其内部必须包含一个且只能包含一个build(){}函数,用于绘制UI;struct之内、build()函数之外的地方用于存放数据。
二、基本UI装饰器
@Entry
装饰struct,页面的入口
@Component
装饰struct,表示该struct具有基于组件的能力
@Entry
@Component
struct TestPage {build() {……}
}
三、数据装饰器
@State 父子相互独立
- 装饰的变量是组件的局部变量,必须本地初始化,可通过构造参数赋值
- 当该数据被修改时,所在组件的build()方法会被重新调用,会重新绘制所在UI
子组价:
@Component
export struct ComponentPage {@State count: number = 0private toggleClick() {this.count += 1}build() {Row() {Column({ space: 20 }) {Button(`这是子组件,${this.count}`).fontSize(24).onClick(this.toggleClick.bind(this))}.width('100%')}}
}
父组件:
import { ComponentPage } from "./ComponentPage"@Entry
@Component
struct StatePage {@State count: number = 0private toggleClick() {this.count += 1}build() {Row() {Column({ space: 20 }) {Button(`这是父组件,当前值: ${this.count}`).fontSize(24).onClick(this.toggleClick.bind(this))//使用默认初始化值ComponentPage()//设置count初始值为:20ComponentPage({ count: 20 })}.width('100%')}.height('100%')}
}
描述:
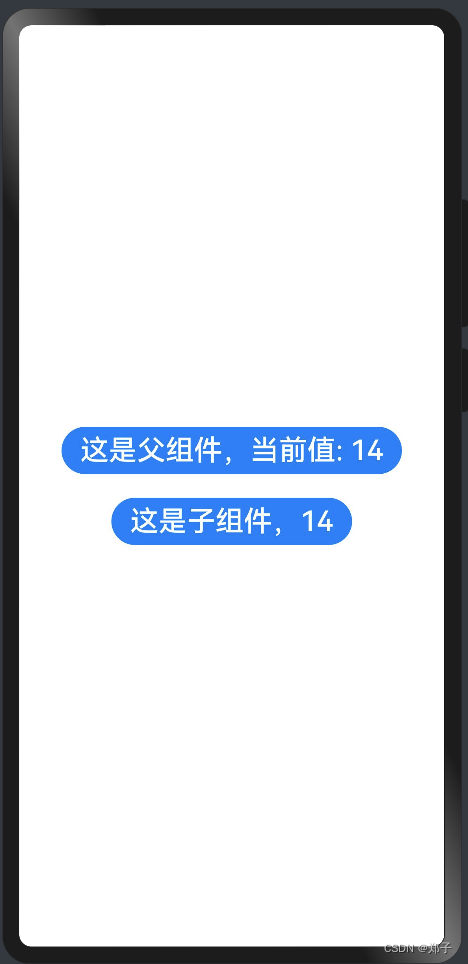
- 当被点击之后修改了count的值,页面会重新绘制UI
- 子组件中的count和父组件的count互不影响
- 可以给子组件构造方法设置初始值
- 使用@State修饰的变量必须初始化
效果图:


@Prop 父子单向同步
- 继承@State的所有功能
- 被其装饰的变量可以和父组件建立单向同步关系。@Prop装饰的变量是可变的,但修改不会同步回父组件,当父组件的@State变化时,本地修改的@Prop会被覆盖
子组件:
@Component
export struct ComponentPage {@Prop count: numberprivate toggleClick() {this.count += 1}build() {Row() {Column({ space: 20 }) {Button(`这是子组件,${this.count}`).fontSize(24).onClick(this.toggleClick.bind(this))}.width('100%')}}
}
父组件:
import { ComponentPage } from "./ComponentPage"@Entry
@Component
struct StatePage {@State count: number = 0private toggleClick() {this.count += 1}build() {Row() {Column({ space: 20 }) {Button(`这是父组件,当前值: ${this.count}`).fontSize(24).onClick(this.toggleClick.bind(this))ComponentPage({ count: this.count })}.width('100%')}.height('100%')}
}
描述:
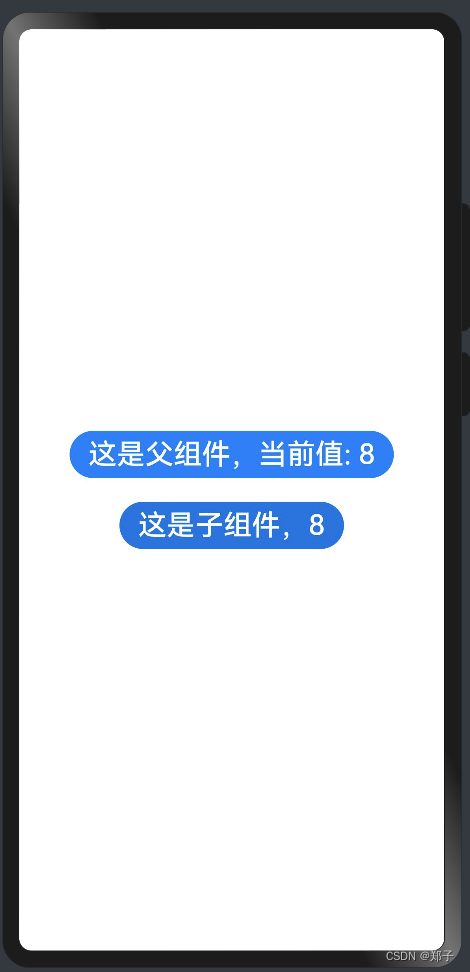
- 将父组件的count设置到子组件使用的@Prop修饰的变量时,父组件与子组件这时建立起单向同步
- 父组件修改值后,子组件跟着修改,子组件修改值父组件不受影响
- 使用的@Prop修饰的变量不能自己初始化
效果图:

@Link 父子双向同步
- @Link装饰的变量和父组件构建双向同步关系的状态变量,父组件会接受来自@Link装饰的变量的修改的同步,父组件的更新也会同步给@Link装饰的变量。
- @Link装饰的变量与其父组件中的数据源共享相同的值
- @Link装饰器不能在@Entry装饰的自定义组件中使用
子组件:
@Component
export struct ComponentPage {@Link count: numberprivate toggleClick() {this.count += 1}build() {Row() {Column({ space: 20 }) {Button(`这是子组件,${this.count}`).fontSize(24).onClick(this.toggleClick.bind(this))}.width('100%')}}
}
父组件:
import { ComponentPage } from "./ComponentPage"@Entry
@Component
struct StatePage {@State count: number = 0private toggleClick() {this.count += 1}build() {Row() {Column({ space: 20 }) {Button(`这是父组件,当前值: ${this.count}`).fontSize(24).onClick(this.toggleClick.bind(this))ComponentPage({ count: $count })}.width('100%')}.height('100%')}
}
描述:
- 父组件通过$count来和子组件的@Link修饰的值绑定
- 绑定之后实现父子双向绑定,修改一端,另一组件也随之变化
- 使用@Link不能自己初始化
效果图:

@State、@Prop与@Link的异同
相同点:
- 都会引起UI重绘
- 内部私有
不同点:
| 不同点 | @State | @Prop | @Link |
|---|---|---|---|
| 装饰内容 | 基本数据类型,类,数组 | 基本数据类型 | 基本数据类型,类,数组 |
| 关联 | 不与其他控件关联 | 父@State -> 子@Prop 单向关联 | 父@State <-> 子@Link 双向关联 |
| 初始化时机 | 声明时 | 创建组件时由参数传入 | 创建组件时由参数传入 |
四、生产消费的装饰器
@Provide、@Consume
后代通过使用@Consume去获取@Provide提供的变量,建立在@Provide和@Consume之间的双向数据同步,与@State/@Link不同的是,前者可以在多层级的父子组件之间传递
案例:
在父组件中将数据多级传递给子组件,子子组件
1.使用@Link修饰的变量进行传递
父组件:
import { ProviderSonPage } from "./ProviderSonPage"@Entry
@Component
struct ProviderPage {@State message: string = '父类A'build() {Row() {Column() {Text(this.message).fontSize(50).fontColor(Color.Red).onClick(() => {//点击文字  进行切换this.message = this.message === '父类A' ? '父类B' : '父类A'})//调用子组件ProviderSonPage({ sonMsg: $message })}.width('100%')}.height('100%')}
}
子组件:
import { ProviderGrandSonPage } from "./ProviderGrandSonPage"@Component
export struct ProviderSonPage {@Link sonMsg: stringbuild() {Column() {Text(this.sonMsg).fontSize(30).fontColor(Color.Green).onClick(() => {this.sonMsg = '我是子类'})//调用孙子组件:子类的子类ProviderGrandSonPage({ grandSonMsg: $sonMsg })}}
}
子子组件:
@Component
export struct ProviderGrandSonPage {@Link grandSonMsg: stringbuild() {Column() {Text(this.grandSonMsg).fontSize(20).fontColor(Color.Blue).onClick(() => {this.grandSonMsg = '我是子类的子类'})}}
}
总结:
- 都需要通过一个多余被@Link修饰的变量进行传递,太过复杂,如果传递层级太深没更加明显
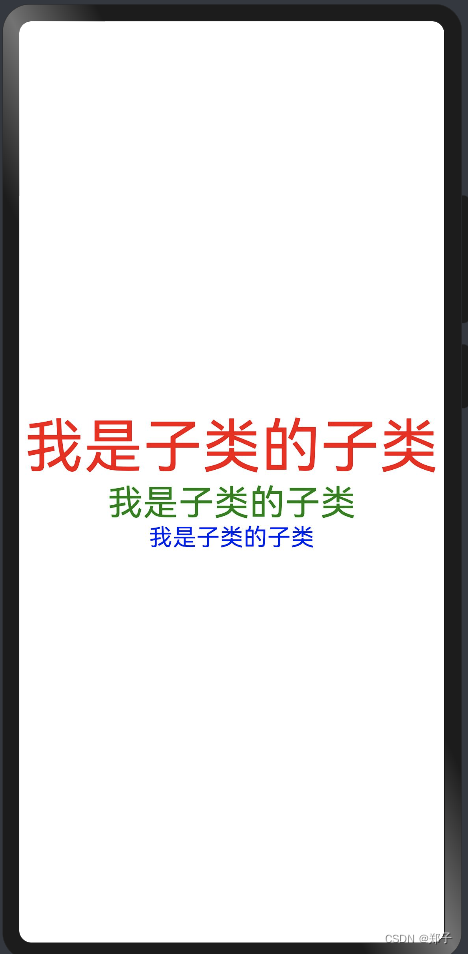
2.发布者订阅者模式
使用发布者Provide和订阅者Consume可以直接传递到子子组件
父组件:
import { ProviderSonPage } from "./ProviderSonPage"@Entry
@Component
struct ProviderPage {@Provide('Mes') message: string = '父类A'//也可以写成@Provide message: string = '父类A'build() {Row() {Column() {Text(this.message).fontSize(50).fontColor(Color.Red).onClick(() => {this.message = this.message === '父类A' ? '父类B' : '父类A'})//调用子组件时就不再需要传递参数ProviderSonPage()}.width('100%')}.height('100%')}
}
子组件:
import { ProviderGrandSonPage } from "./ProviderGrandSonPage"@Component
export struct ProviderSonPage {@Consume('Mes') sonMsg:stringbuild() {Column() {Text(this.sonMsg).fontSize(30).fontColor(Color.Green).onClick(() => {this.sonMsg = '我是子类'})//调用子组件时就不再需要传递参数ProviderGrandSonPage()}}
}
子子组件:
@Component
export struct ProviderGrandSonPage {@Consume('Mes') grandSonMsg:string//也可以写成@Consume message:stringbuild() {Column() {Text(this.grandSonMsg).fontSize(20).fontColor(Color.Blue).onClick(() => {this.grandSonMsg = '我是子类的子类'})}}
}
总结:
- 使用发布者订阅者模式,父类使用@Provide,其他需要观察的子类使用@Consume,就可以能实现双向绑定
- 当层级很深时不需要一层一层的往下传递,直接使用发布者订阅者进行监听就能实现相同的效果
- @Provide和@Consume可以通过相同的变量名或者相同的变量别名绑定,变量类型必须相同
- @Provide必须设置初始值,@Consume不可设置默认初始值
- @Provide修饰的变量和@Consume修饰的变量是一对多的关系
效果图:

五、状态变量更改通知
@Watch:使用观察者模式的装饰器,但该装饰器不是触发变量变化,而是绑定一个函数,当@Watch变量变化时,调用该函数
@Watch和自定义组件更新
子组件:
@Component
export struct TotalViewPage {@Prop @Watch('onCountUpdated') count: number;@State total: number = 0;// @Watch 回调onCountUpdated(propName: string): void {this.total += this.count;}build() {Text(`Total: ${this.total}`)}
}
父组件:
import {TotalViewPage} from "./TotalViewPage"@Entry
@Component
struct CountModifierPage {@State count: number = 0;build() {Column() {Button('add to basket').onClick(() => {this.count++})TotalViewPage({ count: this.count })}}
}
描述:
- CountModifier自定义组件的Button.onClick点击事件自增count
- 由于@State count变量更改,子组件TotalView中的@Prop被更新,其@Watch('onCountUpdated')方法被调用,更新了子组件TotalView 中的total变量
- 子组件TotalView中的Text重新渲染
@Watch与@Link组合使用
bean对象:PurchaseItem
export class PurchaseItem {static NextId: number = 0;public id: number;public price: number;constructor(price: number) {this.id = PurchaseItem.NextId++;this.price = price;}
}
子类:BasketViewer
import {PurchaseItem} from "./PurchaseItem"@Component
export struct BasketViewer {@Link @Watch('onBasketUpdated') shopBasket: PurchaseItem[];@State totalPurchase: number = 0;updateTotal(): number {let total = this.shopBasket.reduce((sum, i) => sum + i.price, 0);// 超过100欧元可享受折扣if (total >= 100) {total = 0.9 * total;}return total;}// @Watch 回调onBasketUpdated(propName: string): void {this.totalPurchase = this.updateTotal();}build() {Column() {ForEach(this.shopBasket,(item) => {Text(`Price: ${item.price.toFixed(2)} €`)},item => item.id.toString())Text(`Total: ${this.totalPurchase.toFixed(2)} €`)}}
}
父类:BasketModifierPage
import {BasketViewer} from "./BasketViewer"
import {PurchaseItem} from "./PurchaseItem"@Entry
@Component
struct BasketModifierPage {@State shopBasket: PurchaseItem[] = [];build() {Column() {Button('Add to basket').onClick(() => {this.shopBasket.push(new PurchaseItem(Math.round(100 * Math.random())))})BasketViewer({ shopBasket: $shopBasket })}}
}
描述:
- BasketModifierPage组件的Button.onClick向BasketModifier shopBasket中添加条目
- @Link装饰的BasketViewer shopBasket值发生变化
- 状态管理框架调用@Watch函数BasketViewer onBasketUpdated 更新BasketViewer TotalPurchase的值
- @Link shopBasket的改变,新增了数组项,ForEach组件会执行item Builder,渲染构建新的Item项;@State totalPurchase改变,对应的Text组件也重新渲染
- 重新渲染是异步发生的

![[C#]C# OpenVINO部署yolov8实例分割模型](https://img-blog.csdnimg.cn/direct/48d6f935d195433dbf9570b92947a532.jpeg)