支持 input 函数的在线 python 运行环境 - 基于队列
- 思路
- 两次用户输入
- 三次用户输入
- 实现
- 前端使用 vue + element ui
- Windows 环境的执行器
- 子进程需要执行的代码
- 代码仓库
- 参考
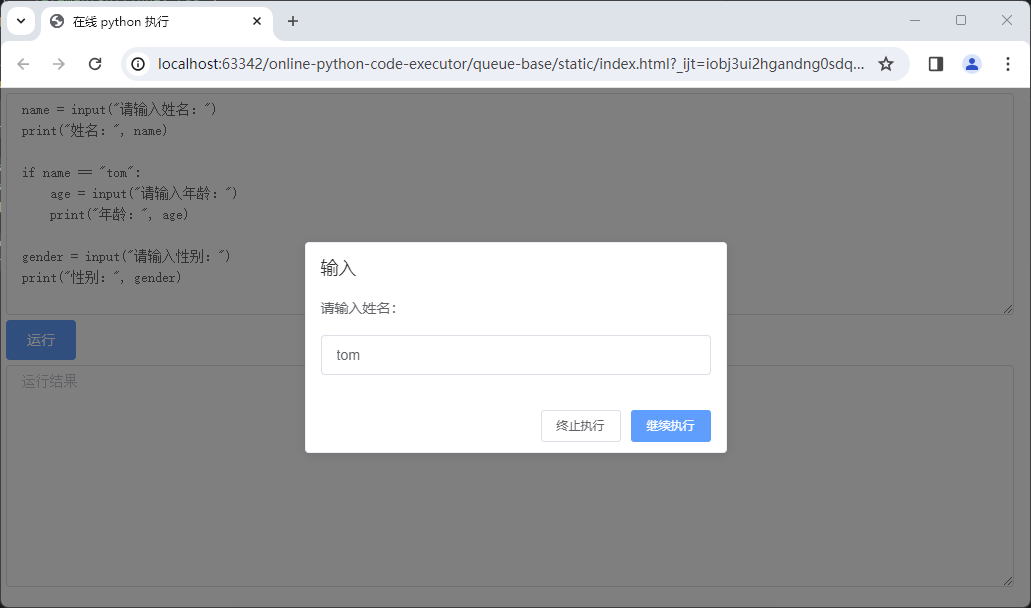
本文提供了一种方式来实现支持 input 函数,即支持用户输的在线 python 运行环境。效果如下图所示:


思路
-
前端使用一个数组
input_queue记录用户从点击运行按钮到现在的所有输入 -
点击运行按钮时将
code、input_queue传给后端 -
后端将参数传给执行 python 代码的子进程
-
子进程重写
input()函数,假设新的实现为input_wrapper,代码如下,到用户代码运行到input()函数时,会执行重写的input_wrapper(), 在input_wrapper中获取到input_queue,然后使用input_queue.pop(0)弹出用户输入最早的信息,如果input_queue为空,则说明需要用户输入,通过抛出InputRequestException异常的方式通知后端def input_wrapper(prompt=''):if input_queue:input_str = input_queue.pop(0)sys.stdout.write(str(prompt) + input_str + "\n")return input_strraise InputRequestException(str(prompt)) -
后端通过处理子进程的标准输出、标准错误,知晓需要用户输入,然后向前端返回以下 json,
event.type为 input_request 代表需要用户输入,prompt是提示信息{"is_timeout": false,"done": false,"event": {"type": "input_request","prompt": "请输入姓名:"} } -
前端弹出弹框提示用户输入,用户输入并点击继续执行按钮时,会将本次的输入追加到
input_queue的末尾,然后再次调用运行接口,这样循环往复直到程序结束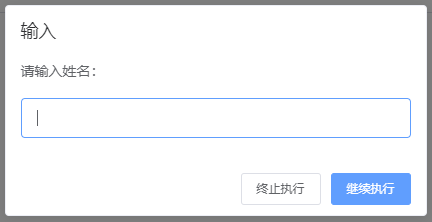
在执行以下代码时,可能需要两次用户输入,也可能需要三次。
name = input("请输入姓名:")
print("姓名:", name)if name == "tom":age = input("请输入年龄:")print("年龄:", age)gender = input("请输入性别:")
print("性别:", gender)
两次用户输入
点击运行按钮
请求参数中的 input_queue 为 []{"code": "name = input(\"请输入姓名:\")\nprint(\"姓名:\", name)\n\nif name == \"tom\":\n age = input(\"请输入年龄:\")\n print(\"年龄:\", age)\n\ngender = input(\"请输入性别:\")\nprint(\"性别:\", gender)","input_queue": []
}返回值
{"is_timeout": false,"done": false,"event": {"type": "input_request","prompt": "请输入姓名:"}
}
输入 jack
请求参数中的 input_queue 为 ["jack"]{"code": "name = input(\"请输入姓名:\")\nprint(\"姓名:\", name)\n\nif name == \"tom\":\n    age = input(\"请输入年龄:\")\n    print(\"年龄:\", age)\n\ngender = input(\"请输入性别:\")\nprint(\"性别:\", gender)","input_queue": ["jack"]
}返回值
{"is_timeout": false,"done": false,"event": {"type": "input_request","prompt": "请输入性别:"}
}
输入 男
请求参数中的 input_queue 为 ["jack", "男"]
{"code": "name = input(\"请输入姓名:\")\nprint(\"姓名:\", name)\n\nif name == \"tom\":\n    age = input(\"请输入年龄:\")\n    print(\"年龄:\", age)\n\ngender = input(\"请输入性别:\")\nprint(\"性别:\", gender)","input_queue": ["jack","男"]
}返回值
{"is_timeout": false,"done": true,"output": "请输入姓名:jack\r\n姓名: jack\r\n请输入性别:男\r\n性别: 男\r\n"
}
三次用户输入
点击运行按钮
请求参数中的 input_queue 为 []
{"code": "name = input(\"请输入姓名:\")\nprint(\"姓名:\", name)\n\nif name == \"tom\":\n    age = input(\"请输入年龄:\")\n    print(\"年龄:\", age)\n\ngender = input(\"请输入性别:\")\nprint(\"性别:\", gender)","input_queue": []
}返回值
{"is_timeout": false,"done": false,"event": {"type": "input_request","prompt": "请输入姓名:"}
}
输入 tom
请求参数中的 input_queue 为 ["tom"]
{"code": "name = input(\"请输入姓名:\")\nprint(\"姓名:\", name)\n\nif name == \"tom\":\n    age = input(\"请输入年龄:\")\n    print(\"年龄:\", age)\n\ngender = input(\"请输入性别:\")\nprint(\"性别:\", gender)","input_queue": ["tom"]
}返回值
{"is_timeout": false,"done": false,"event": {"type": "input_request","prompt": "请输入年龄:"}
}
输入 18
请求参数中的 input_queue 为 ["tom", "18"]
{"code": "name = input(\"请输入姓名:\")\nprint(\"姓名:\", name)\n\nif name == \"tom\":\n    age = input(\"请输入年龄:\")\n    print(\"年龄:\", age)\n\ngender = input(\"请输入性别:\")\nprint(\"性别:\", gender)","input_queue": ["tom","18"]
}返回值
{"is_timeout": false,"done": false,"event": {"type": "input_request","prompt": "请输入性别:"}
}
输入 男
请求参数中的 input_queue 为 ["tom", "18", "男"]
{"code": "name = input(\"请输入姓名:\")\nprint(\"姓名:\", name)\n\nif name == \"tom\":\n    age = input(\"请输入年龄:\")\n    print(\"年龄:\", age)\n\ngender = input(\"请输入性别:\")\nprint(\"性别:\", gender)","input_queue": ["tom","18","男"]
}返回值
{"is_timeout": false,"done": true,"output": "请输入姓名:tom\r\n姓名: tom\r\n请输入年龄:18\r\n年龄: 18\r\n请输入性别:男\r\n性别: 男\r\n"
}
实现
前端使用 vue + element ui
<!DOCTYPE html>
<html lang="" style="height: 100%;">
<head><meta charset="UTF-8"><link rel="stylesheet" href="./element-ui/index.css"><title>在线 python 执行</title>
</head>
<body style="height: 100%;margin: 0;">
<div id="app" style="height: 98%;width: 98%;padding: 5px"><el-inputtype="textarea":autosize="{ minRows: 10, maxRows: 100}"placeholder="请输入代码"v-model="code"></el-input><el-button type="primary" style="margin-top: 5px;margin-bottom: 5px" @click="exec()">运行</el-button><el-inputtype="textarea":autosize="{ minRows: 10, maxRows: 100}"placeholder="运行结果"v-model="result"></el-input>
</div>
</body>
<script src="./axios.min.js"></script>
<script src="./vue.js"></script>
<script src="./element-ui/index.js"></script>
<script>new Vue({el: '#app',mounted() {},methods: {exec() {const params = {code: this.code,input_queue: this.input_queue}axios.post('http://localhost:8080/exec', params).then(res => {console.log("exec", res)if (res.data.done) {// 执行结束了,需要清空队列this.clearQueue()if (res.data.is_timeout) {// 执行超时this.$message("执行超时");} else {// 正常执行结束this.result = res.data.output}} else {// 执行中,需要用户输入const event = res.data.eventif (event.type === 'input_request') {// 弹框提示用户输入this.$prompt(event.prompt, '输入', {confirmButtonText: '继续执行',cancelButtonText: '终止执行',showClose: false,closeOnClickModal: false,closeOnPressEscape: false}).then(({value}) => {// 继续执行,将本次输入的信息追加进队列,然后再次执行this.input_queue.push(value)this.exec()}).catch((action) => {// 终止执行,需要清空队列console.log("action ", action)this.clearQueue()this.$message("终止执行")});}}})},clearQueue() {this.input_queue = []}},data() {return {code:
`name = input("请输入姓名:")
print("姓名:", name)if name == "tom":age = input("请输入年龄:")print("年龄:", age)gender = input("请输入性别:")
print("性别:", gender)
`,input_queue: [],result: null,}}})</script>
</html>
Windows 环境的执行器
import json
import os
import subprocess
import threading
from threading import Timerimport psutilclass AbstractExecutor:def __init__(self, param):# param 包括 code、input_queueself.param = param# 用于保护 is_timeout 的锁self.lock = threading.Lock()# 是否执行超时了self.is_timeout = Nonedef timeout_callback(self, p: subprocess.Popen):"""执行超时时的回调,会终止执行 python 代码的进程组:param p: 执行 python 代码的进程"""with self.lock:if self.is_timeout is None:self.is_timeout = Trueif self.is_timeout:try:# 终止执行 python 代码的进程组self.terminating_process_group(p)except Exception as e:print("超时回调异常, error: %s", e)def terminating_process_group(self, p: subprocess.Popen):"""终止进程 p 及其子进程:param p: 要终止的进程"""raise NotImplementedError()def create_popen(self) -> subprocess.Popen:"""创建 subprocess.Popen,必须将 stderr 重定向到 stdout"""raise NotImplementedError()def output(self, stdout):if stdout is not None:return stdout.decode("utf-8")else:return ""def execute(self):p = self.create_popen()timer = Timer(3, self.timeout_callback, [p])timer.start()try:# 从标准输入传入 json 参数:code、input_queuep.stdin.write(json.dumps(self.param).encode(encoding="utf-8"))stdout, stderr = p.communicate()with self.lock:if self.is_timeout is None:self.is_timeout = Falsefinally:timer.cancel()return self.is_timeout, self.output(stdout)class WindowsExecutor(AbstractExecutor):__output_prefix = "Active code page: 65001\r\n"def create_popen(self) -> subprocess.Popen:filename = r"D:\project\python\online-python-code-executor\queue-base\exec_py.py"cmd = 'chcp 65001 & set PYTHONIOENCODING=utf-8 & python ' + filename# 将 stderr 重定向到了 stdoutreturn subprocess.Popen(cmd, stdin=subprocess.PIPE, stdout=subprocess.PIPE, stderr=subprocess.STDOUT,shell=True)def terminating_process_group(self, p: subprocess.Popen):proc_pid = p.pidparent_proc = psutil.Process(proc_pid)for child_proc in parent_proc.children(recursive=True):print(child_proc.pid)child_proc.kill()parent_proc.kill()print(parent_proc.pid)def output(self, stdout):output = super().output(stdout)if output.startswith(self.__output_prefix):return output.removeprefix(self.__output_prefix)else:return outputif os.name == "nt":executor_cls = WindowsExecutordef execute(param):# 执行用户代码is_timeout, stdout = executor_cls(param).execute()if is_timeout:# 执行超时了return {"is_timeout": is_timeout,"done": True,"output": stdout,}else:arr = stdout.split("InputRequestException")if len(arr) > 1:# 需要用户输入return {"is_timeout": is_timeout,"done": False,"event": {"type": "input_request","prompt": arr[-1]}}else:# 正常执行结束return {"is_timeout": is_timeout,"done": True,"output": stdout,}
子进程需要执行的代码
import json
import sysinput_queue = []class InputRequestException(Exception):"""抛出此异常表示需要用户输入"""passdef execute(param):# 重写 input 函数__builtins__.input = input_wrapper# input_queueglobal input_queueinput_queue = param["input_queue"]try:# 执行代码exec(param["code"])except InputRequestException as e:# 如果需要用户输入,则直接退出sys.stdout.write("\n" + "InputRequestException" + e.args[0])exit()def input_wrapper(prompt=''):# 从 input_queue 中弹出if input_queue:input_str = input_queue.pop(0)sys.stdout.write(str(prompt) + input_str + "\n")return input_str# 需要用户输入raise InputRequestException(str(prompt))if __name__ == '__main__':# 从标准输入读取 json 参数:code、input_queuearg = sys.stdin.read()# 执行execute(json.loads(arg))
代码仓库
- online-python-code-executor/queue-base (github.com)
参考
- https://pythontutor.com
- https://github.com/seamile/PyTutor