文章目录
- Pre
- 概述
- Code
- 源码分析
Pre
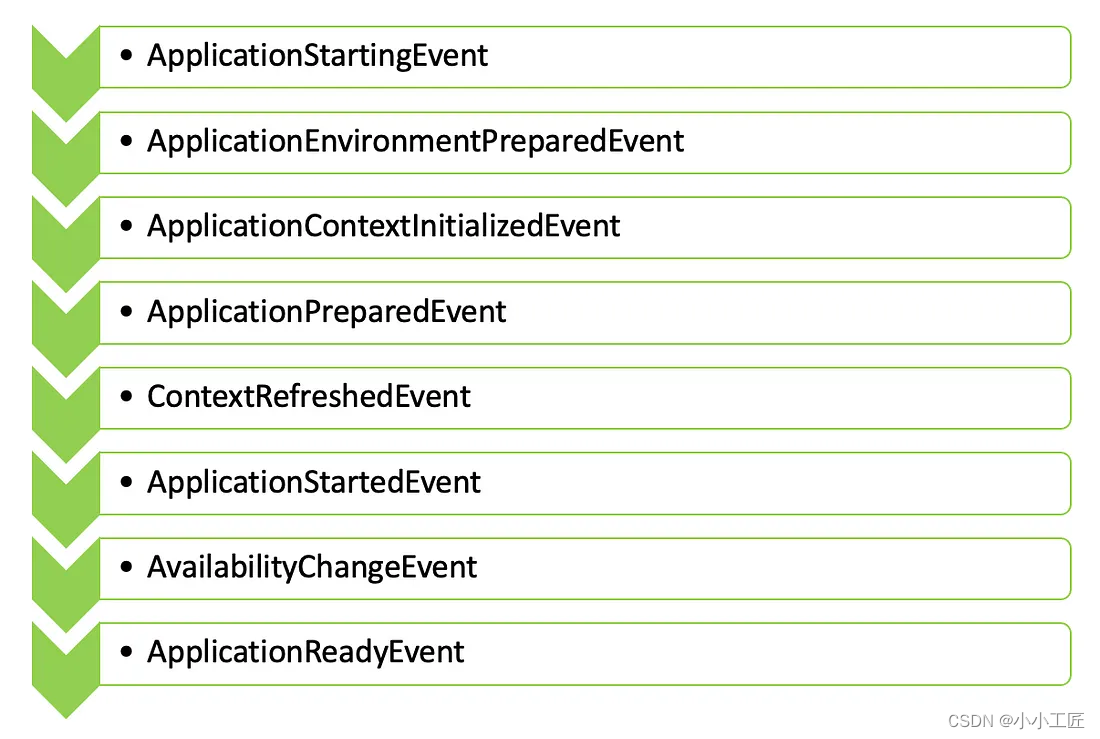
Spring Boot - Application Events 的发布顺序_ApplicationEnvironmentPreparedEvent
概述
Spring Boot 的广播机制是基于观察者模式实现的,它允许在 Spring 应用程序中发布和监听事件。这种机制的主要目的是为了实现解耦,使得应用程序中的不同组件可以独立地改变和复用逻辑,而无需直接进行通信。
在 Spring Boot 中,事件发布和监听的机制是通过 ApplicationEvent、ApplicationListener 以及事件发布者(ApplicationEventPublisher)来实现的。其中,ApplicationEvent 是所有自定义事件的基础,自定义事件需要继承自它。
ApplicationListener 是监听特定事件并做出响应的接口,开发者可以通过实现该接口来定义自己的监听器。事件发布者(通常由 Spring 的 ApplicationContext 担任)负责发布事件。
ApplicationPreparedEvent是Spring Boot应用程序事件的一种,它在应用程序上下文准备就绪但尚未刷新时触发。在这个阶段,Bean定义已经加载,环境已经准备就绪。
我们可以通过创建一个自定义事件监听器来处理ApplicationPreparedEvent,以便在初始化阶段开始之前访问和修改应用程序上下文。以下是一个示例代码:
import org.springframework.boot.context.event.ApplicationPreparedEvent;
import org.springframework.context.ApplicationListener;public class ApplicationPreparedListener implements ApplicationListener<ApplicationPreparedEvent> {@Overridepublic void onApplicationEvent(ApplicationPreparedEvent event) {System.out.println("Handling ApplicationPreparedEvent here!");// 在这里执行需要的操作}
}
然后,在主应用程序类中手动注册这个事件监听器:
import org.springframework.boot.SpringApplication;
import org.springframework.boot.autoconfigure.SpringBootApplication;@SpringBootApplication
public class YourApplication {public static void main(String[] args) {SpringApplication app = new SpringApplication(YourApplication.class);app.addListeners(new ApplicationPreparedListener());app.run(args);}
}
通过这种方式,可以在应用程序上下文准备就绪时执行任何必要的操作。
Code
package com.artisan.event;import org.springframework.boot.context.event.ApplicationPreparedEvent;
import org.springframework.context.ApplicationListener;/*** @author 小工匠* @version 1.0* @mark: show me the code , change the world*/
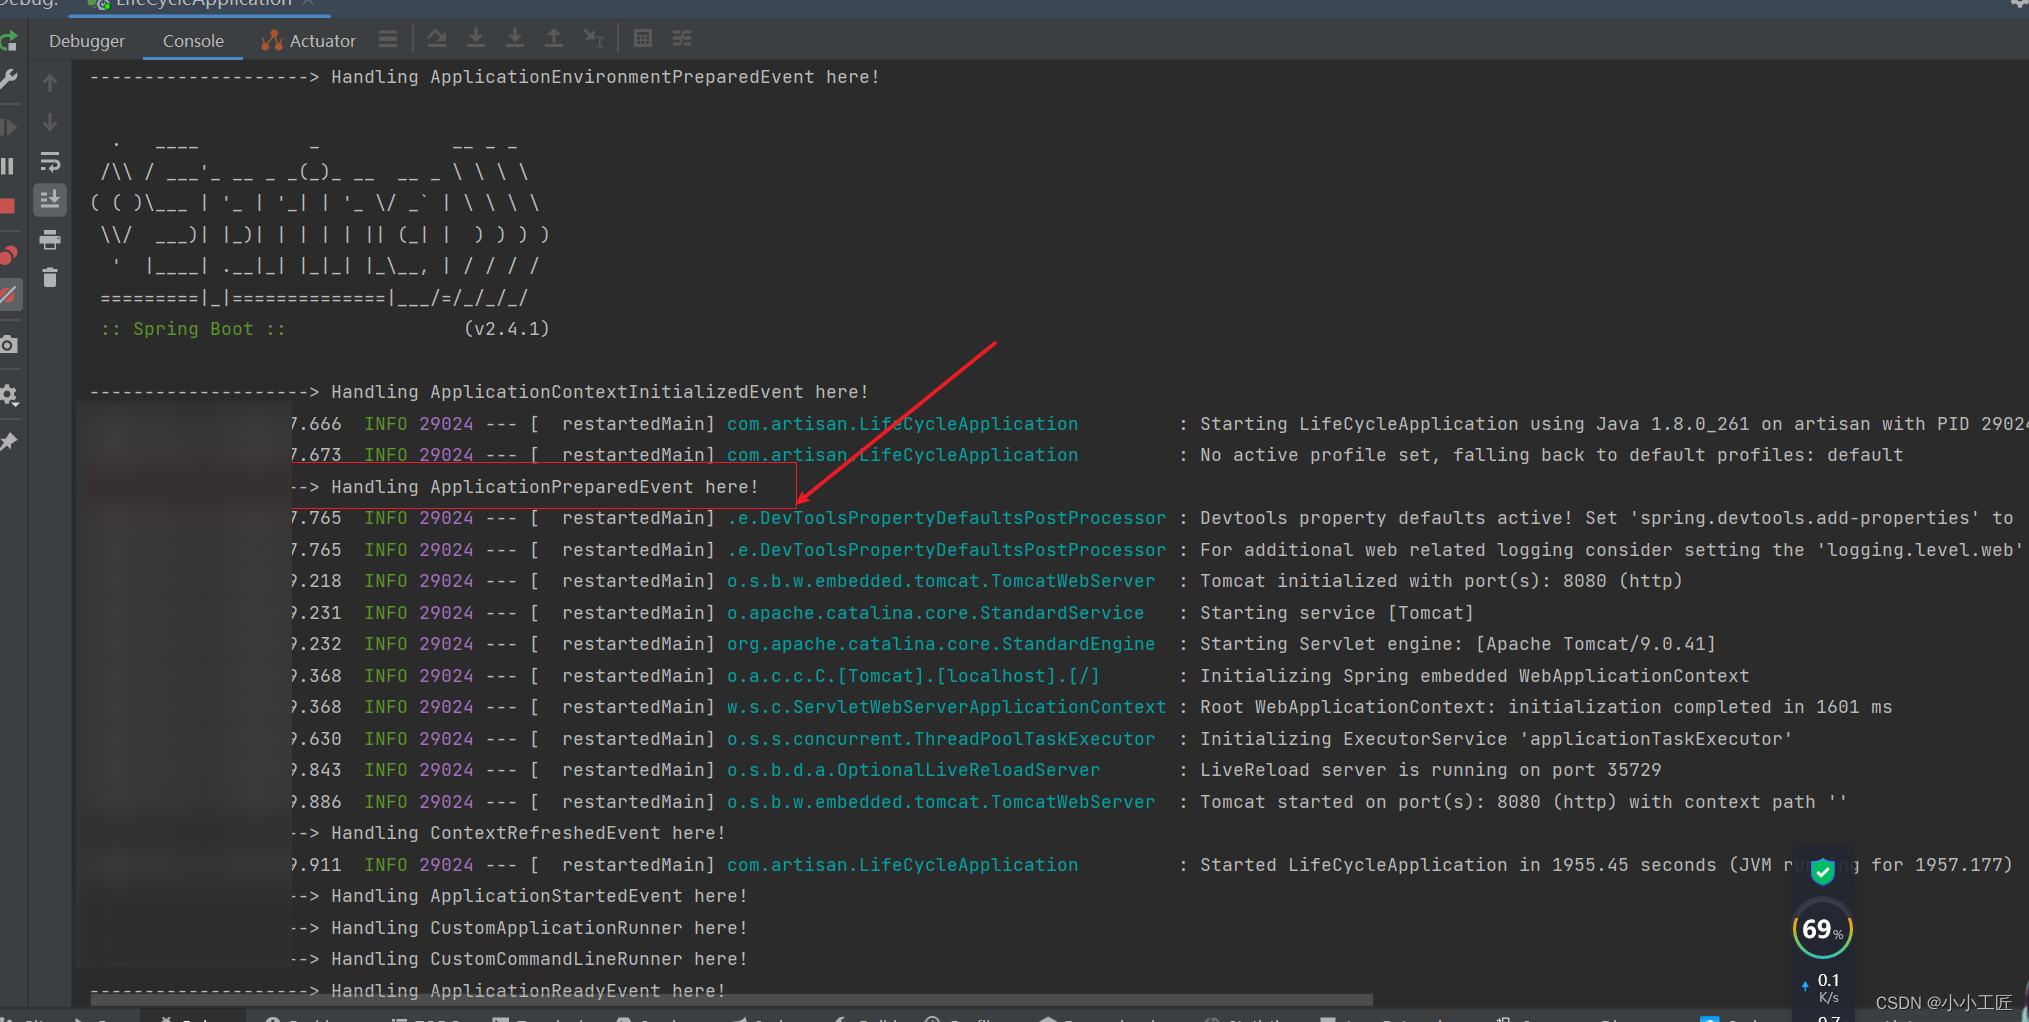
public class ApplicationPreparedListener implements ApplicationListener<ApplicationPreparedEvent> {/*** ApplicationPreparedEvent 在准备应用程序上下文之后,但在装入 Bean 定义和应用程序完全初始化之前触发。* <p>* 通过监听 ApplicationPreparedEvent ,我们可以在任何实际的 Bean 实例化或依赖关系注入发生之前访问和操作应用程序上下文。* 我们可以执行一些事情,例如修改 Bean 定义、注册其他组件、配置方面等等。* <p>* 为了处理 ApplicationPreparedEvent ,我们可以通过实现 ApplicationPreparedEvent 作为泛型类型的 ApplicationListener 接口来创建一个自定义事件侦听器。* 此侦听器可以在主应用程序类中手动注册。** @param event the event to respond to*/@Overridepublic void onApplicationEvent(ApplicationPreparedEvent event) {System.out.println("--------------------> Handling ApplicationPreparedEvent here!");}
}
如何使用呢?
方式一:
@SpringBootApplication
public class LifeCycleApplication {/*** 除了手工add , 在 META-INF下面 的 spring.factories 里增加* org.springframework.context.ApplicationListener=自定义的listener 也可以** @param args*/public static void main(String[] args) {SpringApplication springApplication = new SpringApplication(LifeCycleApplication.class);// 当我们运行 Spring Boot 应用程序时,将调用 的方法 ApplicationPreparedListener , onApplicationEvent() 允许我们在初始化阶段开始之前根据需要访问和修改应用程序上下文。springApplication.addListeners(new ApplicationPreparedListener());springApplication.run(args);}}
方式二: 通过spring.factories 配置
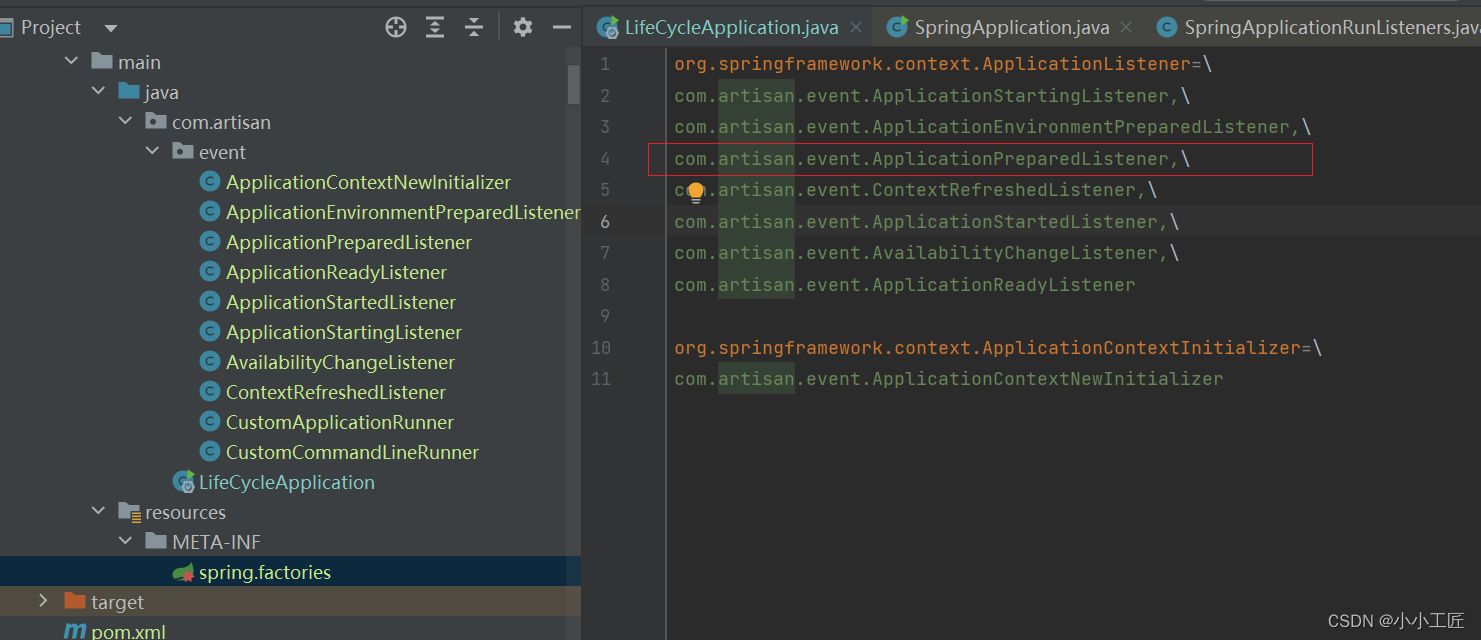
org.springframework.context.ApplicationListener=\
com.artisan.event.ApplicationPreparedListener
运行日志
源码分析
首先main方法启动入口
SpringApplication.run(LifeCycleApplication.class, args);
跟进去
public static ConfigurableApplicationContext run(Class<?> primarySource, String... args) {return run(new Class<?>[] { primarySource }, args);}
继续
public static ConfigurableApplicationContext run(Class<?>[] primarySources, String[] args) {return new SpringApplication(primarySources).run(args);}
这里首先关注 new SpringApplication(primarySources)
new SpringApplication(primarySources)
/*** Create a new {@link SpringApplication} instance. The application context will load* beans from the specified primary sources (see {@link SpringApplication class-level}* documentation for details. The instance can be customized before calling* {@link #run(String...)}.* @param resourceLoader the resource loader to use* @param primarySources the primary bean sources* @see #run(Class, String[])* @see #setSources(Set)*/@SuppressWarnings({ "unchecked", "rawtypes" })public SpringApplication(ResourceLoader resourceLoader, Class<?>... primarySources) {this.resourceLoader = resourceLoader;Assert.notNull(primarySources, "PrimarySources must not be null");this.primarySources = new LinkedHashSet<>(Arrays.asList(primarySources));this.webApplicationType = WebApplicationType.deduceFromClasspath();this.bootstrappers = new ArrayList<>(getSpringFactoriesInstances(Bootstrapper.class));setInitializers((Collection) getSpringFactoriesInstances(ApplicationContextInitializer.class));setListeners((Collection) getSpringFactoriesInstances(ApplicationListener.class));this.mainApplicationClass = deduceMainApplicationClass();}
聚焦 setListeners((Collection) getSpringFactoriesInstances(ApplicationListener.class));
run
继续run
// 开始启动Spring应用程序
public ConfigurableApplicationContext run(String... args) {StopWatch stopWatch = new StopWatch(); // 创建一个计时器stopWatch.start(); // 开始计时DefaultBootstrapContext bootstrapContext = createBootstrapContext(); // 创建引导上下文ConfigurableApplicationContext context = null; // Spring应用上下文,初始化为nullconfigureHeadlessProperty(); // 配置无头属性(如:是否在浏览器中运行)SpringApplicationRunListeners listeners = getRunListeners(args); // 获取运行监听器listeners.starting(bootstrapContext, this.mainApplicationClass); // 通知监听器启动过程开始try {ApplicationArguments applicationArguments = new DefaultApplicationArguments(args); // 创建应用参数ConfigurableEnvironment environment = prepareEnvironment(listeners, bootstrapContext, applicationArguments); // 预备环境configureIgnoreBeanInfo(environment); // 配置忽略BeanInfoBanner printedBanner = printBanner(environment); // 打印Bannercontext = createApplicationContext(); // 创建应用上下文context.setApplicationStartup(this.applicationStartup); // 设置应用启动状态prepareContext(bootstrapContext, context, environment, listeners, applicationArguments, printedBanner); // 准备上下文refreshContext(context); // 刷新上下文,执行Bean的生命周期afterRefresh(context, applicationArguments); // 刷新后的操作stopWatch.stop(); // 停止计时if (this.logStartupInfo) { // 如果需要记录启动信息new StartupInfoLogger(this.mainApplicationClass).logStarted(getApplicationLog(), stopWatch); // 记录启动信息}listeners.started(context); // 通知监听器启动完成callRunners(context, applicationArguments); // 调用Runner}catch (Throwable ex) {handleRunFailure(context, ex, listeners); // 处理运行失败throw new IllegalStateException(ex); // 抛出异常}try {listeners.running(context); // 通知监听器运行中}catch (Throwable ex) {handleRunFailure(context, ex, null); // 处理运行失败throw new IllegalStateException(ex); // 抛出异常}return context; // 返回应用上下文
}
我们重点看
prepareContext(bootstrapContext, context, environment, listeners, applicationArguments, printedBanner);
继续
private void prepareContext(DefaultBootstrapContext bootstrapContext, ConfigurableApplicationContext context,ConfigurableEnvironment environment, SpringApplicationRunListeners listeners,ApplicationArguments applicationArguments, Banner printedBanner) {// 将环境设置到应用上下文中context.setEnvironment(environment);// 后处理应用上下文postProcessApplicationContext(context);// 应用初始化器applyInitializers(context);// 通知监听器,上下文已准备就绪listeners.contextPrepared(context);// 关闭bootstrapContextbootstrapContext.close(context);// 如果需要记录启动信息if (this.logStartupInfo) {// 记录启动信息logStartupInfo(context.getParent() == null);// 记录启动profile信息logStartupProfileInfo(context);}// 注册Spring Boot特有的单例beanConfigurableListableBeanFactory beanFactory = context.getBeanFactory();// 注册applicationArguments为单例beanbeanFactory.registerSingleton("springApplicationArguments", applicationArguments);// 如果有打印的Banner,也注册为单例beanif (printedBanner != null) {beanFactory.registerSingleton("springBootBanner", printedBanner);}// 如果是DefaultListableBeanFactory的实例,设置是否允许Bean定义覆盖if (beanFactory instanceof DefaultListableBeanFactory) {((DefaultListableBeanFactory) beanFactory).setAllowBeanDefinitionOverriding(this.allowBeanDefinitionOverriding);}// 如果需要懒加载初始化,添加Bean工厂后处理器if (this.lazyInitialization) {context.addBeanFactoryPostProcessor(new LazyInitializationBeanFactoryPostProcessor());}// 加载所有源Set<Object> sources = getAllSources();// 断言源集合不为空Assert.notEmpty(sources, "Sources must not be empty");// 加载应用上下文load(context, sources.toArray(new Object[0]));// 通知监听器,上下文已加载listeners.contextLoaded(context);
}
重点关注: listeners.contextLoaded(context);
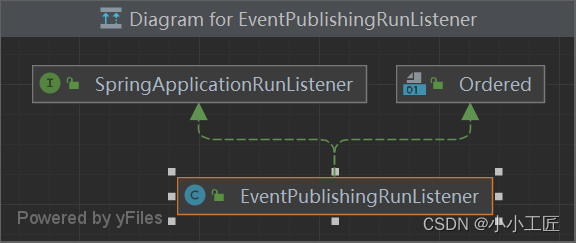
void contextLoaded(ConfigurableApplicationContext context) {doWithListeners("spring.boot.application.context-loaded", (listener) -> listener.contextLoaded(context));}关注 listener.contextLoaded(context)
@Overridepublic void contextLoaded(ConfigurableApplicationContext context) {for (ApplicationListener<?> listener : this.application.getListeners()) {if (listener instanceof ApplicationContextAware) {((ApplicationContextAware) listener).setApplicationContext(context);}context.addApplicationListener(listener);}this.initialMulticaster.multicastEvent(new ApplicationPreparedEvent(this.application, this.args, context));}
继续
@Overridepublic void multicastEvent(ApplicationEvent event) {multicastEvent(event, resolveDefaultEventType(event));}
@Override
public void multicastEvent(final ApplicationEvent event, @Nullable ResolvableType eventType) {// 如果eventType不为null,则直接使用它;否则,使用resolveDefaultEventType方法来解析事件的默认类型。ResolvableType type = (eventType != null ? eventType : resolveDefaultEventType(event));// 获取一个线程池执行器,它用于异步执行监听器调用。Executor executor = getTaskExecutor();// 获取所有对应该事件类型的监听器。for (ApplicationListener<?> listener : getApplicationListeners(event, type)) {// 如果执行器不为null,则使用它来异步执行监听器调用;// 否则,直接同步调用监听器。if (executor != null) {executor.execute(() -> invokeListener(listener, event));}else {invokeListener(listener, event);}}
}
继续
private void doInvokeListener(ApplicationListener listener, ApplicationEvent event) {try {listener.onApplicationEvent(event);}catch (ClassCastException ex) {......}}
就到了我们自定义实现的代码逻辑中了。
@Overridepublic void onApplicationEvent(ApplicationPreparedEvent event) {System.out.println("--------------------> Handling ApplicationPreparedEvent here!");}

