一、前言
pytest配置文件可以改变pytest的运行方式,它是一个固定的文件pytest.ini文件,读取配置信息,按指定的方式去运行
二、ini配置文件
- pytest里面有些文件是非test文件
- pytest.ini pytest的主配置文件,可以改变pytest的默认行为
- conftest.py 测试用例的一些fixture配置
- _init_.py 识别该文件夹为python的package包
- tox.ini 与pytest.ini类似,用tox工具时候才有用
- setup.cfg 也是ini格式文件,影响setup.py的行为
ini文件基本格式
# 保存为pytest.ini文件[pytest]addopts = -rsxX
xfail_strict = ture
使用pytest —help指令可以查看pytest.ini的设置选项
—rsxX 表示pytest报告所有测试用例被跳过、预计失败、预计失败但实际被通过的原因
三、mark标记
如下案例,使用了2个标签:webtest和hello,使用mark标记功能对于以后分类测试非常有用处
# content of test_mark.py
import pytest@pytest.mark.webtest
def test_send_http():print("mark web test")def test_something_quick():passdef test_another():pass@pytest.mark.hello
class TestClass:def test_01(self):print("hello :")def test_02(self):print("hello world!")if __name__ == "__main__":pytest.main(["-v", "test_mark.py", "-m=hello"])
运行结果
============================= test session starts =============================
platform win32 -- Python 3.6.0, pytest-3.6.3, py-1.5.4, pluggy-0.6.0 -- D:\soft\python3.6\python.exe
cachedir: .pytest_cache
metadata: {'Python': '3.6.0', 'Platform': 'Windows-7-6.1.7601-SP1', 'Packages': {'pytest': '3.6.3', 'py': '1.5.4', 'pluggy': '0.6.0'}, 'Plugins': {'metadata': '1.7.0', 'html': '1.19.0', 'allure-adaptor': '1.7.10'}, 'JAVA_HOME': 'D:\\soft\\jdk18\\jdk18v'}
rootdir: D:\MOMO, inifile:
plugins: metadata-1.7.0, html-1.19.0, allure-adaptor-1.7.10
collecting ... collected 5 items / 3 deselectedtest_mark.py::TestClass::test_01 PASSED                                  [ 50%]
test_mark.py::TestClass::test_02 PASSED                                  [100%]=================== 2 passed, 3 deselected in 0.11 seconds ====================
有时候标签多了,不容易记住,为了方便后续执行指令的时候能准确使用mark的标签,可以写入到pytest.ini文件
# pytest.ini
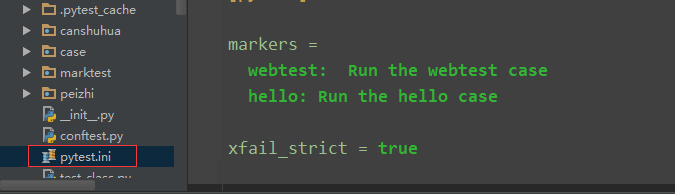
[pytest]markers =webtest: Run the webtest casehello: Run the hello case
标记好之后,可以使用pytest —markers查看到
$ pytest —markers
D:\MOMO>pytest --markers
@pytest.mark.webtest:  Run the webtest case@pytest.mark.hello: Run the hello case@pytest.mark.skip(reason=None): skip the given test function with an optional re
ason. Example: skip(reason="no way of currently testing this") skips the test.@pytest.mark.skipif(condition): skip the given test function if eval(condition)
results in a True value.  Evaluation happens within the module global context. E
xample: skipif('sys.platform == "win32"') skips the test if we are on the win32
platform. see http://pytest.org/latest/skipping.html@pytest.mark.xfail(condition, reason=None, run=True, raises=None, strict=False):mark the test function as an expected failure if eval(condition) has a True val
ue. Optionally specify a reason for better reporting and run=False if you don't
even want to execute the test function. If only specific exception(s) are expect
ed, you can list them in raises, and if the test fails in other ways, it will bereported as a true failure. See http://pytest.org/latest/skipping.html@pytest.mark.parametrize(argnames, argvalues): call a test function multiple tim
es passing in different arguments in turn. argvalues generally needs to be a lis
t of values if argnames specifies only one name or a list of tuples of values ifargnames specifies multiple names. Example: @parametrize('arg1', [1,2]) would l
ead to two calls of the decorated test function, one with arg1=1 and another wit
h arg1=2.see http://pytest.org/latest/parametrize.html for more info and example
s.@pytest.mark.usefixtures(fixturename1, fixturename2, ...): mark tests as needingall of the specified fixtures. see http://pytest.org/latest/fixture.html#usefix
tures@pytest.mark.tryfirst: mark a hook implementation function such that the plugin
machinery will try to call it first/as early as possible.@pytest.mark.trylast: mark a hook implementation function such that the plugin m
achinery will try to call it last/as late as possible.
最上面两个就是刚才写入到pytest.ini的配置了
四、禁用xpass
设置xfail_strict = true可以让那些标记为@pytest.mark.xfail但实际通过的测试用例被报告为失败
什么叫标记为@pytest.mark.xfail但实际通过,这个比较绕脑,看以下案例
# content of test_xpass.py
import pytestdef test_hello():print("hello world!")assert 1@pytest.mark.xfail()
def test_momo1():a = "hello"b = "hello world"assert a == b@pytest.mark.xfail()
def test_momo2():a = "hello"b = "hello world"assert a != bif __name__ == "__main__":pytest.main(["-v", "test_xpass.py"])
测试结果
collecting ... collected 3 itemstest_xpass.py::test_hello PASSED    [ 33%]
test_xpass.py::test_momo1 xfail     [ 66%]
test_xpass.py::test_momo2 XPASS     [100%]=============== 1 passed, 1 xfailed, 1 xpassed in 0.27 seconds ================
test_momo1和test_momo2这2个用例一个是a == b一个是a != b,两个都标记失败了,我们希望两个用例不用执行全部显示xfail。实际上最后一个却显示xpass.为了让两个都显示xfail,那就加个配置
xfail_strict = true
# pytest.ini
[pytest]markers =webtest:  Run the webtest casehello: Run the hello casexfail_strict = true
再次运行,结果就变成
collecting ... collected 3 itemstest_xpass.py::test_hello PASSED        [ 33%]
test_xpass.py::test_momo1 xfail         [ 66%]
test_xpass.py::test_momo2 FAILED        [100%]================================== FAILURES ===================================
_________________________________ test_momo2 __________________________________
[XPASS(strict)]
================ 1 failed, 1 passed, 1 xfailed in 0.05 seconds ================
这样标记为xpasx的就被强制性变成failed的结果
五、配置文件如何放
一般一个工程下方一个pytest.ini文件就可以了,放到顶层文件夹下
六、addopts
addopts参数可以更改默认命令行选项,这个当我们在cmd输入指令去执行用例的时候,会用到,比如我想测试完生成报告,指令比较长
$ pytest -v —rerun 1 —html=report.html —self-contained-html
每次输入这么多,不太好记住,于是可以加到pytest.ini里
# pytest.ini
[pytest]markers =webtest:  Run the webtest casehello: Run the hello casexfail_strict = trueaddopts = -v --rerun 1 --html=report.html --self-contained-html
这样我下次打开cmd,直接输入pytest,它就能默认带上这些参数了
最后感谢每一个认真阅读我文章的人,礼尚往来总是要有的,虽然不是什么很值钱的东西,如果你用得到的话可以直接拿走:
【软件测试技术交流(资料分享)】:320231853(备注C)![]() http://qm.qq.com/cgi-bin/qm/qr?_wv=1027&k=wvdQ7J4AdIhjWqHqp-aGkIYde-wLap1P&authKey=4Zvhap%2BH44eyRbqYp4nbq21NHkZHo8kyPWSvyY50ssokKTX0rEYT15ZCaKuJE0Zc&noverify=0&group_code=320231853
http://qm.qq.com/cgi-bin/qm/qr?_wv=1027&k=wvdQ7J4AdIhjWqHqp-aGkIYde-wLap1P&authKey=4Zvhap%2BH44eyRbqYp4nbq21NHkZHo8kyPWSvyY50ssokKTX0rEYT15ZCaKuJE0Zc&noverify=0&group_code=320231853 生命不息,奋斗不止。每一份努力都不会被辜负,只要坚持不懈,终究会有回报。珍惜时间,追求梦想。不忘初心,砥砺前行。你的未来,由你掌握!
生命短暂,时间宝贵,我们无法预知未来会发生什么,但我们可以掌握当下。珍惜每一天,努力奋斗,让自己变得更加强大和优秀。坚定信念,执着追求,成功终将属于你!
只有不断地挑战自己,才能不断地超越自己。坚持追求梦想,勇敢前行,你就会发现奋斗的过程是如此美好而值得。相信自己,你一定可以做到!