目录
1.基于Swagger的knife4j
2.代码开发
依赖
然后在WebMvcConfig
设置静态资源映射
在LoginCheckFilter中设置不需要处理的请求路径
3.启动类的优化
1.基于Swagger的knife4j
里面方便我们测试什么的
2.代码开发
依赖
<!--swagger 及knife4j--><dependency><groupId>com.github.xiaoymin</groupId><artifactId>knife4j-spring-boot-starter</artifactId><version>${knife4j.version}</version></dependency><knife4j.version>3.0.2</knife4j.version>然后在WebMvcConfig
A. 在该配置类中加上两个注解 @EnableSwagger2 @EnableKnife4j ,开启Swagger和Knife4j的功能。
B. 在配置类中声明一个Docket类型的bean, 通过该bean来指定生成文档的信息。
@Slf4j
@Configuration
@EnableSwagger2
@EnableKnife4j
public class WebMvcConfig extends WebMvcConfigurationSupport {/*** 设置静态资源映射* @param registry*/@Overrideprotected void addResourceHandlers(ResourceHandlerRegistry registry) {log.info("开始进行静态资源映射...");registry.addResourceHandler("/backend/**").addResourceLocations("classpath:/backend/");registry.addResourceHandler("/front/**").addResourceLocations("classpath:/front/");}@Beanpublic Docket createRestApi() {// 文档类型return new Docket(DocumentationType.SWAGGER_2).apiInfo(apiInfo()).select().apis(RequestHandlerSelectors.basePackage("com.itheima.reggie.controller")).paths(PathSelectors.any()).build();}private ApiInfo apiInfo() {return new ApiInfoBuilder().title("瑞吉外卖").version("1.0").description("瑞吉外卖接口文档").build();}
}
设置静态资源映射
由于Swagger生成的在线文档中,涉及到很多静态资源,这些静态资源需要添加静态资源映射,否则接口文档页面无法访问。因此需要在 WebMvcConfig类中的addResourceHandlers方法中增加如下配置。
registry.addResourceHandler("doc.html").addResourceLocations("classpath:/META-INF/resources/");
registry.addResourceHandler("/webjars/**").addResourceLocations("classpath:/META-INF/resources/webjars/");
在LoginCheckFilter中设置不需要处理的请求路径
需要将Swagger及Knife4j相关的静态资源直接放行,无需登录即可访问,否则我们就需要登录之后,才可以访问接口文档的页面。
在原有的不需要处理的请求路径中,再增加如下链接:
"/doc.html",
"/webjars/**",
"/swagger-resources",
"/v2/api-docs" 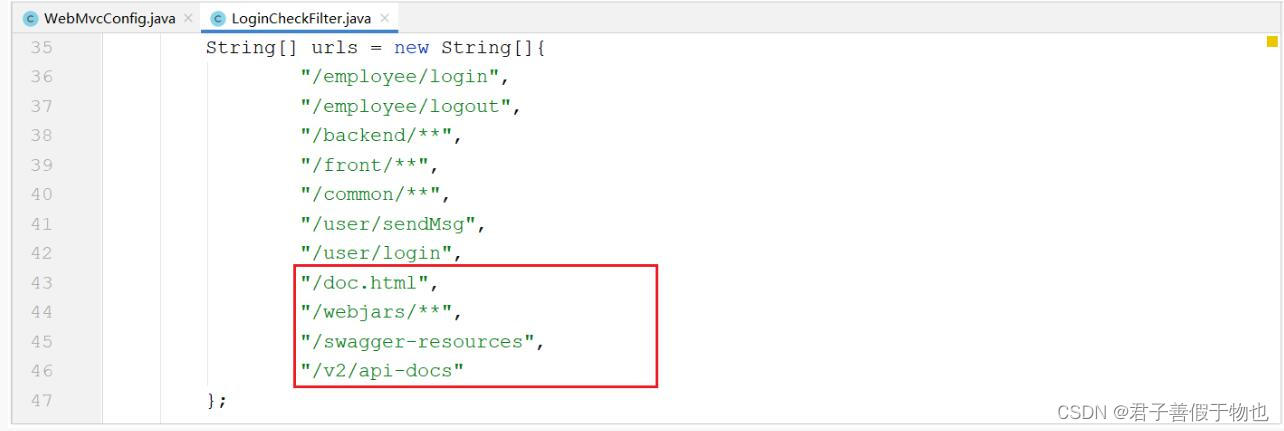
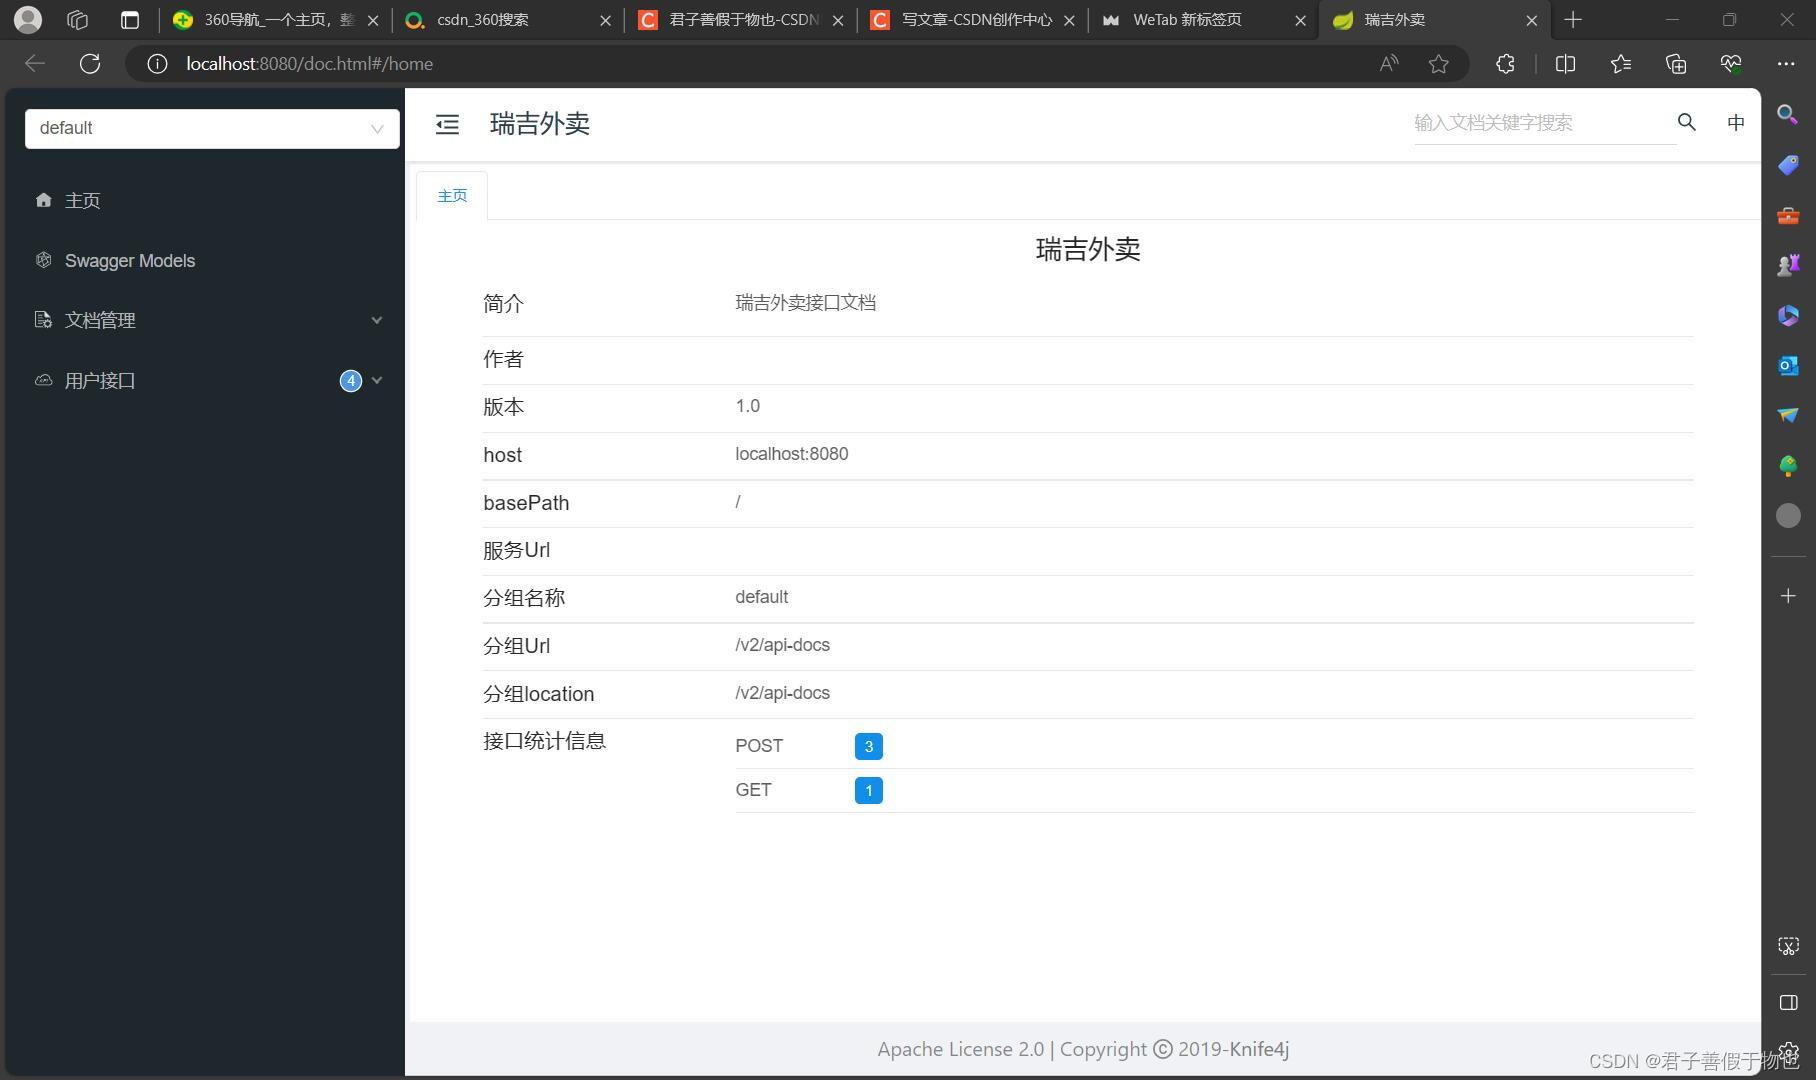
经过上面的集成配置之后,我们的项目集成Swagger及Knife4j就已经完成了,接下来我们可以重新启动项目,访问接口文档,访问链接为: http://localhost:8080/doc.html
3.启动类的优化

package com.itheima.reggie;import lombok.extern.slf4j.Slf4j;
import org.springframework.boot.SpringApplication;
import org.springframework.boot.autoconfigure.SpringBootApplication;
import org.springframework.boot.web.servlet.ServletComponentScan;
import org.springframework.context.ConfigurableApplicationContext;
import org.springframework.core.env.Environment;
import org.springframework.transaction.annotation.EnableTransactionManagement;import java.net.InetAddress;@Slf4j
@SpringBootApplication
@ServletComponentScan
public class ReggieApplication {public static void main(String[] args) {ConfigurableApplicationContext application = SpringApplication.run(ReggieApplication.class, args);Environment env = application.getEnvironment();String port = env.getProperty("server.port");log.info("\n----------------------------------------------------------\n\t" +"running success! Access URLs:\n\t" +"Local: \t\thttp://localhost:" + port +"/backend/page/login/login.html"+"\n\t" +"Swagger文档: \thttp://localhost:" + port + "/doc.html\n" +"----------------------------------------------------------");}
}