一、创建项目
1.1、创建项目

1.2、配置编码

1.3、取消无用提示
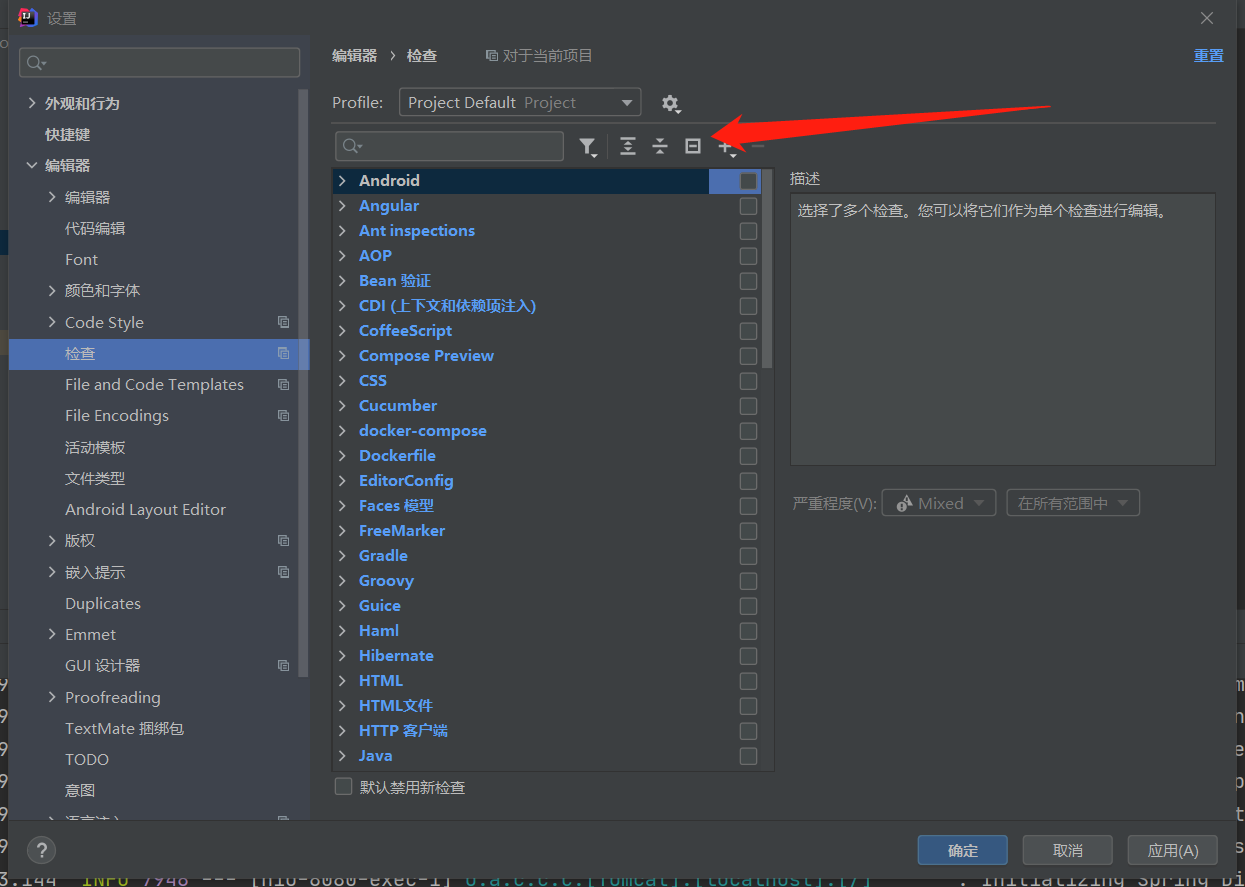
1.4、取消无用参数提示

二、添加POM父依赖
<!-- 两种方式添加父依赖或者import方式 -->
<parent><groupId>org.springframework.boot</groupId><artifactId>spring-boot-starter-parent</artifactId><version>2.5.7</version>
</parent>
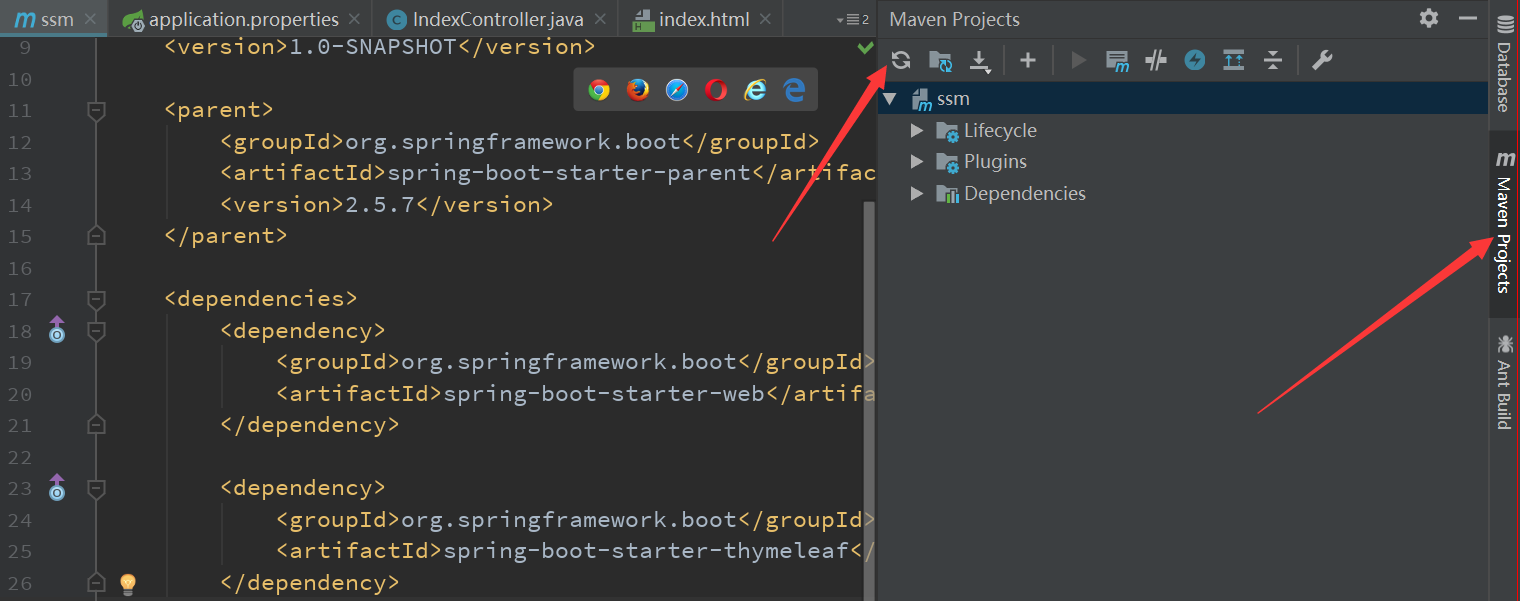
maven的pom文件手动更新
添加完成maven的pom文件之后,会自动更新,也可能不会自动更新,那么我们需要手动更新它。
三、支持SpringMVC
<dependencies><!-- 支持SpringMVC --><dependency><groupId>org.springframework.boot</groupId><artifactId>spring-boot-starter-web</artifactId></dependency>
</dependencies>
四、创建启动类、rest接口
import org.springframework.boot.SpringApplication;
import org.springframework.boot.autoconfigure.SpringBootApplication;@SpringBootApplication
public class StartApplication {public static void main(String[] args) {SpringApplication.run(StartApplication.class, args);}}
五、配置插件
配置完成后,maven打包可以生成可执行jar文件
<build><plugins><!-- 打包成可执行jar --><plugin><groupId>org.springframework.boot</groupId><artifactId>spring-boot-maven-plugin</artifactId></plugin><!-- 配置跳过测试 --><plugin><artifactId>maven-surefire-plugin</artifactId><configuration><skip>true</skip></configuration></plugin><!-- 配置jdk版本11 --><plugin><groupId>org.apache.maven.plugins</groupId><artifactId>maven-compiler-plugin</artifactId><configuration><source>11</source><target>11</target><encoding>utf-8</encoding></configuration></plugin></plugins></build>六、添加thymeleaf模板
<dependency><groupId>org.springframework.boot</groupId><artifactId>spring-boot-starter-thymeleaf</artifactId>
</dependency>
七、添加配置
在resources文件夹下,创建application.properties
在resources文件夹下,创建templates文件夹
# 应用名称
spring.application.name=thymeleaf
# 应用服务 WEB 访问端口
server.port=8080
# THYMELEAF (ThymeleafAutoConfiguration)
# 开启模板缓存(默认值: true )
spring.thymeleaf.cache=false
# 检查模板是否存在,然后再呈现
spring.thymeleaf.check-template=true
# 检查模板位置是否正确(默认值 :true )
spring.thymeleaf.check-template-location=true
#Content-Type 的值(默认值: text/html )
spring.thymeleaf.content-type=text/html
# 开启 MVC Thymeleaf 视图解析(默认值: true )
spring.thymeleaf.enabled=true
# 模板编码
spring.thymeleaf.encoding=UTF-8
# 要被排除在解析之外的视图名称列表,⽤逗号分隔
spring.thymeleaf.excluded-view-names=
# 要运⽤于模板之上的模板模式。另⻅ StandardTemplate-ModeHandlers( 默认值: HTML5)
spring.thymeleaf.mode=HTML5
# 在构建 URL 时添加到视图名称前的前缀(默认值: classpath:/templates/ )
spring.thymeleaf.prefix=classpath:/templates/
# 在构建 URL 时添加到视图名称后的后缀(默认值: .html )
spring.thymeleaf.suffix=.html
八、添加controller
import org.springframework.stereotype.Controller;
import org.springframework.web.bind.annotation.RequestMapping;
import org.springframework.web.servlet.ModelAndView;@Controller
public class IndexController {@RequestMapping("/index")public ModelAndView index(){ModelAndView mv = new ModelAndView();mv.setViewName("index");return mv;}}
import org.springframework.stereotype.Controller;
import org.springframework.web.bind.annotation.GetMapping;
import org.springframework.web.bind.annotation.RequestMapping;
import org.springframework.web.bind.annotation.RestController;
import org.springframework.web.servlet.ModelAndView;@RestController
public class HelloController {@GetMapping("/Hello")public String Hello(){return "haha";}
}
import org.springframework.web.bind.annotation.GetMapping;
import org.springframework.web.bind.annotation.RestController;/*** rest测试controller*/
@RestController
public class RestIndexController {@GetMapping("/restIndex")public String index(){return "rest";}}
九、添加html
在templates下创建index.html
<!DOCTYPE html>
<html lang="en" xmlns:th="http://www.thymeleaf.org" >
<head><meta charset="UTF-8"><title>index</title>
</head>
<body>
index
</body>
</html>
十、访问
需要maven执行编译,否则容易404
http://localhost:8080/index
